RE: Solid infill with high variable flow
Please attach your saved project file (File>Save Project as from PS. Then take the resulting 3mf file and ZIP it up. It must be zipped for the forum to allow the attachment as the forum only allows a very limited number of file types.
With a project we can slice it and examine/debug things as a project contains all the settings you are using and saves them all for later use.
RE: Solid infill with high variable flow
deadpool-bust-v2-supportless.stl_2
3mf attached
RE: Solid infill with high variable flow
Any help here my friends ? thanks a lot !
RE: Solid infill with high variable flow
Good afternoon Alisson,
I am not experienced in producing hollow prints. and I don't have prusa slicer 2.6.0 Beta4.
Have you tried the stable release of Prusa Slicer 2.6.0 ? there is a link below
https://github.com/prusa3d/PrusaSlicer/releases/tag/version_2.6.0
It would appear to me that your model is trying to print with zero percent infill.
As I believe you have noticed, the model is not suitable for vase mode, because it has large relatively horizontal area at the top, and a number of reflex areas where the surface dips below the horizontal and creates an area that cannot be printed without support.
I Also note that you are using a 0.4mm nozzle, with 0.4mm extrusion width Which is unusual.
Additionally you appear to have enabled supports, even though the STL says that it is supportless. however you have not enabled automatic support generation, and the .3mf file has not uploaded any custom supports.
moving on to your model.
The Purple features in the image below, seem to correlate to the variable flow rate areas that you related to in your post

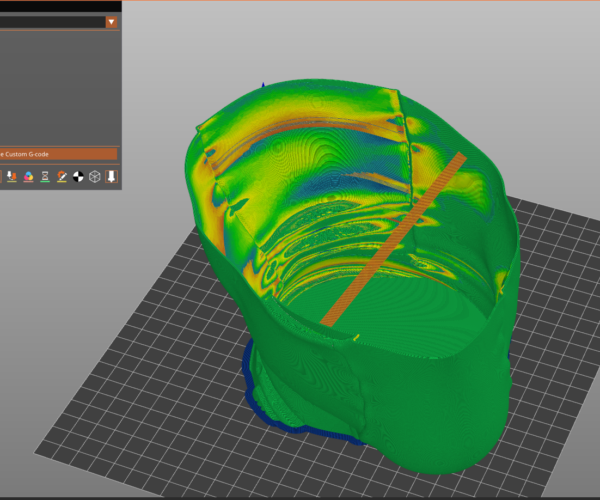
in the image below you have these areas of variable flow rate. 
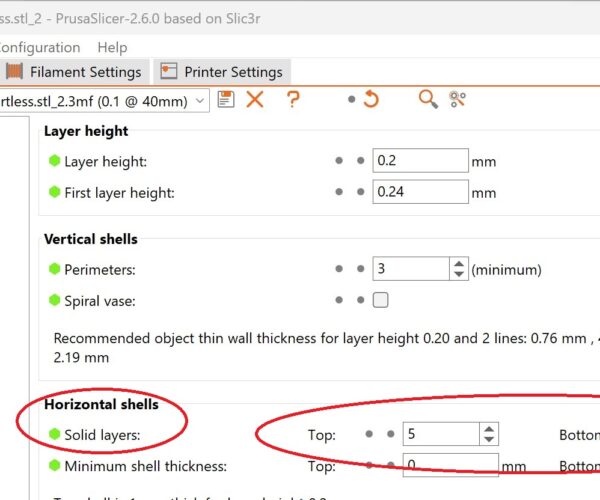
the purple areas in the first image seem to be created by the 'Horizontal Shells, Top and Bottom layers ' settings
everywhere there is a slope in the Model surface, the slicer considers it to have bottom, or top layers, and adds the solid infill, inside the model.
in the image below, I have added a height range modifier to change the number of top layers and bottom layers for the mid part of the model
starting at 1mm ( the height of the 5 bottom layers) and going up as far as necessary (we will discuss how far is necessary, later)
as you can see in the image below, all of the purple, except for the very bottom, has been prevented.
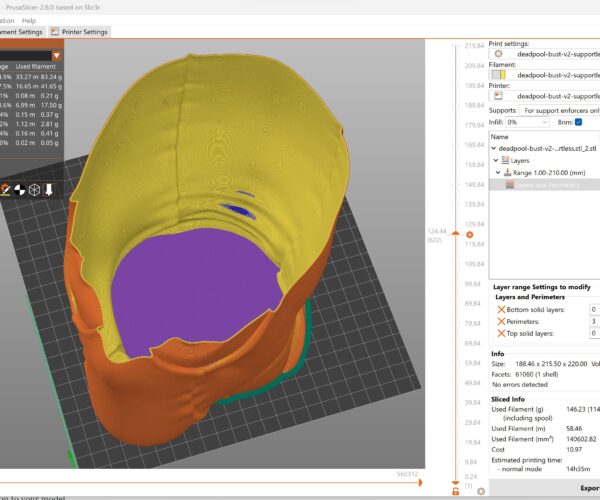
Looking at the flow rate, it is now much more uniform, which I believe is what you are looking for.
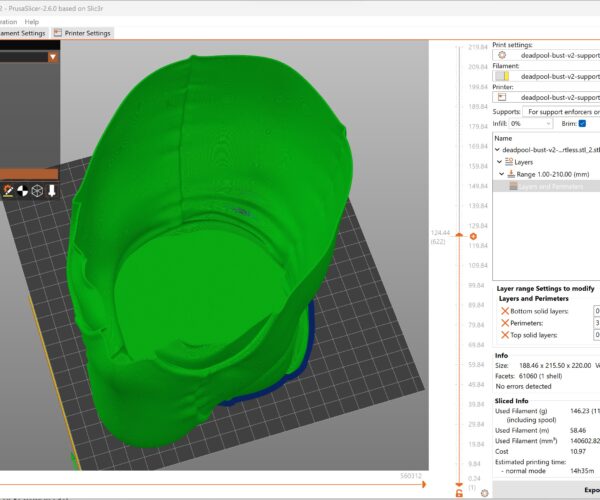
the changes that I made to cause this, were the addition of a height range modifier,
then setting the height range modifier to zero top layers and zero bottom layers
Initially I sett he top of the height range modifier to be 219mm but that left a number of larger holes in the top of the head
so I reset the top of the height range modifier to 210 mm and that gave me the image below.
you will note there are a number of small areas, highlighted in red where holes are unsupported, these are in the dimples in the stitched areas of the hood.
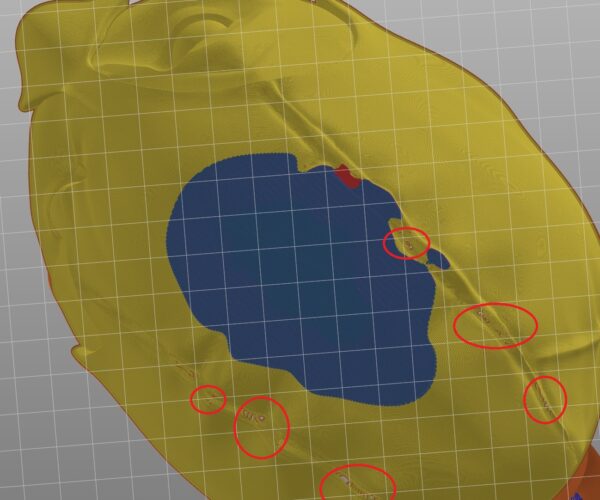
you may find it satisfactory to fill these holes after printing, in preference to adding a lot of solid infill during the print
the dark blue area is bridging infill
you could try lowering the top of the height range modifier to improve the shell. a lot depends upon your preferences
I suggest that you consider printing test sections of the model, to see how they perform, before committing to the full print, in order to save time and save filament
Above is a section of the 'Scalp' of the hood, the red sections show areas where the print needs internal support.
the image below shows a section of the inside of the test print that shows long bridging supports that will attempt to support the two details at the lower side of the image 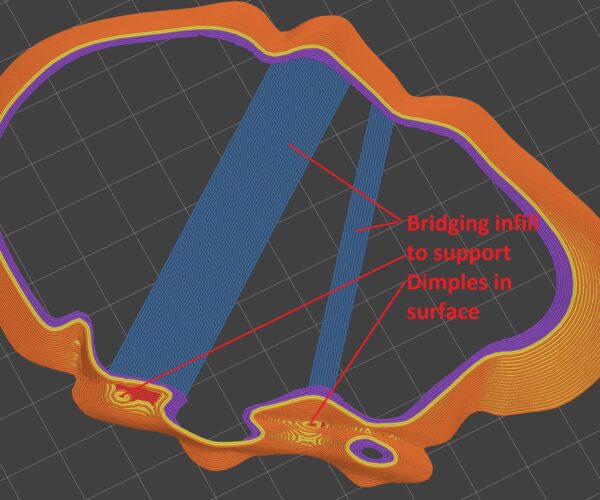
this image has been trimmed to exclude the lower 5 layers and some upper layers, in order to highlight the long bridging layer feature inside the shell and the purple solid infill that will reappear in these higher layers
I have included .3mf files for the :
Chin section,
Neck Roll section and
scalp section,
in case you want to test print them before printing the full model
I Hope this helps,
regards Joan
I try to make safe suggestions,You should understand the context and ensure you are happy that they are safe before attempting to apply my suggestions, what you do, is YOUR responsibility.Location Halifax UK
 I'm trying to have a constant flow on this print, but the solid infill (the purple one) is having high variable flow on my printing, anyone know why this ? i'm using prusa 2.6.0 Beta 4 version