PrusaSlicer GCODE created horizontal scar on surface
Hi,
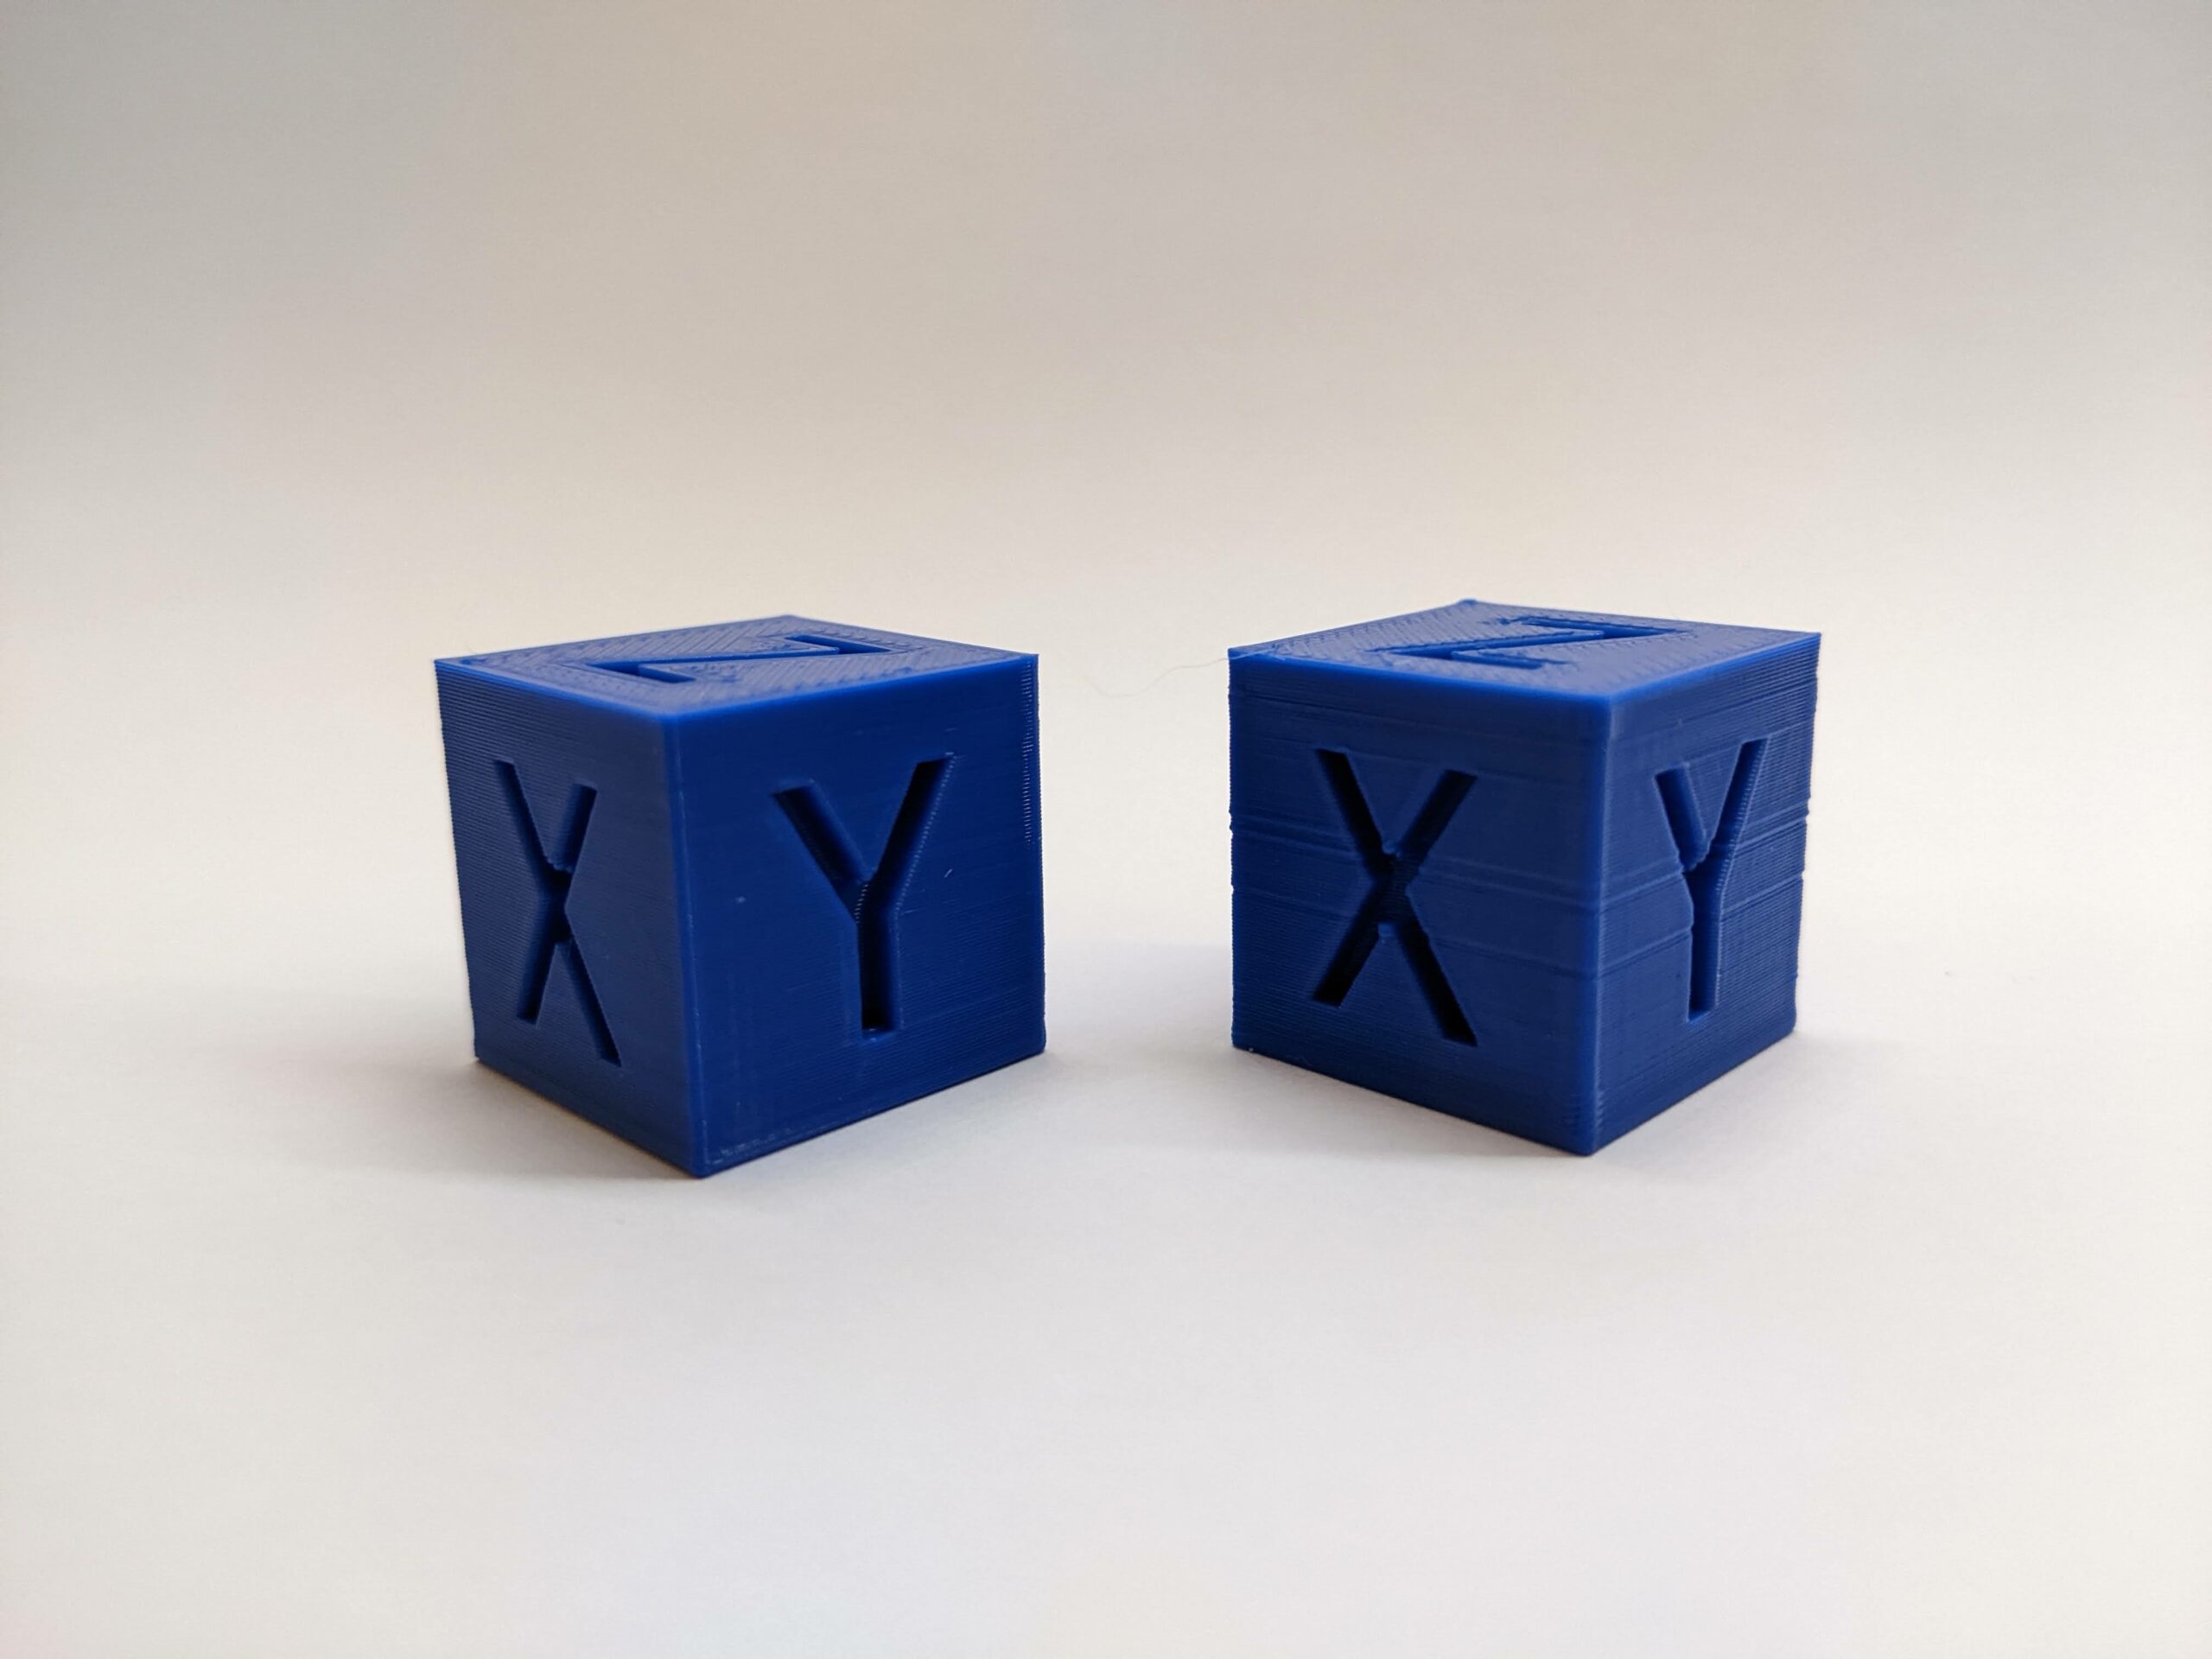
I have some minor quality issues when slicing a model with PrusaSlicer in comparison to Cura. There are horizontal scars around the cube on specific layer heights. It is very reproducible every time I print the cube (with different settings) the scars appear on the same heights.
I've attached the GCODE of Cura and PrusaSlicer and the PrusaSlicer project.
https://1drv.ms/u/s!AqQE0B3ZGpOci9wLnocAvxbukuF1jg?e=gBh0Jk
I can try the cube as often as I'd like. The scars are always on the exact same height, but only on cubes printed with the PrusaSlicer GCODE.
Any ideas what could be the root cause of this?
Best,
Jakob
Best Answer by bobstro:
I have some minor quality issues when slicing a model with PrusaSlicer in comparison to Cura. There are horizontal scars around the cube on specific layer heights. It is very reproducible every time I print the cube (with different settings) the scars appear on the same heights.
It's possible that you're running into the eternal "buldge" issue. Fortunately, that odd spelling makes this a very easy problem to search for. Do a quick search on that term and you'll find a LOT of discussion on possible mitigation. The common symptom is very small variations in perimeter surfaces corresponding to changes in internal print features (e.g., transition from sparse to solid infill, transition from spare to gap infill, solid layers on opposite sides).
First thing I'd suggest is slowing way down. If results even out, it's likely a flow issue, possibly related to some combination of filament, speeds, volumetric rates, and internal features. I've settled on 25mm/s for my external perimeters for best finish.
RE:
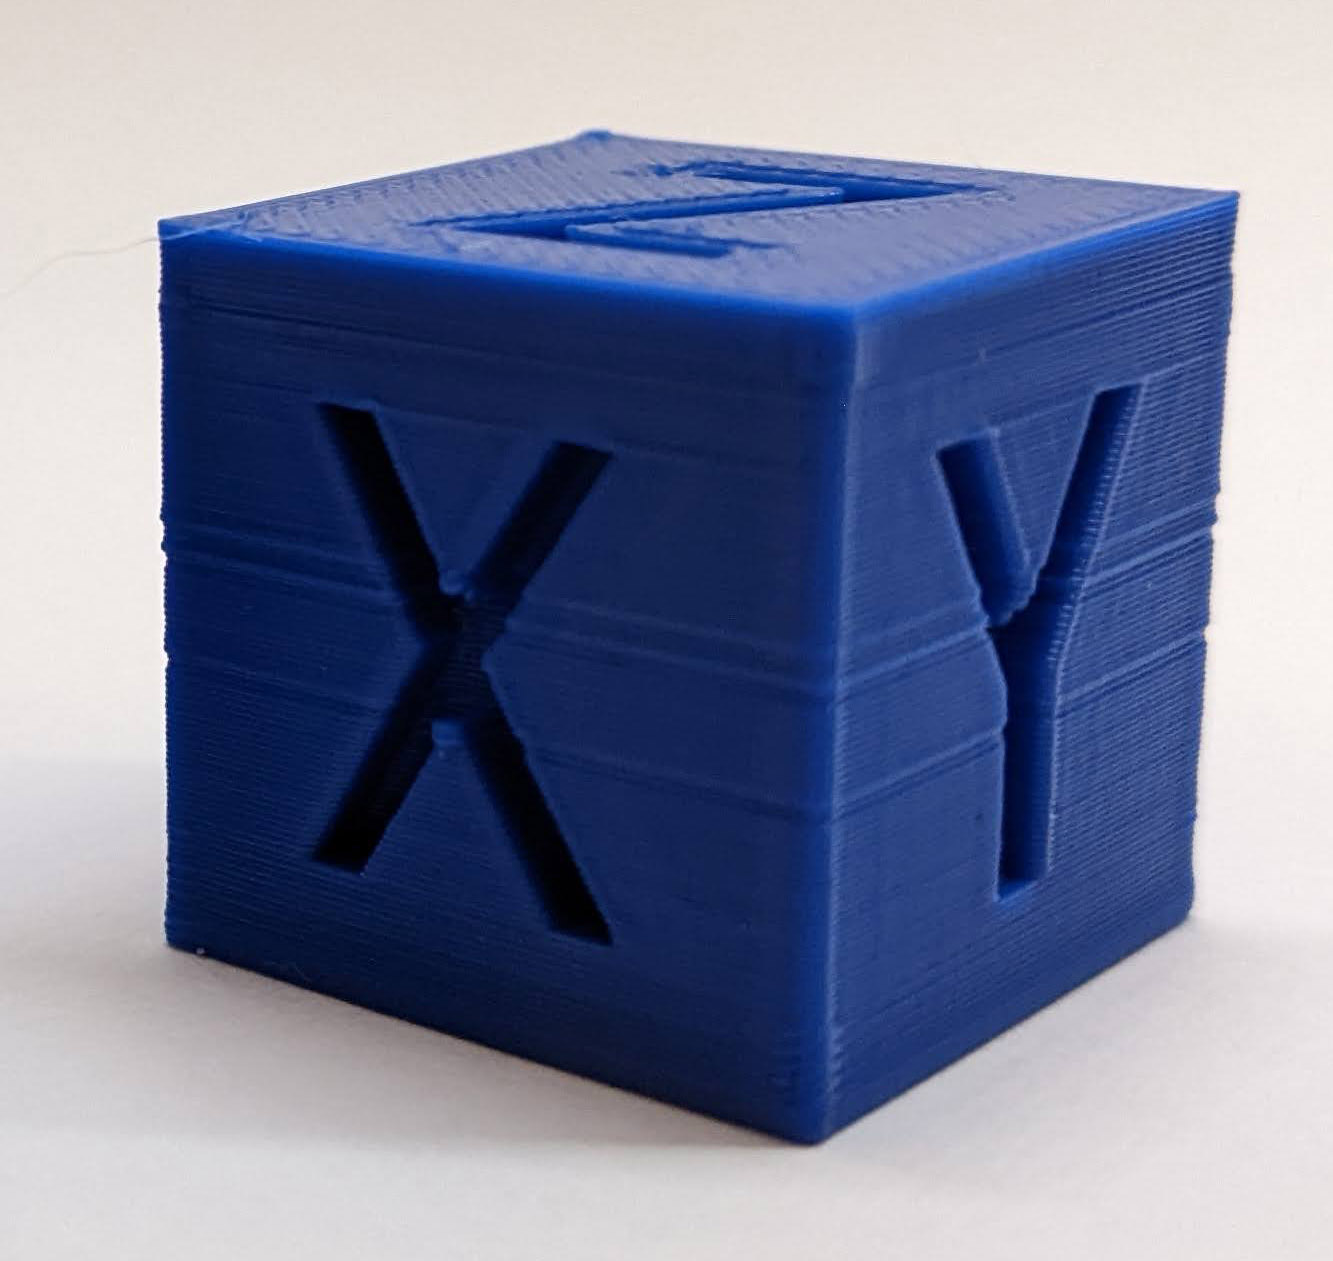
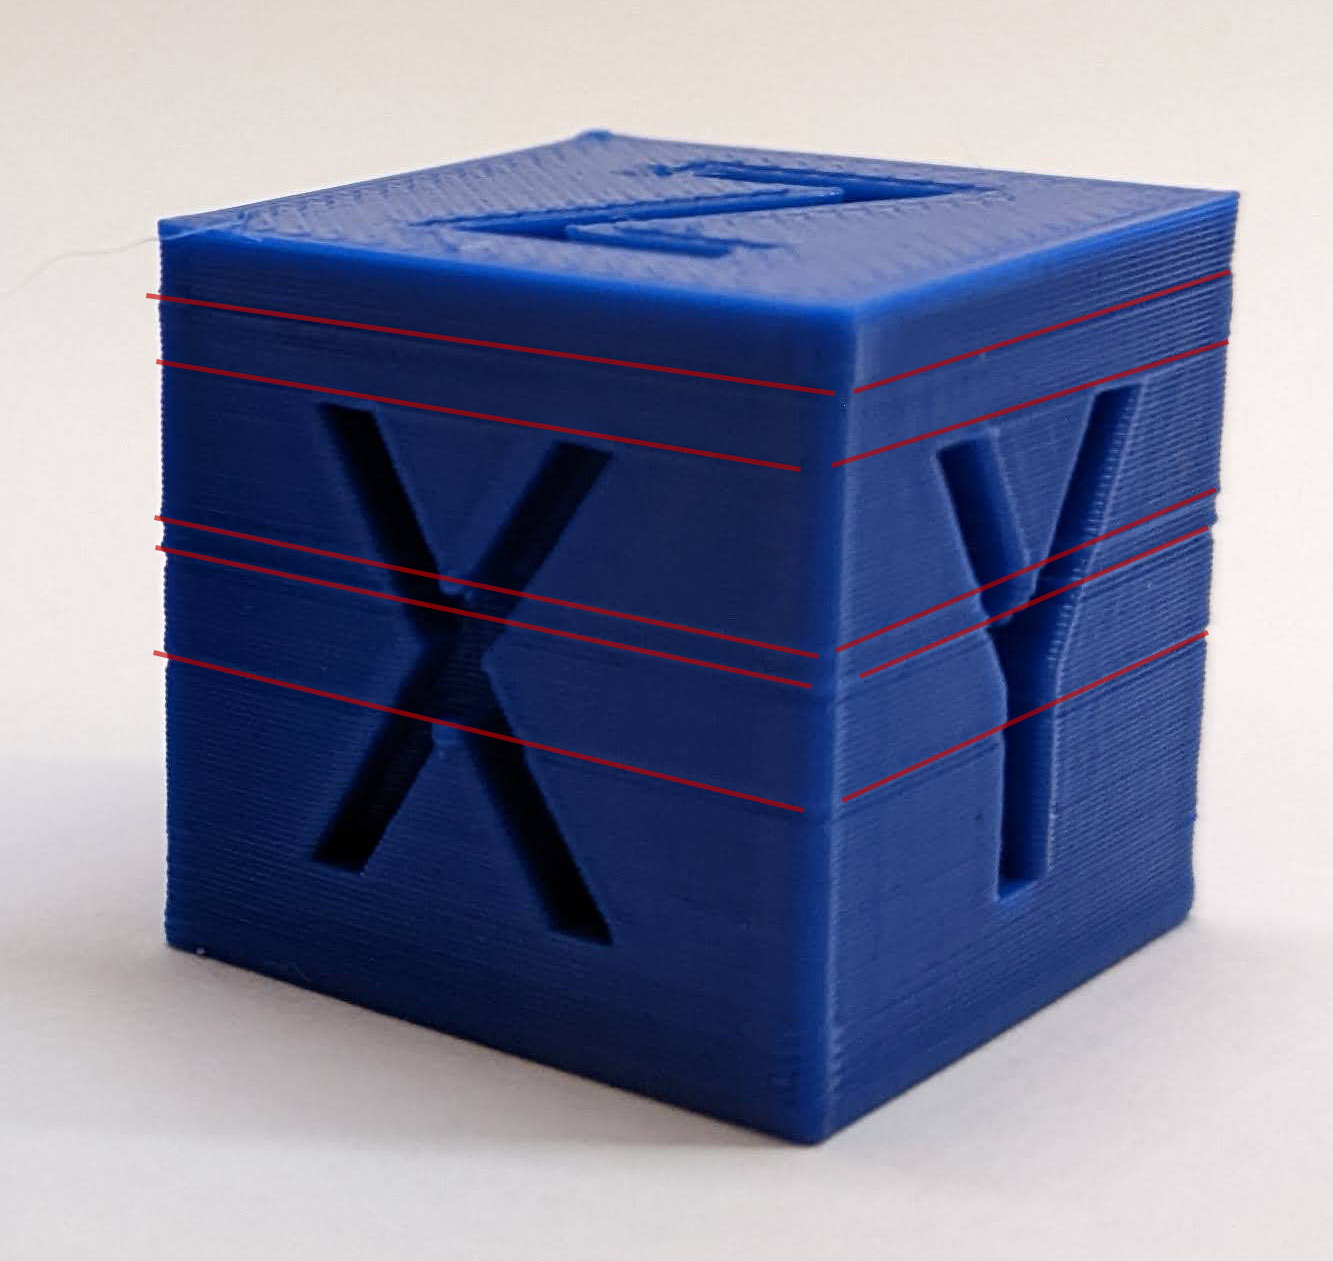
Here are two more pictures that zoom in a little:
RE: PrusaSlicer GCODE created horizontal scar on surface
I have some minor quality issues when slicing a model with PrusaSlicer in comparison to Cura. There are horizontal scars around the cube on specific layer heights. It is very reproducible every time I print the cube (with different settings) the scars appear on the same heights.
It's possible that you're running into the eternal "buldge" issue. Fortunately, that odd spelling makes this a very easy problem to search for. Do a quick search on that term and you'll find a LOT of discussion on possible mitigation. The common symptom is very small variations in perimeter surfaces corresponding to changes in internal print features (e.g., transition from sparse to solid infill, transition from spare to gap infill, solid layers on opposite sides).
First thing I'd suggest is slowing way down. If results even out, it's likely a flow issue, possibly related to some combination of filament, speeds, volumetric rates, and internal features. I've settled on 25mm/s for my external perimeters for best finish.
and miscellaneous other tech projects
He is intelligent, but not experienced. His pattern indicates two dimensional thinking. -- Spock in Star Trek: The Wrath of Khan Unfortunately,…
RE: PrusaSlicer GCODE created horizontal scar on surface
@bobstro Thanks a lot for that hint. I will search for other posts that go into detail about the "buldges" 🙂
RE:
Here's a summary I posted a while ago:
Unfortunately, no single fix has been identified that will work in all cases, but a few things that help:
- Be sure you're not just seeing the effect of minor warping/lifting/curling along edges or in corners. This can really throw troubleshooting off. Rotate the print and verify the problem occurs in the same place.
- Slow down external perimeter speeds (and all speeds in general). If the nozzle is moving a bit too fast, you get slight under extrusion on some layers. These are apparent as adjacent layers print with slightly different extrusion rates. I use 25mm/s for external perimeters when appearance is important.
- Calibrate your extrusion multiplier for each filament. Any slight over or under extrusion can produce very small but noticeable variations in layers with different features (e.g. infill, gap fill, top solid infill). The closer your slicer settings match your actual printer and filament, the more accurate the gcode will be.
- Calibrate linear advance (LA) for each filament. LA adjusts the flow of filament to compensate for acceleration and deceleration. If it's not right, you may see artifacts even away from features such as bumps or hole on the same layer. In some cases, a hole on one wall causes imperfections on the far side of the print.
- Add an external perimeter if vertical walls allow it. The thicker combined perimeter allows the filament flow to even out.
- Tweak perimeter extrusion widths. The problem can appear when the slicer switches between gap fill, sparse infill, and solid or top infill. If you can find a multiple of perimeter widths that minimizes these transitions, it can work for a specific print.
- If you are the part designer, make vertical free-standing walls thicker. IME, at 1.5mm thick, the problem is less noticeable. You can try for a multiple of extrusion widths, although be aware the PrusaSlicer does some internal calculations for overlap between extrusions that can throw you off.
- Check cooling. Variations in fan speeds can cause changes in print appearance.
Unfortunately, with the current state of FFF consumer-grade 3D printing, we still have to do some hand-tuning for specific prints. I've gotten to the point that I can usually eliminate the effect to my satisfaction. Dig through those threads for examples. Contrary to some theories, this is not exclusively a PrusaSlicer thing.
In your specific example, slice the part and spend some time in preview mode checking to see if the defect aligns with any shifts in infill, solid layers, transition from perimeters to sparse infill or gap fill, etc. If you'd save your part & settings off in a 3MF project file, zip it up, and attach it to a reply here, we may have better suggestions.
The Prusa Benchy hull line notes might also be interesting.
and miscellaneous other tech projects
He is intelligent, but not experienced. His pattern indicates two dimensional thinking. -- Spock in Star Trek: The Wrath of Khan Unfortunately,…