Prusa Slicer Extrusion Width: Unexpected Behaviour
I'm reading up on extrusion width at the moment and playing with parameters.
With a 0.4mm nozzle size, a 140% extrusion width brings me to 0.56mm. However... Slicer shows different results depending on what I enter.
140% gives thin lines, and increases print time dramatically.
0.56 shows fatter lines, and reduces print times over the default 0.45mm - as expected
Am I misunderstanding something here? The tooltip says extrustion width is derived as a percentage of nozzle width...?
RE: Prusa Slicer Extrusion Width: Unexpected Behaviour
It’s complex with tons of math. There are also multiple threads here (which are difficult to find as the search function here sucks) as well as multiple over on GitHub. If you want the deep math reasons then I’d look on GitHub.
I’m not at PS at the minute but I thought when expressed as a percentage it was expressed as a percentage of layer height and not nozzle width ? So at 0.2 layer height even 150% is only going to be 0.3 which is smaller than a normal nozzle and so won’t print right. It’s one reason the Prusa profiles always use a specific value for each like 0.45
Besides from your pic the zig zag is top infill and the white is gapfill. I’d think looking at it that you might have infill below inside the wall of your model but without having the project so we can check the slice I can’t be sure of that.
RE: Prusa Slicer Extrusion Width: Unexpected Behaviour
As @neophyl says, if you enter extrusion widths as a percentage, it's interpreted as a percentage of the layer height. The reasons for this go way back to the original Slic3r code that PrusaSlicer is based on.
You probably want to specify the extrusion width explicitly in mm or set the value to 0 to use a value calculated based on the current nozzle size.
This is all explained (confusingly) in the tooltip text if you hover over the entry boxes. Prusa is in the process of improving the help for these features, so expect the documentation to improve soon.
and miscellaneous other tech projects
He is intelligent, but not experienced. His pattern indicates two dimensional thinking. -- Spock in Star Trek: The Wrath of Khan Unfortunately,…
RE: Prusa Slicer Extrusion Width: Unexpected Behaviour
As @neophyl says, if you enter extrusion widths as a percentage, it's interpreted as a percentage of the layer height. The reasons for this go way back to the original Slic3r code that PrusaSlicer is based on.
I'd say the tooltip needs updating! That does explain why the extrusion width gets smaller at 140% than it is at 0.45mm though!
RE: Prusa Slicer Extrusion Width: Unexpected Behaviour
No the tooltip is correct, it even says it in your screen cap. When expressed as a percentage it’s expressed over layer height.
RE: Prusa Slicer Extrusion Width: Unexpected Behaviour
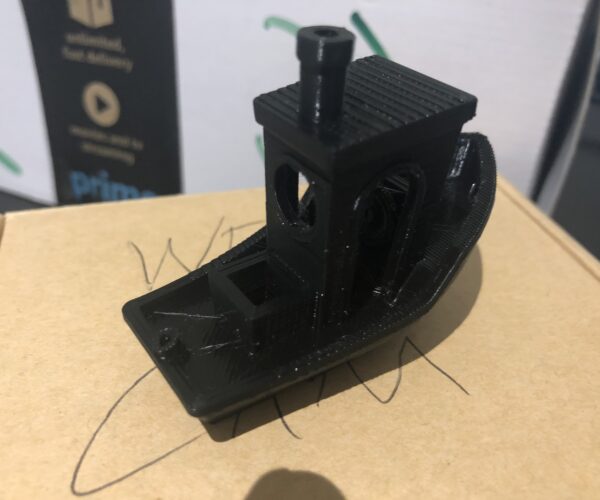
[...] So far its a capable little machine, but I need to do some more dialling in re:Bed height. The quality of the prints is surprisingly good for a sub $100 printer!
I have to say, that's better than a lot of the first Benchy prints I see done with other printers on the Reddit groups! I assume it's pretty slow getting that result. Does it have a part cooling fan? The bow looks pretty good.
I can see a sub-group of 3D hot rodders forming around that thing. I expect to see Hemera extruder and linear rail upgrades soon.
and miscellaneous other tech projects
He is intelligent, but not experienced. His pattern indicates two dimensional thinking. -- Spock in Star Trek: The Wrath of Khan Unfortunately,…
RE: Prusa Slicer Extrusion Width: Unexpected Behaviour
@neophyl
Jeez, you are completely right, I didn't read it properly! What a doofus!
@bobstro - I have been really surprised with it too. I'm fiddling around with Octoprint at the moment trying to get some stuff working (Print history, pricing etc for fun) but after that I'm going to properly try and calibrate the machine.
So far I've been printing with it with far too much bed adhesion, adjusted via bed levelling screws and Z slack compensation. I think the bed is not completely flat, so I've had to wind it all out real far to get good adhesion across the whole bed. This leads to some real sticky prints, and terrible elephants foot.
I attach the Gcode for the benchy. I don't remember the exact settings or time taken, but I do remember doing it at what I would consider "optimal" quality settings.
It does have a part cooling fan, which has actually failed already. I have a few 25x25x7mm fans on order.
Next job for me is printing out a webcam mount for it (So I can stop using my tripod) and doing some proper calibration of the bed to dial in first layer adhesion. It's been a great learning experience, and I've enjoyed reading your articles on muppet labs. I'll gladly share my findings with you! Feel free to send a PM if you have any questions or suggestions for me 🙂


