Losing Pattern on last layer
Hello Everyone,
I generated a model in Blender and exported it for STL format, and then sliced it on Prusa Slicer 2.3.3 on Windows. I'll be printing on Ender 3 v2 printer.
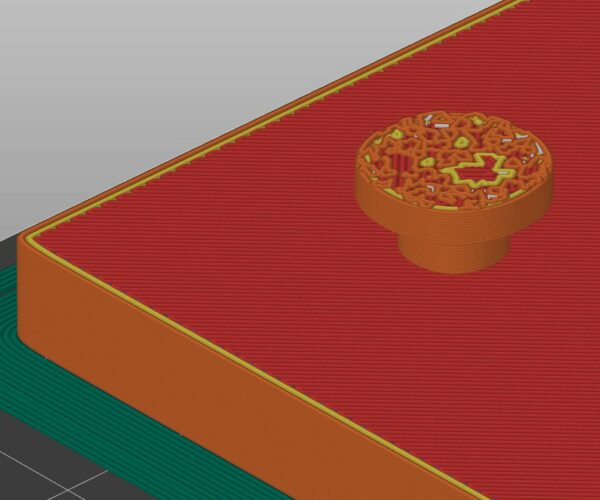
After slicing the object, it got 69 layers. The object has 3 rounded pins, and the top layers of them are with weird pattern, or I would say: no pattern, as you can see on the image bellow.
Is there any solution for this?
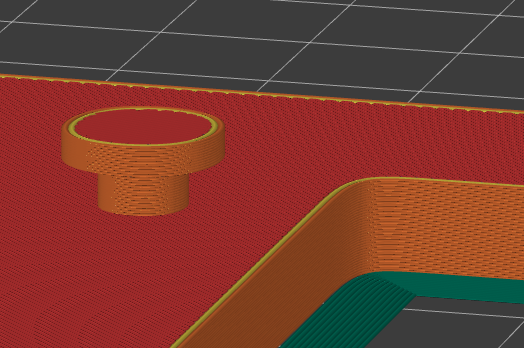
Most interesting is that layer 68 is ok like all the rest of layers.
Best Answer by sylviatrilling:
I suspect that the tops of the pins were not perfectly flat and parallel to the bed in such a tiny amount it was hard to detect in Blender. The slicer did what it could with the model it had. I cut off the smallest sliver possible from the top of the model and got it to slice properly.
.3mf
Please zip your .3mf file and attach it to a post.
Mk3S+,SL1S
Re. 3mf file
Hello sylviatrilling,
In the link bellow there is the zipped 3mf file.
Thanks.
Tops not level?
I suspect that the tops of the pins were not perfectly flat and parallel to the bed in such a tiny amount it was hard to detect in Blender. The slicer did what it could with the model it had. I cut off the smallest sliver possible from the top of the model and got it to slice properly.
Mk3S+,SL1S
Works Great
Thank you sylviatrilling.
I am new into 3d printing, and you helped me a lot. I did the same cut here and worked perfectly. Thanks vey much.
...Is there any solution for this? ...
Yes, there is... you need to learn how to make 3D objects more rational in Blender. Did you noticed that your object (which is very simple actually) is made of more that 3 million polygons?! For such object few hundreds polygons should be enough.
[Mini+] [MK3S+BEAR]
Booleans
What I do for this kind of thing is to do a boolean cut operation. I use Zbrush and not Blender but the idea is the same. You take a large cube, set it to the height where you want your model to be flat underneath it and subtract the volume of the cube from the volume of your model. Here is a tutorial:
Mk3S+,SL1S
Re. Booleans
Great tip, and very usefull tutorial. I really have to use more booleans operations.
I am already printing the stand, very nice. My first functional object to be printed.
Its Blender so there are numerous ways to achieve the same results. A boolean subtract will work but its easier to just select the verts of the surface you want in edit mode and then scale to the same plane. So if for example the surface was on the 'top' and you wanted them all at the same Z height you could select them all (vertices that make up the surface) in edit mode and then use 'S' for scale and then type 'z' (for the axis you want to work with in this case z) and then '0'. That would put then all at the same height. You can then adjust the now flat surface to the desired position.
Note this works great for surfaces aligned to the x/y/z planes. It not as easy for other angles but that is still possible using other methods.
I do make extensive use of non destructive workflows using booleans in Blender but for simple stuff like this its better to 'fix' the underlying model vertices position rather than adding yet another boolean modifier to the stack.

