how to set z height
I am trying to stack one object on another. I have both objects centered on top of each other (although it doesn't matter where I try), and when I try to set the z height in the object properties, when I hit the enter button, it goes back to .06 (thickness of the object) If I try to use the move button on the left, I get the green, red and blue cone and square. I can move the object with the green or red and the object stays where I put it, but when I lift the object up with the blue, as soon as I let it go, it drops back down to the bed.
What am I doing wrong?
Thanks
RE: how to set z height
Interesting.
I created a half cube in freecad and exported as STL, and then tried PrusaSlicer, and saw what you describe.
Then I tried in cura I used before, and saw the same.
Now for cura there is a simple solution:
Unmark "Automatically drop models to the build plate" in preferences, and you are done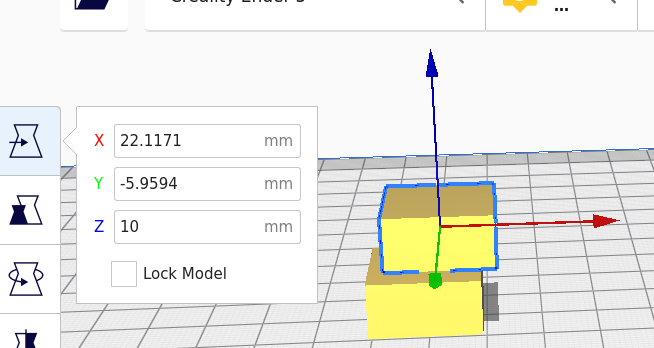
Now with PrusaSlicer stacking can be done as well, a little bit more complicated, with "support enforcement" and some more steps, described in this 5min video:
RE: how to set z height
Prusa Slicer doesn't allow you to do that. All objects must have at least some part of them on (or below as of 2.4) the plater.
If you think about it that makes perfect sense as you cant print something starting in mid air. Of course that doesn't take in account use cases where there are existing objects on the plater from previous printing that PS doesn't know about.
There are tricks to get around this though and if you had used google search you would have found many threads about this here and on the PS github. I think the 'why cant i place my object xx in z' request on github is one of the longest and acrimonious issues on there. https://github.com/prusa3d/PrusaSlicer/issues/1513
The 'trick' is to use a multi PART object. As only a single PART needs to be on the bed to fulfill the requirement you can add a tiny tiny part onto the bed where ever you want and then you can move the other parts around freely.
RE: how to set z height
The 'trick' is to use a multi PART object. As only a single PART needs to be on the bed to fulfill the requirement you can add a tiny tiny part onto the bed where ever you want and then you can move the other parts around freely.
THANK you!
That is much easier than in the video, where the step you described was only a part.
I did import my half cube, then added it in addition, and was able to move it anywhere.
I intentionally moved it too high (more than 10mm, half cube is 20x20x10mm).
Pressing Slice then resulted in big warning on empty layers.
I started again, then zoomed in before moving added part in z direction (in order to be able to move it exactly 10.0mm high), and then moved it 10mm high. Then I moved it a bit in x and y direction, and finally sliced it without issues!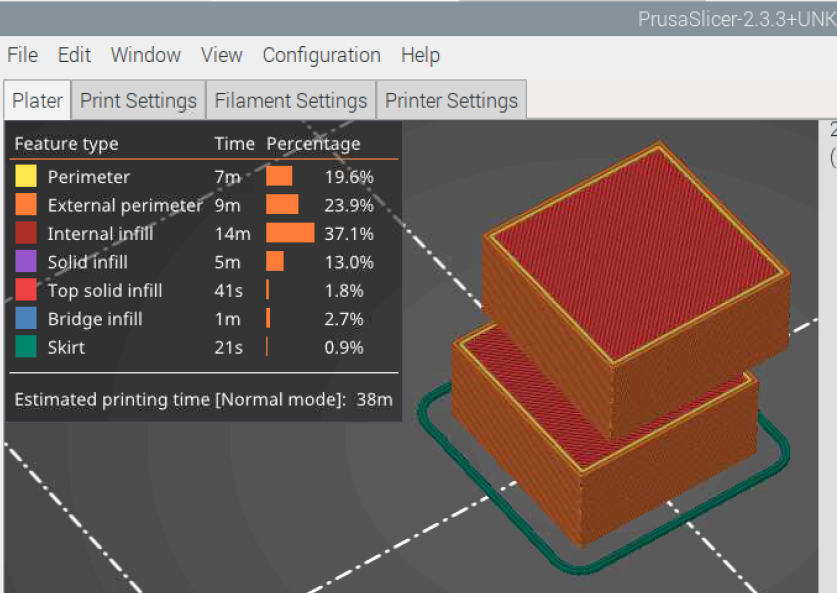
RE: how to set z height
We have been asking for this feature for years. It seems to be too difficult for them to implement it.
I am trying to stack one object on another. I have both objects centered on top of each other (although it doesn't matter where I try), and when I try to set the z height in the object properties, when I hit the enter button, it goes back to .06 (thickness of the object) If I try to use the move button on the left, I get the green, red and blue cone and square. I can move the object with the green or red and the object stays where I put it, but when I lift the object up with the blue, as soon as I let it go, it drops back down to the bed.
What am I doing wrong?
Thanks