Fixing a thin walled print
I am fairly new to 3D printing (using my Prusa MK3S+) and noticed a few new issues with my latest print. I am not sure what modifications I should make to fix this print. It is a cover for a Kindle Paperwhite I found on Thingiverse here. I printed it with 2 perimeters and didn't change the speed of print at all. I noticed a few issues with this print and don't know what I should do to correct:
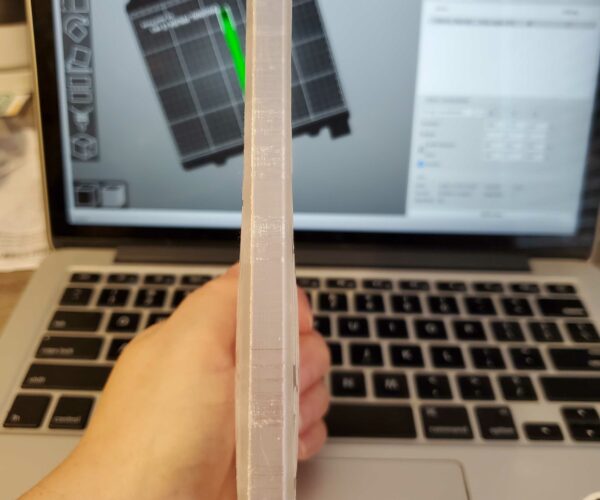
- The first problem with the print is that the wide side walls are bowed outwards towards the bottom of the cover and bowed inwards towards the top of the cover. How can I fix this? More perimiters? Slower speed?
- If I increase the perimeters, will this mean that my kindle may no longer fit inside?
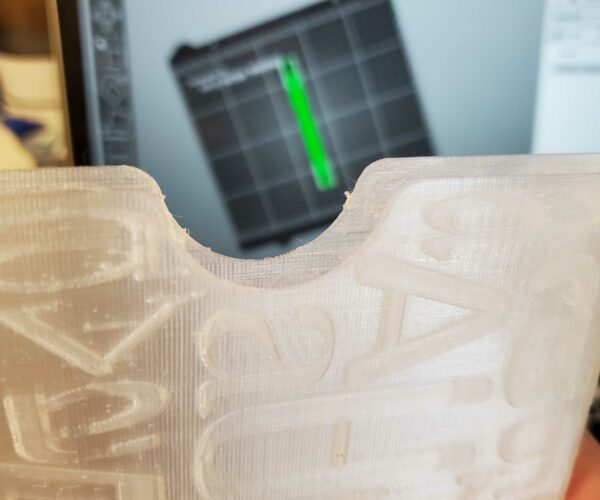
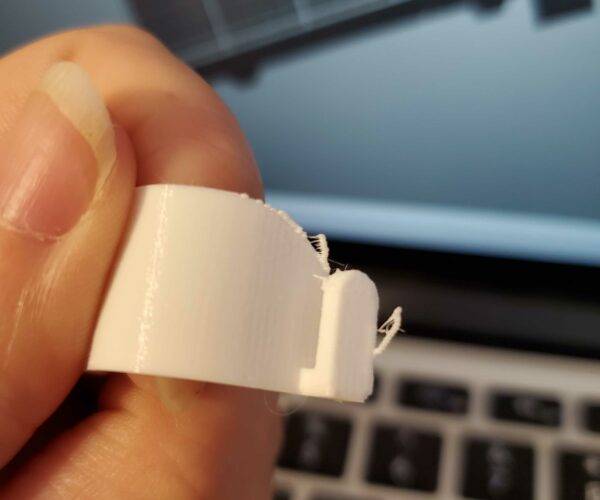
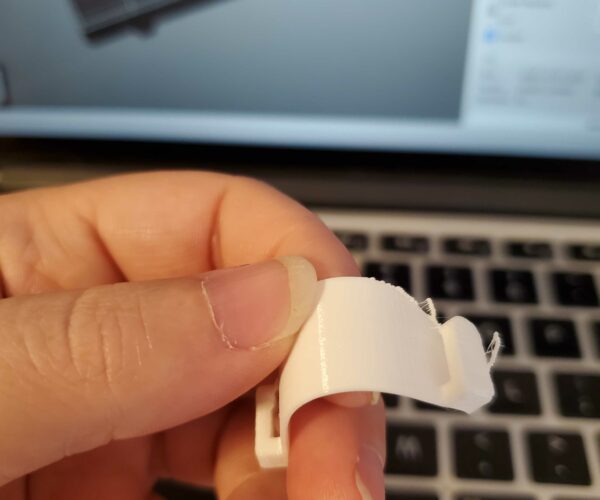
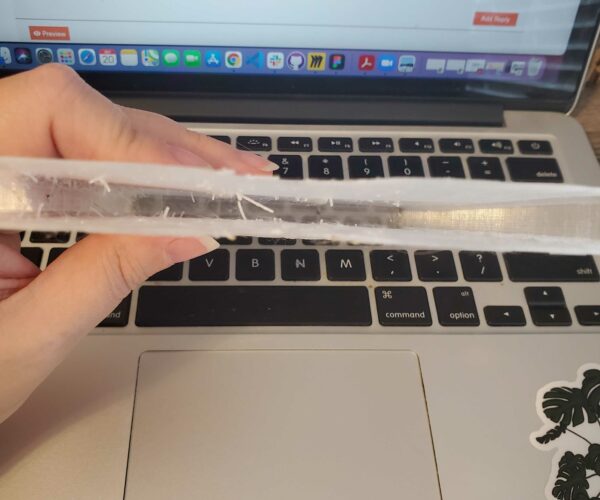
- The second problem that I have noticed with this print I also noticed for the first time with a separate print (using white filament) I completed before this paperwhite cover (using clear filament). The edge was very bumpy and jagged. I pulled off most of the jagged edges before taking the picture of the cover, but I've included a picture of the first print I noticed these jagged edges. Does the nozzle need to be cleaned? Or is there some other issue I am unaware of?
I'm using PETG filamentand I have included pictures to show the problems I am talking about. Thanks so much for any help and advice!
@dethomp16
Images are helpful, however, posting a Zipped up .3mf project file, is the best way to get answers, this will allow us to see all the settings your trying to print with relative to the model, and see the project the way you set it up, as well you mentioned PETG but did not mention the brand, this can be important, as all PETG is not created equal and may require changes in print setting from brand to brand.
Remember the .3mf has to be zipped or the server will not allow it to be posted.
Good Luck
Swiss_Cheese
The Filament Whisperer
That project says it is optimised for a 0.5mm nozzle. The default Prusa nozzle is 0.4mm, two perimeters will not fit the wall thickness parameter.
The author also offers an untested file for 0.4mm nozzle; have you tried that?
White is always the trickiest colour to print as it contains more filament than any other colour which can affect flow rates leading to problems with corners and fine edges. Often raising the extrusion temperature by 5-10 degrees is enough to fix it.
Cheerio,
.3MF file
@swiss_cheese, thank you for your response. I have attached the zipped .3MF file here. Both filaments I was using (the white and the clear) are Amazon Basics brand. I was having wonderful success with the white until that last print I included a picture of in my original post where there were jagged edges. I switched to the clear filament afterwards and have gotten jagged edges and rough interior edges ever since. 04mm_Nozzle_Kindle_Paperwhite_protective_case.3mf
0.4mm nozzle
@diem thank you for your response. I was using the 0.4mm nozzle file the author included. I tried modifying the print to 3 perimeters and a slower speed using the same clear filament and I feel like the jagged edges may be worse, but definitely not better. The interior of the print has a ton of jagged edges now and the bowed edges are the same. I've attached pictures of this newest test to show what I mean. I may switch back to my white Amazon Basics PETG filament and try printing with that instead of the clear. At least I can start the print and stop it if I notice the same issues. 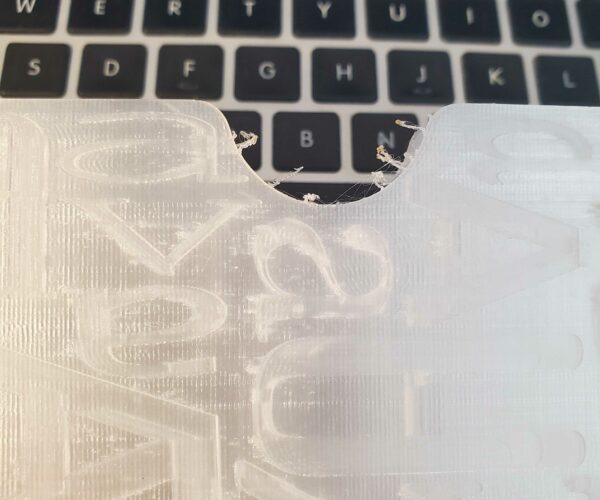
@dethomp16
I took a look at your project file and found what I believe to be the culprit, you had 2 perimeters selected, however the model wall thickness only allows for one. As slicer sees it the inside of the sleeve and the outside represent external perimeters, this makes up the full wall thickness for a total of 2 external perimeters.
Using 2 perimeters in this case would equal 4 total perimeters, 1 "External perimeter" & 1 "perimeter" X 2 for a total of 4, this is twice as much plastic as needed and will cause the blemishes you were experiencing.
I made a couple adjustments in the lower end of the project as well, in the hopes of printing the bottom cleaner around the chamfered edge.
I noticed that you had your bed temperatures lower then I might normally use for first layer and other layers, I did not alter them, since you didn't mention having any adhesion issues. If you find you are, you may want to increase those temperatures, turn off "elephant foot compensation" set skirt loops to zero, and add a 10mm brim. this should prevent the print from warping off the bed while printing.
I've included a .3mf project file with the changes I mentioned for you to consider and explore.
Kindle_Paperwhite_protective_case_Swiss.zip
Good luck
Swiss_Cheese
The Filament Whisperer
I was using the 0.4mm nozzle file the author included.
I suppose we should be fair to the designer who did say this file was not tested but offered it as an alternative. @swiss_cheese has probably licked your immediate problem. If stringing persists you might try drying your filament.
Cheerio,
White is always the trickiest colour to print as it contains more filament than any other colour which can affect flow rates leading to problems with corners and fine edges.
Who would of thunk it!
Who would of thunk it!
The reverse is also true: 'natural' or clear filament is the easiest as it contains no pigment and flows freely, sometimes so freely so that reducing temperature is in order.
Cheerio,
@diem wrote:
If stringing persists you might try drying your filament.
I agree with Deim, and think you should dry it anyway just to remove any possibility that it may not be dry.
Regards
Swiss_Cheese
The Filament Whisperer
.3mf file
@swiss_cheese I bought a filament drier and, after a busy few weeks, am getting back around to this project. I tried downloading the .3mf file you attached but I was just taken to a blank page on this forum. I assume this link must have expired? I'd like to try printing with your changes since I am new to all this and didn't even know drying filament was a thing!
@dethomp16
You are right! someone has gone through and removed many of the files associated with posts I've made, I have no idea why, and am not happy about it. I'm not sure I still have the file I adjusted for your project. If I can find it I'll post it for you.
I'm going to find an other file server to post my work on from now on.
Thank you for bringing my attention to this.
Swiss_Cheese
The Filament Whisperer
Missing file
That's so weird! I'm sorry about that. If you do find it, I'd love to try your version. In the meantime, I adjusted my perimeters like you suggested and am doing a test run now.
Thanks again for all your help!
@dethomp16
FYI, your file is also gone... 🤔
Prusa i3 MK3S+ FW 3.11.0 (kit dec -20), PrusaSlicer 2.6.1+win64, Fusion 360, Windows 10
Off topic
Off topic. It realty is unfortunate that this board does not host pictures, that way stuff all stays together.
It does if you use the add media option, it then stores them in the gallery on the server when you upload them.
At some point though I expect peoples gallery to get pruned as at the moment there's no way to delete something you have added to your gallery and the server will fill up eventually so the admins wont have much choice.
I suspect the missing archives have also been removed by either a delete stuff older than xxx or delete stuff over size xxx type process anyway.
Fixing a thin walled print
@neophyl
I'm sure your right, I just wish I had known that would be the case, many of the project files where still relevant to anyone who might have read the post and wanted to explore how things were done. As well many of them would still be relevant in 2.4.
Lesson learned I won't be posting files on Prusa servers anymore.
Regards
Swiss_Cheese
The Filament Whisperer
Welp
Thanks for those answers about the missing files! I'm adding my original zipped file using the Add Media button in case anyone wanted to see it. 04mm_Nozzle_Kindle_Paperwhite_protective_case.3mf
It does if you use the add media option
Oh thats a good idea.
Lesson learned I won't be posting files on Prusa servers anymore.
I'm confused, I thought the info had been deleted from a third party server?
@towlerg
No it was deleted from Prusa's server. I'm now only going to be posting from a 3rd party server so that wont happen again, unless of course they delete the entire post, I have no control over that.
Regards
Swiss_Cheese
The Filament Whisperer
