First | Initial Layer flow
Is it possible to set the flow of the first layer independently of the main flow higher ? To get a bit more adhesion. In Cura it is called 'Initial Layer Flow'
The only thing I could find is this:
https://forum.prusa3d.com/forum/prusaslicer/prusaslicer-initial-layer-flow/
So only in G-code possible ?
RE: First | Initial Layer flow
There are a couple of ways that spring to mind but adding a couple of lines to your printers start gcode is the simplest and least effort solution. You could slice and use the layer slider to insert custom gcode at whatever layer you want. Thats a pain and you would have to do it for every model though so I wouldn't recommend that method. In the start gcode of your printer profile is best.
Just a few days ago in this very forum someone was trying to do something very similar https://forum.prusa3d.com/forum/prusaslicer/how-to-do-arithmetic-inside-a-condition/
They ended up using this in their start gcode
{if layer_num==0}M221 S75{endif}
{if layer_num==1}M221 S{100 * extrusion_multiplier[0]}{endif}
as they wanted a lower extrusion on the first layer and it reset back to the value set in the filament settings on layer 1. You can do the same but set a higher value first the first entry.
Don't know what printer you have but the usual advice on adhesion is - clean bed, get the z height right so the first layer is properly squished and then it doesn't come loose. Simple as that. Then use elephants foot compensation to remove the first layer spread. However that advice while always applicable to a prusa printer might not necessarily be applicable to another depending on the print bed in use. If it is a prusa though then sort that out before messing around with flow and multipliers and all the other crutches.
RE: First | Initial Layer flow
Hello,
I tried to set that gcode piece at start gcode and prusaslicer keeps sending an error:
start_gcode
Parsing error at line 19: Not a variable name
{if layer_num==0}M221 S105{endif}
    ^
RE: First | Initial Layer flow
That is because you cant use it in the START gcode field. The example thread you took the lines from is using them in the custom layer change gcode sections. Same tab but different sections.
Also you cant just add that line in as it will set the flow to 105% and then it will stay at that value. Which is why you need to add BOTH lines from that post
{if layer_num==0}M221 S105{endif}
{if layer_num==1}M221 S100{endif}
As the first one will set the flow for the first layer to 105 and the second will set it to 100 on the second layer. Alter for whatever values you want.
Also if you are doing this to improve layer adhesion on the first layer its not really the right solution. You would normally adjust your bed levelling first, then use a slicker thicker first layer height is you have problems with an uneven print surface. After that its increasing the first layer extrusion width. Increasing flow to fix a fundamental underlying problem is like hitting things with a hammer.
RE: First | Initial Layer flow
Thank you very much!.
It is not related with adhesion, my pla sticks pretty good at default settings. Its because small gaps of, what I think, underextrusion, in the first layer:
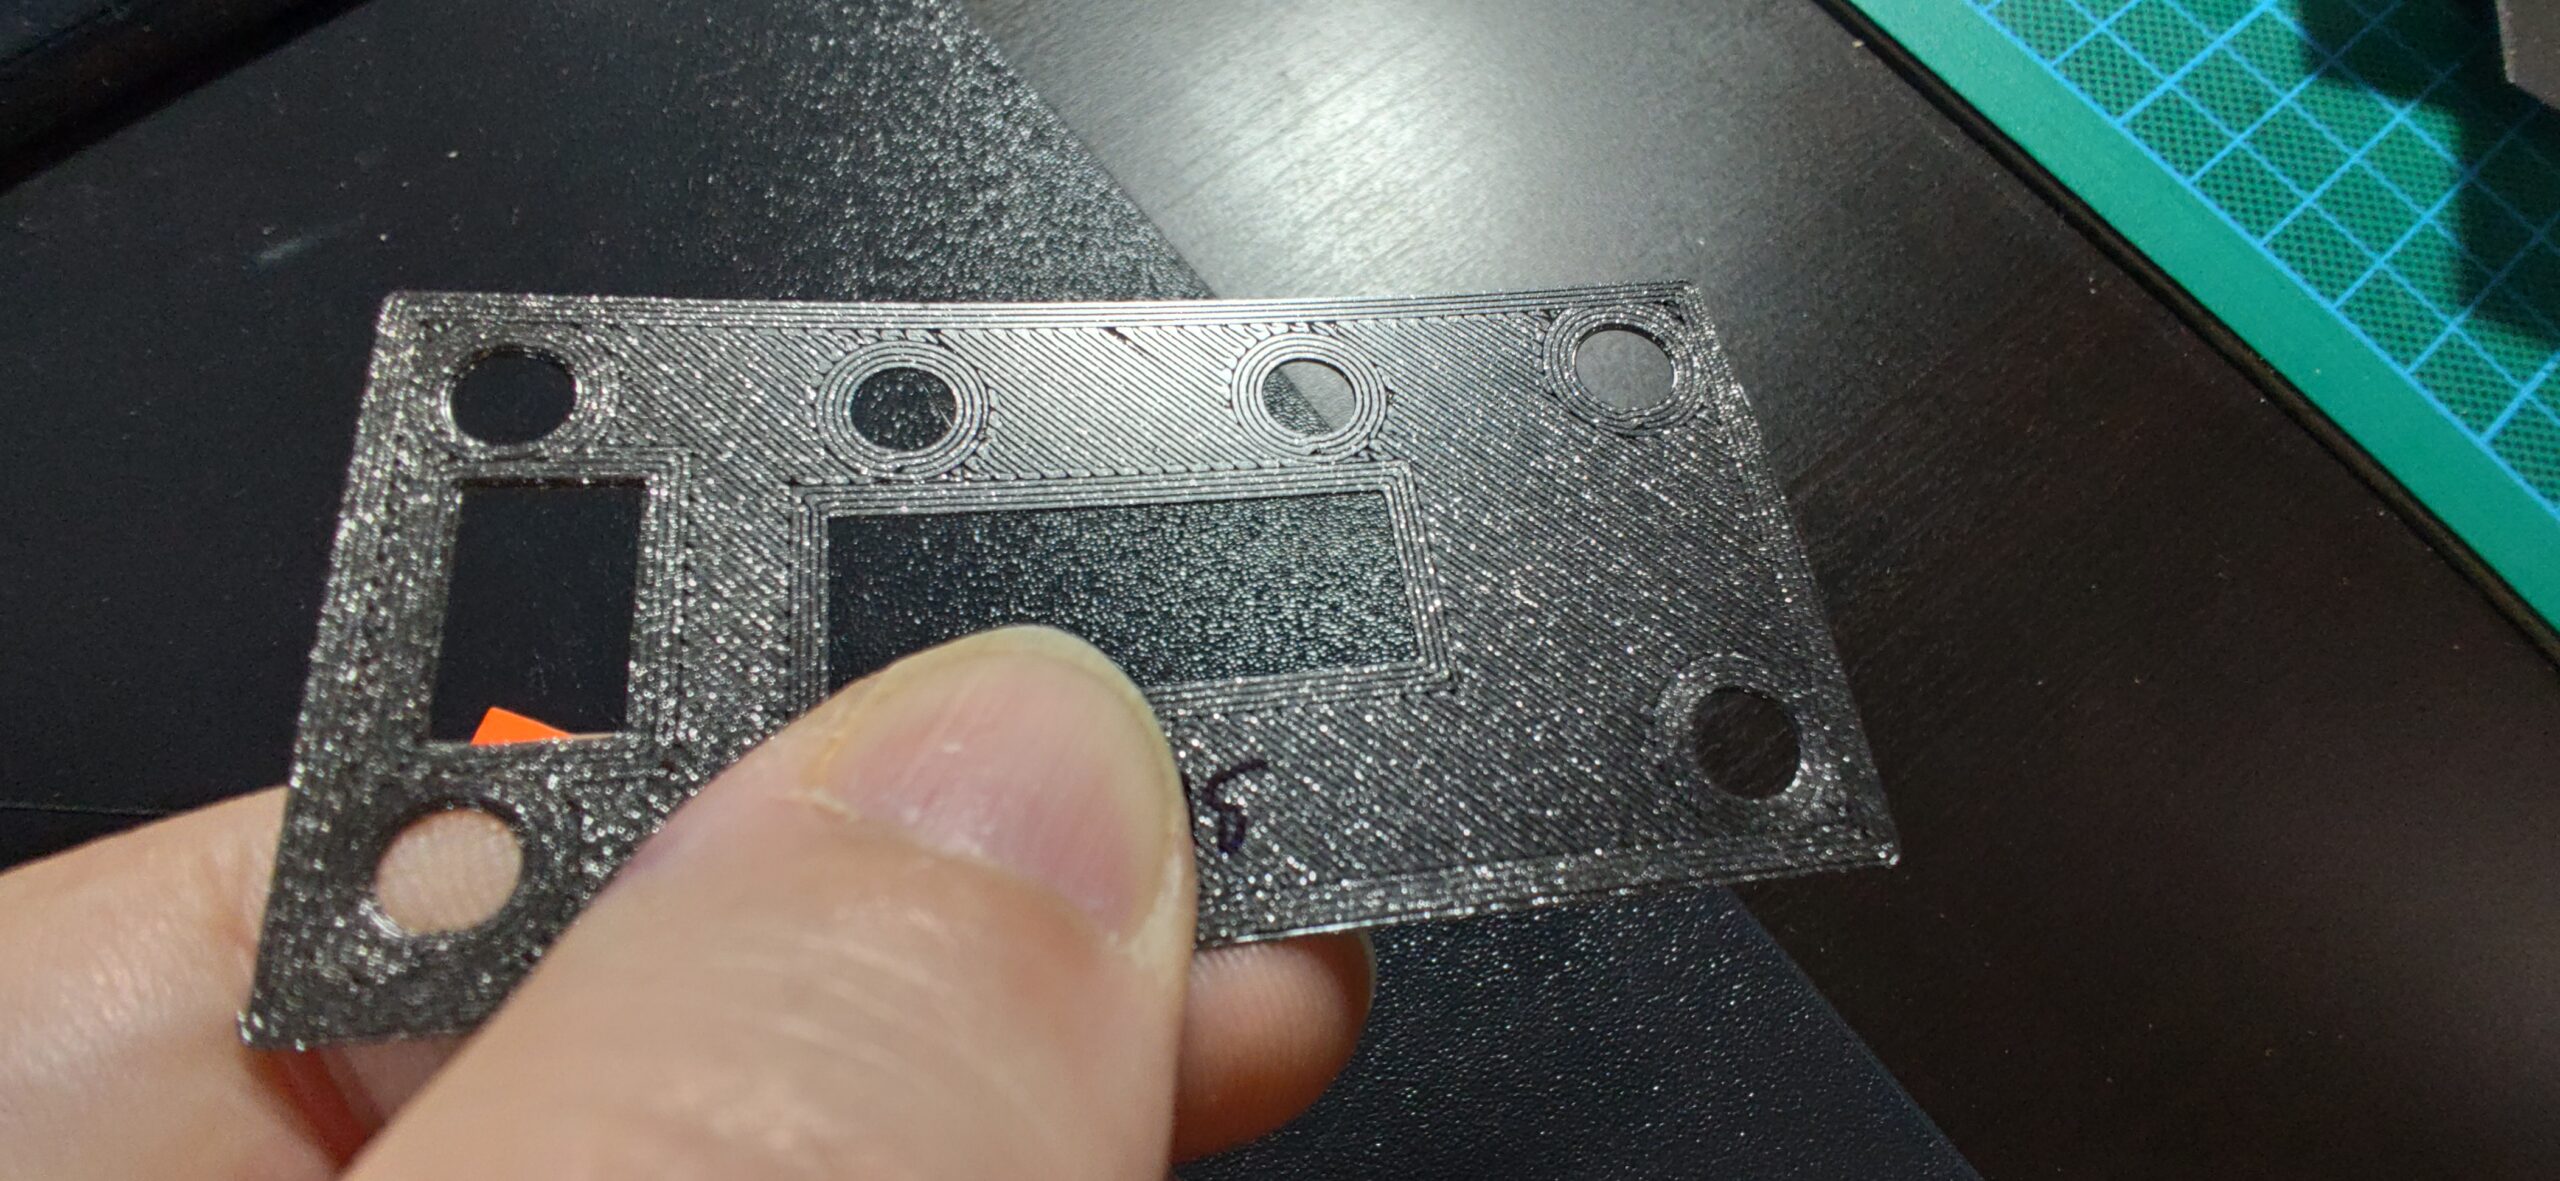
In my previous artillery genius printer, I used this "technique" to avoid those gaps.
RE: First | Initial Layer flow
@taviens have you sorted this out? I too have no adhesion problems, perimeters are ok, but I'm getting those infill gaps like in your photo... sometimes at random places too
RE: First | Initial Layer flow
Anyone seen any further reflections on this topic? It might be solvable by reducing initial layer height, but I've then had problems back-extruding (pressure through die orifice too high if gap is too small). Setting a "safe" z-distance on initial layer and rather compensating with larger flow would be nice (especially for the more "messy" polymer filaments). Bump and cheers!
RE: First | Initial Layer flow
In my experience with my Mini, with default flow rate of 95 with PLA (Prusa and Hatchbox) and properly set z, I still get those first layer gaps. I have been able to substantially improve that by increasing the flow rate. Changing the M221 line in the custom G-code to 98% generally works well.
M221 S98 ; set flow
If I want to make it really smooth, I bump it up to 100 or 104 for the first layer and then manually turn it down to 98% with the Tune -> flow factor menu after the first layer prints.
RE:
After that last post, I did an experiment with Hatchbox PLA, 0.4 nozzle and varying the flowrate on the first layer comparing 98, 104, 110, and 115. I found 110 was where all the gaps were consistently filled on the first layer. Going to 115 was not necessary to fill gaps, but it did reduce the ridges further. Based on this and referencing the code from This discussion, I've saved a printer preset with the following code at the beginning of the _Before Layer Change G-code_ section under Printer Settings and it is working well without needing to do manual changes with the tuning function.
;BEFORE_LAYER_CHANGE
G92 E0.0
M221 S{if layer_num==0}110{else}98{endif}
As the last line in my _Start G-code_ section I also have this line, but I believe it is redundant.
M221 S110 ;
RE: First | Initial Layer flow
Just a little explanation: within the Printer Settings Tab, Custom G-Code, start_gcode the variable layer_num is not available (and an error is thrown), however in every other custom gcode field (end_gcode, before_layer_code, etc.) the variable layer_num it seems available. So I needed to add M221 S110 in Start gCode and then in before_layer_gcode: {if layer_num==1}M221 S{100*extrusion_multiplier[0]} ;set Flow to normal{endif}
I tried to tie it to the filament custom start_gcode: M221 S110 (where layer_num is not available in start_gcode, but no error is thrown), but an overwrite of before_layer_gcode is not available, so in before_layer_gcode: {if layer_num==1}M221 S{100*extrusion_multiplier[0]} ;set Flow to normal{endif} has to be in printer_settings.
That is because you cant use it in the START gcode field. The example thread you took the lines from is using them in the custom layer change gcode sections. Same tab but different sections.
Also you cant just add that line in as it will set the flow to 105% and then it will stay at that value. Which is why you need to add BOTH lines from that post
{if layer_num==0}M221 S105{endif}
{if layer_num==1}M221 S100{endif}As the first one will set the flow for the first layer to 105 and the second will set it to 100 on the second layer. Alter for whatever values you want.
Also if you are doing this to improve layer adhesion on the first layer its not really the right solution. You would normally adjust your bed levelling first, then use a slicker thicker first layer height is you have problems with an uneven print surface. After that its increasing the first layer extrusion width. Increasing flow to fix a fundamental underlying problem is like hitting things with a hammer.