What went wrong with this print?

This is Prusament PETG on Core One. It is from this model, https://www.printables.com/model/233043-wankel-rotary-fidget-spinner-toy/
Prusa Core One
RE: What went wrong with this print?
Have you resolved your camera mounting issue? It's always nice to get some feedback when one tries to help others.
You lost adhesion in the concave, try slowing the print a little; if that's not enough increase the nozzle temperature by 5°
Cheerio,
RE: What went wrong with this print?
Hi Jürgen, I did take the camera cover off and see the magnets installed. I will try re-mounting it after the printer completes its current job. Thanks for your help.
Prusa Core One
RE:
In the print above, I find it strange that all four copies of the part would have come loose at once. When you found them, were they all detached from the build sheet? Or could it be that the printer has lost its XY position at some point and then started to print in mid-air?
There is a known bug in PrusaSlicer, where it generates "impossible" Gcode (very rapid moves with sudden acceleration) when the option "Print Settings > Layers and Perimeters > Quality > Avoid crossing perimeters" is activated. This has caused step losses for many users. It's recommended to keep that option disabled.
In general, I like to use "Print Settings > Output options > Complete individual objects". The printer will then print a complete object (all layers) before moving on to the next. Fewer objects will fit onto a build plate (the Plater's "Arrange" button will be aware of this mode) -- but if one fails, the others are typically still usable.
RE:
Only the small, spindle is attached to the bed. The web mess is just floating over the bed, look at the attached side view
None of the parts were detached from the bed
Prusa Core One
RE: What went wrong with this print?
I’m new to 3d printing and obviously have no idea how to print this part.
Prusa Core One
RE: What went wrong with this print?
I’m new to 3d printing and obviously have no idea how to print this part.
In PrusaSlicer, save the project as 3MF, zip it and attach the ZIP file to your reply. Then we can look at it and give guidance.
RE: What went wrong with this print?
Flip the object over so the large side is on the print bed surface.
In PrusaSlicer, on the left hand grey box there's a set of icons. The forth one down is a box with an arrow pointing downward. Click on that. Then, you'll see a white surface on the top of the part. Click on that, and that'll be placed onto the printbed.
It's never going to print as originally oriented without supports. Placing it properly avoids the need for those.
RE:
Oh, you should print them with the flat side down, and the little axle stub pointing up. Otherwise you will not have enough attachment area to the print bed. And the printer will try to print the first layer of the large flat side in mid-air, which is what caused the fail here.
When you load the part into PrusaSlicer, the left side-bar of the "Plater" view has a tool called "Place on Face". Select the part (click it so it becomes green), select the "place on face" tool, then the Plater will highlight the larger surfaces of the model which are candidates for the bottom surface. Click the large, largely flat surface, and you are good to slice and print.
RE: What went wrong with this print?
The other side is not flat. I attached the .3mf in a zip.
Prusa Core One
RE:
I know, the other side has that little dimple. Its bottom surface will be printed in mid-air again -- not ideal, but since they are supported on all sides, the filament strands will stay where they should go.
You can see on the title photo of the Printables page that the bottom surface of that dimple does not look great. That's exactly because the filament strands were not deposited on a well-defined surface but were strung out in free space.
RE: What went wrong with this print?
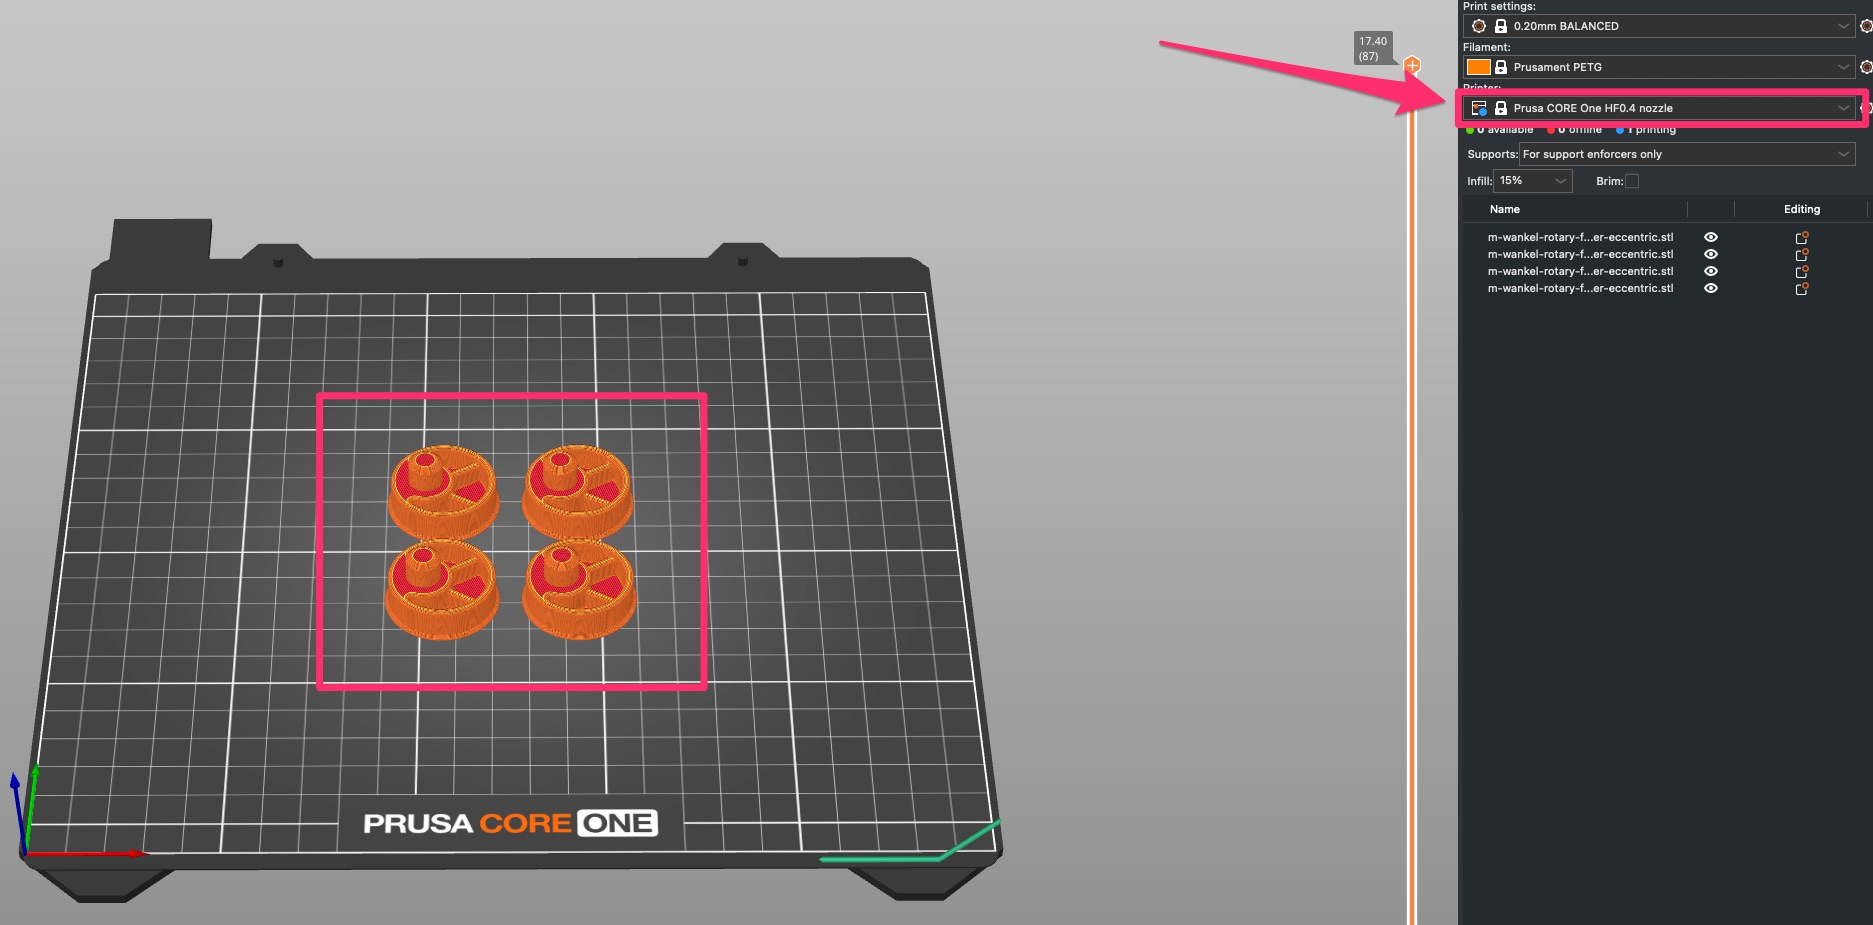
So you need to print them with the top side down and the spindle pointing up. Also you have Prusa Core One HF0.4 nozzle selected. Double check that you actually have the high flow nozzle in your heat block. If you have the brass one from Prusa it should have "CHT" printed on the heatbreak tube.
RE: What went wrong with this print?
Thanks Jürgen. I flipped them and will print them next.
Prusa Core One
RE: What went wrong with this print?

They came out well this time. Thanks for everyone's help.
Prusa Core One
RE: What went wrong with this print?
They came out well this time. Thanks for everyone's help.
For the finger indentation on the flat side you can enable Supports: Support on build plate only
The will add a removable support. The shape will be better but the surface will be a slightly rough.
RE: What went wrong with this print?
As @hyiger said, "Supports" can help. You can turn them on in the right sidebar ("Supports on build plate only"). Or, if you want to tweak the settings, see Print Settings > Support Material -- but that should not be necessary for starters. The support material can be broken away easily after you take the finished print off the print bed, but it does leave some little "pock marks" on the surface.
Alternatively you can try and tweak the print settings for "bridges" -- that's what those free-floating filament sections e.g. at the bottom of the dimple are called. If you print bridges more slowly (Print Settings > Speed > Bridges) and/or with a bit of extra material (Print settings > Advanced > Bridge flow ratio), they may come out cleaner. But I think that's for later, as witnessed by the fact that those settings will not even be shown if PrusaSlicer is set to "Beginner mode" (top right).