First print - Keychain
This is my very time even seeing a 3D printer irl, let alone running one.
I printed the sample keychain loaded on the flash drive and have some questions about it. See photo….
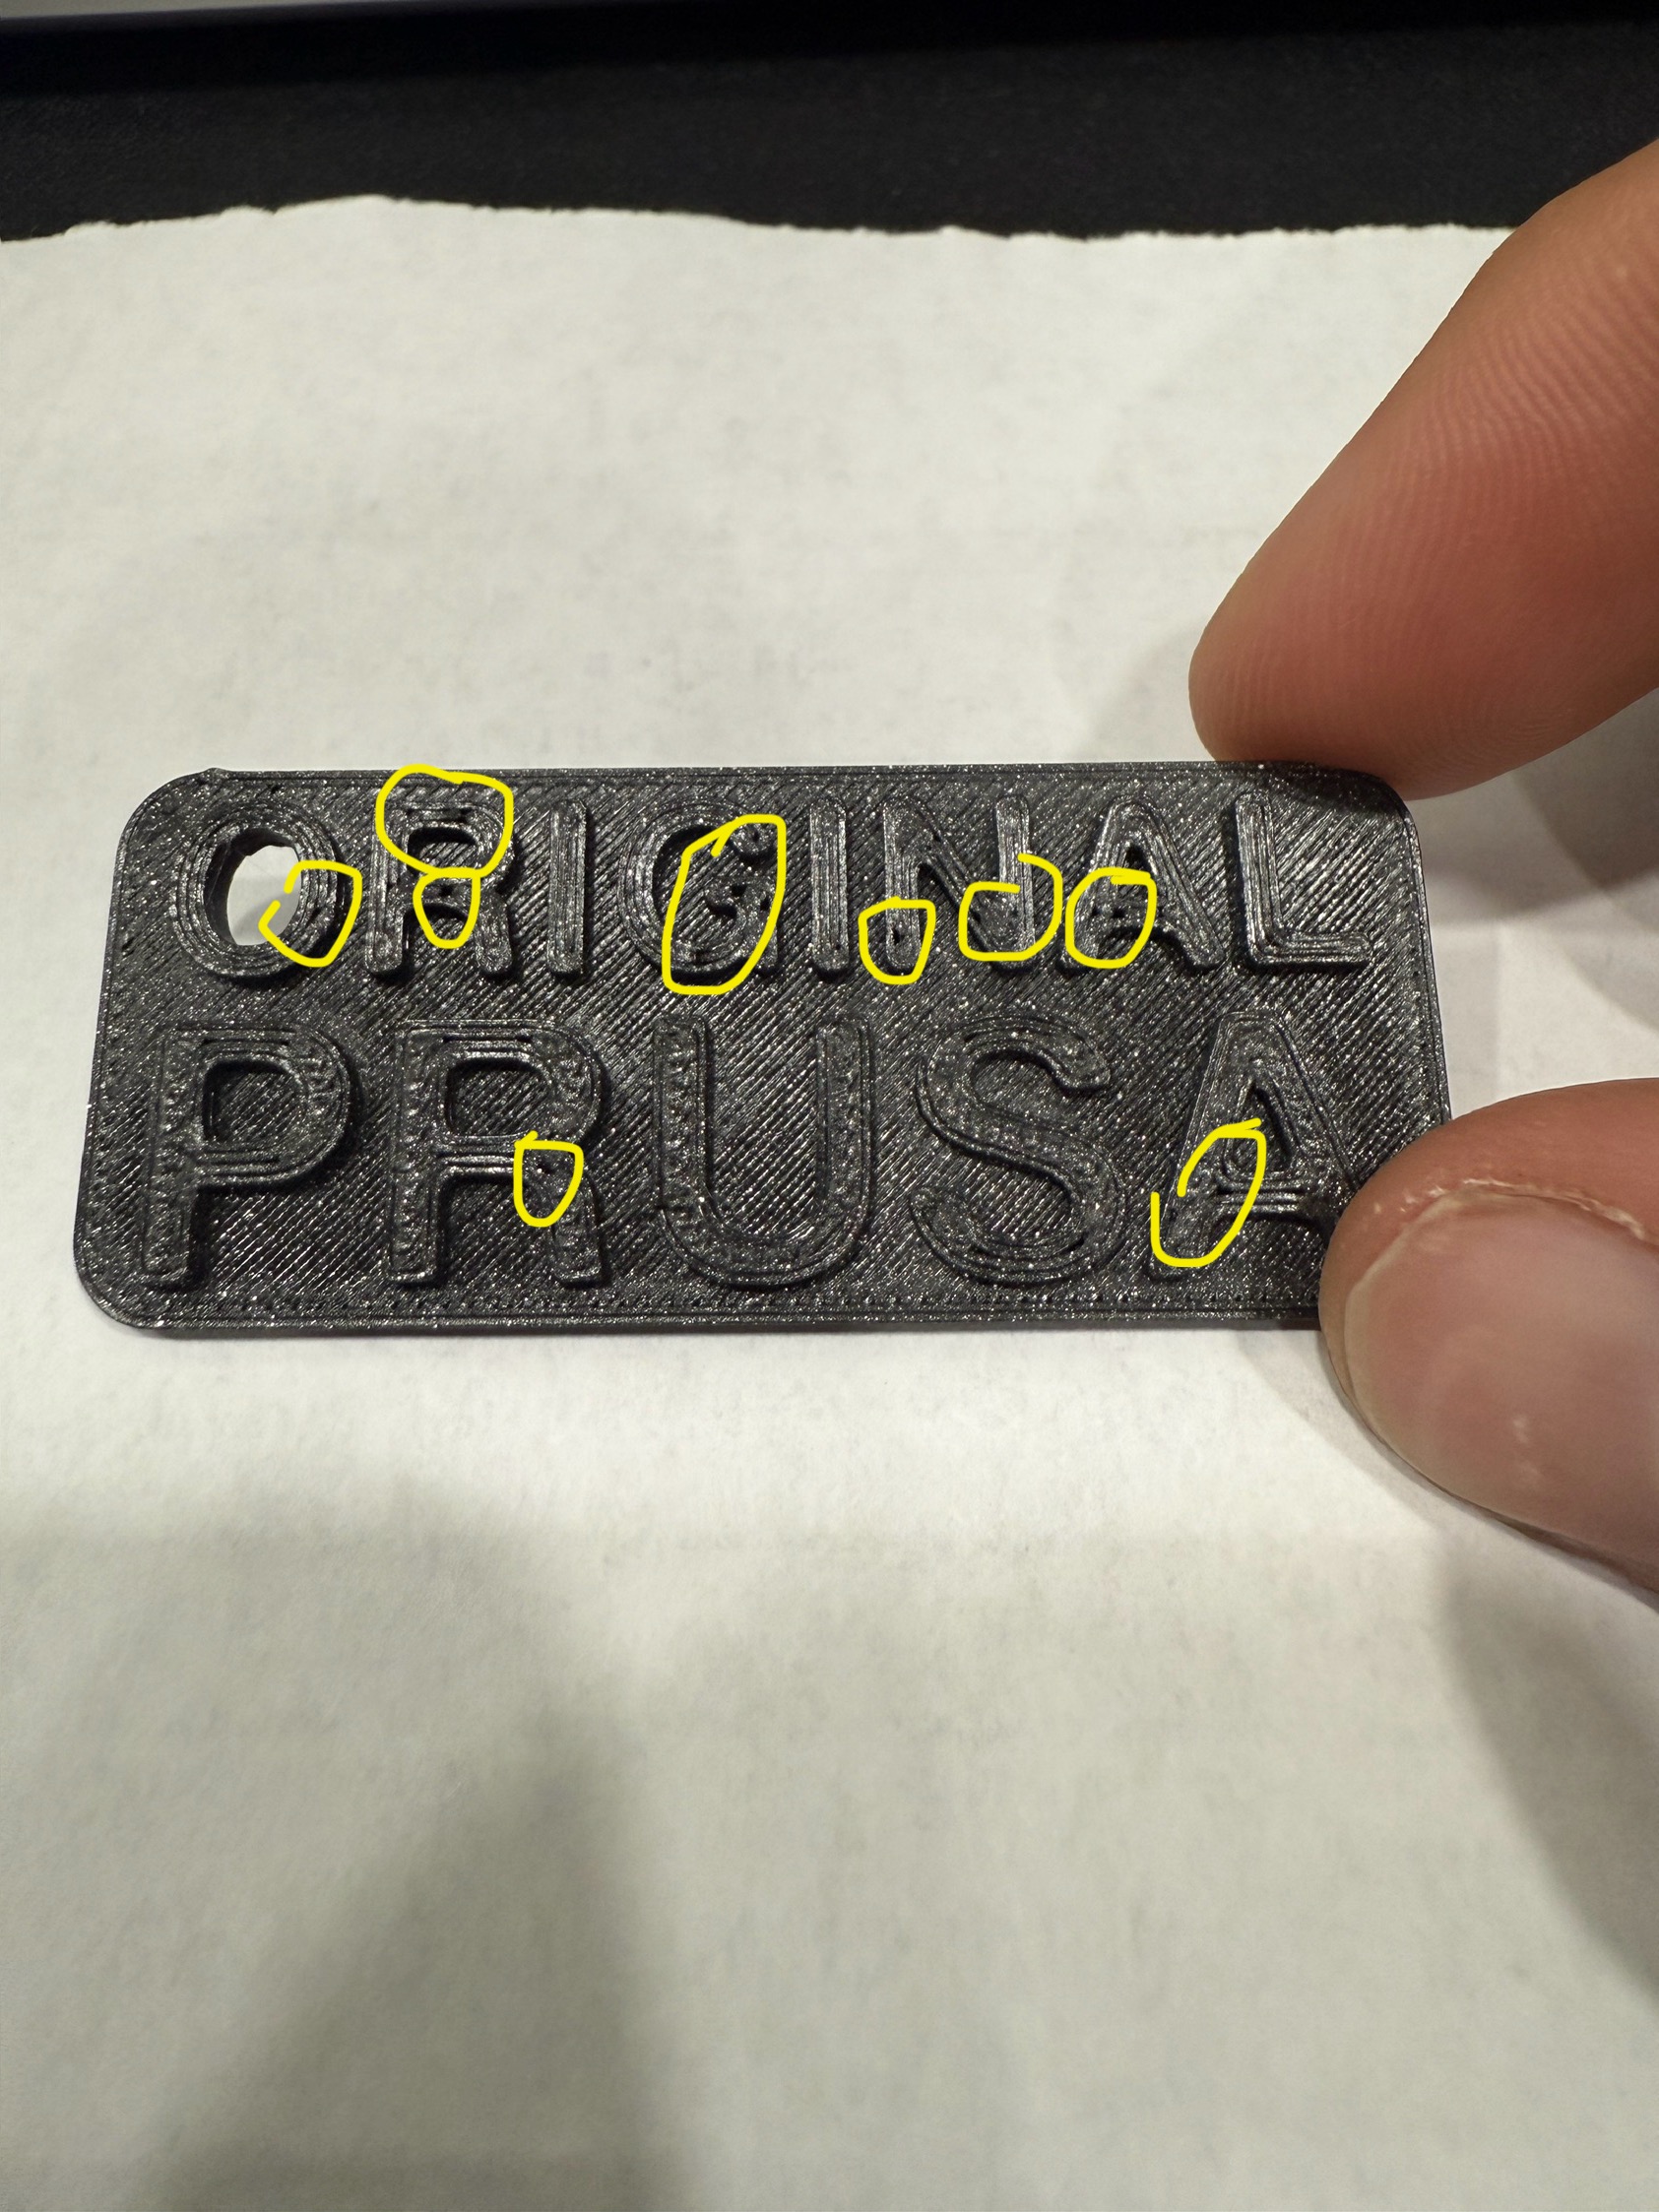
There are holes or gaps in the letters where it should’ve been filled in.
I’m sure there’s an explanation for this. Just looking for some guidance.
RE: First print - Keychain
Try increasing the nozzle temp by about 5 degrees. If that doesn't help, it may be that the filament is wet (happens often with PETG, but not too often with PLA) and that you may need to dry it. This looks like a pretty good print with minor issues; I only say that because it has only happened on the small parts (only 3 lines of extrusion).
RE: First print - Keychain
I have the same problem, all my prints have these holes.
t.hamilton1233, do you have a solution yet?
I've tried different PLA filaments, with different temperature settings, but it's always the same.
RE: First print - Keychain
I have the same problem, all my prints have these holes.
t.hamilton1233, do you have a solution yet?
I've tried different PLA filaments, with different temperature settings, but it's always the same.
Which nozzle are you using? What is the nozzle selection in the PrusaSlicer?
RE: First print - Keychain
These are my first prints from this printer.
I'm using the standard Core One nozzle, without any changes to the settings.
It doesn't matter whether I print directly from the printer or from a slicer.
It's probably something to do with flow control.
RE:
These are my first prints from this printer.
I'm using the standard Core One nozzle, without any changes to the settings.
It doesn't matter whether I print directly from the printer or from a slicer.
It's probably something to do with flow control.
What is printed on the side of the nozzle heat break tube? Does it say “CHT”? If so, then ensure you are using a high flow nozzle profile. If not, ensure you are using a standard nozzle profile and not “high flow”
RE: First print - Keychain
What is printed on the side of the nozzle heat break tube? Does it say “CHT”? If so, then ensure you are using a high flow nozzle profile. If not, ensure you are using a standard nozzle profile and not “high flow”
OP wrote that he uses the standard nozzle that came with the Core One, so 0.4 mm high flow. And he printed the pre-sliced keychain from the flash drive, which I would very much hope to be sliced for that standard nozzle. (Unfortunately the file names from PrusaSlicer do not seem to encode that; they include "0.4n" no matter whether a high flow or regular nozzle was configured.)
So it must be something else that causes the apparent under-extrusion. Partially clogged nozzle? Wrong tension on the Nextruder gears, so the drive is slipping? Bad thermistor, so the nozzle temeprature is not what the Core One thinks it is?
The purpose of the simpler supplied models is to make it possible for a new user to print something no-matter how ineptly the machine has been set up.
That code has been optimised for printability, not neatness.
For really neat prints the design must take into account the extrusion width and direction of lay but this only works well with a well tuned machine.
Cheerio,
RE:
Alright, I just printed the demo keychain on my Core One, and it has gaps in exactly the same spots as shown in the original post above. So everything is alright with the OP's printer.
I don't buy into Diem's explanation that Prusa did this deliberately and for good reasons. The demo prints should show off what the printer can do, and make users happy with their purchasing decision. What good is a demo that reliably produces a crappy-looking result? And more specifically, what typical "poor tuning" situation would Prusa mitigate by deliberately setting up the demo files to be under-extruding?
It seems that the keychain file was just sliced sloppily: All the letters are actually hollow, going deep into the base plate -- which causes the upper layers of the base plate to be laid down in a complex dance instead of just nice diagonals. And the top layer of the large letters is filled in with a zig-zag instead of concentric lines. I'm wondering whether they did not use the Arachne slicer, leading to the gaps on the smaller letters. I am pretty confident that one can get a better-looking keychain out of the Core One, and am a bit disappointed that Prusa did not pay more attention to the first impression they make on many new users.
RE: First print - Keychain
Jürgen, thank you for testing. Now I'm sure – this is how it's supposed to look.
I tested other prints from the slicer today, and unfortunately, the holes are visible. I'm disappointed because I have two cheap printers from China, and they don't do this. Even the "benchy" print has holes.

RE: First print - Keychain
Thanks for all the replies. The nozzle is a standard "CHT" 0.4, and that's how it's set in the printer. I reinstalled it just in case, but that didn't change anything.
RE: First print - Keychain
Thanks for all the replies. The nozzle is a standard "CHT" 0.4, and that's how it's set in the printer. I reinstalled it just in case, but that didn't change anything.
CHT is the high flow nozzle. So I'm assuming you have Setup -> Hardware -> Print Head with HF set to "on" and are using the HF0.4 nozzle profile in the PrusaSlicer?
RE: First print - Keychain
One of my initial prints was the dog tag ... and it does look pretty ugly under a magnifying glass. Grab the STL from the Prusa site and slice it yourself and set the surface polishing to enabled (in Slicer). That will fill the top surface to a fairly nice result, well, it should. lol.
RE: First print - Keychain
Thanks for all the replies. The nozzle is a standard "CHT" 0.4, and that's how it's set in the printer. I reinstalled it just in case, but that didn't change anything.
CHT is the high flow nozzle. So I'm assuming you have Setup -> Hardware -> Print Head with HF set to "on" and are using the HF0.4 nozzle profile in the PrusaSlicer?
yes, I have this option enabled
One of my initial prints was the dog tag ... and it does look pretty ugly under a magnifying glass. Grab the STL from the Prusa site and slice it yourself and set the surface polishing to enabled (in Slicer). That will fill the top surface to a fairly nice result, well, it should. lol.
I did some printing today and noticed that the strucktual option looks a bit better. Ironing the surface obviously covers those holes.