Assembly of the CoreONE, Step 7, "Securing the rear motor"
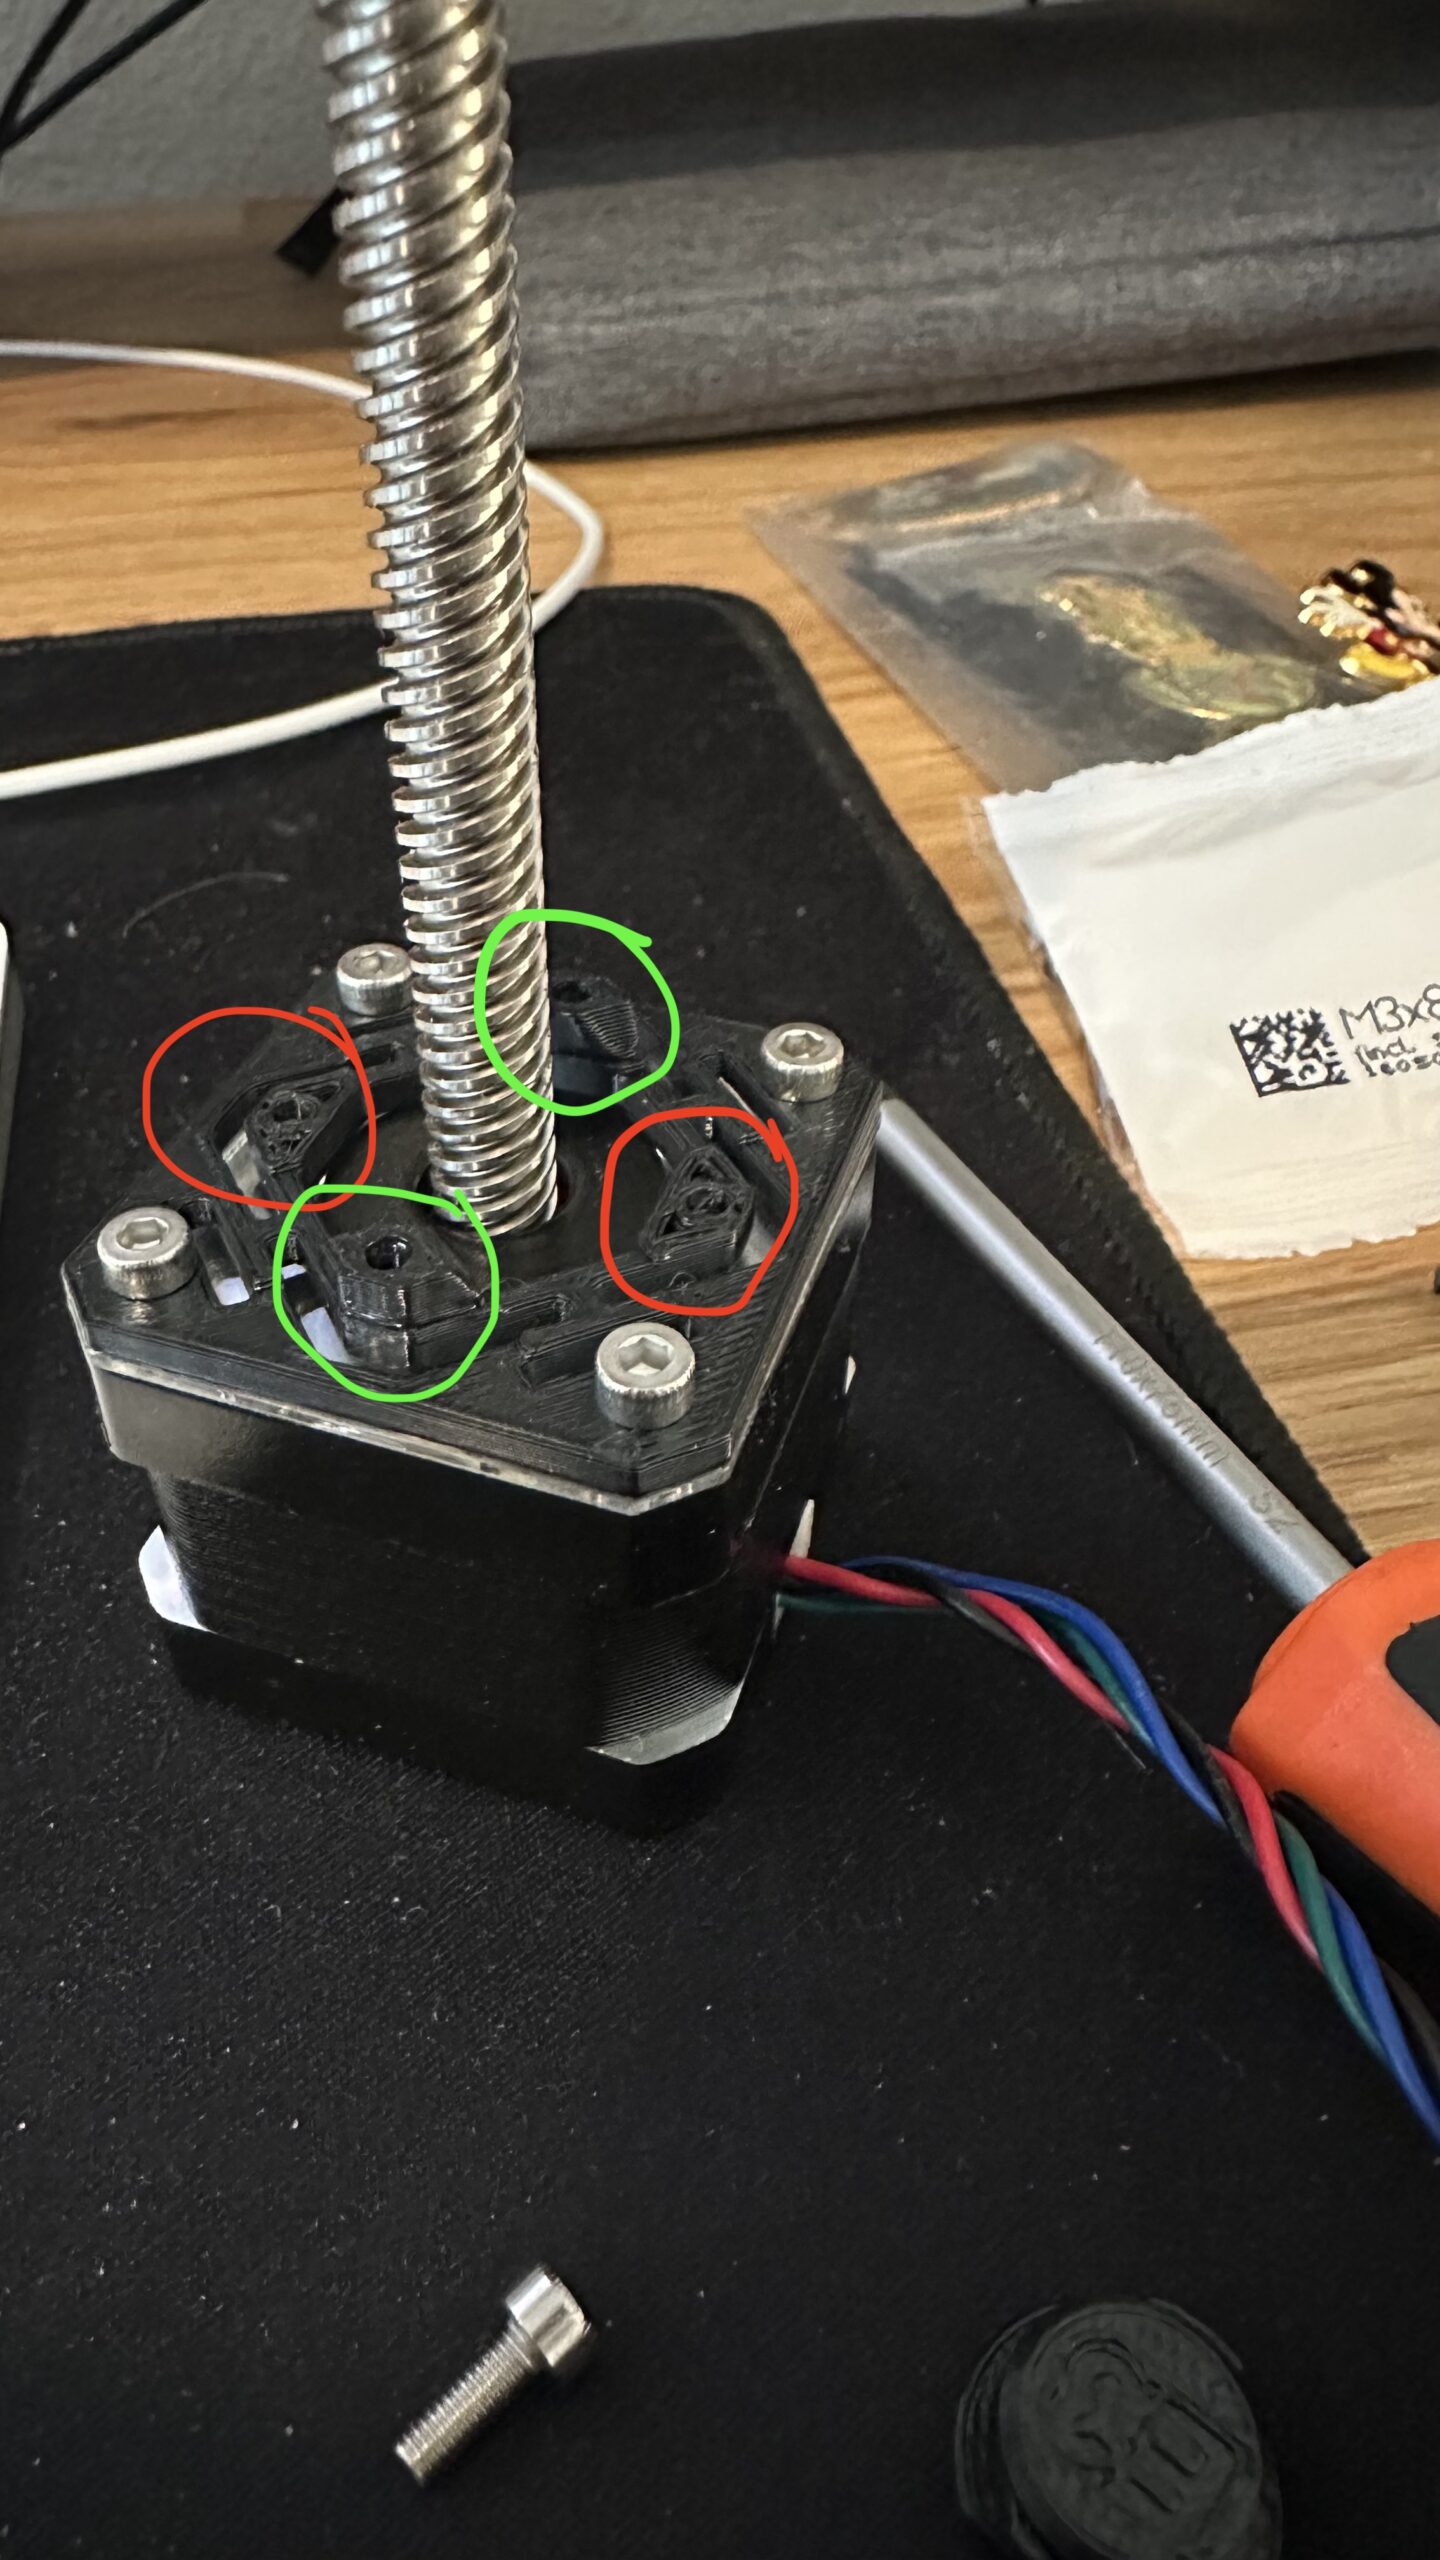
I'm basically at the near-beginning of assembly of the core 1, step 7, "securing the rear motor". The little standoffs on the z-motor mount keep breaking off when just starting to screw them into the bottom panel (not over tightening, but within the first turn or 2). It's like the M3x8 screws are not the right size. Now I'm not sure I can proceed with the rest of the build. I uploaded a photo.
I contacted support and they did't understand was I was referring to, suggested I was using the wrong screws (and had me verify with the cheatsheet), finally said they will send me 1 z-motor mount, and said my other mounts are probably fine. But just delicately testing if the M3x8 screw even goes into the remaining mounts, I'm saying no, I'm not convinced they are fine. And as for the screw size - this is the 1st bag of screws that are opened in the assembly (meaning, I'm not mixing screws around on a workbench).
I do feel like this is a "me issue". I'm doing something wrong. I don't have any other 3d printer, and this is my first printer! Any suggestions moving forward?
Circled in red are the broken standoffs. Circled in green are still in tact.
RE: Assembly of the CoreONE, Step 7, "Securing the rear motor"
forgot to add: this particular part is on the z-axis right in the rear.
RE:
My opinion is they provided a defective part and should be replaced. Do you have a friend with a 3D printer that can print one for you? You can find the part here: CORE One printable parts under Base Assembly. Otherwise, just ask support to send you a new one.
Or you can try to glue it back then use a screw to pre-thread the holes.
RE: Assembly of the CoreONE, Step 7, "Securing the rear motor"
Thanks! I found someone who can print another for me. I like the idea of pre-threading the holes with a different screw. Support did offer to send another, but only 1. Sounds like I'm better off having a friend print a few for me.
Thanks for the response!
RE: Assembly of the CoreONE, Step 7, "Securing the rear motor"
i would rather use a 3mm thread cutter than a screw. Or maybe drill the holes to 4,5mm and ad heat inserts
RE: Assembly of the CoreONE, Step 7, "Securing the rear motor"
Thanks ckobar. I'm going to switch to your thread cutter idea. Using a small screw worked for one of the z-left motors. But it was not for the faint of heart. It was super slow going, turning 1/4 turn each screw until securely mounted. I could feel the resistance. re-tapping should fix that. If I struggle too much more, I'll use the newly printed pieces and do the heat insert idea.
Thanks!
RE: Assembly of the CoreONE, Step 7, "Securing the rear motor"
These are in a tough spot to avoid side loads while mounting. Tapping before you try to assemble will help a ton (whether a tap or just a screw) but also pay attention as you're working to avoid this. You may have been doing just fine and probably have a defective part.
RE: Assembly of the CoreONE, Step 7, "Securing the rear motor"
If you have access to the appropriate heat set inserts I highly recommend printing and installing these:
I printed these from Prusament PC-CF before I even had my upgrade kit in hand. The inserts make for a much easier installation and the PC-CF makes them nearly indestructible (plus the added rigidity means the z-axis screws don't vibrate as much).
Regards,
Steve
I remember someone from Prusa saying (I think it was an assembly comment) that PC-CF is too rigid and may cause issues later with the z-axis. It should be printed in either PETG or PC Blend but not PC-CF.
RE: Assembly of the CoreONE, Step 7, "Securing the rear motor"
oooh, I like that newer motor mount! and I do have some petg ready for use. I think I'll finish assembly with the normal parts by re-tapping them (my friend will print other mounts for me, also I just got a shipping notification from Prusa on a replacement part), print benchy, THEN print the modified mounts and replace them, and finally enjoy the printer.
It know things happen. this is just one of those "why me" after spending a month deciding what printer to get, and now I'm essentially stopped at Step 3 out of 100! But I'll get through it.
RE: Assembly of the CoreONE, Step 7, "Securing the rear motor"
[...] PC-CF makes them nearly indestructible (plus the added rigidity means the z-axis screws don't vibrate as much).
The whole reason for having these parts is that they act as flex joints. So I would not make them from a stiffer material.
RE: Assembly of the CoreONE, Step 7, "Securing the rear motor"
True, however, the design of the part is such that even printed from PC-CF they still flex freely. If the Z-axis screws are trying to move so far out of "plumb" that the PC-CF rigidity is an issue then your printer likely has much more significant issues :). They certainly can be printed from whatever material you choose (PETG is, I believe, what Prusa uses) however, PC-CF is what I had loaded when I printed and I've had zero issues with the parts in over 1400 hours of printing.
Regards,
Steve
RE: Assembly of the CoreONE, Step 7, "Securing the rear motor"
First off, thank you all—the number of replies and the discussion here is really encouraging. Some of the other hobbyist forums I’m on are basically crickets compared to here.
Here's where I'm at 4 days later:
- Prusa is sending me a replacement part (hopefully it’s “parts” plural). It arrives Monday.
- I’ve installed two of the Z-mounts thanks to tips from this thread. The rear motor is still the sticking point.
- My friend is struggling with his own printer issues and only has PLA, so I may skip asking him to reprint parts.
- If the Prusa replacement works, that's great and I hope to let the everyone here know I'm on step 8! If not, I'll either just find a makerspace here in Central Florida, or ask someone here for some private help. I know I can wait for more overseas parts, even under warranty; but, I'm just anxious to get this finished.
Thank you!
RE: Assembly of the CoreONE, Step 7, "Securing the rear motor"
Prusa parts came in. I got 2 mounts. Anyway, I decided to slowly pre-screw it a little at first, then mount them. All is well and I'm on to Step 10.
Thank you all again for your time and ideas. Should I run into another issue I'll create a new thread.
Thanks!
RE: Assembly of the CoreONE, Step 7, "Securing the rear motor"
Should I run into another issue I'll create a new thread.
Thanks!
Hopefully you won't run into any more issues. Good Luck!