Belt Tensioning strips Screw/Nut thread
Hi guys,
I am still trying to get past the Y calibration phase of my printer. Trying to discuss this with support as well. Last week one of the belt tensioning screws ( or the nut, who knows) stripped after some time adjusting the belts. I thought to myself: Yeah whatever my fault. I thought there wasn't too much tension on the belt to strip out a nut but whatever. Ordered replacement parts, waited for them to come. Today I've installed them and what do you know? Both left and right tension block stripped out their respective thread, both while loosening! And don't get me wrong guys, this happened with a relatively loose belt (under 80 Hz) The screw strips right in the middle of the thread, so its impossible to remove the pulley block from it.
My theory is, that the end of the screw starts to grind of a little bit of the PC-CF. If you mess around with the screw, tightening and loosening it, you end up getting some of the carbon fibre in the thread which leads to it stripping out. In my case that happened during inital build, but I guess thats also to be expected after some usage time.
Really disappointed with this. Anybody else have that problem?
My personal broken Pulley-Block-Count is now up to 3.
RE: Belt Tensioning strips Screw/Nut thread
https://forum.prusa3d.com/forum/prusa-core-one-assembly-and-first-prints-troubleshooting/tension-pulley-broken/ suggests that it is not the thread but the nut turning in the part (which would fit as well, CF blocks the thread and both parts move together). There is quite some play in that Pulley part, so that might be.
I didn't add any pictures, because from the outside it looks just fine. Imagine your tensioning block - but when turning the tensioning screw the block doesnt advance in either direction, it just stays in place.
RE: Belt Tensioning strips Screw/Nut thread
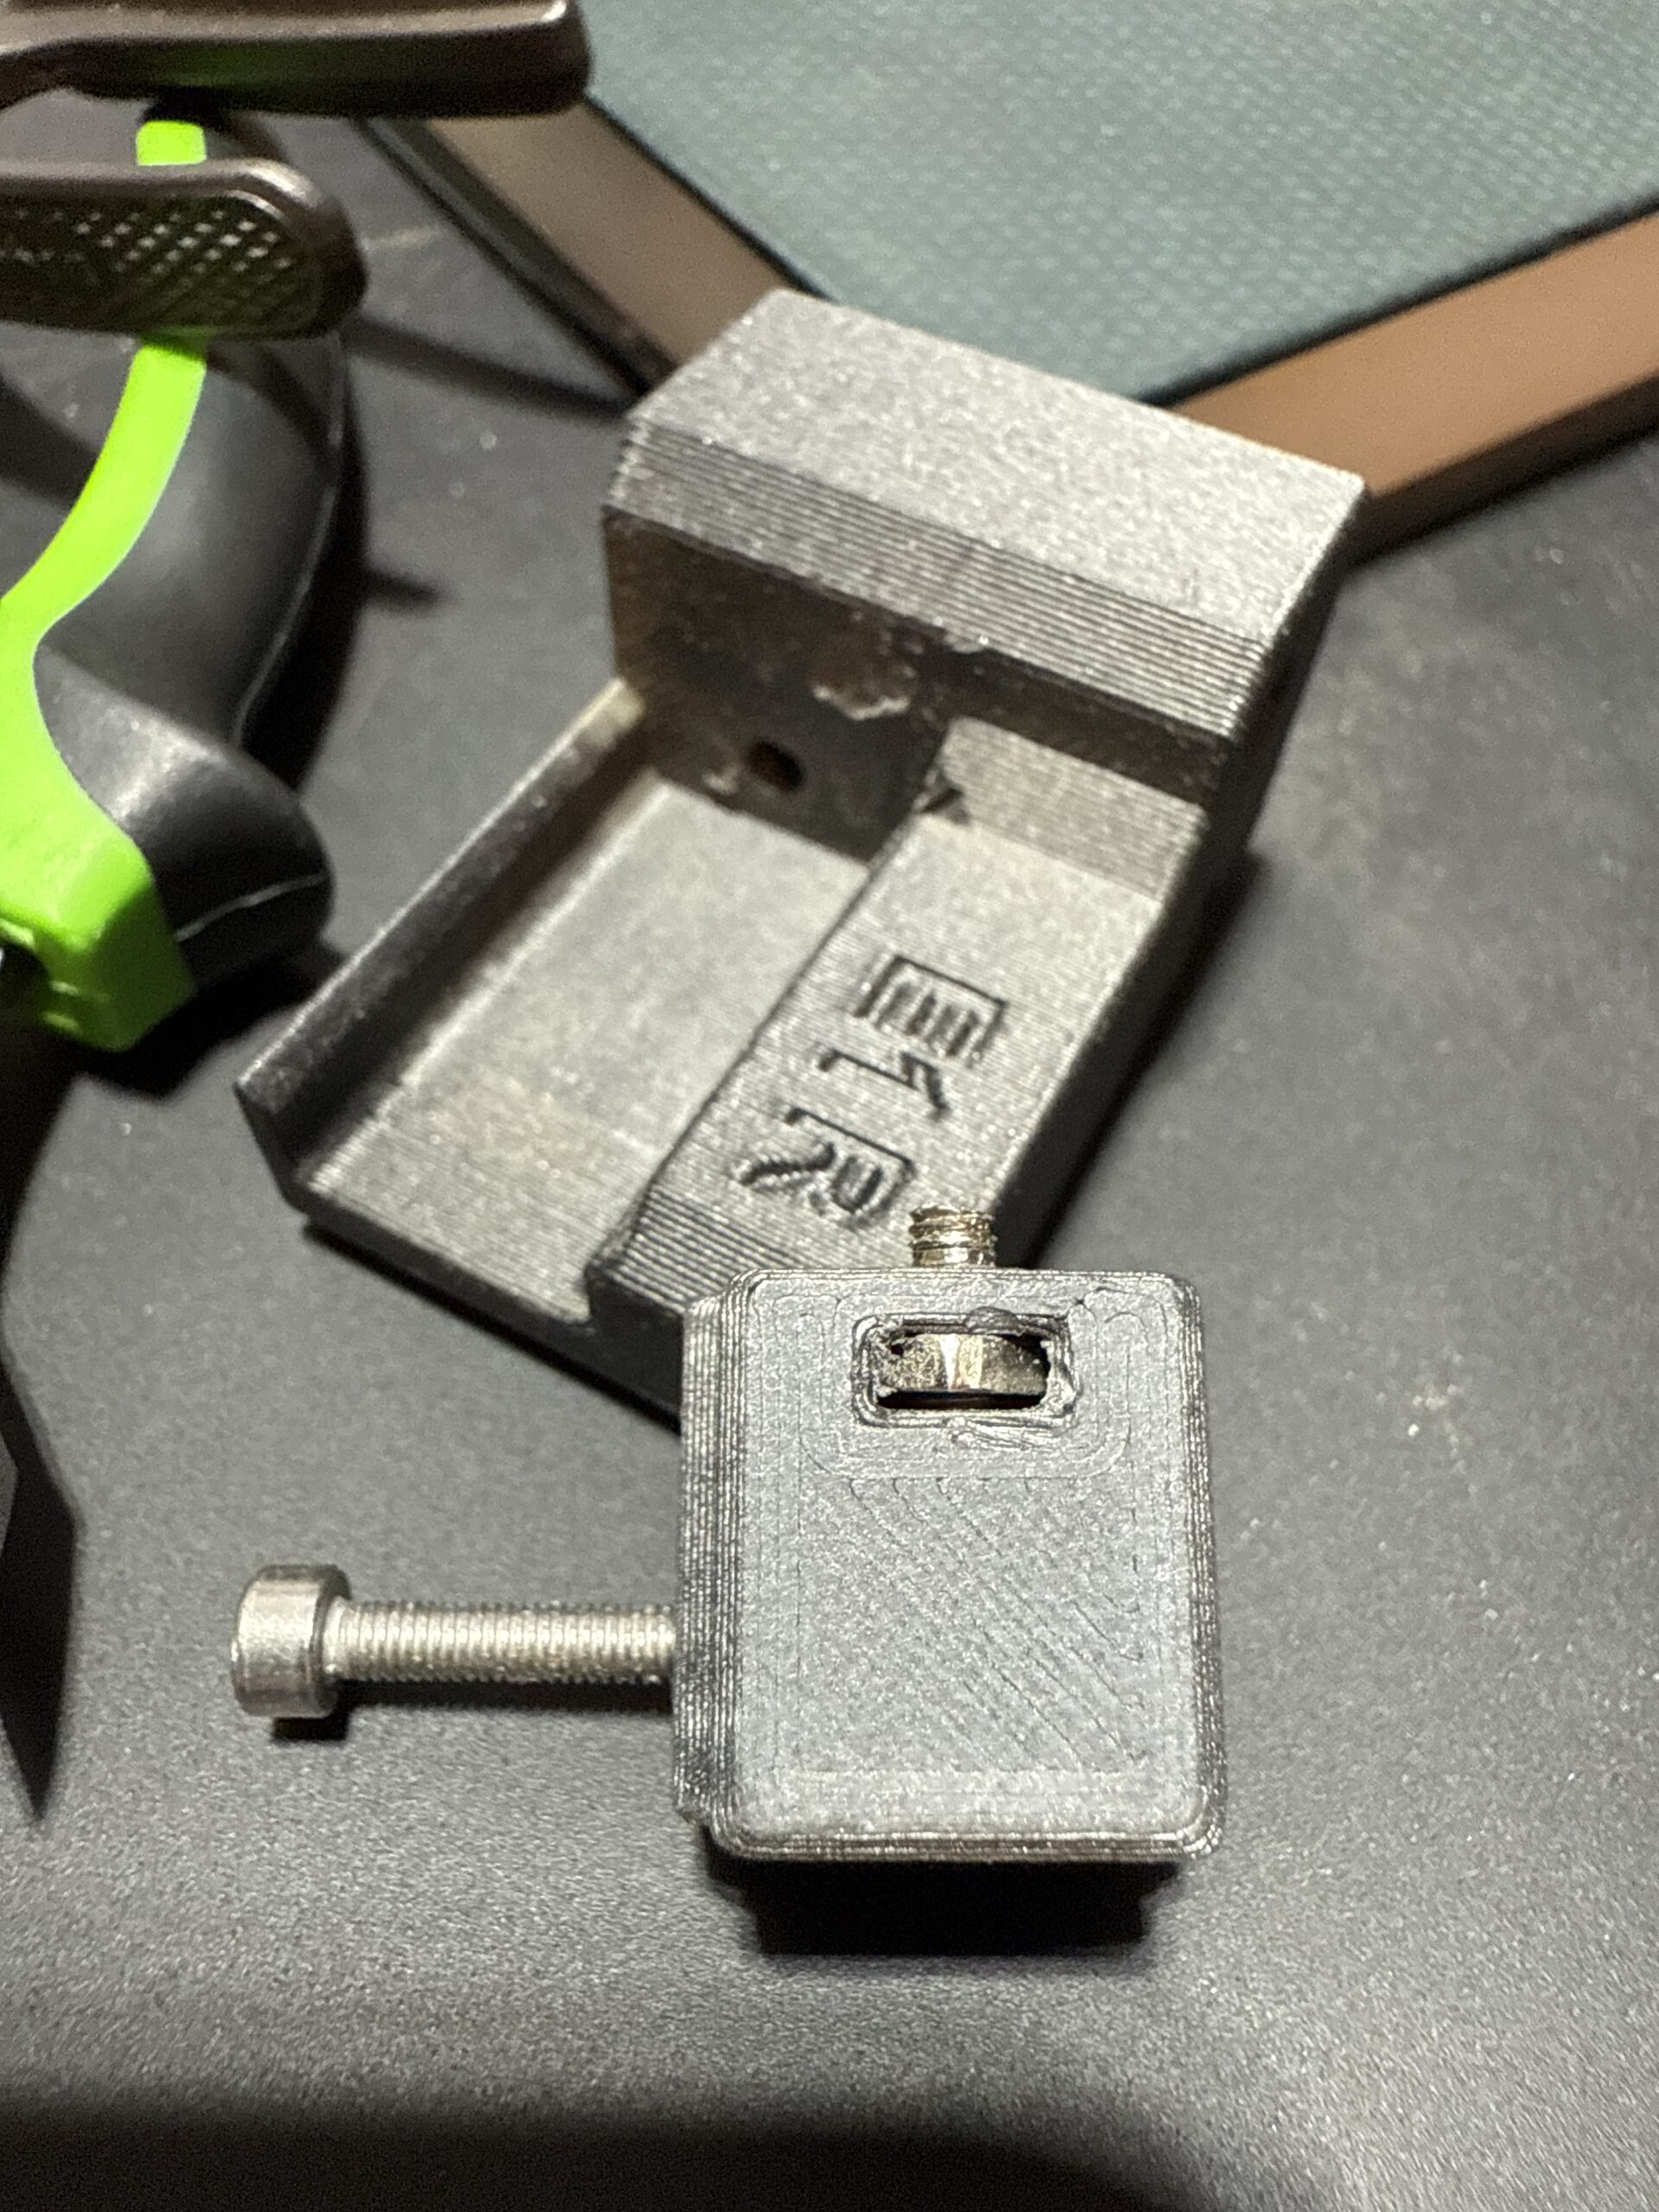 The nut on the turns inside the tighter the end result was I had to cut the screw to remove the part to get this picture.
I rebuiltthe part using new screw and nut secured with JB Weld. It works untili order a replacement and will modify nw part to keep from repeating.
What a mess
RE: Belt Tensioning strips Screw/Nut thread
I've noticed, that the reprinted parts on my own machine had a much tighter fit for the nut than the ones I've received. @Prusa did you maybe just send out a bad batch? I've contacted support about it, they suggested they hadnt heard of the issue yet. But the parts I've received were physically way more loose than the new ones. Loose as in: I could drop the nut in and it fell into the slot without me pushing. I've bought 3 replacement parts with that problem until I fixed the problem once and for all printing my own.
RE: Belt Tensioning strips Screw/Nut thread
In many cases, a failure of the Y axis test is caused by a misalignment of the X and Y axes, i.e. they aren't separated by exactly 90 degrees. The remedy is located here: https://arachnoid.com/3D_Printing_Prusa_Core_One/index.html#Core_XY_Axis_Alignment .
Also, don't try to solve this issue by changing belt tensions -- that's entirely independent. After the above-linked procedure, the printer should pass the Y axis test and the two belts should have a tension frequency of 85 Hz.
The concern I have with this is that the author is making the XY axis "orthogonal" (square) by using the case as the guide. However, this assumes that the case itself is true, which is unlikely.
RE: Belt Tensioning strips Screw/Nut thread
Why not? The XY assembly is based on a laser cut steel plate, no?
RE:
> The concern I have with this is that the author is making the XY axis "orthogonal" (square) by using the case as the guide. However, this assumes that the case itself is true, which is unlikely.
This method doesn't rely on the alignment of the case, but only on the relationship between the X and Y axes. The point is to make sure the X and Y axes are orthogonal, separated by 90 degrees -- the case's relative alignment shouldn't matter. And there's an objective test to verify the success of the procedure -- one can print a test STL file to verify that the alignment has been successful.
Beyond this, on a Prusa Core One, the Y axis test always fails if there's any significant misalignment between the X and Y axes.
Imagine the printer falling out of an airplane and crashing into the ground from 30,000 feet, making the case something difficult to look at, door either missing or difficult to open, but if the X and Y axes are aligned and nature has been kind to the printer, the printer would function correctly. Speaking hypothetically, of course.
RE: Belt Tensioning strips Screw/Nut thread
The enclosure may be twisted or skewed, e.g. the top and bottom may be slightly rotated from each other (torsion), or the frame may be leaning to one direction (parallelogram).
It is a frame with side panels held together by screws and rivets which have enough play for it to be built, but also enough play for it to not have truly 90 degree angles. Even lifting and moving the printer will alter the twist or skew.
You can press on a top corner and see the enclosure twist, and if you do this when the head is aligning it will report a crash
I do believe that it may be sometimes necessary to perform the actions described, but I don't think that assuming the enclosure is, or will remain, orthogonal.
RE: Belt Tensioning strips Screw/Nut thread
Oh my bad!
I misinterpreted the instructions; it is using the enclosure for leverage only.
Poor excuse... I was on my phone and it looked like it was showing to press the CoreXY assembly against the the back of the enclosure. I now see that it is pressing the carriage against the CoreXY assembly.
Thanks for clarifying guys
RE: Belt Tensioning strips Screw/Nut thread
But squaring the gantry is done in the XY plane against parts attached to the laser cut steel XY frame. I think it's a pretty good assumption that that leads to a square gantry. And anecdotal evidence shows that it helps with homing and even belt tension.
RE: Belt Tensioning strips Screw/Nut thread
> But squaring the gantry is done in the XY plane against parts attached to the laser cut steel XY frame. I think it's a pretty good assumption that that leads to a square gantry. And anecdotal evidence shows that it helps with homing and even belt tension.
The X and Y axes and their associated hardware are made to be as independent of the enclosure as practical, for obvious reasons. In the final analysis, the relationship between the X and Y axes can be put out of alignment by something as predictable as a bump during shipping, or an intentionally applied fingertip force, as in my article.
Many recipients of this printer, who either build it or simply unpack it, report that they need to align the relationship between the X and Y axes. In fact, after I removed and replaced one of the side panels to install a USB cable, my printer failed its Y motion test because of the change in forces caused by the reassembly.
This isn't a criticism of the printer -- the fact that this alignment option exists sets it apart from the many printers whose axes cannot be realigned, whose owners must put up with print skew they can't correct.
Also, the expression "laser-cut" does not mean particularly rigid or immune to flexure over time. You can laser-cut cheese too. It doesn't improve the cheese.
RE: Belt Tensioning strips Screw/Nut thread
The rigidity comes from the steel, obviously 😉 And the accuracy comes from the laser cutting. The steel XY assembly plate, for practical reasons, will not deform in the XY plane and thus the squareness is pretty much guaranteed. What is of course not guaranteed is the position and deformation outside of the XY plane.
RE: Belt Tensioning strips Screw/Nut thread
> The rigidity comes from the steel, obviously 😉 And the accuracy comes from the laser cutting.
No, this isn't remotely correct. The accuracy of the Core-XY mechanism in no way relies on the fact that, at an early stage of manufacturing, a flat piece of steel is partitioned by a laser instead of a machine press. Laser cutting is less expensive and more precise than the old methods (methods I oversaw during my time as a NASA Space Shuttle engineer), but it does not make the end product more accurate with respect to XY alignment -- our topic.
Remember that, after the sheet metal has been sliced up using a laser (new way) or a machine press (old way), the metal is then bent into its final form using time-tested methods. Four of those reshaped pieces of metal join the printer's X and Y axes at the corners.
> The steel XY assembly plate,
Wait, the what? The Core-XY assembly's orthogonality relies entirely on four small angle brackets, brackets notorious for their flexibility, and having properties that do not depend on the fact that they were laser-cut early in the manufacturing process. There is no "steel XY assembly plate." There are bars and supports in the X and Y axes, whose angular relationship is determined by four small metal angle brackets located at corners where the X and Y axes intersect.
> ... for practical reasons, will not deform in the XY plane and thus the squareness is pretty much guaranteed.
If there really was an "XY assembly plate," it would have the effect you describe. But there is no such thing. Because if it existed, it would interfere with the Z-axis platform, which must have unrestricted access to an empty square void between the X and Y axes.
The Z axis platform rises and comes into contact with the print head. It can only do this because of the complete absence of an "XY assembly plate."
> What is of course not guaranteed is the position and deformation outside of the XY plane.
The possibilities for deformation are present but not relevant outside the Core-XY mechanism. Inside, such deformations are important but easily corrected, using the methods I describe on my Web page: https://arachnoid.com/3D_Printing_Prusa_Core_One/index.html .
RE: Belt Tensioning strips Screw/Nut thread
I really don't understand where you're coming from but right now I'm sure there is some sort of misunderstanding.
There specifically is a laser cut steel XY plate that holds the entire Core XY assembly. See https://help.prusa3d.com/guide/5-corexy-assembly_872604#875353
It is a specific chapter in the assembly instructions and it pretty much starts with a part called the Core XY plate. The gantry is squared against the end stops fastened onto that single plate, giving you a pretty good accuracy.
Hope that clears things up so we don't have to further confuse this topic.
RE: Belt Tensioning strips Screw/Nut thread
> There specifically is a laser cut steel XY plate that holds the entire Core XY assembly.
Ah, I see -- a misnamed plate. It's actually a frame, connected at the corners by the small angle brackets we've been discussing. I hope I never have to eat a meal using a plate like that one. You need to understand that this "plate" isn't at all rigid, as you described it. Small forces can knock it out of orthogonality, which leads to many discussions like this one, in which people ask, "How do I make my Core-XY mechanism truly square?"
Each time a Prusa Core One fails its Y axis test, this demonstrates that the XY "plate" isn't actually a plate, and certainly not rigid.
I built my Core One, during which I managed to overlook or ignore this frame being described as a plate. Then, when my printer failed its Y motion test, I knew exactly what to do.
RE: Belt Tensioning strips Screw/Nut thread
Great, case closed! I'm glad we sorted out the confusion. I'm not going to further argue semantics about how the part is named. 😋
RE: Belt Tensioning strips Screw/Nut thread
> I'm not going to further argue semantics about how the part is named.
It's not semantics, instead it may have been a mistranslation from the original language used by the authors of the assembly manual. Who knows -- in modern times they may have relied on AI to give them a rough cut of an English rendering, and "plate" may have been confused with platter and a few similar terms. But one thing is certain -- it's not a rigid structure, a "plate". It bends. Many people who ordered printers, who didn't assemble them, who only unpacked them, have encountered this easily corrected XY non-orthogonality issue. No big deal, it's easy to fix, but denying its existence gets us nowhere.
RE: Belt Tensioning strips Screw/Nut thread
Please note you guys have deviated from the topic of the thread.
About the nuts stripping/turning
For anyone running into the same problem: Either: Order some PCCF and print your own tensioners, which have a tighter tolerance than (i guess just some) Prusa Parts. Who knows why, but i had them side by side.
OR: Add a drop of glue in there together with the nut. Be careful not to get any glue in the threads.
This part was the source and solution of the issue for me. Unfortunately I had to carry all the costs by myself, support was really not good and quite condescending. In the end I was promised replacement parts which i never received. Also: What would i do with replacement tensioners now? At least refund me my spool of PCCF. Definitely put a bumper on my prusa experience.
Hope this issue does never come up again for anyone else!
Kind regards
RE: Belt Tensioning strips Screw/Nut thread
> For anyone running into the same problem: Either: Order some PCCF and print your own tensioners, which have a tighter tolerance than (i guess just some) Prusa Parts. Who knows why, but i had them side by side.
Yes, I did this also, all the same steps including printing tensioner spares with PCCF, but there's an issue not yet discussed. Early in the assembly process, when the belt is being attached to its X axis carriage, the instructions clearly specify how much extra belt length should be pulled through the carriage -- on this page: https://help.prusa3d.com/guide/5-corexy-assembly_835522#845973 we read "leave 4-5 teeth sticking out".
But the manual doesn't emphasize how important this is. As it turns out, if the extra length meets the manual's description, then the belt will have an optimal length and the tensioners will be in mid-range when the belt achieves the required tension. But if this extra pulled-through belt length doesn't meet the provided description, if not enough belt length has been pulled through the carriage, later on the user may only be approaching 85 Hz when the tensioner gets to the end of its travel and strips out.
This is a classic example of a small detail with big consequences.