RE: Ideas to make enclosure for XL Multi Tool
Nice, so the thread starter does not have to ask ChatGPT himself 👍
It sounds like you have some excellent ideas for designing an enclosure for your XL Multi Tool 3D printer. Here are some additional suggestions and considerations:
Lighting: Consider adding LED lighting inside the enclosure to improve visibility while monitoring prints and making adjustments. Proper lighting can also help with time-lapse recording of your prints if you're into documenting your 3D printing projects.
Cable Management: Plan for cable management to ensure that all the wires going in and out of the enclosure are neatly organized and do not obstruct the printer's movement. Cable trays, clips, or channels can help with this.
Filament Management: While keeping the spool holders outside is a good idea, you can design a small access port for the filament to enter the enclosure. This can help reduce the chances of filament getting tangled or caught on anything while printing.
Insulation: Consider insulating the enclosure to maintain a stable and controlled temperature inside. This is particularly important if you're printing with materials that require a specific environment.
Sealing: Make sure the enclosure is well-sealed to prevent heat loss and to minimize the escape of fumes or odors. This can help maintain a stable temperature and create a controlled printing environment.
Noise Reduction: If the printer is noisy, you might want to add some acoustic foam or other soundproofing materials to the interior of the enclosure. This can make the 3D printing process less disruptive.
Emergency Shutdown: In addition to a fire suppression system, consider adding an emergency shutdown button accessible from the outside. This can be handy in case of any issues that require an immediate stop.
Camera Mount: If you want to monitor your prints remotely, you can add a camera mount inside the enclosure for a webcam. This will allow you to keep an eye on your prints even when you're not in the same room.
Filtration System: In addition to HEPA filters, you can consider adding an activated carbon filter to help remove odors and VOCs (volatile organic compounds) generated during printing. This can be particularly useful if you're printing with materials that produce strong odors.
Safety Interlock: Consider adding a safety interlock system that prevents the printer from starting if the enclosure is not properly closed or if the filters are not in place.
Materials Choice: Ensure the materials you use for the enclosure are fire-resistant and have good thermal insulation properties. Safety should be a top priority.
Ergonomics: Design the enclosure in a way that is user-friendly. Make sure it's easy to load and unload filament, access the printer's controls, and perform routine maintenance.
Remember to regularly assess the enclosure's performance and safety, and make adjustments as needed. Building a well-designed enclosure can greatly enhance the usability, safety, and print quality of your 3D printer.
RE: Ideas to make enclosure for XL Multi Tool
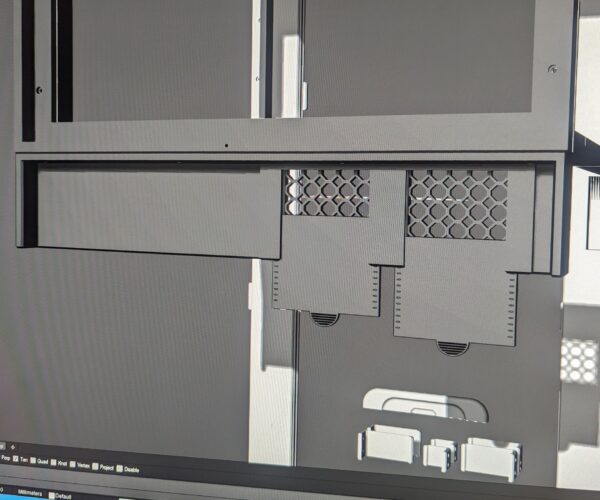
Back at it today. I decided to start on the panel to cover the vented area on the upper back of the printer.
I decided to make it with adjustable vent covers so I can control the venting behind the Nextruders.
Here is the Cad for the vent cover panel.
What do you think?
RE: Ideas to make enclosure for XL Multi Tool
Good Job!
RE: Ideas to make enclosure for XL Multi Tool
That’s looking good.
I did wonder whether a hit & miss vent design might also work well:
It wouldn’t open up quite airflow wise as much as the design you have, but it would be easier to operate with a servo motor or something if you wanted to automate the airflow.
I had thought about something similar but decided just to keep it simple. Adjusting the opening will be very easy.😎
RE: Ideas to make enclosure for XL Multi Tool
I have thought about this little project while I was working on the enclosure.I have about 6 partial spools of black filiment I need to join together to make one. I did 2 spools without a filiment holder and it was a PITA
I decided to make a filiment fusing stand to make it easier to do. For now I will just use a heated scalpel blade to fuse the filiment.
RE: Ideas to make enclosure for XL Multi Tool
With the XL why not just use the 'Spool join' function to use up those old rolls. I've not tried it yet but I use it on my Bambu Lab X1C with AMS and it works great. Ideal for functional prints which slight variation in appearance doesn't matter.
RE: Ideas to make enclosure for XL Multi Tool
With the XL why not just use the 'Spool join' function to use up those old rolls. I've not tried it yet but I use it on my Bambu Lab X1C with AMS and it works great. Ideal for functional prints which slight variation in appearance doesn't matter.
Most of the spools only have between 8 and 10 meters or so of filiment on them. So joining them might be a better option. If they were 1/2 spools I would definitely use that function. I have not updated yet waiting for the bugs to be worked out!!
RE: Ideas to make enclosure for XL Multi Tool
I just ordered this little helper:
I used spool join with my Mk3S and MMU2S. But not all spool could be used for joining, as on some spools the end of the filament is tied to the spool and you have no chance to get it free before the spool is nearly empty. The second thing is, that the length from the end of filament sensor is also lost every time.
So I will try to solve this problem by fusing the rest of several nearly empty spools together and put them on an empty spool. So you only could not use small amount of filament. The same is done with the https://www.mosaicmfg.com/products/palette-3-pro to get multi colour prints for almost any printer.
At least the fusing seems to work quite well.
That was so cheap I ordered one to check it it!! They have them on Amazon as well .
RE:
I started to print the left half of the back lower vent panel in ASA this morning. This is my largest ASA print to date. I am using Magigoo to see how it works with ASA filament. The part is long and narrow which would normally have a tendency to warp a little.
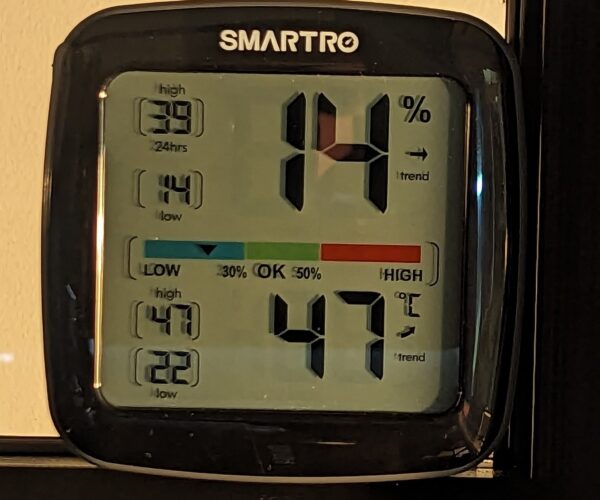
The enclosure is a balmy 47C and has been holding there on this cool morning. I did cover the vented area with a piece of cardboard for this print.
Bed temp is 100C
Nozzle temp is 260C
Enclosure Temp is 47C
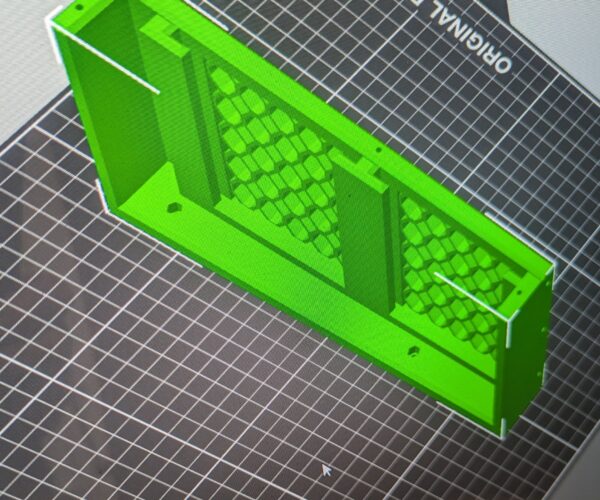
This is the part I am printing. It is the lower left vent cover with adjustable venting.
With a 20mm brim this part is approximately 30cm long 43cm ceep and 12cm tall
RE: Ideas to make enclosure for XL Multi Tool
Print dimensions including brim are approximately 30cm long 8cm deep and 12cm tall. Messed up above dimensions!
RE:
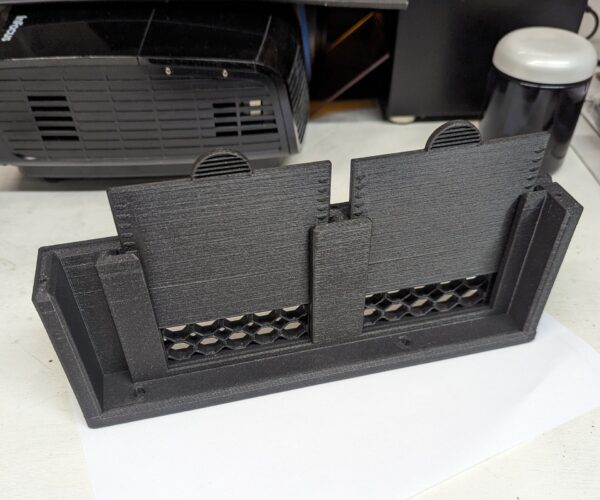
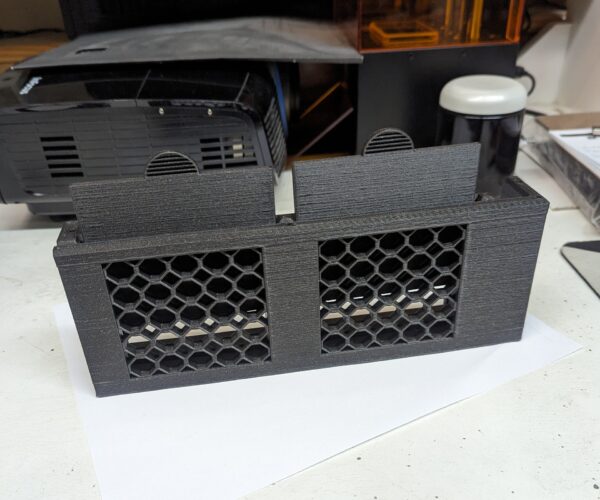
Aright the first ASA panel finished last night. I didn't really have high hopes as this was a rather long narrow print. I really thought it would bow and possibly have some layer separation.
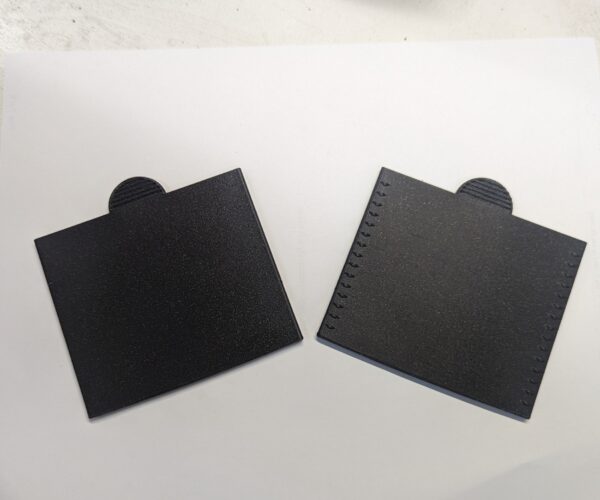
When I came in this morning I was pleasantly surprised to see the print. It did have some very slight lifting on the corners but that was it. No layer separation of any type. The gates fit well. I did have to take the little locking nubs down a little to make them slide in and lock a little better. This was no issue. I just made a few passes with a file then took a lighter to smooth them back out.
Here are a few pics of the first parts for the vent area cover.
Printed in Prusament galaxy black ASA.
RE: Ideas to make enclosure for XL Multi Tool
For those wondering how the PLA Enclosure is holding up? The enclosure has been holding up perfectly. When I was designing it I was hoping that the parts with a little more volume without the T2020 inserts would dissipate the heat through the part to cool them off . That seems to be working. The lighter parts which hold the T2020 frames with the acrylic panels are also holding up perfectly. None of the parts on this enclosure show any distortion what so ever. I am very happy with it.
Now that being said the maximum temp the enclosure has been up to is 48C. If I were to print over 60C I would probably be concerned about the PLA Enclosure parts. I do believe if you stay under 60C it will perform as it should.
I have been printing all week at 45C-48C without any issues.
That's it for this week, I be back at it next week.
RE: Ideas to make enclosure for XL Multi Tool
Yeah got my xl today, so first I have to assemble it and then attack the enlosure. Which is very important for me.
reason why I almost bought a qidi.
looking forward to this project
RE: Ideas to make enclosure for XL Multi Tool
PLA should be fine. Typically, an enclosure that his heated by the hotend alone will only reach about 35-40 C. Large pieces would only warp minimally. My experience has been similar.
For those wondering how the PLA Enclosure is holding up? The enclosure has been holding up perfectly. When I was designing it I was hoping that the parts with a little more volume without the T2020 inserts would dissipate the heat through the part to cool them off . That seems to be working. The lighter parts which hold the T2020 frames with the acrylic panels are also holding up perfectly. None of the parts on this enclosure show any distortion what so ever. I am very happy with it.
Now that being said the maximum temp the enclosure has been up to is 48C. If I were to print over 60C I would probably be concerned about the PLA Enclosure parts. I do believe if you stay under 60C it will perform as it should.
I have been printing all week at 45C-48C without any issues.
That's it for this week, I be back at it next week.
--------------------
Chuck H
3D Printer Review Blog
RE: Ideas to make enclosure for XL Multi Tool
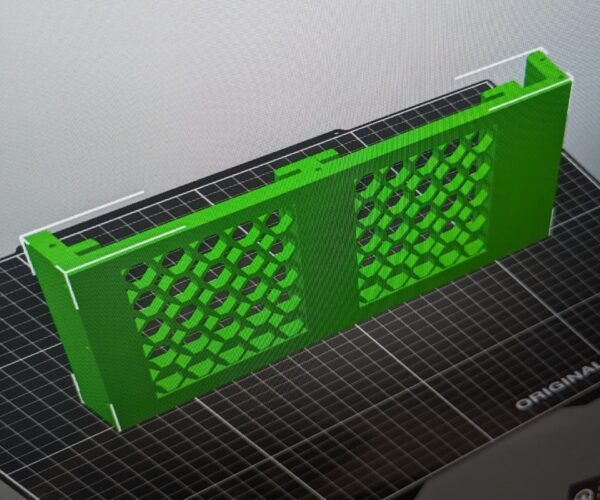
I was able to print the second part for the lower back vent panel. I am looking for a silicone strip to go across the bottom before I install it. I need something flexible on the bottom for the PTFE tubes and wiring.
RE: Ideas to make enclosure for XL Multi Tool
Why not TPU?
RE:
Why not TPU?
I thought about that. I actually found what I needed on Amazon for $13.00. It was cheaper just to buy it. I designed in the mounting holes on the bottom of the piece above. You might be able to see the holes in the photo. I just have to print the 2 parts to hold it to the bottom.
