RE: A slightly different XL Enclosure design
When I get some free time I definitely want to try these out. Thanks!
RE: A slightly different XL Enclosure design
so I'm getting down to printing a few of these things, to try out my config. starting with some of the plugs first just to try out my config. In a sainsmart black 95A tpu. I noticed in your pictures you've don't have all 5 tools. which of the tool compartment seals do I need to print, and how many? thanks!
RE: A slightly different XL Enclosure design
For a five tool machine, you'd need 5 of the 50 mm and under tool pieces, 1 of the end piece to cover the grounding plug on the left side. There is likely going to be a gap at the right hand side as I don't know what space is left over after adding three more tools. I trimmed the last piece with scissors to get it to fit right.
For installation, remove the tools from the toolbay, then install the 50mm pieces first between the tools and then the end piece on the left hand side (viewing from the front). Then slide the under tool pieces carefully so that they sit on top of the 50 mm and end pieces. Push forward on the under tool pieces to lock them into place. You may have to manually snug the cloth covered wire bundle to the corner of the toolbay holder to fit the under tool piece properly. It's pretty easy to do.
The toolbay parts are made from rigid filament. I used PETG.
so I'm getting down to printing a few of these things, to try out my config. starting with some of the plugs first just to try out my config. In a sainsmart black 95A tpu. I noticed in your pictures you've don't have all 5 tools. which of the tool compartment seals do I need to print, and how many? thanks!
RE: A slightly different XL Enclosure design
Awesome thanks!
For a five tool machine, you'd need 5 of the 50 mm and under tool pieces, 1 of the end piece to cover the grounding plug on the left side. There is likely going to be a gap at the right hand side as I don't know what space is left over after adding three more tools. I trimmed the last piece with scissors to get it to fit right.
For installation, remove the tools from the toolbay, then install the 50mm pieces first between the tools and then the end piece on the left hand side (viewing from the front). Then slide the under tool pieces carefully so that they sit on top of the 50 mm and end pieces. Push forward on the under tool pieces to lock them into place. You may have to manually snug the cloth covered wire bundle to the corner of the toolbay holder to fit the under tool piece properly. It's pretty easy to do.
The toolbay parts are made from rigid filament. I used PETG.
so I'm getting down to printing a few of these things, to try out my config. starting with some of the plugs first just to try out my config. In a sainsmart black 95A tpu. I noticed in your pictures you've don't have all 5 tools. which of the tool compartment seals do I need to print, and how many? thanks!
RE: A slightly different XL Enclosure design
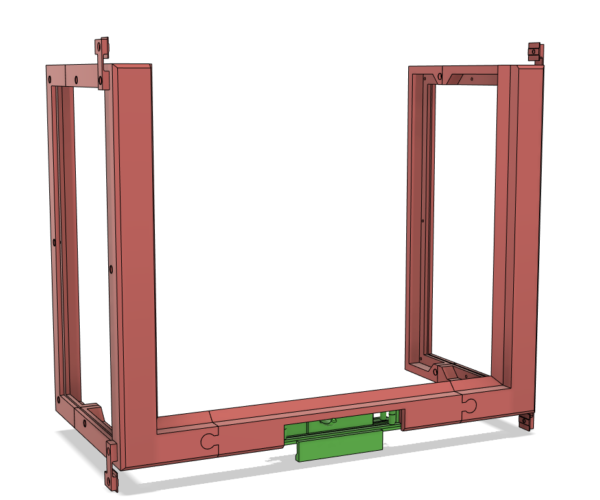
I've made some progress on the "slightly different" enclosure. The bottom part is just about finished and I'm printing test parts now. One interesting thing that I don't often run into is the problem of shrinkage. Typically, I cut things out of existing materials with a CNC and that leaves shrinkage out of the equation. When I got my MK3, the size was such that shrinkage never really came into play. Now with the larger XL, I've actually had to compensate for it. Not a big deal, but ignore at your peril!
This is a corner piece. Fits just right. I have to add seals to the bottom parts like I did the top. Not complicated but careful work.
Here's the completed "system" as it stands. The top has version 1 parts all printed while the bottom is still on version 0. More work to do.
I uploaded the XL model to Printables: https://www.printables.com/model/762684-prusa-xl-model
RE: A slightly different XL Enclosure design
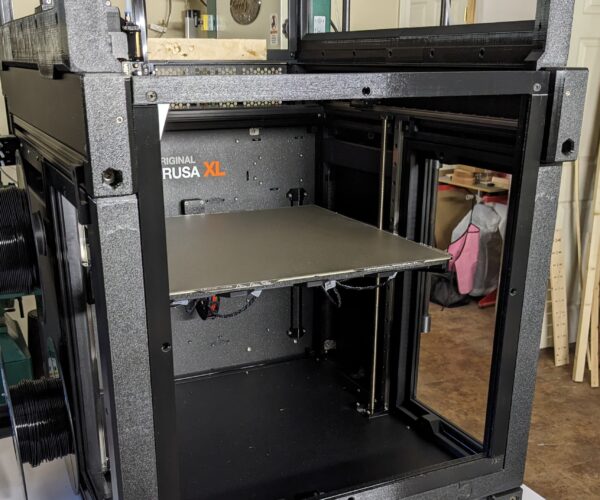
You may find sealing the printer up that tight might cause issues. I'm printing stuff for my sumo enclosure now and I used a cardboard box for a temporary enclosure. I had to open the box because it was approaching 50°C with heat from the bed and extruders only. You can see in the picture where I propped the top open.
Others have shared on this forum that printing above 45°C starts to cause issues with printing, filament jams etc. I also read somewhere that Prusa doesn't recommend running the electronics above 45°C. The main boards are outside but the breakout boards on the extruders are not.
RE: A slightly different XL Enclosure design
You may find sealing the printer up that tight might cause issues.
The second part of this project is to add a recirculation system with filtered exhaust to provide a negative pressure inside the enclosure. The air will be circulated by fan from the top to the bottom and a certain amount will be exhausted (using a valve) so all leaks will go into the enclosure and only filtered air will leave it. Rather than filtering all the air, this design will only filter the exhaust. That way, the heated sent to the bottom to keep the entire enclosure at one temperature. If it's too hot, then more air can be exhausted, with fresh air entering through a port at the bottom of the enclosure.
I have the design in my head for this and all the parts are sitting in my shop. I just have to make it so.
This is why I have a lot of seals. The smaller the leaks, the less air has to be exhausted to keep the internal pressure negative.
RE: A slightly different XL Enclosure design
The design is finalized. I may have to tweak it a bit but I think at this point the only thing left is to print, assemble, and mount.
The new design includes latches for the bottom part. This requires added a cap screw to each front corner. The base then "snaps" into place with the latches.
RE: A slightly different XL Enclosure design
Always have to tweak some things on them!!
RE: A slightly different XL Enclosure design
First complete printing of the bottom unit complete. It turned out remarkably well. Fit without any shrinkage issues. I guess a little planning goes a long way. The latches are missing from this picture as well as the acrylic.
RE: A slightly different XL Enclosure design
It definitely takes a while. I was still making changes as mine was printing.
RE: A slightly different XL Enclosure design
One thing I've found very satisfying about 3D printing as opposed to cutting things out with a CNC, is the immediacy of the results. Sure, it takes 10 hours to print something but when I pull it off the printer, it's finished. I don't have to do hours of post processing with sanding and drilling. The part is complete.
That's kind of a broad statement as some things do require post processing but in general, I print finished goods. I find that cool.
RE: A slightly different XL Enclosure design
After using my enclosure for a while, I decided the access to the interior was limited. Removing the base each time I need to access the heat bed is cumbersome. I redesigned the bottom to have a window that is removable so that the entire inside of the machine can easily be accessed without removing the enclosure.
Here's the new base. Note the adjustable vent at the bottom-center. That's for a fresh air supply.
Here's the latest version:
RE: A slightly different XL Enclosure design
I thought about the front a lot when I designed mine. You are right you need to be able to access at least half of the front at a time.
RE: A slightly different XL Enclosure design
This is how it looks open. Lots of access. Much better.
And with the window...
Held in with 12x3mm magnets.
RE: A slightly different XL Enclosure design
Love the simplicity of your design, and the double pane. Would you be willing to post stls or steps of where you ended up? Thanks!!
RE: A slightly different XL Enclosure design
Yes, I'll post the entire project soon. Total cost to build is around $200 including the acrylic. Since I'm using the thinner stuff, it's not only inexpensive, but cuts easier, and a full size sheet can be purchased from Amazon and shipped for free (for Prime members). The thinner sheets can be rolled up to ship.
Love the simplicity of your design, and the double pane. Would you be willing to post stls or steps of where you ended up? Thanks!!


