XL FINALLY be what it should be !!!
Over the course of the last few months i have posted more than my fair share of bad XL Multi tool experiences. I had been working back and forth with a couple of different prusa support support agents . We have been ongoing with everything from dock mounting, pre-installed nozzle sets , belt adjustments , Z-RODs , custom g-codes and even YGK3D custom bump block . All this was to resolve the extremely bad very random layer lines, layer shifts and overall poor quality in general .... but ONLY when using the multi tool function . Using the machine with single extruder only worked perfectly . Well about 2 months ago i had gotten to the point of frustration cancelled my other 2 pre-orders for other XL units and purchased a Bambu X1C with AMS for my multi color options. It is a great machine for sure within its capabilities but like anything else it does have its pros and cons but that's not what this is about is it ......... 😀
There was one tech who i was working with at Prusa support , his name was Rodolfo . I had stopped even trying to contact them anymore because i wasn't getting the results i had expected and readjusted to use the machine in a different projects . Out of nowhere ( 2 months after the last communication ) i get an email from him asking how the machine was and if i had any progress with it . I have sent a long winded email about my overall dissatisfaction with this particular machine . The next day i got a follow up email with a very apologetic response with a link to an updated firmware and a link to the added procedure of lubricating the coupler pins (link here) So with that i updated the firmware , greased the 3 couplers on both extruders with the Prusa Grease tubes and performed the calibrations again on the machine docks , Z and extruders position settings .
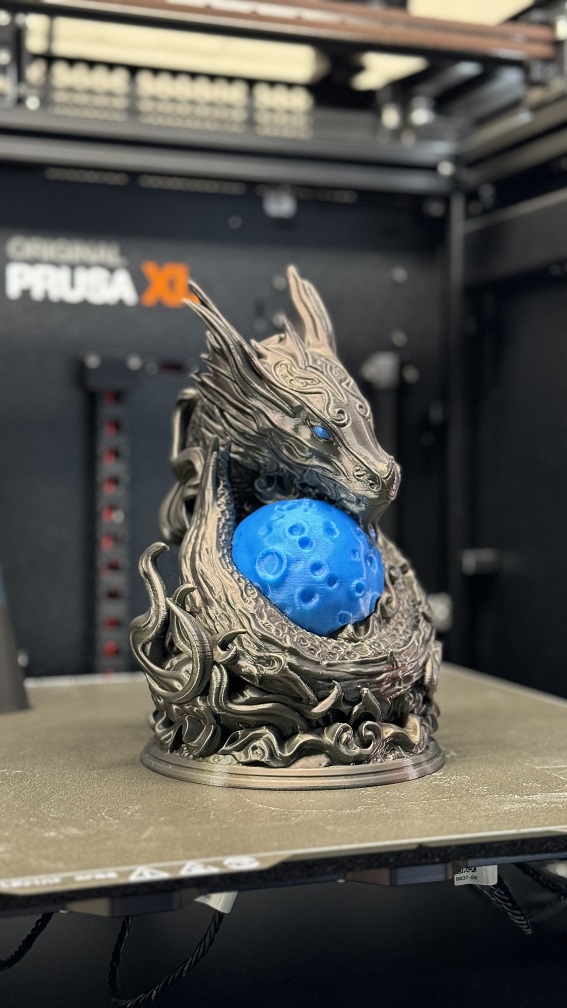
Well im 4 prints in so far ....... I started small then did this one at about 11" tall . Prints damn near perfect now .
I can honestly say I'm shocked by not only the machine working like this but also that after almost 2 months Rodolfo had reached out to me ( unprovoked ) to follow up and helped me get thing finally resolved. With that he gets a big thank you for one of best support agents i've ever dealt with . Things like this is what i believe the biggest reason is most people stay true to companies with their loyalty when they show support like this. Theres alot of manufacturers out there that don't have the ease of use communication, care or have agents that just don't care and never reply .
Hoping this helps someone else , with that I'm hoping the XL woes are over and its happy printing now from this point forward !! Now to
RE: XL FINALLY be what it should be !!!
@DarkTech,
I am also happy with the assistance I received from Rodolfo 👍 and want to add at least 2 other techs @Prusa that get it. Thank you Blas 👍 and Tomas 👍 for going above and beyond. I am still having issues but avoiding frustration by printing things in between that are working.
Tomas just suggested greasing the extruders. I am going to do that next as I have been having problems that are only tool changer related but they are also REALLY sporadic and the machine seems to recover from them after manual intervention. I printed 5 cylinders and each tool change was precise and the prints were perfect. I was leaning toward Input Shaper and 'paint on' tool changes being the ultimate problems. There is a lot more to things than that just those.
I truly believe that any machine that we interact with has a learning curve for the operator. 😉 Here is to preparing for a short and productive learning curve. 🍺
RAH
I am the inveterate tinkerer. I can tink up most anything.
RE: XL FINALLY be what it should be !!!
Thank you for the feedback. I am eagerly awaiting my kit which is supposed to arrive tomorrow:-)
Yet I certainly will not slap it together quickly. Quite the contrary: I will definitely take my time, follow the instructions meticulously and ensure, everything is straight and level and fixed properly. This will pay off later for sure.
I even made an assembly plane extra for this purpose like I had done for my smaller MK3S+. Kind of straightening plate. Admittedly homebrewed and not like in our company but it will do the job. It consists of 3 pieces of kitchen counter top (work surface). 2 bolted together and clamped onto a table form a stiffer lower side. The 3rd one is suspended above on a grid of 12 M6 bolts and leveled with a 160mm machinist spirit. At its worst point, it deviates 0.2mm/m. When checked with a 300mm straight edge, I see no spot where a 0.05mm feeler gauge can slip below. Most are better than 0.03mm. I hope that this will literally be the base for a successful assembly. Fingers crossed.
RE: XL FINALLY be what it should be !!!
@blauzahn,
You are gonna love this. Most all of the printer is really assembled and you won't need your level table except for a nice place to assemble it. Each set of instructions is classified as EASY, (unlike the MK3 which had a lot of instructions that were considered DIFFICULT ). Just be careful routing the xLCD wire and flipping the printer when it says to do so. Just go slow and follow the instructions. It was super easy. Even if you put together a MK3 before, the XL semi-kit requires practically no skills at all.
I do recommend that you read through ALL of the instructions first. At least once before attempting to do the steps. Make yourself familiar with each step before you try to do it. That will pay off in the long run. The manual is ONLY online. You can print it out but you will not get a paper copy of the assembly unless you print it.
If you got the 1 or 2 head version there are 2 PSUs on the back plate. I am certain it will be easier to install than the 3 PSU version for the 5 tool version.
If you got the 5 head version there is ONE thing I would add to this: Get some assistance when you put on the back (with the PSUs). It took 2 people to get mine screwed down because it weighs a LOT and is awkward to get into place. Other than that it can be assembled in a few hours alone.
RAH
I am the inveterate tinkerer. I can tink up most anything.
RE:
Agreed. Studying the online manual, Prusa apparently put effort into kit and manual so that even inexperienced user can assemble it easily iff one follows instructions closely. You have to read the text AND watch the images. They kept the amount of information relatively low and what is left over is there for a reason. Yet, I'd appreciate torque values and some tolerances as well for users who have the tools to make use of it. I would have preferred a paper one but I can live with online only instructions. I will see how it will work out.
I ordered the 5 tool version and I did indeed assemble my MK3s which was not very difficult either. I did the latter a second time after a while because I was not satisfied with the precision ootb (mainly perpendicular z-axis) and modded a few minor bits and pieces (e.g. spring mod for bed leveling, x-, y- and z-axes adjustable with screws). Hence the level table. I am used to much larger, more complex machinery which requires substantial precision.
RE: XL FINALLY be what it should be !!!
If you found the MK3 easy and modified it, you will have zero problems with the XL. As I noted before be VERY careful routing the xLCD cable, the hotbed set of instructions (routing that cable), and inserting/removing cables from all of the boards. The connectors on the boards are VERY easy to pull off and then you need a new board.
On the 5 head, the PSU back board is extremely heavy and it's hard get the M3 screws aligned. It would be easier to have one person hold it in place and one put in the screws. The alignment of the screws and the holes are not easily lined up while holding up the back with the PSUs. The plastic retainers for the screws don't easily stay in the V channel groove.
Other than that I had no problems with the kit.
All really easy stuff.
RAH
I am the inveterate tinkerer. I can tink up most anything.
RE: XL FINALLY be what it should be !!!
@RAH1: Thanks. I will keep an eye on those spots.
RE: XL FINALLY be what it should be !!!
My advice would also be to read all the comments for a step *first*, before you attempt it. Lots of useful insights of people who have struggled with exactly the same thing you’re about to but don’t yet know! Saves you making the same mistakes they did.
I also found in places that it was useful to read the comments for the one & two head version as well as the 5 (like the infamous LCD cable bit). As the sales volume is higher and the release date earlier, you got more helpful comments, certainly in the early days.
RE: XL FINALLY be what it should be !!!
Agreed. In addition to that, there are a lot more comments in the english version than in the german version I naturally prefer.