MMU3 Tip Tuning
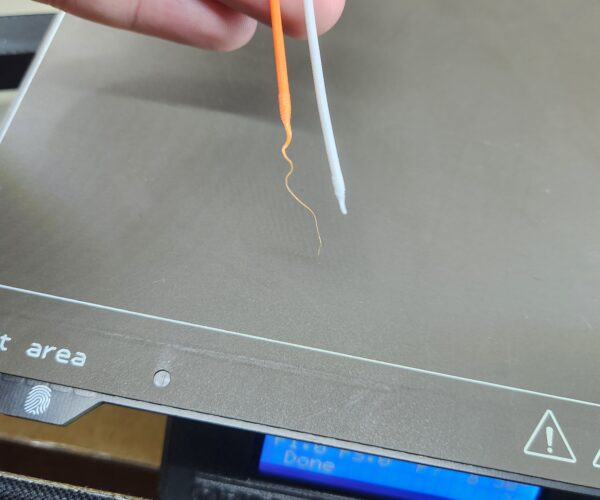
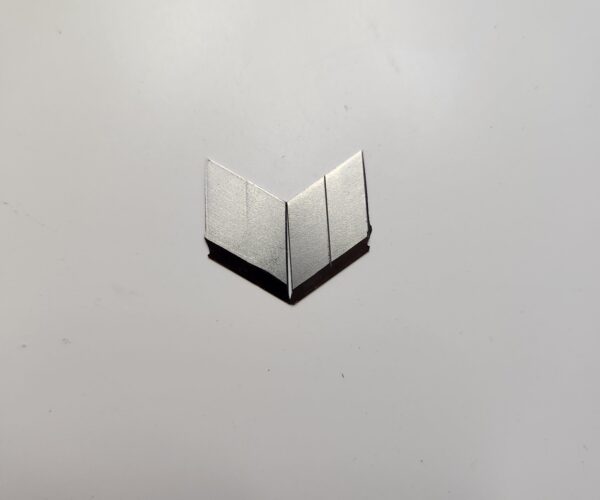
I've just received my new MMU3 and have spent several hours trying to tune the ramming/tool change parameters but for some reason every setting I change seems to give the same pointy-stringy results. I've adjusted the "Unloading speed at the start" - "unloading speed" anywhere between 20-150 mm/s - "Number of cooling moves" 1-3 - and "Ramming settings" anywhere from .50 - 5 seconds. I'm new to the MMU world so trying all the settings I can. Anyone have any tips or tricks that could help me hone this in? I'm printing in hatchbox PETG. I've attached an image of my best result so far.
RE:
The challenging thing with deteriorating tip quality is that one needs a a few hundred filament changes for really getting to know if good tips can be lastingly created. Stringing has a tendency of increasing over time if settings or filaments aren't optimal.
Have you tuned your hotend temperature? For the MMU you might need a lower temperature than for regular prints to get nice tips. Generally for the tip quality it tends to be the lower the better, as long as your print quality doesn't suffer too much or you risk clogging.
Regarding material change settings I have used those for challenging filaments. These are rather robust, not so delicate settings generally leading to not as nice tips compared to stock settings with nice filament however, with nasty filament it seems much more as I said... robust. Especially against formation of long strings that tend to mess up the MMU.
Loading speed at the start: 19 mm/s
Loading speed : 14 mm/s
Unloading speed at the start: 140 mm/s
Unloading speed 90 mm/s
Filament load time: 15 s
Filament unload time 12 s
Delay after unloading 0 s
Number of cooling moves: 4 (or maybe 5)
Speed of first cooling move: 20 mm/s
Speed of last cooling move 10 mm/s
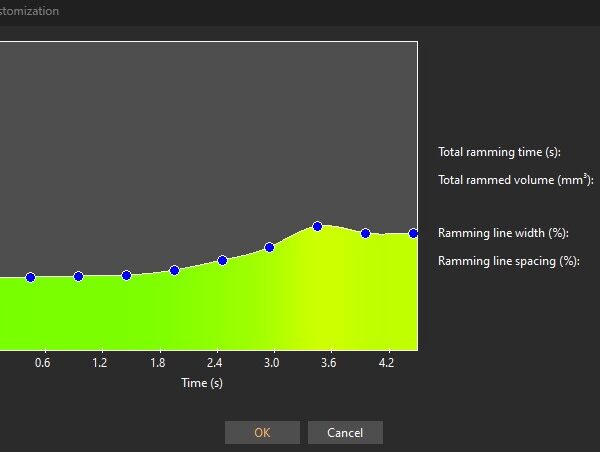
Ramming setting:
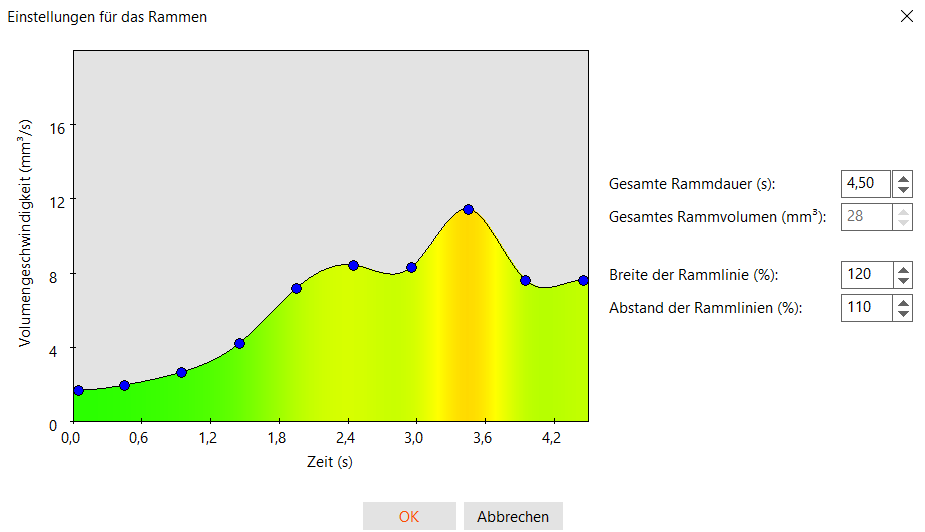
Change "total ramming time (s)" to: 4.5
Mk3s MMU2s, Voron 0.1, Voron 2.4
RE: MMU3 Tip Tuning
I have not tried tuning the hotend temp. I had my PETG settings dialed in perfectly so didn't really think to need to tune the temp. I'm currently trying to print a 2 day MMU model and I've tuned the temp to from 230 to 220. Will see how that does. Thanks for the suggestion and I will post back with my results.
RE: MMU3 Tip Tuning
Yes, but you had it dialed in perfectly for the Mk3 or Mk4 without an MMU, right? The optimal settings for that are not the same as the optimal settings for the MMU.
Tuning in for MMU can be a bit trickier than for a single material printer. I have used the 1-5 small cubes calibration print for testing conditions. You can also test flushing volumes while verifying a modified hotend temp.
I would expect it to have some impact on tip quality if you reduce the temp by 10°C but we will see. It is important to know that there are filaments that work better with the MMU and those that are just a pain, also of the same type, sometimes it is even that individual colours are difficult. You have an easier life if you find a set of filaments you have seen to work well and stick to those for the MMU, at least for long prints. Generally speaking, and maybe not so surprising, I have found that Prusament works generally quite well but that is just a baseline, one can venture from there I think.
Mk3s MMU2s, Voron 0.1, Voron 2.4
RE: MMU3 Tip Tuning
I suppose that I’m delusional but I had hoped the stringing tip problem was somehow solved with the MMU3 and Nextruder.
Inconsistency in forming tips has been my greatest cause of failures.
I’ve never seen a good explanation of the function and effect of changing various parameters. And I don’t want to fiddle with it to make it work.
RE: MMU3 Tip Tuning
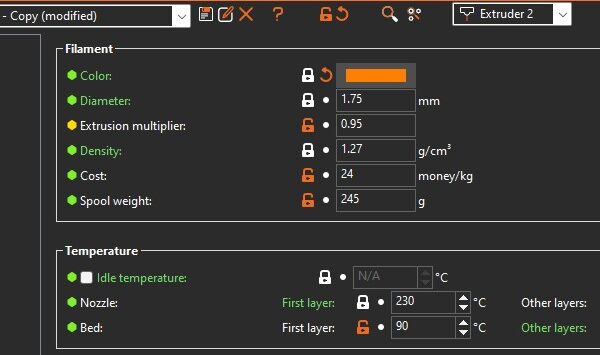
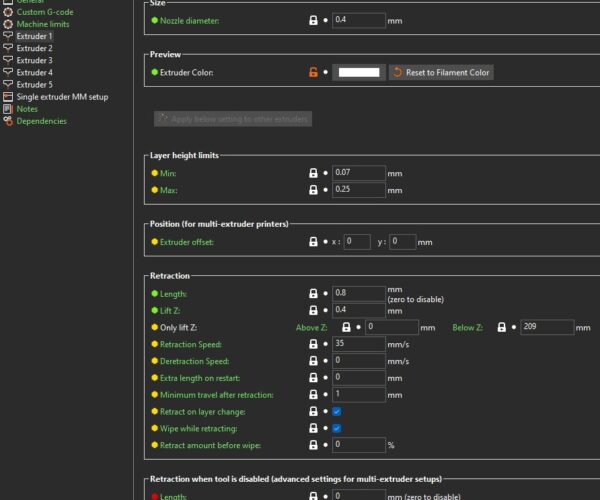
I'm printing with hatchbox PETG currently which I thought was a fairly "high end" filament? It's all I ever really print with. I'm also not printing on a MK3.9 or MK4, but now I wish I was. I'm printing on a MK3S+. I've tuned the temperature down as far 215c(from 230) and the stringing still seems to be just as bad. I'm afraid if I go any lower it will just cause the nozzle to clog up. I'm currently at a loss of what else to try. These are all my current settings. I wouldn't think retraction speed/distance would make any difference since the "Toolchange Parameters..." options is what is controlling the filament being retracted on filament change?
Filament Settings:
Printer Settings:
RE: MMU3 Tip Tuning
I may have solved my issue..so far.
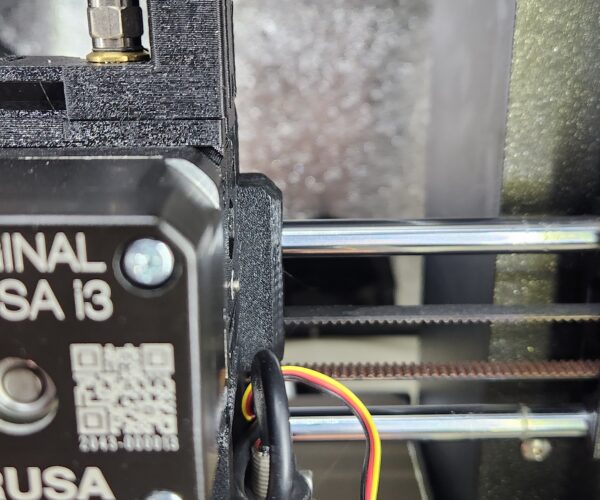
Idler needed to be tightened up - 2-3 threads sticking out of the nut
Temp needed to be adjusted from 220-230c down to 203. I am printing in Hatchbox PETG.
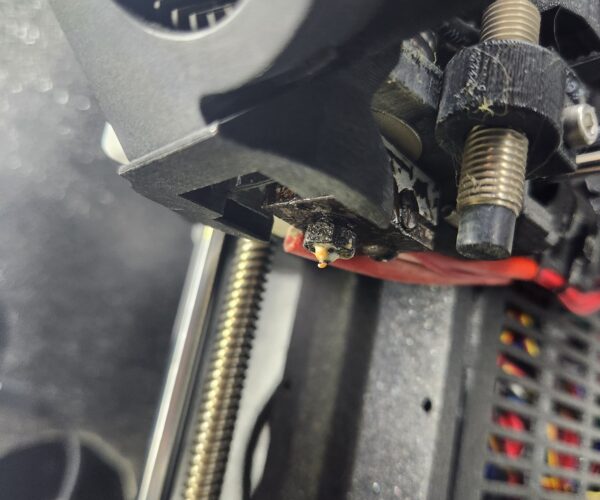
So far, this 203 temp has created perfect spear tips with no strands but now it creates a build up of blobs on the hot end. I believe this to be coming from the wipe tower and it changing/extruding the new filament. I think because the temperature is so low, it's not extruding as fast so it spits out little blobs first until the new filament has caught up to then create a perfect filament line. I'm assuming I may need to adjust the loading speed at the start and speed of the first/last cooling move to allow the new filament to catch up and melt properly.
Ideally, we should have the option to set a ramming temperature(would be lower than print temperature) to help with forming filament tips that work the best while being able to use the normal printing temperature to prevent blobs. I've seen some articles that have some python scripts that can do this to the GCODE but I don't understand how to implement it. If anyone is familiar, I would love to speak more in depth about it.
RE: MMU3 Tip Tuning
Tuning the filament tip is not an issue of the MMU3 vs MMU2. Of course the MMU3 should be a bit more tolerable to bad filament tips. But first tune your print and ramming settings.
First get your filament to minimum stringing (printing a strining test to find best temperature). Then do a systematic test on the ramming and cooling settings. This will take some time.
Please study all the ideas on the MMU2 discussion:
The moste trouble I experienced on the extruder (MK3) because it is very sensitive on filament tip and failure to load. My hope is that the nextruder on the MK4 is much more robust. What I experienced up today with the MK4 nextruder is, that I can load any bad filament - even with very long stringing - without any load problem. I hope that this will lead to a very robust process. I will report once I have an MMU3.
RE: MMU3 Tip Tuning
203°C is really very low indeed. Have you tried out my alternative filament change settings above?
I wonder why your ramming profile looks so different from mine. Sadly there is no numerical readout, just this rough graph where you can move the points. Mine looks like that:
Mk3s MMU2s, Voron 0.1, Voron 2.4
RE: MMU3 Tip Tuning
Mk3s MMU2s, Voron 0.1, Voron 2.4
RE: MMU3 Tip Tuning
Regarding change temp for filament change. That is beyond my capabilities as well but it should be certainly possible somehow. But just keep in mind that this will add a substantial amount of time to it the print as you have to change hotend temp twice per filament change.
Mk3s MMU2s, Voron 0.1, Voron 2.4
RE: MMU3 Tip Tuning
I tuned all my settings to what you had to see what would happen. It seemed to help a little but the major thing that ended up getting rid of stringing tips was putting the hot end temp at 203c. Ultimately the print failed at 22 hours because the filament build up on the nozzle caused such a blob on the wipe tower that it knocked the wipe tower over. I am going to play with ramming settings and all the toolchange settings today to see if I can get it dialed in to prevent blob build up from the wipe tower. Once the nozzle leaves the wipe tower, there doesn't appear to be any stringing being created during the model itself. I do really wish I could print at the normal 220-230 as I am still afraid over time, it may cause a clog in the hot end but idk.
RE: MMU3 Tip Tuning
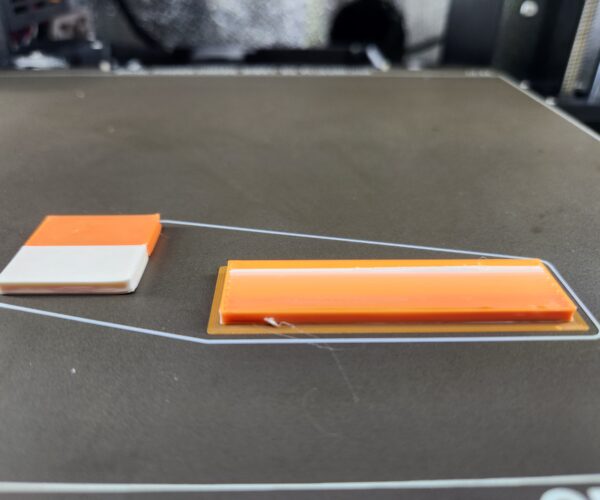
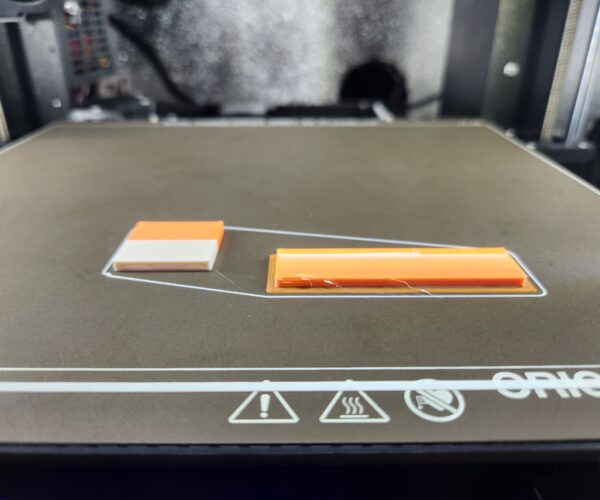
I've got the temp to 205, anything hotter than that creates stringing at the end of the tip. As you can see in the pictures, the white is 205 and the orange is anything hotter than 205. The issue I'm having now is blobbing/stringing while on the wipe tower. It appears that the blobbing is occurring when at the point that the new filament is consistently purging from the nozzle. I assume this is because of some gap/pressure in the transition of the molten filament in the hot end. As you can see in the video, it shoots out a string of filament that doesn't adhere to the wipe tower(the transition part I assume) then it continues to correctly adhere/extract the filament to the wipe tower correctly. It also seems that before the new filament is completely purged, the residual filament that is being pushed out from the old tends to curl up on the nozzle. Not sure why? Is there anyway to just make the nozzle stay in place while it purges out the old filament and in with the new? Not sure if fast or slow speeds are better for the wipe tower.
Wipe tower video -
Orange: anything over 205c
White: 205c
Blob created from wipe tower purging:
RE: MMU3 Tip Tuning
Keep in mind, this test was completed on a 30m print. I am now testing on a 23h print. If all goes well with it, I will post pics of my complete filament/printer settings in hopes that it helps someone else.
Now that I've got the filament tips tuned, the purge tower became an issue with blobbing/over extrusion. I realized that the loading speed of the filament after a change was lower than that of my print speed so I got the mind set that maybe the filament is blobbing up after filament change because the filament is not being fed at the same speed as if it were printing, causing a gap between the new filament and the old filament for too long. So I implemented the loading speed and loading speed at the start to somewhat match that of my print speed( 35 and 50). I also set my cooling moves to 0. For me, all the cooling moves seemed to do was move the hot end back and forth without any filament coming out but w/e filament did come out, ended up being a little blob somewhere along that cooling move line that would then be picked up by the hot end during extrusion. Instead, I thought just implement a delay equal to the time of that for the cooling move(10~ seconds). Doing this allowed the filament to get into the hot end and to a point where it would extrude a straight line of filament quicker. I also adjusted a few other settings but the main things were:
Loading speed at the start: 35
Loading speed: 50
Delay after unloading: 10
Number of cooling moves: 0
This is with settings I had been printing with initially after getting the filament tip dialed in.
This is with the new settings:
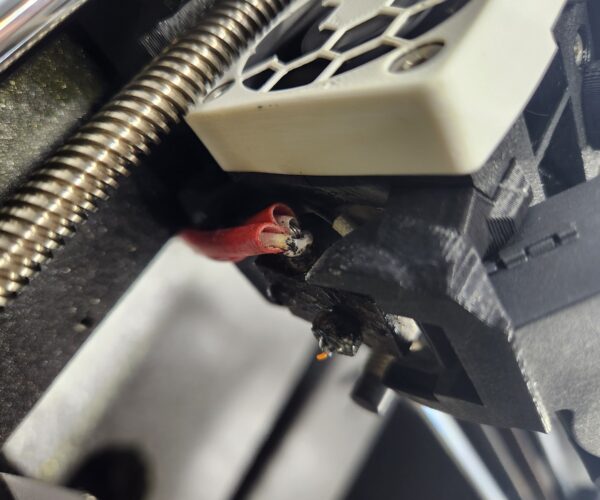
I also had this catastrophic error with the cutting blades coming loose. Looks like prusa sent unevenly cut blades which I didn't think would be a problem when I installed them but apparently it caused an issue. Hopefully the cutting blades won't be needed.
RE: MMU3 Tip Tuning
Any ideas what setting could affect these empty spaces in the purge tower? It causes blobs due to the filament trying to bridge it which eventually accumulates on the nozzle and on the wipe tower which in turn will fail the print. This is really the only issue I am having now and if I can fix it, I the think the mmu will be golden.
RE:
To be honest, I removed the cutting blade on my MMU2 completely. It causes more troubles than what it is worth. If you need it, then you are already in troubles anyway and if you have a well dialed in process you don't need it anyway.
The empty spaces are actually normal. What isn't normal is that it causes print threatening blobs. But then, you are printing PETG which is more prone to that than other filaments. Still, I can't remember having such issues with Prusament PETG. The empty spot is caused as the new filament has to move through the nozzle again before it reaches the orifice. I would have to look it up if there is a setting which moves the filament in further before starting the wipe, or at least do so faster. What you can try anyway is to wipe more material, you seem to be on the short side anyway. If you wipe longer you also clean your nozzle longer with nice extrusion.
Mk3s MMU2s, Voron 0.1, Voron 2.4
RE:
When you say "wipe more material" is that the "minimal purge on wipe tower" setting that needs to be adjusted? I adjusted that to 20mm^3 but not sure what I'm looking for physically to see if it's actually purging more. I took a short video of what else may be causing the blobs to start. As you can see, upon filament insertion the hot end moves and then purges an excessive amount of filament at once in a short line which causes it to collide with the cone part of the hot end, therefore causing it to stick and create blobs. I'm currently playing with the "Loading speed at the start" and "Loading speed", assuming these are the settings that control that, with the thinking that if I can slow it down just enough to where it will purge out filament as if no filament change was made and it's still continuing the same single strand of filament.
RE: MMU3 Tip Tuning
I also want to add that this is a fresh spool of prusament PETG that prusa sent with the MMU3. This is the first time it's been out of it's packaging and it is giving same results as the hatchbox I was using.
RE: MMU3 Tip Tuning
I give up on PETG. As far as my tests are concerned, MMU3 is NOT compatible with PETG. If someone has a working gcode I could test with to prove me wrong, I'd be willing to try it. Otherwise I will be returning this printer weight, selling the MK3s+ and buying a bambu lab x1c.

