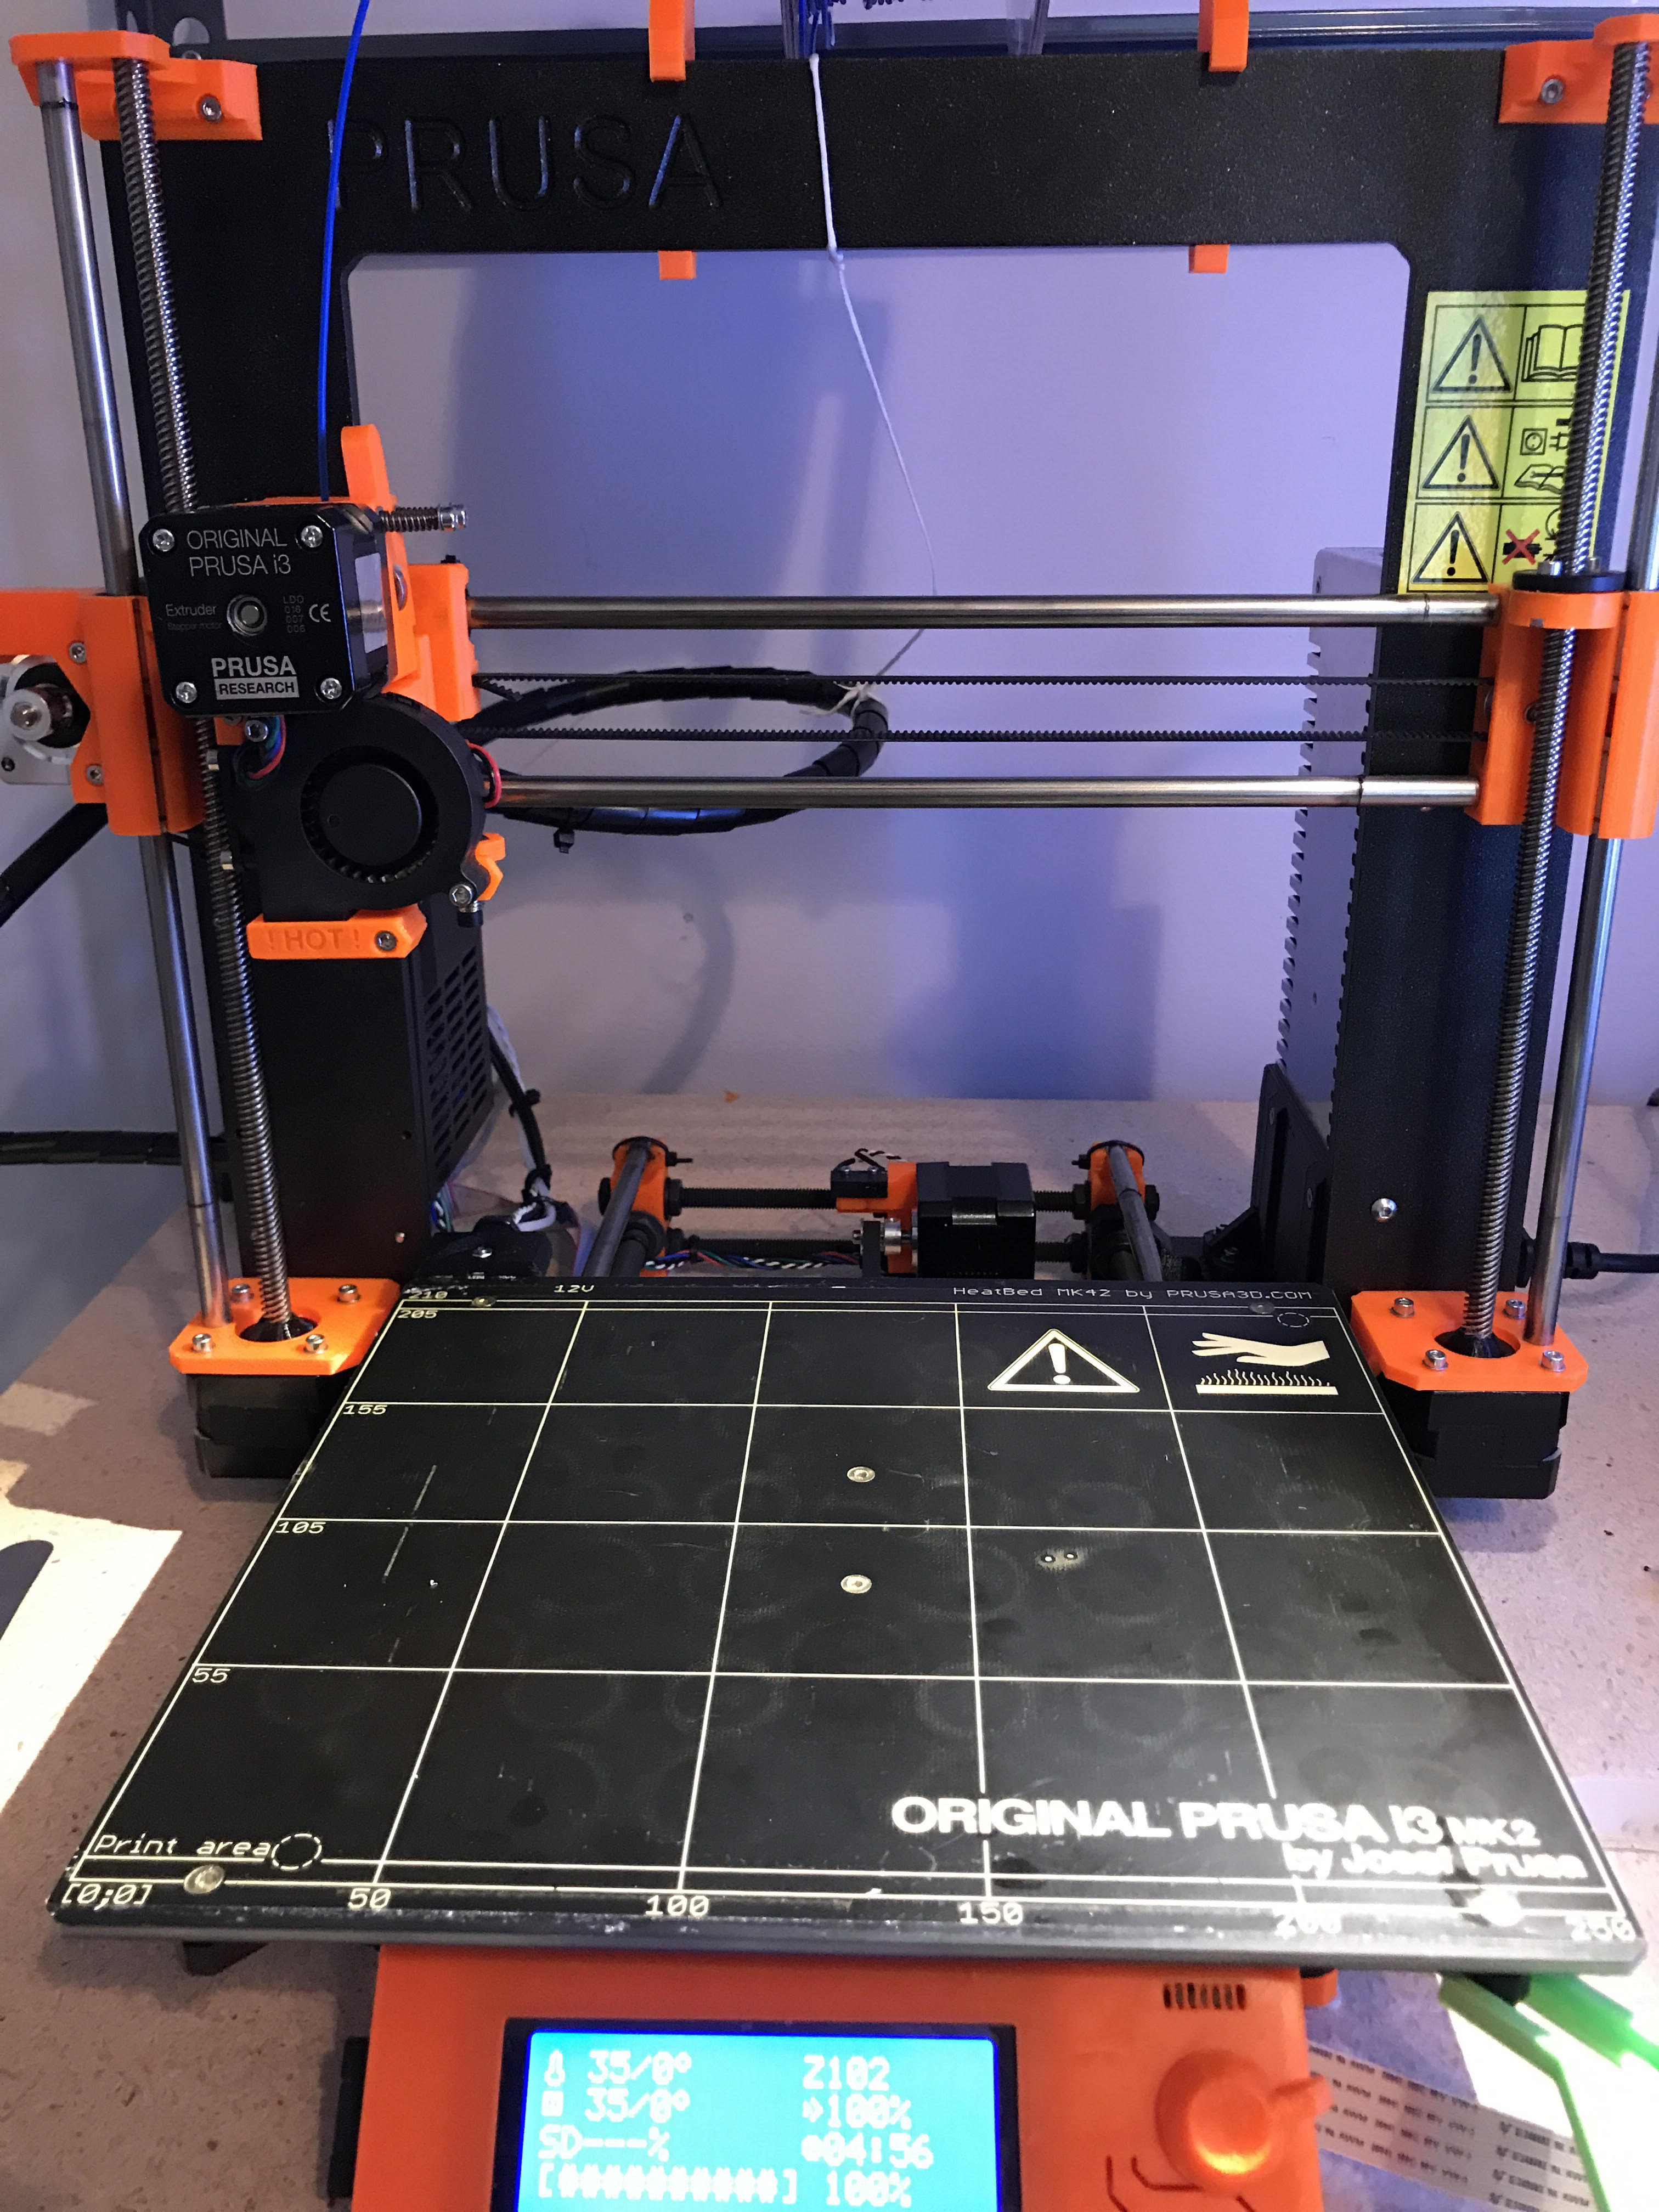
Mods galore (kit built with a collection of mods)
Hello!
Kind of new to the forum, but I will introduce myself by sharing my build from a new Mk3 kit. I have owned various versions of the printer and I thought I would make a build that would take anything I could throw at it! I may be missing a couple of things.... but for now it runs perfect and silent! Adding heaters and other things soon!
Modifications:
Everything that was a printed part from prusa was replaced with modifications that I gathered from many sources online. Some parts where modified a touch to make everything function better.
Z-tops- PC/ASA printed with ptfe ceramic bearings (loaded down with ceramic grease to alleviate any bearing rattle)
Z motor holder- Thingiverse sourced from puddnig. These are printed out of PC/ASA with aluminum cone washers.
X end motor holder - (Was PC/ASA) Thingiverse file from puddnig. Printed PC/CF. Tensioner out of PC/ASA. Aluminum rod screw M3
X end idler- Thingiverse file from puddnig. Printed PC/ASA. Aluminum 16T idler. Aluminum rod screw M3
Y axis motor holder- Thingiverse file from Athruz. ( First one PC/ASA until cracked) Printed from PC/CF and aluminum locknuts for show 🙂
Y- belt tensioner- Thingiverse file that I modified more specifically for a thumbscrew and a 16t pully. Printed from PC (white) and PC/CF.
Y rod holders - Printed ASA/PC
Y belt holder - Modified stock design to fit the thicker steel belt. Printed PC/CF
Y bearing holders- PC/ASA for IGUS RJ4JP-01-08.
Frame brace/ PSU delete- relo frame brace from jltx printed PC/ASA
Einsy (temporary until relocation outside of enclosure. PC/ASA printed
Belts- Steel core 2GT belt
Bearings- Mitsumi Z axis. Igus Y and X axis
PSU- Meanwell LRS- 350. Printed housing out of PC
Wiring - all wrapped in braided sleeve. Molex style disconnects on extuder base. PT-100 inside on einsy case for now.
Now the really fun stuff 🙂
Extruder setup
Carriage setup- The bearing holder was modified for a tight fit for the IGUS RJ4JP-01-08 bearings and the belt clamp area was widened for the steel core belt. Both the holder and the cover are printed PC/ASA. All hardware is Aluminum.
Extruder body- Modified stock file in Fusion 360 to give the bond tech gears a more direct filament path Rounded some corners for aesthetics. Was printed from PC/CF and sanded and polished the fan intake.
Extruder body cover- Stock design. PC/CF printed file aluminum nylock nut.
Extruder/bondtech door- Centered the gear to make a more direct filament path and put M3 aluminum locknuts in. This is printed out of Taulman 910 from a Ultimaker 🙂
Extruder filament sensor cap - Clear acrylic lasercut and tapped for reverse bowden.
Extruder itself- E3d- V6 Gold edition
E3d Copper block
E3d titanium heatbreak
PT-100 with amp
Premium 30w heater
Olson Ruby nozzle 0.4
Capricorn tube V cut for modified extruder
E3D sock
I think that is about it 🙂

Re: Mods galore (kit built with a collection of mods)
Prusa candy 
But you missed the most important thing... how does it print?
Re: Mods galore (kit built with a collection of mods)
But you missed the most important thing... how does it print?
Dosent matter, all is in the looks.
---
Gert
Re: Mods galore (kit built with a collection of mods)
It actually prints great after rebuilding it a couple of times. When I first built this I compiled 3.2.0 RC2 firmware with the ability to read the pt-100 sensor. I struggled for about a day trying to figure out why mesh leveling was not working. Come to find out.... The RC2 firmware has issues with mesh leveling. So back to RC1 and it prints great! The only thing I need to change is the Igus bearing on the right side of the Y-axis. For some reason it has about 1 mm of play that I need to correct. The fact that when I first assembled it I didn't have the belt straight possibly wore the bearing down after a 14 hour print.
Re: Mods galore (kit built with a collection of mods)
I struggled for about a day trying to figure out why mesh leveling was not working. Come to find out.... The RC2 firmware has issues with mesh leveling.
What issue with mesh leveling? Did you open a issue on GitHub regarding this?
Re: Mods galore (kit built with a collection of mods)
Mesh leveling like... it would go half way through and about the middle of the bed it would trigger the pinda twice and fail. Reading it correctly everytime. I believe the issue is already on github seeing that it is already been known on the RC2 thread. I rolled back to RC1 and no issues. Now that I am playing with fire .... I just burned up my Pt-100 🙁
Re: Mods galore (kit built with a collection of mods)
Ah yes- I see this is potentially caused by overly sensitive stall current on the Z-Axis for some printers ( https://github.com/prusa3d/Prusa-Firmware/pull/701 ). Odd that it affects some, and not others. I wonder if your z trapezoid nuts are a bit too tight?
Re: Mods galore (kit built with a collection of mods)
Exactly! Yea, the tolerances are really tight on my printer for good reasons. The trapezoid nuts are actually snug. The binding comes from the tighter tolerance of the belt tension squeezing the two sides of the printer together (steel braided belts needed stretched). I corrected this and made it more stable by adding the modified Z tops with the ceramic bearings. It kinda pulled the tops apart and squared everything up. I knew something was way off since I started with the It was wayyyy too tight with the Igus bearings in the X axis motor mount and idler. Went to mitsumi bearings and then rolled back firmware and it was way better!
Re: Mods galore (kit built with a collection of mods)
What are you using for an enclosure. I'm looking to upgrade from my current one, a big cardboard box.
Re: Mods galore (kit built with a collection of mods)
are you running the Steel core 2GT belts using the 16t pulleys? Past experience the steel breaks on anything under 24t pulleys
The Latest Firmware can be found here https://github.com/prusa3d/Prusa-Firmware/releases
Open Firmware Issues https://github.com/prusa3d/Prusa-Firmware/issues
Re: Mods galore (kit built with a collection of mods)
What are you using for an enclosure. I'm looking to upgrade from my current one, a big cardboard box.
I am using a Luxor Multipurpose W26E Utility cart. I had a spare one from work and noticed that the measurements were really close to what I needed! I used Acrylic with aluminum U brackets so I can slide the acrylic in and out if I need to service the machine. For the door I used extruded aluminum and then printed the corners.
It works really really well... Almost too well sometimes. Right now I have the PSU (LRS-350 Meanwell) relocated outside with the einsy inside the enclosure. That will soon change as I am planning to move that outside of the enclosure as well. I also have some Lasko 200W ceramic heaters I have gutted and put some noctua fans on for the heaters when I get around to it.
Re: Mods galore (kit built with a collection of mods)
are you running the Steel core 2GT belts using the 16t pulleys? Past experience the steel breaks on anything under 24t pulleys
Well... So far nothing has happened and I am not showing any signs of wear quite yet on the 16t. The reasoning for that was to get the belt perfectly centered along with the modified belt holder. That was a HUGE pet peeve for me on the pre-built units I have. The stock belt seems to "wander" all over the place and I wanted to correct that from the start. Right now the only downside to it is the initial stretching. It probably took about 32 hours of total printing to get fully stretched. But.... So far so good!
If it starts to break or show steel, then I will probably redesign for the 24t pullys.