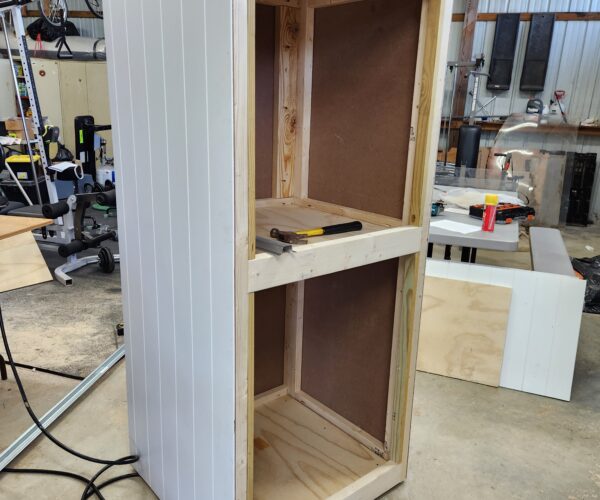
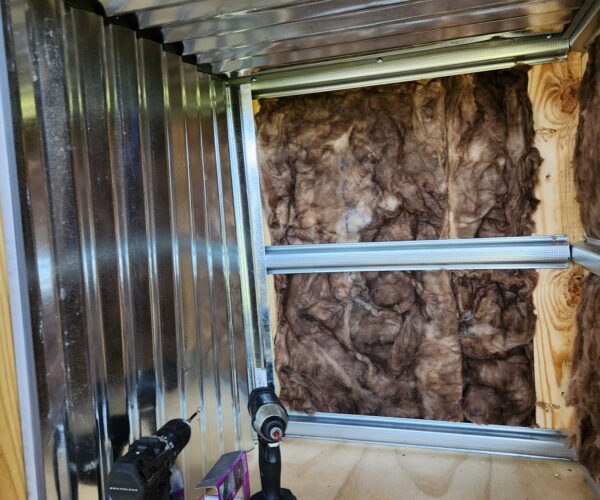
Built enclosure-unsure of plan forward
Pretty new to 3D printing. Ordered M3S+ early April, started reading a ton on this forum, received and assembled the kit. Couple of minor hiccups but things have gone very smoothly to this point. My use case for the printer will involve needing to print plenty of PETG and eventually ASA. Knowing that would very likely require an enclosure and needing a place to put the printer I built a box...a BIG box. I had allot of leftovers from a recent kitchen remodel (yes, even the corrugated metal) so the box got a bit "overbuilt"... pictures below.
So printing PETG, the inside warms up to 35-38C within 10-15 minutes.
So my first issue is definitely going to be the PSU. I know on the PRUSA designed Lack enclosure there are some printed parts to mount the PSU outside of the enclosure. So I intend to download those files and mount the PSU on the side or back of the cabinet, running cable extensions thru the floor of the enclosure area.
I've been reading up on OCTOPI and have ordered a good bit of hardware to get that setup but am unsure about ventilating the enclosure. I've read of people using the Elegoo air filter that basically uses activated charcoal to filter the airborne particles. I think that is what the Bambu X1 carbon does as well... but have also seen several videos of people just using a fan and a duct to the outside to let OCTOPI turn on a fan and suck all the sketchy particle laden hot air to the outside after the print is done. Seeing as how this is in my office, keeping the smell and extra heat (hot summers here) out are important.
So I guess I'm looking for advice or some "this is what I did" thoughts.
RE: Built enclosure-unsure of plan forward
I think you'll definitely want some ventilation, which you've already identified. Many filaments just like to be in a warm environment when printing, but maybe more specifically, one without breezes. So your enclosure will do that well, but regulating that temperature with an exhaust fan and a electronic thermostat would probably be ideal.
One of these work great for driving the fan and controlling it via a temperature probe.
https://protosupplies.com/product/xh-w1219-temperature-controller-module/
You could also get real fancy and throw humidity sensing into the mix as well with one of these.
https://protosupplies.com/product/xh-m452-dual-temperature-humidity-control-module/
For both the fan, the controller, and indeed any additional powered accessories I'd highly recommend setting up an independent power supply. I've read it's not recommended to run anything off the printer PSU apart from the printer.
As for the PSU, remote mounting is an option. In my enclosure the PSU is simply located down on the floor of the enclosure with openings to the outside for heat exchange from the vent holes. I have one of these for whatever it's worth: https://www.printer-box.com/. Interestingly a lot of the ideas they use could be applied to your custom enclosure as well.
Finally, and as a safety measure when dealing with heat and flammable materials, I would recommend a fire suppression system. I have a Blazecut tube in mine mounted to the top. I would think the mounts I designed would also work in any other enclosure since it just needs to screws/bolts to attach. https://www.printables.com/model/379157-printer-box-fire-suppression-mounts
Aaron
RE: Built enclosure-unsure of plan forward
Those are great ideas! I knew I could setup OCTOPI to monitor temp and control a fan/heat ( ) Been questioning the value versus just one of those activated charcoal filters. Think just going the whole way and shooting a vent tube outside is probably the final solution... just get it over with and save the intermediate step of playing with a filter.
I've been looking at a couple of small cabinet sized dehumidifiers... would like to put a couple of bars across the top of the cabinet on rollers so can just switch filaments and print from as needed and just keep the cabinet dry.
Going to get to setting up the OCTOPI and get the PSU moved. I would like to make a quick connect to connect/disconnect the PSU since remote mounting it will mean having to unhook the extension cables to pull the printer out of the enclosure. Saw a topic on here about the different types of quick connects (not really in my areas of expertise) didn't really seem to be any consensus on a good route to go there. Gotta be safe, don't want to test the fire resistance of my cabinet.
RE: Blazecut tube. I've seen those listed on Amazon, are there any other good supplier options for those?
RE: Built enclosure-unsure of plan forward
Actually, that little device I linked can handle temperature, hysteresis, and can also be setup with a knob to control the speed when the fan does turn on. No RPi required, but you can definitely control temps with one of those too. I actually do that for the fans inside the case that houses the RPi in my enclosure.
With my enclosure it came with a printable part to setup anything from a fan to a full HEPA filter. I modified mine to hold a filter and carbon element. My understanding is that it's really only useful for printing with plastics that produce a lot of VOCs like ABS.
Now I was going to recommend a place to get the Blazecut tubes because they had the best price, but they were on eBay and now I can't find ANY Blazecut products of any kind on eBay. So something tells me some legal action might have been taken. So it's going to be the best price you can find on the model T025. This product is made in Europe so I'm wondering if they're not closing down other outlets to begin US distribution of their own.
As a side note, it seems the aircooled VW crowd has known about these for a while: https://www.mrbusco.com/products/blazecut-t025e
Aaron


