Re: Problem with first layer
Window cleaner as instructions, and gluestick with challenging prints.
When it sticks it really sticks well
But this looks like it doesn't stick at all. 😉
My experience with window cleaner isn't good. Some window cleaners contain water-repellent substances or anti-smear agents leaving not-very-sticking film on surface of bed. Since I started to use pure alcohol I have no problems with first layer any more.
When talking about printing PLA, I clean the bed with paper tissue and pure alcohol before each print and I don't use any glue or hair spray or anything. Just clean dry heatbed and PLA sticks like hell.
Re: Problem with first layer
OK, I'll use some alcohol to see if I can spot a difference then!
I've been using Octoprint so far, sending prints directly to the server from Slic3r.
Im starting to think that something is wrong in slicer or octoprint. I've used the Extrusion Multiplyer value without any real difference of the extrusion in my eyes. Been testing from 1 to 1.5...
What I did now is that I exported Gcode directly to SD card, and printed from that..
I also adjusted flow to 120 under the Tune meny, and the speed down to 40, doing the first layer now of a print and it looks good, alot thicker extrusion and squeezed enough into the buildplate, when it reaches layer 2 I will speed it up to 100 again.
Could my extrusion issues be connected to slicer or and Octoprint?
Me on MyMiniFactory!
Me on Instagram
3D Printing Live Feeds
Prusa MK2 Usergroup Slack Live Chat
Unofficial live chat by users for users.
Re: Problem with first layer
Could my extrusion issues be connected to slicer or and Octoprint?
I'm almost sure it has nothing to do with Octoprint. I've been using Octoprint (in a form of OctoPi image on Raspberry Pi) for years and AFAIK it does no change in provided gcodes, just queues their lines to printer as it got them from the user.
Being in your situation, I would choose to start completely from beginning.
- clean the heatbed, clean hotend nozzle, write down the value of Z calibration and reset printer to defaults, redo Z calibration
- uninstall Slic3r, delete all traces of it from system, do fresh installation from 1.7.2 package provided on prusa3d.com website
- get some simple object (calibration cube or something) and slice it with default settings provided from Prusa (0.2 NORMAL, with Zhop), or use sample gcodes provided with printer - Prusa logo is good enough for tests.
- use clean PLA filament, no dust, no grease, recheck its diameter (should be almost exactly 1.75mm)
Re: Problem with first layer
Yes I will most likely do a reboot of everything 😀
Cubes prints fine though, the problem is that I need to fine tune everything (Z offset at level 1 and then at level two again and Flow...I cant get it to extrude enough plastics without touching the printer) at the printer to get a successful cube...
But one question for example... In Slicer I choose "Keep fan always on", but when printing through Octoprint, the fan is still turned off the first layer.
If I click "fan on" in the control tab inside octoprint it turnes on though.
Me on MyMiniFactory!
Me on Instagram
3D Printing Live Feeds
Prusa MK2 Usergroup Slack Live Chat
Unofficial live chat by users for users.
Re: Problem with first layer
But one question for example... In Slicer I choose "Keep fan always on", but when printing through Octoprint, the fan is still turned off the first layer.
If I click "fan on" in the control tab inside octoprint it turnes on though.
And this?
Re: Problem with first layer
I thought "keep fan always on" overrides other settings regarding fan on/off? Maybe not?
about to reset the printer, pushing in the rotary knob and at the same time pressing the X below (according to the manual), it dosnt beep like the manual says, and my "live adjust Z" values are still the same?
Me on MyMiniFactory!
Me on Instagram
3D Printing Live Feeds
Prusa MK2 Usergroup Slack Live Chat
Unofficial live chat by users for users.
Re: Problem with first layer
I thought "keep fan always on" overrides other settings regarding fan on/off? Maybe not?
about to reset the printer, pushing in the rotary knob and at the same time pressing the X below (according to the manual), it dosnt beep like the manual says, and my "live adjust Z" values are still the same?
"Keep fan always on" only overrides cooling thresholds. BTW fan off for first layer is for reason. Keep this setting.
About reset - I think you have to push rotary knob, hold it down, push reset (that X button), release reset and still keep rotary knob pushed, until it beeps confirming factory reset.
Re: Problem with first layer
Your heatbed looks too shiny, like greasy. My heatbed looks dim with no marks of previous prints.
This is how my heatbed looks like just after cleaning. Scratches are proof of sticking force of PLA. I usually have to work hard to remove objects from bed.
Re: Problem with first layer
Dissembled the printer now and been working on the Y axis squareness for a few hours. Now all the fees touches the ground and when I measure the diagonals I have 1mm difference. I think that's OK.
Really assembling the printer now, measuring 100mm from the feet to the lock nuts washer. But then the mounting "balcony" for the PSU is 5mm offset (away from the PSU holes) should I just adjust the "100mm" so the holes on the PSU and the "mount-plate" match? Then I will have around 98mm from the front-face of feet to the metal frame.
Me on MyMiniFactory!
Me on Instagram
3D Printing Live Feeds
Prusa MK2 Usergroup Slack Live Chat
Unofficial live chat by users for users.
Re: Problem with first layer
You will probably get in trouble aligning Z-probe to calibration points. I don't know why your setup ended 98mm instead of 100mm. Please double check your assembly. If you don't find any error, you should maybe add some washer between PSU-Y-part and Y-axis-corner to achieve 100mm distance from frame.
Re: Problem with first layer
I got misled by the images in the assembly instructions, looking back at them I looked at this one: https://d17kynu4zpq5hy.cloudfront.net/igi/prusa3d/aTj2LNdgbsopYtH4.huge
....which is a bit miss leading, so I took the measurement WITHOUT the washer. I scrolled through the instructions again after a while and found the first image regarding that distance, and there its clear that the washer should be INCLUDED in that 100mm. So I adjusted that and now I have 100mm sharp from the face of the Y corners to the metal frame.
So.. this will be a restart of this messy thread 😀
What I've done now: (commends and findings in bold that might indicate a problem)
1. Dissembled the Y Axis from the metal frame.
2. Rebuilt the Y Axis pretty much from scratch, measuring diagonals, using the frame as "template" when tightening the 8mm bolts.
Something I saw was that the LCD Support legs are actually sticking down more than the feet's, stopping the feet's to touch the ground, not much but one mm or so. Probably one thing that got me thinking that something was wrong, and started to adjust the Y Axis bolts to correct that.
3. Reassembled everything again, always checking my diagonals as well as that all 4 feets are standing stable on the surface. When tightening the larger bolts that connects the Y Axis to the metal frame the frame got a bit skewed, so loosened it again, skewed it back and tightened it very carefully.
4. Now my printer is ready and plugged in, the bed is cleaned with Alcohol. The printer has also been hard reset.
5. Powering up, doing the Self Test from the LCD, everything is OK, although when it checks Z axis it stepping the extruder downwards and pushes down the buildplate about 3mm before stopping and returning up.
6. Visually Checking that the Y axis is perpendicular to the X axis, looks ok, maybe 0.5-1mm off from the right to the left side, but I assume thats ok.
7. Running calibrate Z, and the probe seems to be outside the circle.. not much, and its not the same offsets on all 9 circles.
Its something like this in general:

According to the instructions its too much, what will this mean, that I cant print the whole build plate (25x21 cm) or can this make my print fail more?
If I'll start to adjust bolts now to get this corrected this will for sure ruin the flat Y axis that I have now Im sure... 🙁
When I chose move Z axes at the LCD to move up the extruder the starting value is +000.2 so that sounds correct right according to the min distance to the buildplate in the FW... (yes PJR im starting off with the standard calibration procedure, following the instructions from Prusa now as a start :D)
8. Preheating the nozzle to 210 degrees and load the filament. The extrusion from the nozzle looks smooth and straight, no curling or spirals coming out, BUT the first second when it loads filament it seems to push through alot more plastic, and at that phase its skipping steps / chewing / slipping or what its called, 10 times to be precise 🙂 After the "wider" extrustion it continues to extrude a more normal width and that works great without any skipped steps. Does this point at that I have some dirt or something in the hotend? (I have not touched the hotend/extruder at all yet.
10. Testing to print the V2 Autocalibration, RESULT:
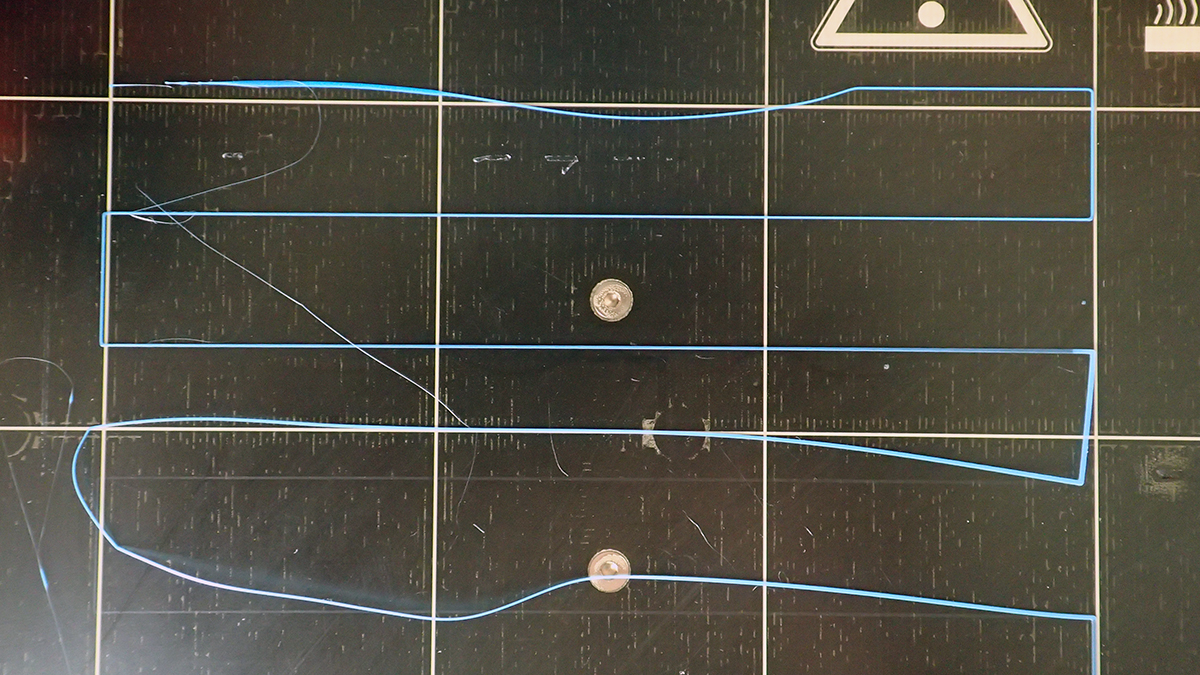
The first line was not sticking to bed of course, I used Live Adjust Z, and changed it to -0.222 where it started to look better, and was stuck to the buildplate (second line from above) when trying to rub it off with the nail. Although what I saw was that on the left side its not as squeezed as on the right side where it looks good, shouldn't a functional auto leveling fix that?
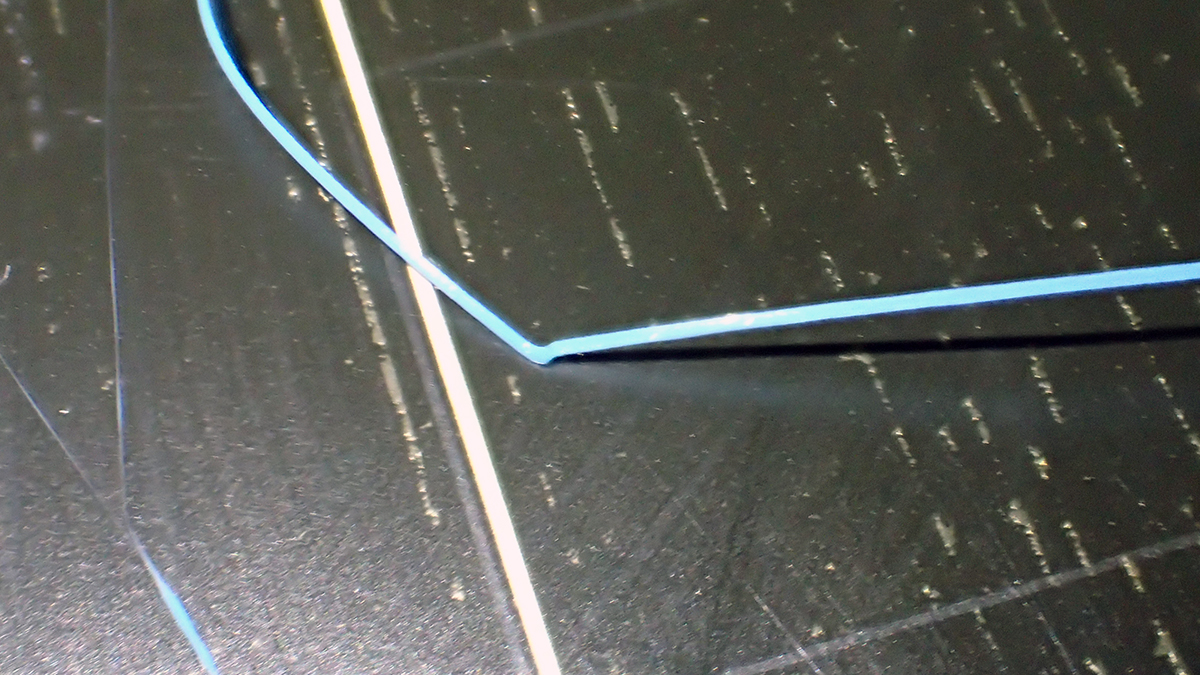
Removing plast, cleaning with Alcohol again, and did the V2 Calibration test again with the -0.222 Z offset setting from start, better result from start, but there is still a visible difference between the right and left side. One of the Y axis layouts came loose from the bed, everything else seems to sit nice to the bed.
11. Testing to print the prusa logo, result will follow in the next post!
Me on MyMiniFactory!
Me on Instagram
3D Printing Live Feeds
Prusa MK2 Usergroup Slack Live Chat
Unofficial live chat by users for users.
Re: Problem with first layer
Starting good!
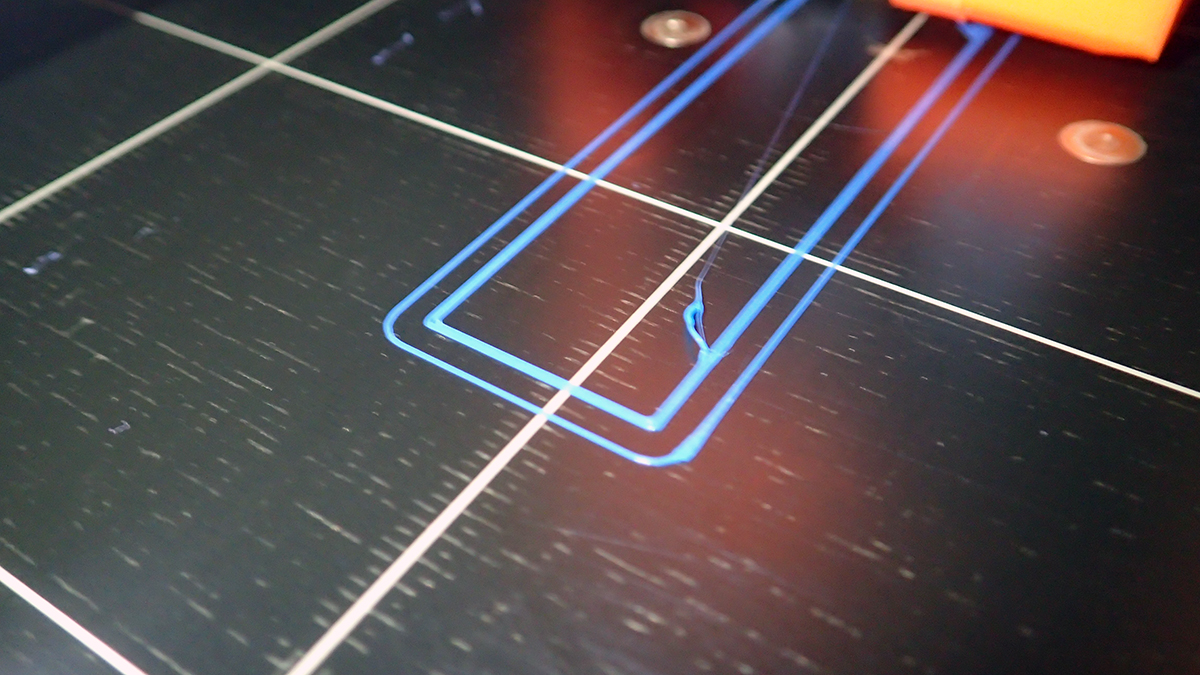
First Layer!
Second Layer!
This looks good right?
Will post the final print when its done.
Me on MyMiniFactory!
Me on Instagram
3D Printing Live Feeds
Prusa MK2 Usergroup Slack Live Chat
Unofficial live chat by users for users.
Re: Problem with first layer
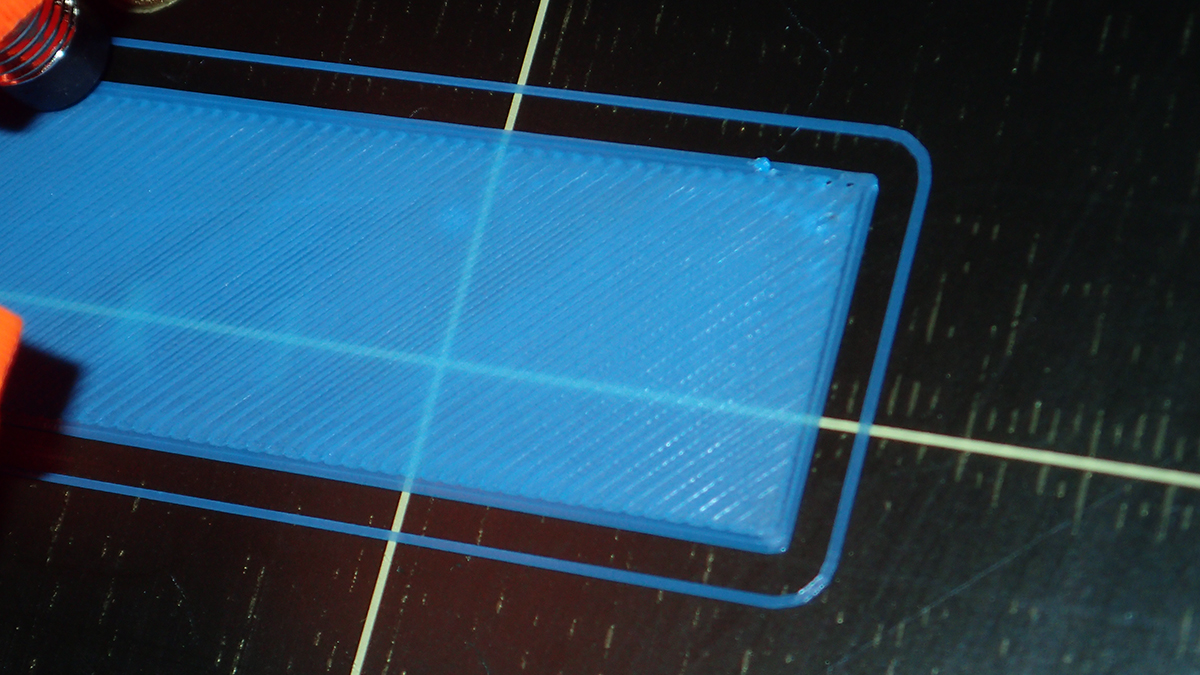
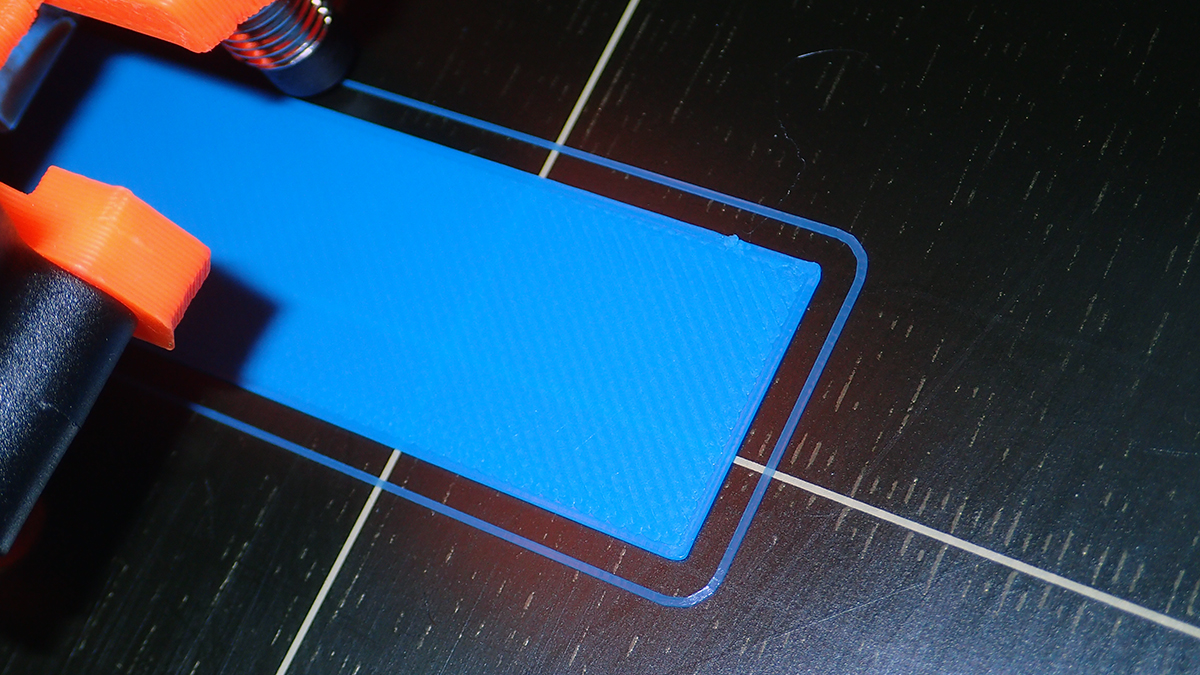
Final print Bottom! (this is a macro shot, it looks like the lines dosnt bond, but IRL it feels really flat and smooth!
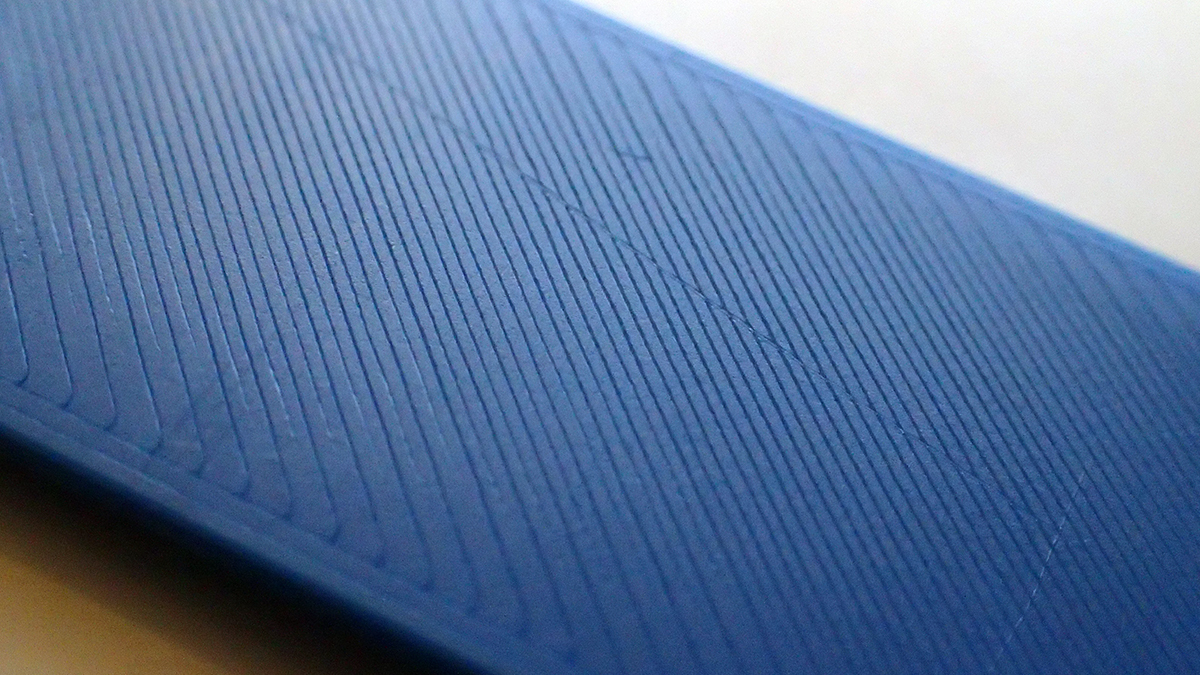
Details of the top:
The top dosnt really look good in my eyes, but maybe good enough for a first test. And maybe it needs one more top layer? Or is it a slight underextrusion?
Im glad that it seems to extrude!
Next step (tomorrow...I'll go to bed as a happy man with bed sticking plastic!) will be to uninstall slicer, and reinstall it, do a 2x2x2cm testcube and slice it with the default settings for 0.2mm layer height. Any thoughts on the bold questions/info two posts above? Or adjustments I should do just after looking at the top layer?
Me on MyMiniFactory!
Me on Instagram
3D Printing Live Feeds
Prusa MK2 Usergroup Slack Live Chat
Unofficial live chat by users for users.
Re: Problem with first layer
Patrik
It is very important that you set your printer up in a manner that works for you. I can only tell you what fixed things for me, but the problem there is that I tend to use machines differently to most people on here...
Incidentally, like you I was caught out by the 100mm excluding the washer. I did mention the issue to Josef and had believe it to be clarified now.
It looks as though you still have issues; I printed out the Prusa logo early on; the base was similar to yours, but the top of mine was very clean without the gaps I see on your picture.
Peter
Please note: I do not have any affiliation with Prusa Research. Any advices given are offered in good faith. It is your responsibility to ensure that by following my advice you do not suffer or cause injury, damage…
Re: Problem with first layer
Patrik
It is very important that you set your printer up in a manner that works for you. I can only tell you what fixed things for me, but the problem there is that I tend to use machines differently to most people on here...
Incidentally, like you I was caught out by the 100mm excluding the washer. I did mention the issue to Josef and had believe it to be clarified now.
It looks as though you still have issues; I printed out the Prusa logo early on; the base was similar to yours, but the top of mine was very clean without the gaps I see on your picture.
Peter
According to my experience the gaps that I see is under extrusion? I've done the steps/mm calibration, maybe I should do it again, just to be sure.
I will test print another model from the SD card, and see how that goes.. before I start to slice myself.
Me on MyMiniFactory!
Me on Instagram
3D Printing Live Feeds
Prusa MK2 Usergroup Slack Live Chat
Unofficial live chat by users for users.
Re: Problem with first layer
Patrik
It would appear to be under-extrusion, but there are parts which appear to be over-extruded, hence my reluctance to comment...
The extruder step value may not be saved in EEProm, so every time you reset/restart the printer it would lose the value.
The M500 command stores values to EEProm or you could simply include the setting in the printer start GCode area within the slicer.
Peter
Please note: I do not have any affiliation with Prusa Research. Any advices given are offered in good faith. It is your responsibility to ensure that by following my advice you do not suffer or cause injury, damage…
Re: Problem with first layer
Patrik
Question: Was the logo printed from the supplied GCode files? Did the print complete (or did you stop it a layer short)?
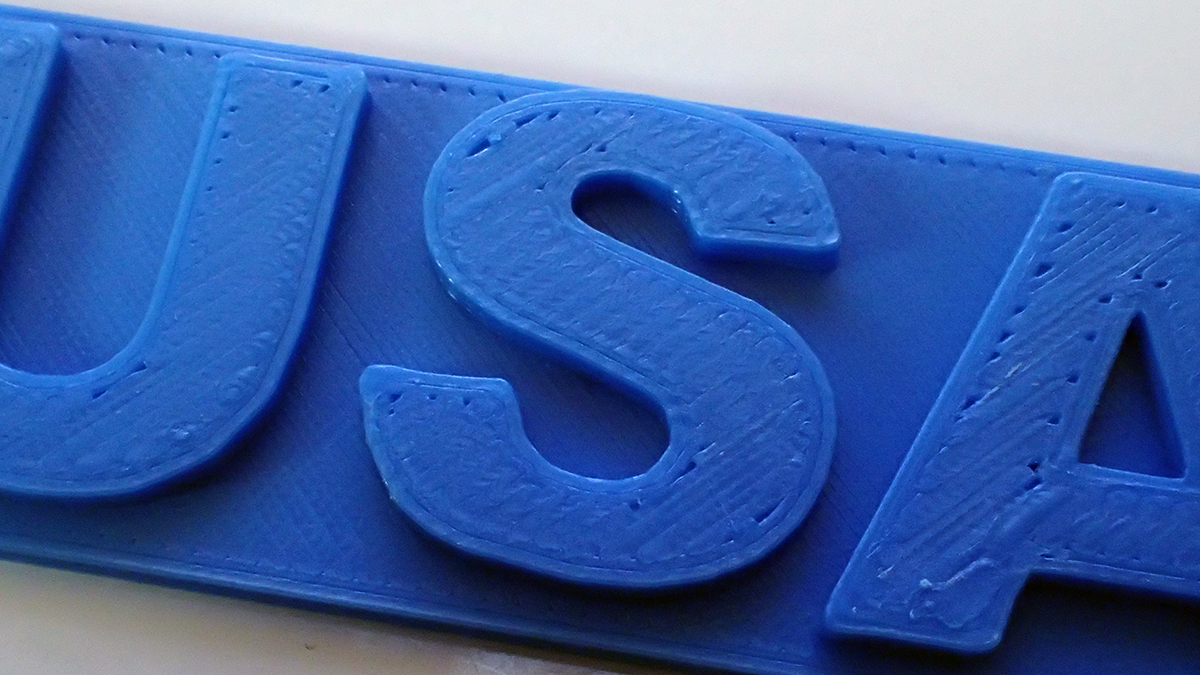
Here's a picture of my logo print:
You will see that my top layer is in a different direction to yours.
Peter
Please note: I do not have any affiliation with Prusa Research. Any advices given are offered in good faith. It is your responsibility to ensure that by following my advice you do not suffer or cause injury, damage…
Re: Problem with first layer
Patrik
It would appear to be under-extrusion, but there are parts which appear to be over-extruded, hence my reluctance to comment...
The extruder step value may not be saved in EEProm, so every time you reset/restart the printer it would lose the value.
The M500 command stores values to EEProm or you could simply include the setting in the printer start GCode area within the slicer.
Peter
hi!
Yes I did use the M500 Command, following this guide:
But I'll check again if the setting is still correct.
Whistle and Marwin printed fine, tested the 0.05mm threefrog as well but that didnt stick.
I'll try slice a cube now in slicer default settings
Me on MyMiniFactory!
Me on Instagram
3D Printing Live Feeds
Prusa MK2 Usergroup Slack Live Chat
Unofficial live chat by users for users.
Re: Problem with first layer
Patrik
Question: Was the logo printed from the supplied GCode files? Did the print complete (or did you stop it a layer short)?
Here's a picture of my logo print:
You will see that my top layer is in a different direction to yours.
Peter
Yes it was the gcode on the SD card that came with the printer. I'll try print it again!
since I did a hardware reset the steps/mm values seems to have been reset. So I added them again, from 161.3 to 173.4.
printing now! Really strange that our last layers have different directions 🙂
Had to raise the nozzle with Live Z adjust 0.02mm, probably because of the increased extrusion.
Me on MyMiniFactory!
Me on Instagram
3D Printing Live Feeds
Prusa MK2 Usergroup Slack Live Chat
Unofficial live chat by users for users.
Re: Problem with first layer
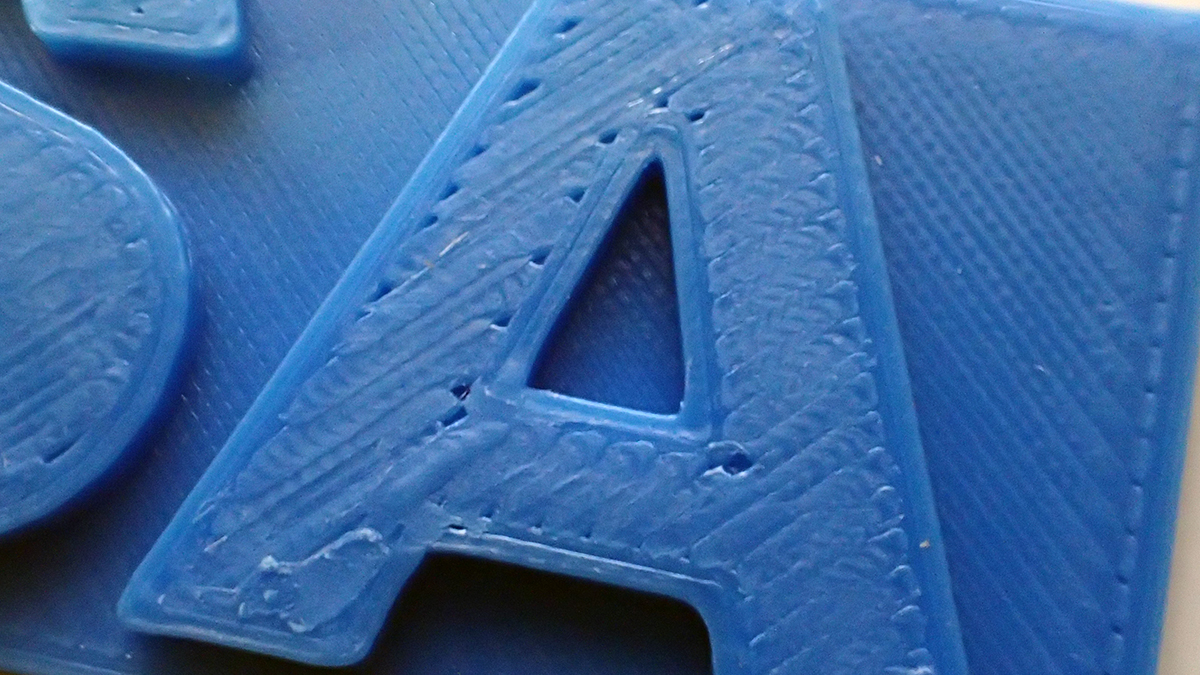
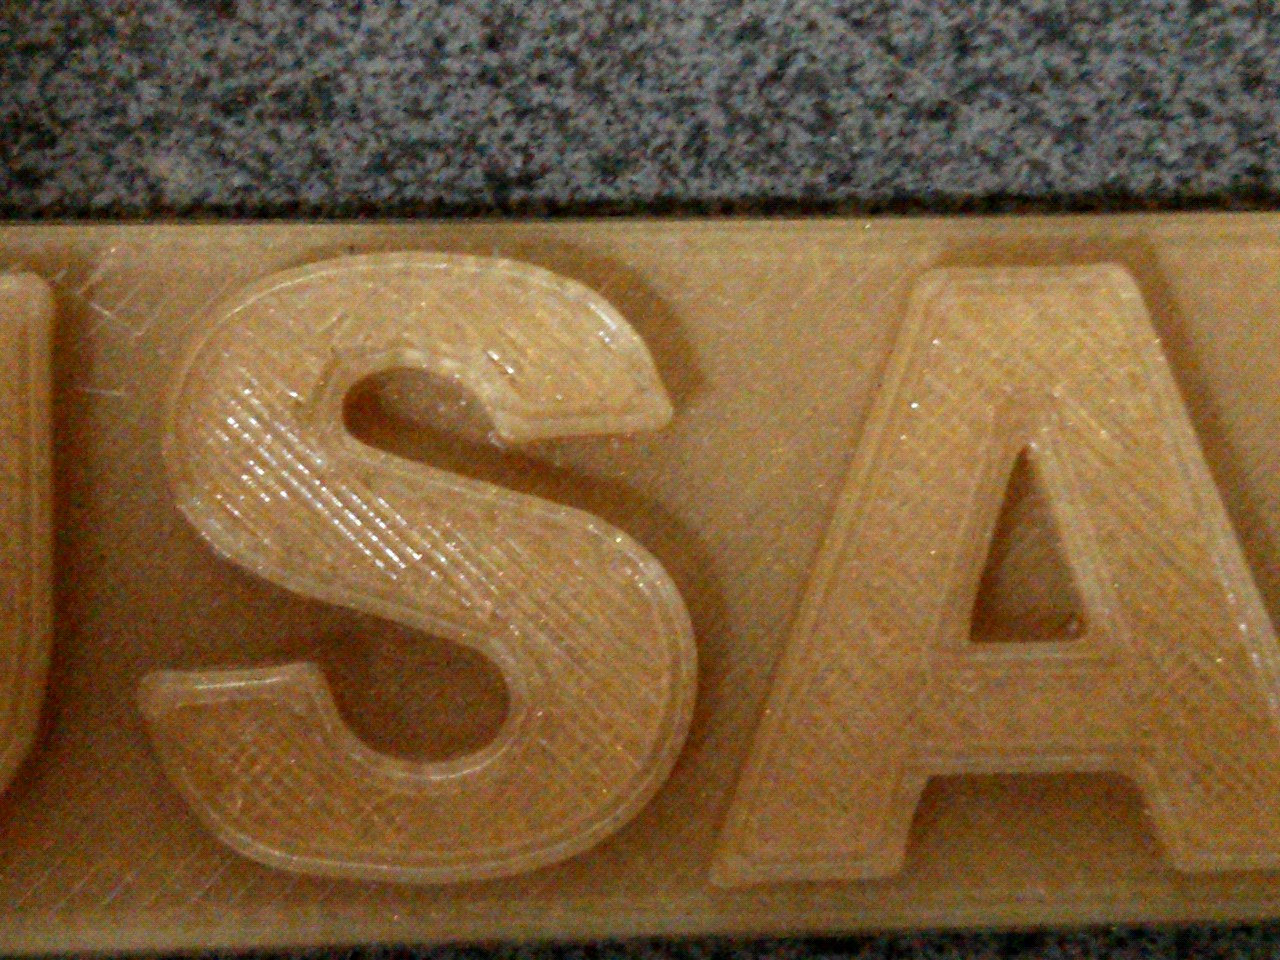
New Prusa logo, its filled better now, but it looks like the nozzle is a little bit to close now, looking at the top layer it looks like its dragging the nozzle in the plastic. Still the opposite direction compared to your top layer though 😀
it printed 4 top layers
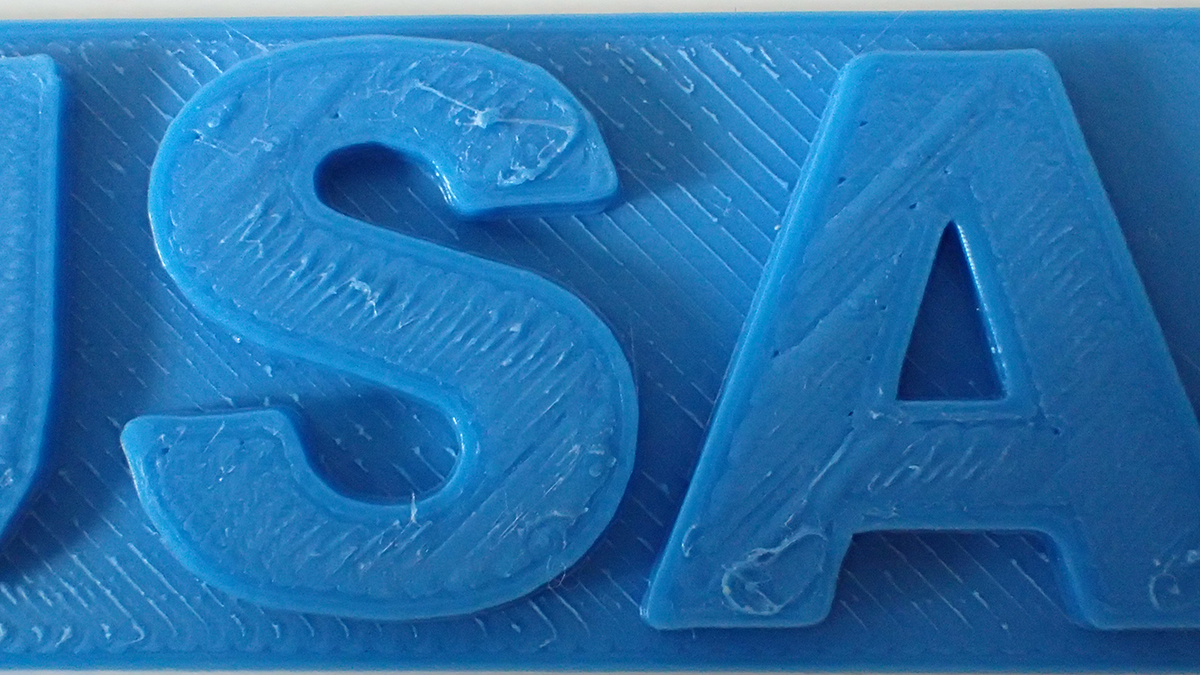
Comparison with the first print, before I adjusted steps/mm

Me on MyMiniFactory!
Me on Instagram
3D Printing Live Feeds
Prusa MK2 Usergroup Slack Live Chat
Unofficial live chat by users for users.