Slic3r Graphic Screens
I have questions relating to what I see on two Slic3r screens.
After performing the slice operation and choosing the "Preview" screen, I see the model as yellow on the screen. However, there are sections in red. Can you tell me what the significance of the red is. I would think red would indicate some error or something difficult to print, but the part prints very well with no apparent problem in the "red" areas.
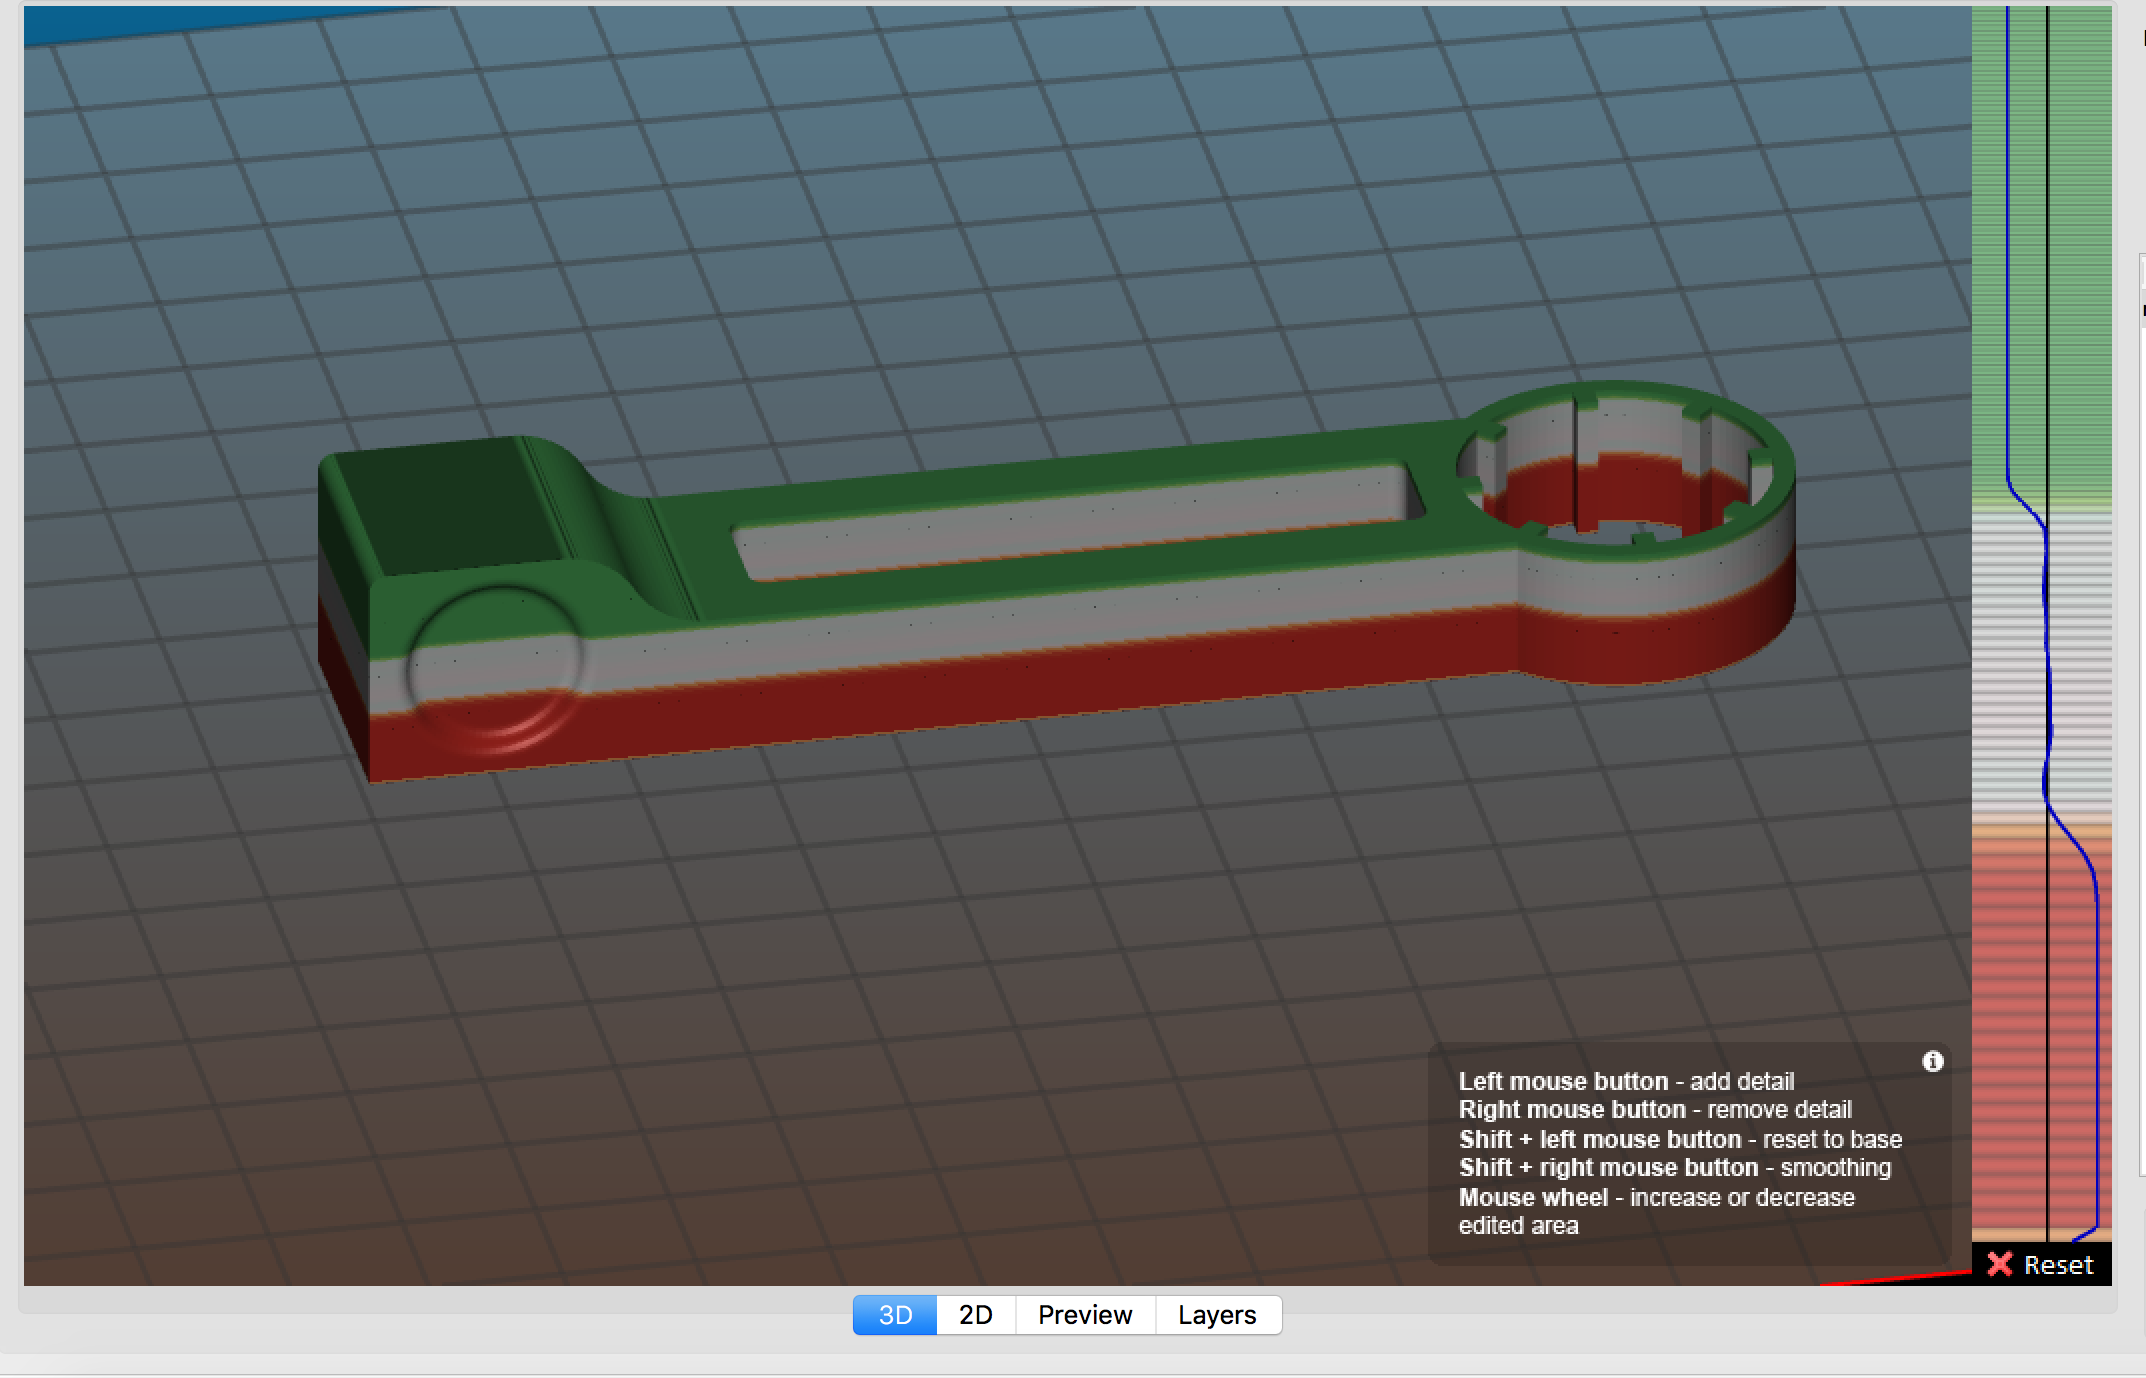
From the "3D" screen with "Layer editing" turned on I am thoroughly confused by the rectangle on the right of the window. There is an accompanying information message that says, in part "Left mouse button - add detail Right mouse button - remove detail . . . . ". When I left click my mouse in that rectangle and move up or down, I see a squiggly line appear to the left of the vertical line, and lots of colors appear in the rectangle and on the model. Right clicking on the mouse moves that squiggly line to the right. I don't see any more or less detail in the image. "Shift + left mouse button - . . . " and "Shift + right mouse button . . . . " does nothing that I can see. I'm hoping someone can explain the purpose of that feature and how I can best use it.
Thanks
Re: Slic3r Graphic Screens
Hi Martin,
the red you see on the preview screen indicates infill, while the yellow indicates perimeters. If you ever use support on your print you will see it appear as green on the preview screen.
The Layer Editing feature you mentioned can be used to vary the layer heights within the model you are printing, the red is a bigger layer height and the green is a smaller layer height. The more you move the line to the left the smaller the layer height, the more you move the line to the right the bigger the layer height. For example, in the picture I am using the .15mm layer height setting, but I have also used the variable layer height feature so the part will print at a .25mm layer height to begin with then ramp down to .15mm in the grey and then ramp down to a .07mm layer height in the green. This feature is particularly useful if you have a part with varying amounts of detail, in that situation you can use a bigger layer height to print faster when their is less detail and then use a smaller layer height when there is more detail like with the slopes at the top of the part in the picture.
Here is a link where Jo explains himself: http://www.prusaprinters.org/smooth-variable-layer-height-awesome-supports-slic3r-prusa-edition/#_ga=2.205590870.459548722.1505161219-301855142.1484158254
Re: Slic3r Graphic Screens
Thank you very much for your very detailed answer. It's really appreciated.
The Slic3r program has excellent help with the printer settings but I could find no help with the the user interface (the screens and such).
Thanks again
