Polycarbonate: Here's how to print it without warping, delamination, or an enclosure, with better-than-ABS results.
TLDR at end of post!
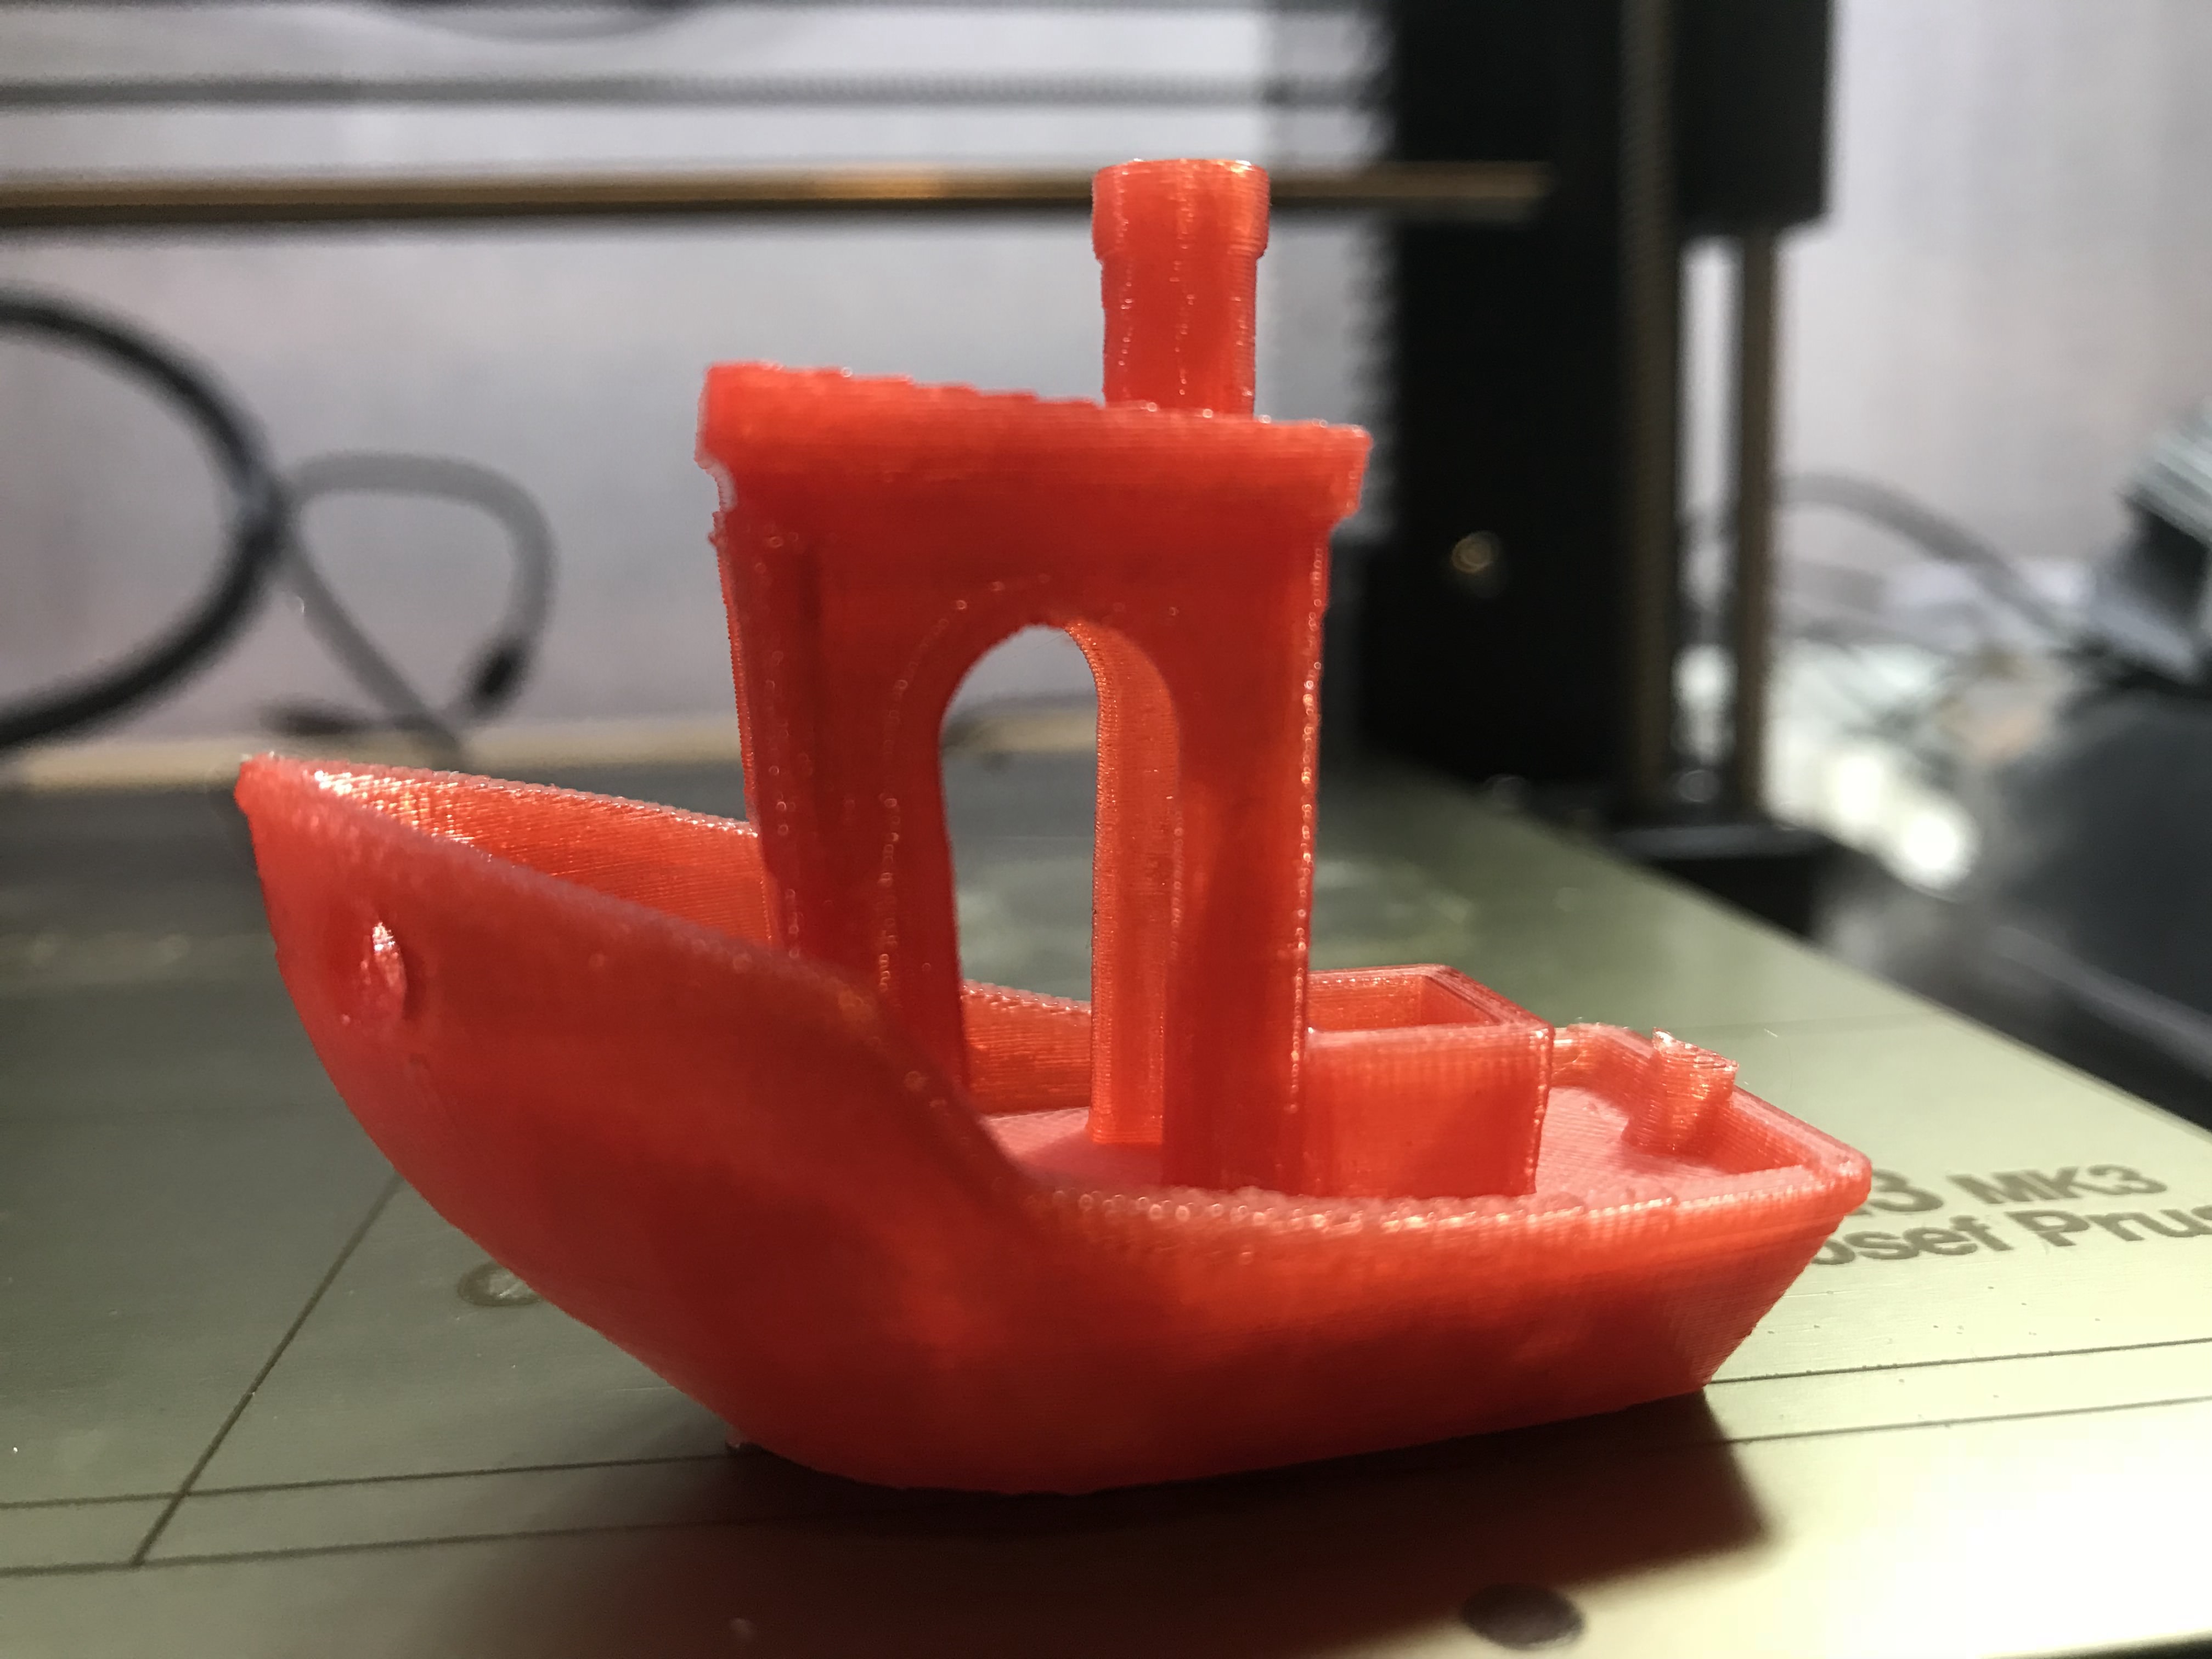
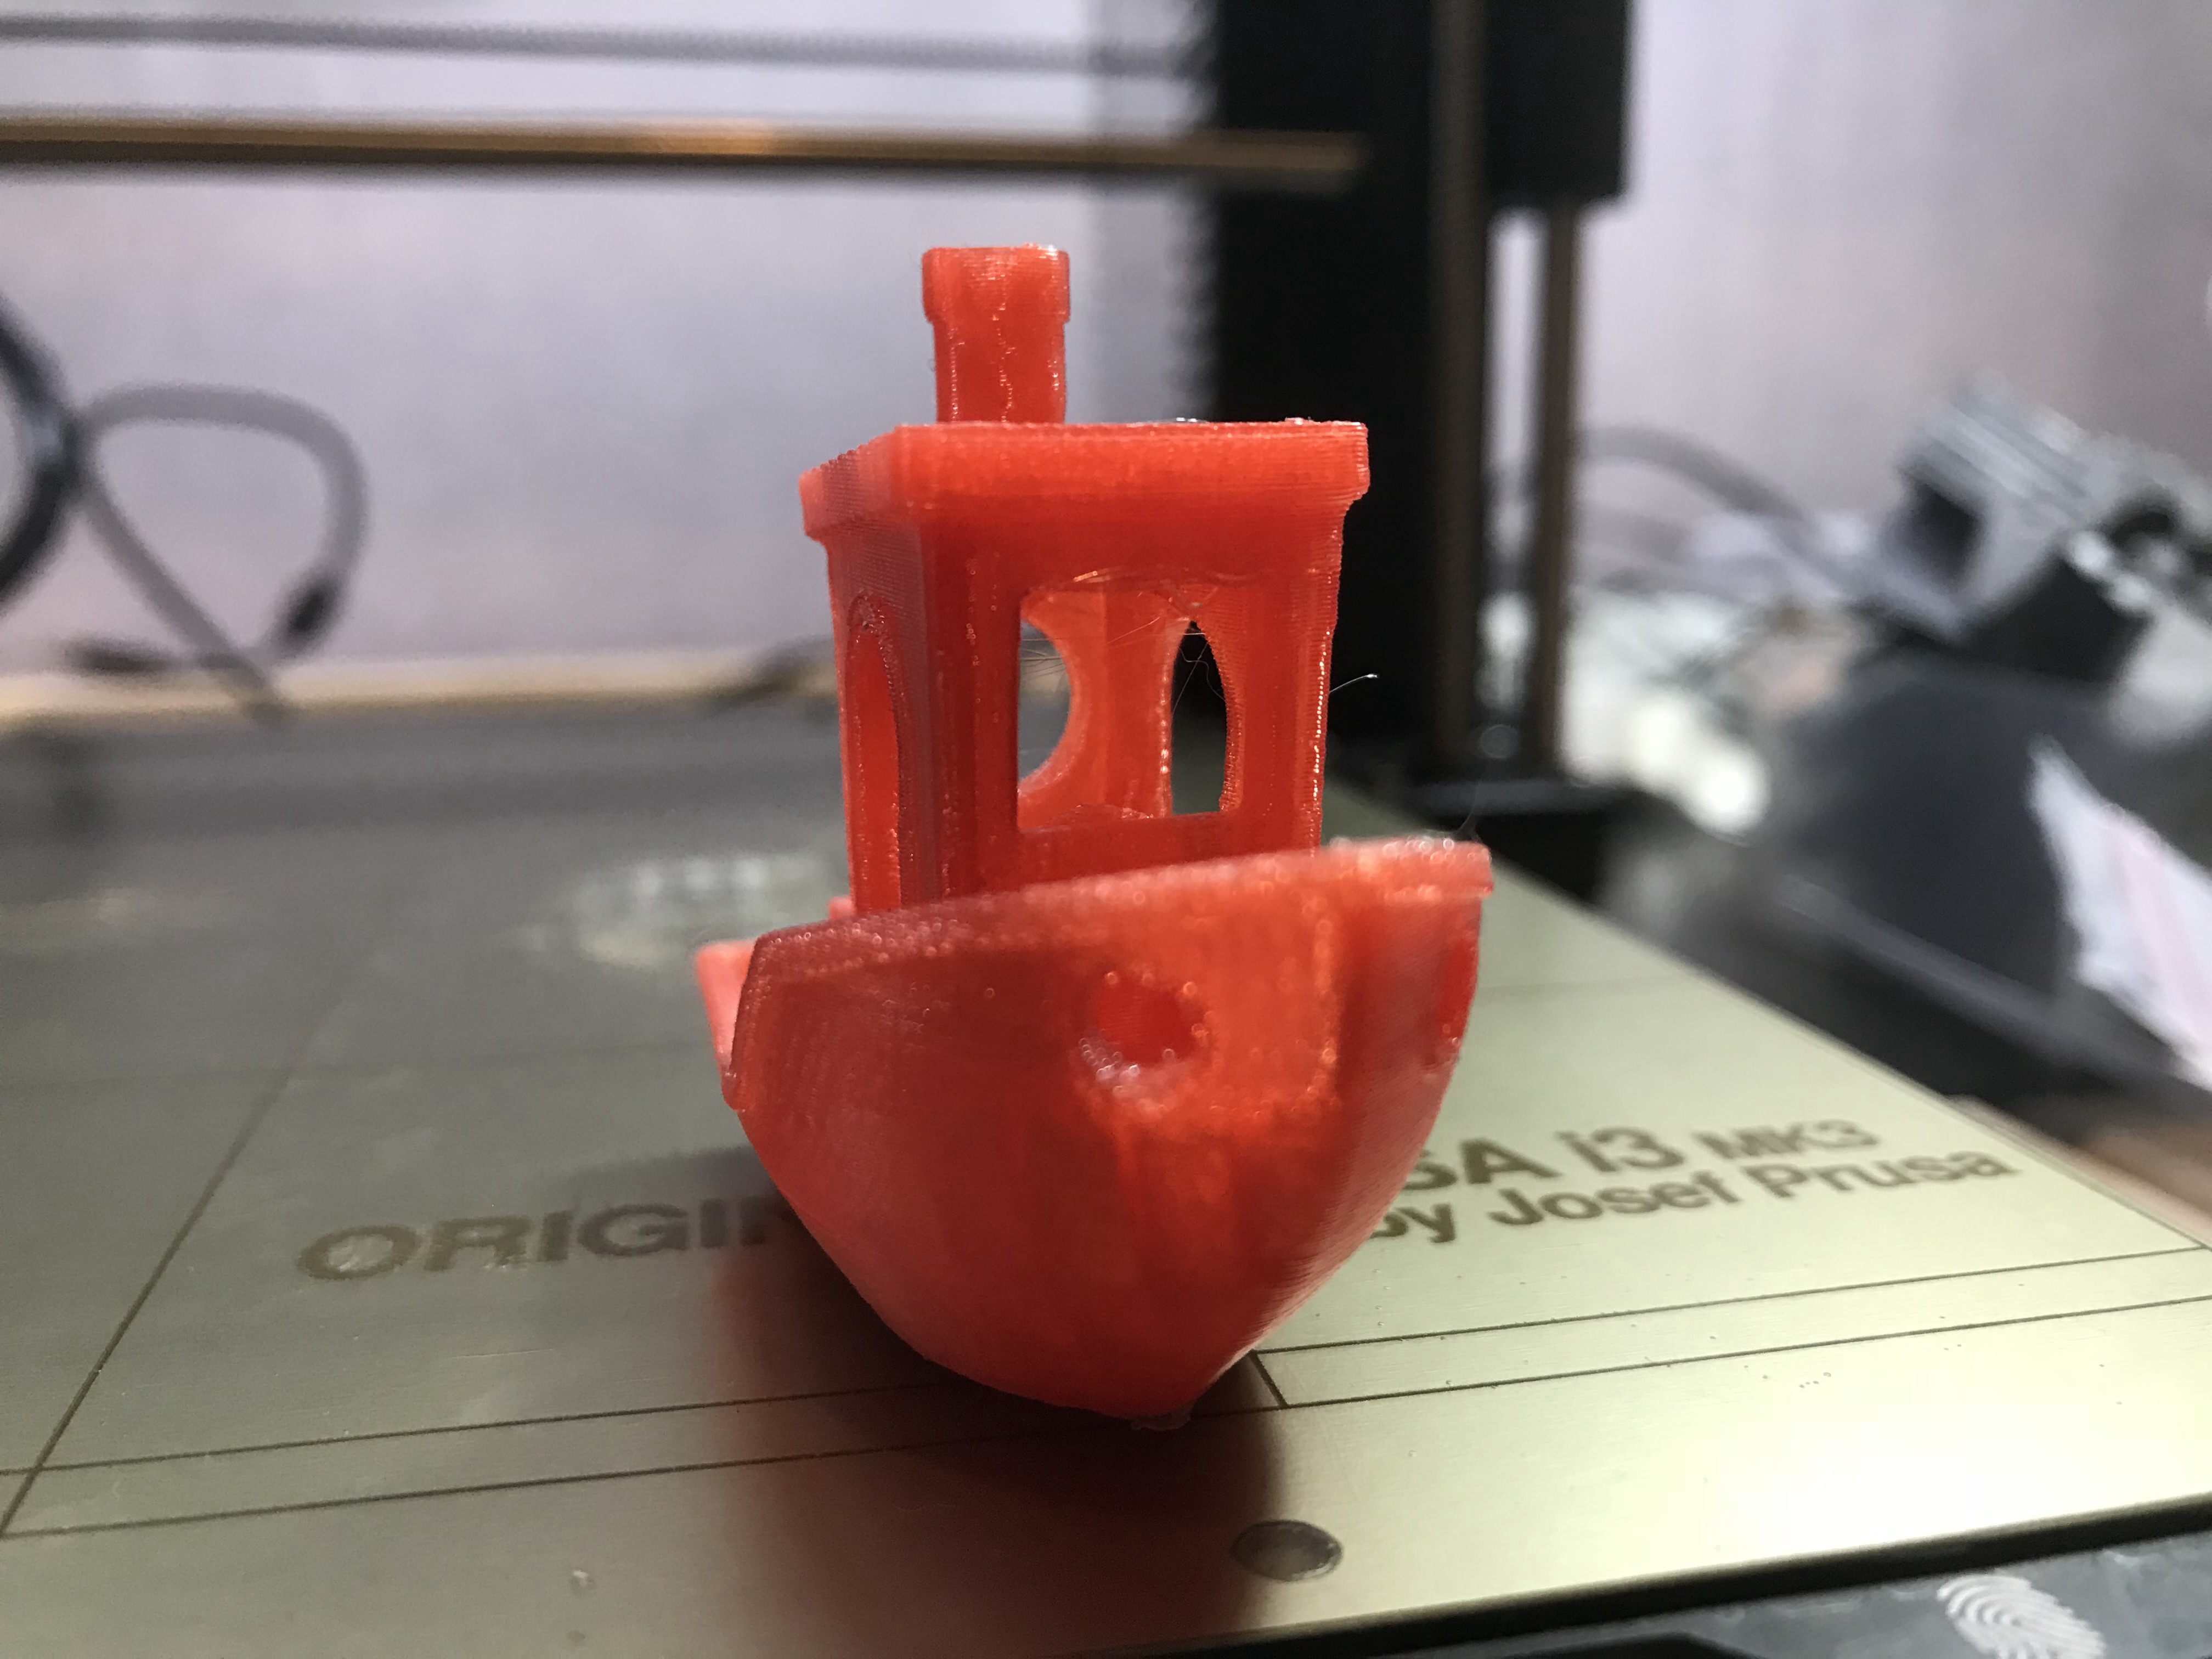
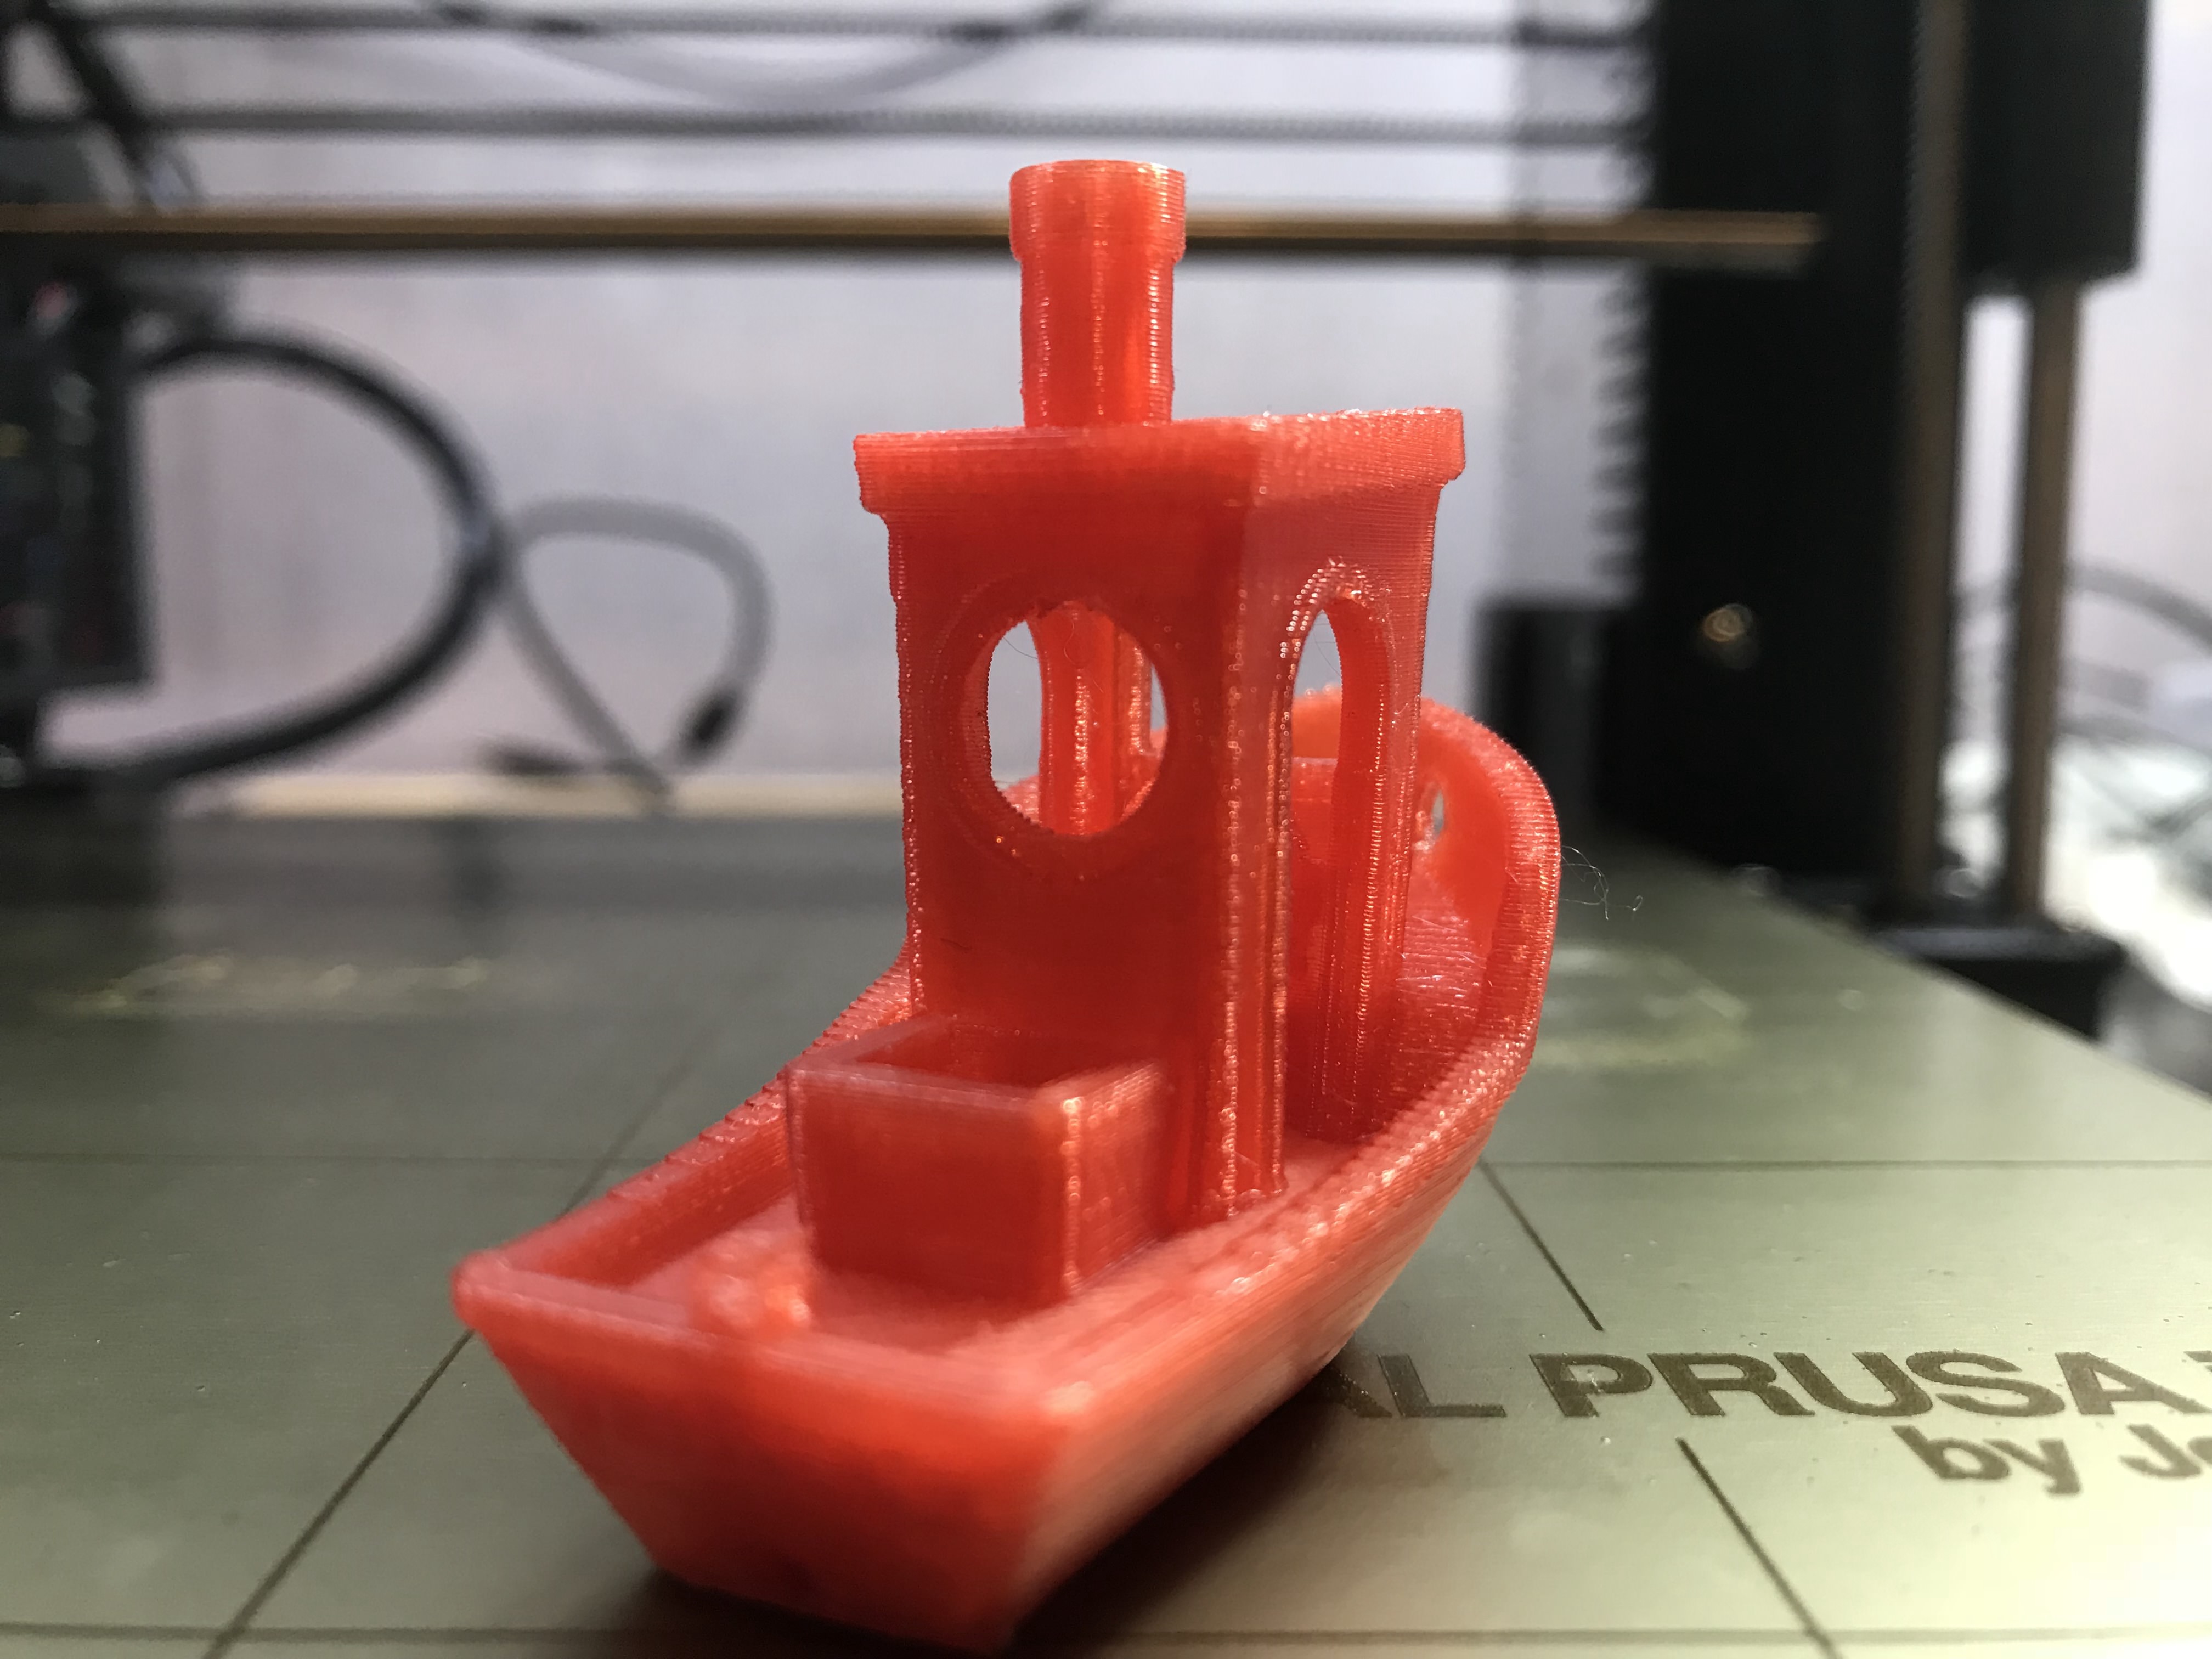
You're probably a bit skeptical, the title sounds to good too be true. But benchy don't lie:

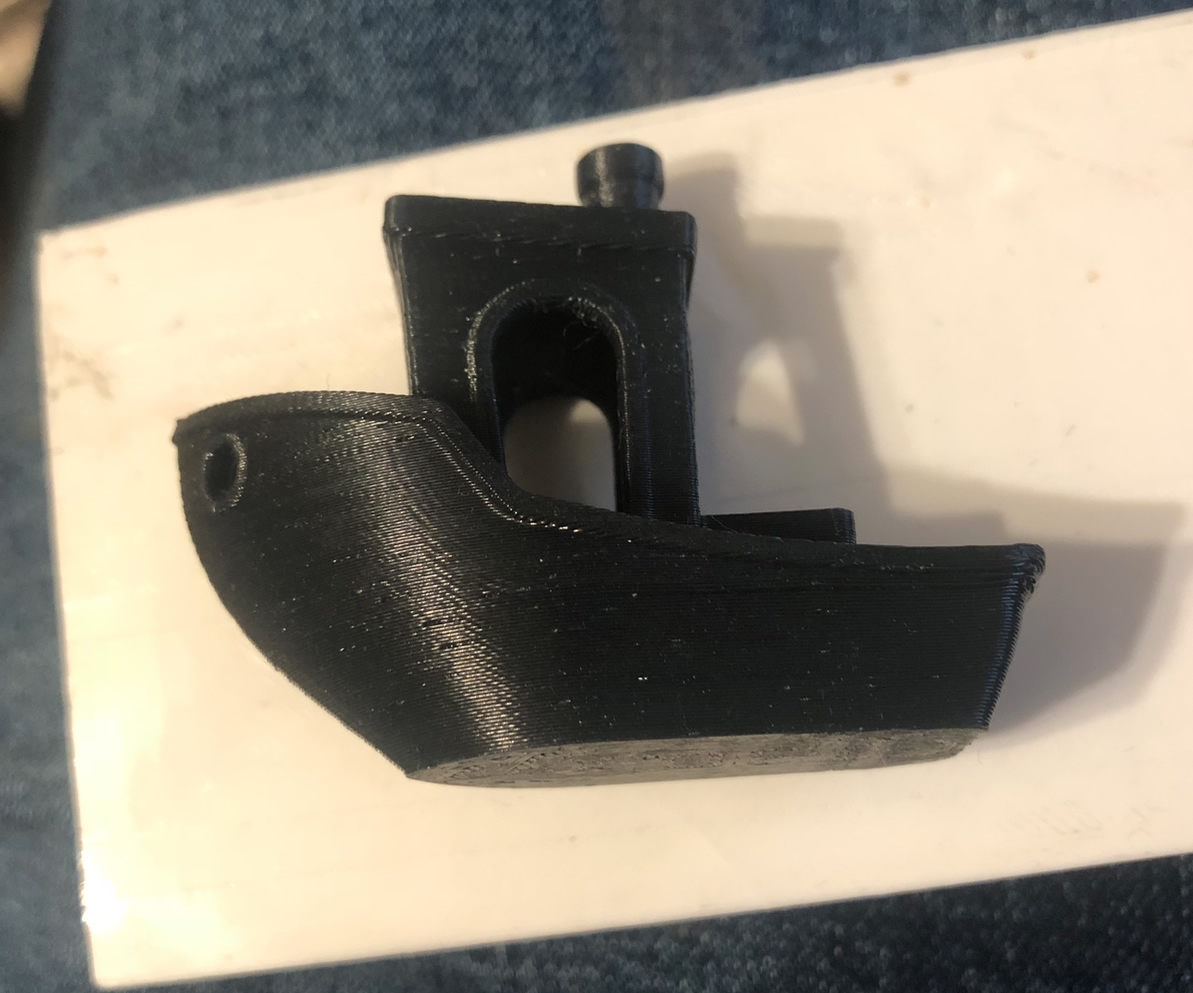
All of the parts in the attached photos were printed using the crappiest/cheapest polycarbonate filament I could find on a stock Prusa i3 Mk2s, the glue stick it came with, and some fairly unusual Slic3r settings.
If you aren't familiar with polycarbonate, it's what bullet proof glass is made out of. And it is notoriously difficult to print. To the point that the 'action shots' of eSun etc. shows, well, pretty crappy results in the 3D printed objects.
But I think that's because we're taking a fundamentally incorrect approach to printing PC. I'm getting excellent results. I see no reason to print ABS, PETG, or even nylon at this point - all polycarbonate, all the time. Er, I'm obviously more about practical prints that need strength, PC is not going to be a good replacement for PLA for aesthetic prints :).
I'm currently in the process of replacing all ABS parts on my printer with polycarbonate ones, now that I have a good printing process figured out. Let me tell you - aside from being comically strong (PC's nickname 'King of the Filaments' is well-earned), the dimensional accuracy is just killer. I remember having trouble getting a few nuts in their holes when assembling my Mk2s from a kit, the ABS tolerances just weren't that great. Nothing some percussive maintenance couldn't fix, but still.
Polycarbonate parts, at least when printed with these settings, seem to have a nearly perfect fit. I've printed round ball bearing holes, hex nut holes, and the entire extruder, x-axis carriage, x-axis ends, and every all fit perfectly together, and have a much better fit than even the original ABS parts. And, of course, they are flame retardant, rated to temperatures much higher than ABS, and have amazing strength combined with rigidity without brittleness.
And when I say comically strong, I mean I can't break that benchy in the photos. I'm sure I could snap the smoke stack on top off, but besides that, I am actually unable to break it. Using all my strength to try and torque or snap the cockpit off...nope. I can't even make it visibly flex. I try to deform it in any way, and the benchy simply says, "no." Even a weak point, the top corner of the rim about 1/3rd from the front of the boat, I can make that flex slightly when pressing on it with all my strength from the side, but that's it.
Now, this is a dramatic difference from my initial experience with PC. My initial experience was: severe warping, as in you just couldn't really print it at all without an enclosure. And absolutely terrible interlayer adhesion. What I did try to print delaminated and split apart several places, and I could pull each layer apart with my bare hands. It crumbled in my fist, essentially. Yet I was printing at the maximum temperature.
Well, temperature was ultimately the source of my other woes as well... warping, delamination, etc. So I decided to stop relying on temperature. Bonding of most polymers, but especially polycarbonate, depends on both temperature and pressure. The standard process in 3D printing is to rely mostly on temperature. Pressure is really only used (sometimes) for first layer bed adhesion, like how ABS likes to be mashed into the print bed surface a bit.
If you have pressure, you can achieve the same level of bonding at a lower temperature. So maybe polycarbonate would work better if there was some real pressure behind the layer deposition, hopefully reducing the sensitivity to temperature.
Well, it worked :D.
And I had to go outside what is even considered 'sane' settings. So, the downside to this is I've only managed to do it with one layer height - 0.200m. The good news is that it prints about as fast as 0.350mm (this was what I was trying to emulate). Not through crazy extrusion speeds, but through volumetric rate. Which brings me to the secret sauce.
0.200m layer height.... 0.75mm extrusion width. I wanted 0.8mm, at least a 4:1 aspect ratio, but after some trial and error, 3.75:1 is more reliable and just as strong. The cross sectional area of the extrusion is almost the same as the default 0.350mm default, so ultimately the same sized part takes similar amounts of time to print.
Anyway, such a large aspect ratio really makes the extruder have to IRON that filament down into the print to force a line that wide. It also gives a lot of thermal interface and lets the nozzle inject a fair bit more heat into the print, further improving things.
I did, however, retain the smaller width for external perimeters, so the ability to resolve detail isn't noticeably effected.
The only downside is this style of printing is less forgiving when it comes to your extrusion multiplier. Worse, I uh accidentally destroyed my hobbed gear at one point and the new one I'm using is not the same radius, so I am kind of guessing at what the extrusion multiplier should be for printers with the stock gear. So you may need to dial that in a bit for polycarbonate, but you can tell if it is too high or too low after just 2 layers (the extrusion lines should be well-melted together without gaps, but should also not be making 'bumps' of excess plastic that had no where to go and was forced upwards).
Also, this is a bit weird....but printing polycarbonate like this seems to have some capacity for 'warp recovery'. You may notice certain parts to warp, even severely, and definitely something you'd normally abort the print for. Don't. polycarbonate layers don't seem to 'compress' like ABS ones do, and if you just let the print follow through, it will eventually unwarp the warped bit and it will be in exactly the right spot. Even though you will see the extruder nozzle visibly forcing a warped dangly bit 5mm downwards over and over (I mean, really severe warping) amidprints. Resist the urge to stop the print - it'll probably be ok :).
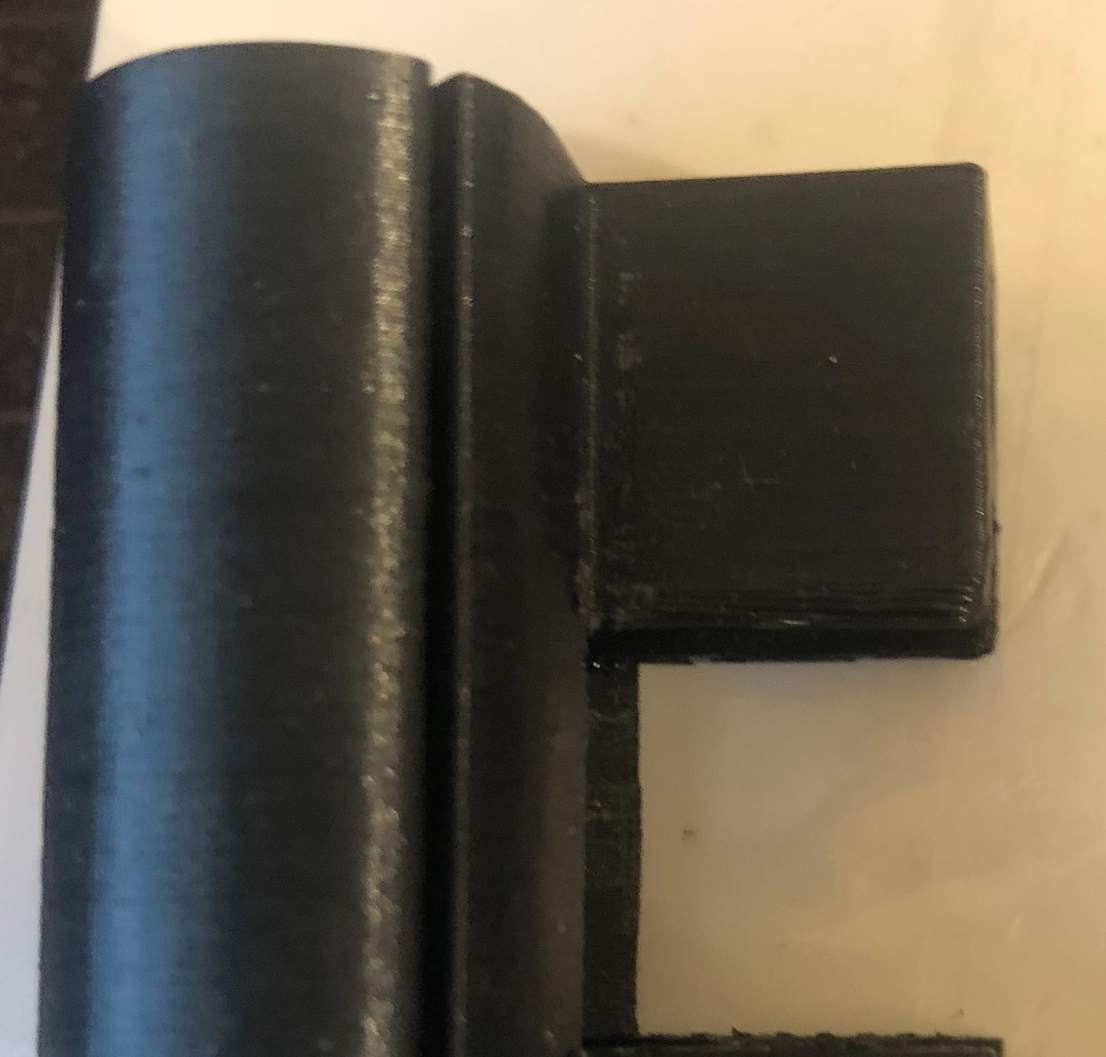
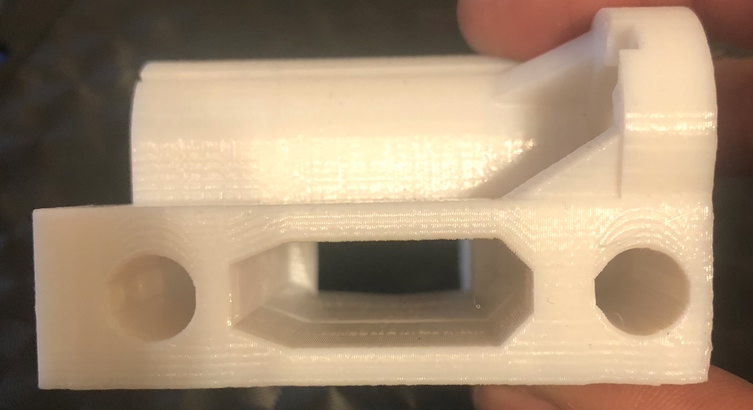
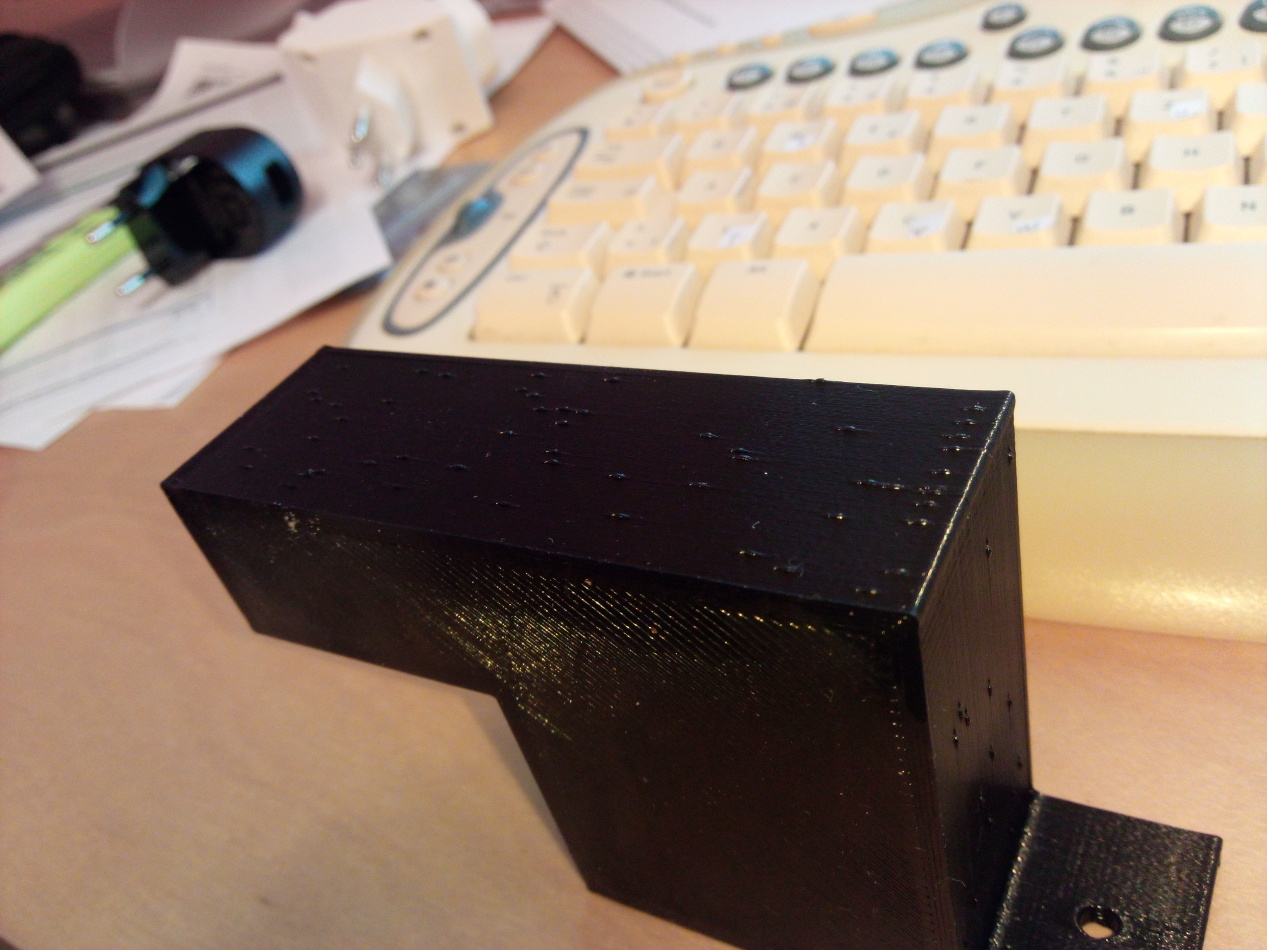
Case in point, this part needed supports due to the square cutout, and at one point, there were just two little long rectangles before they were bridged to complete the idler bearing cut out.
Well, those little rectangles warped so badly they ripped away from their own supports, and were very nearly curling up and were maybe a full centimeter above the layer being printed. But it was ok, because I sure can't even tell there was any warping in the finished print:
TLDR;
Anyway, I've attached the Slic3r settings to this post. Go nuts - I'd love to see if anyone is able to replicate these results, or even better makes improvements! Oh, linear advance is 100% mandatory, so make sure you are using the latest version of the firmware. Also, the K factor is higher than the default polycarbonate (PC-MAX) Slic3r setting. It's on purpose. You will see a lot of unusual things in these settings, most likely. Some of them I actually calculated (if you change the extrusion width, you'll need to adjust the bridge flow rate for example).
Oh, I almost forgot, bed adhesion. Just use a glue stick. Works a treat. In fact, it seems to work best if you let it dry a bit first, or apply it hot and wait a couple minutes. You generally do not need to reapply each print. The PVA layer, dry or not, seems to make polycarbonate stick on par with PETG to the print bed. No special glue nonsense needed :).
FInal note: I already tried this out of curiosity with ABS and PETG. They super don't like being printed this way. It seems to be fairly specific to polycarbonate.
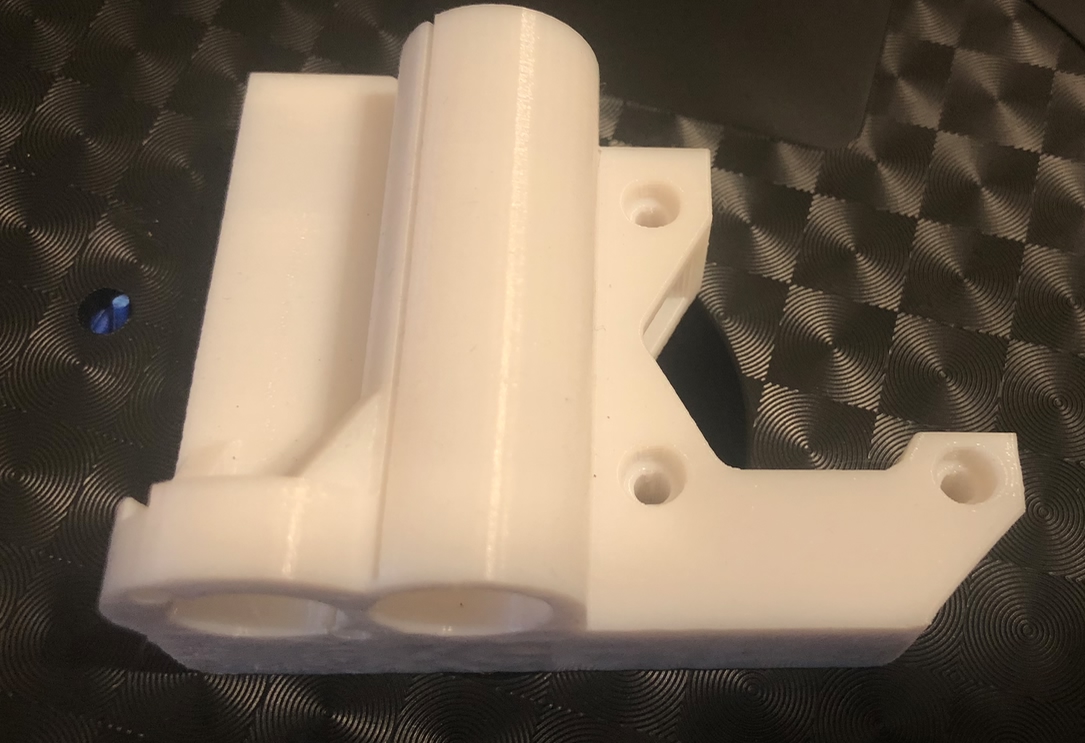
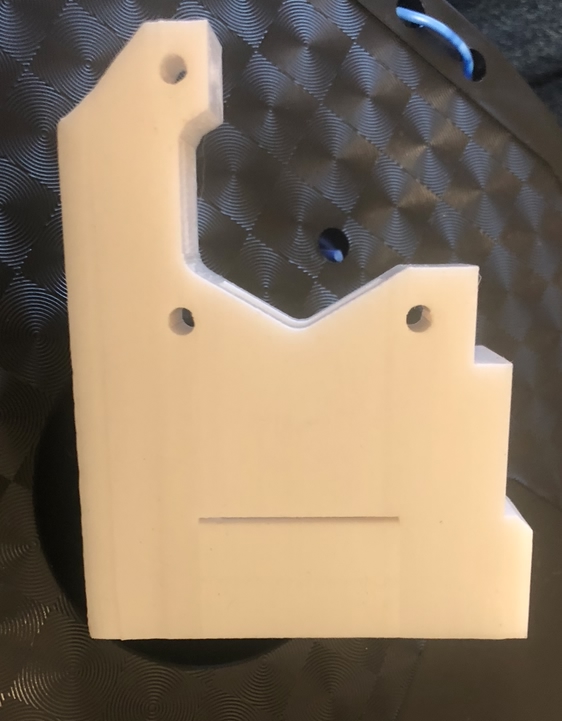
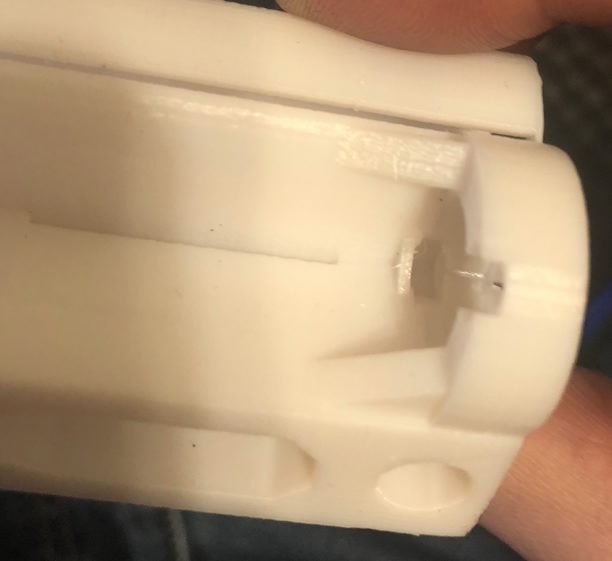
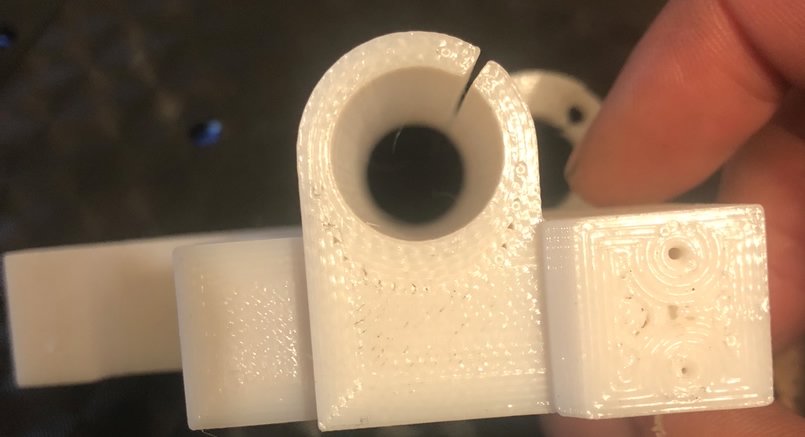
A few more pics, of the x-axis motor mount:
Re: Polycarbonate: Here's how to print it without warping, delamination, or an enclosure, with better-than-ABS results.
Hi!, which brand of polycarbonate filament did you use? 0.4 or 0.6 nozzle?
Thanks
Re: Polycarbonate: Here's how to print it without warping, delamination, or an enclosure, with better-than-ABS results.
I'm using a 0.4 nozzle, which should be set in the Slic3r settings as such I believe. I would imagine that with a 0.6 mm nozzle, you would have to use very wide extrusion widths to achieve the same pressure. Additionally, my Slic3r settings are already operating near the volumetric limit for the E3Dv6 hotend, if you up the speeds a bit more, you'll start missing steps on your extruder motor. So, there would be no real advantage I think to using a larger nozzle, at least not without something like a volcano.
I've tried both the Priline Polycarbonate filament (in the US, it's the cheapest available, it's around $28 for a kg spool on Amazon). I've also tried eSun's ePC. Given the maximum printing temperature of both of these is 260°C, they are probably polycarbonate with lower molecular mass. This lowers the melting point a bit but results in lower strength as well. I think Polymaker PC-Max is probably higher molecular mass so I have some of that on order to test at higher temperatures, so we'll see.
In terms of ease of printing/results/mechanical strength etc. (basically, all practical considerations), Priline is actually just as good as eSun's polycarbonate, which is great considering how much cheaper it is ($28 vs. $40 per kg). HOWEVER, Priline's color (white or black) leaves much to be desired. In fact, the black isn't even really black, it's closer to really dark pastel blue. It looks black, but if you shine a bright light on it, you'll see that it isn't quite black. The white is white... but eh.... it's not a bright white. It just seems weakly dyed.
the eSun PC, both black and white, looks absolutely terrific. It seriously looks like 'Apple white'. The black is this awesome almost matte black.
Also, it is recommended to keep PC filament sealed up and dry it in an oven before use. I haven't really done this, but I live in a very dry climate so YMMV.
Re: Polycarbonate: Here's how to print it without warping, delamination, or an enclosure, with better-than-ABS results.
Thanks for your very good explanation
Re: Polycarbonate: Here's how to print it without warping, delamination, or an enclosure, with better-than-ABS results.
D'oh, I should add one more thing: for those importing the Slic3r settings, you have to select new settings from all 3 pull-down menus. You want them to look like this:
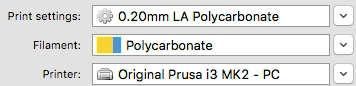
Print Settings: 0.20mm LA Polycarbonate
Filament: Polycarbonate
Printer: Original Prusa i3 MK2 - PC
Re: Polycarbonate: Here's how to print it without warping, delamination, or an enclosure, with better-than-ABS results.
Crap, apparently there is a time limit on editing posts... I would have liked to add this to the top but it's too late =/.
Latest version can always be found at this link:
https://gist.github.com/metacollin/18ecb0a58fb475cfae86e0781bf51325
Change log:
Dec. 07 2017
- Now using 0.9mm extrusion width for nearly a 5:1 aspect ratio
- Bridge flow and overlap changed to compensate
- Bed adhesion notes added
Re: Polycarbonate: Here's how to print it without warping, delamination, or an enclosure, with better-than-ABS results.
metacollin,
Dude! Awesome post - thank you so much.
Here is my experience/tests.
FILAMENT: PRILINE PC (with Carbon Fiber).
PRINTER: Prusa i3 Mk2 (some S) with MMU modifications.
- Intake funnel: https://www.thingiverse.com/thing:2718992
- 3 port duct: https://www.thingiverse.com/thing:2718093
BED PREPARATION: Cleaned PEI, then added Elmer's (Purple) Glue Stick (School Glue)
SLICER: 2.1.1 version of Slic3r (1.38.6)
Test 1: Used "Poly Maker PC Max" Slic3r setting, with everything else "normal" for a single print.
Result 1: Poor layer adhesion - messy - brittle. Yuck. I would have been very frustrated.
Test 2, 3: Used metacollin's Dec 7 .ini file. Needed to make modifications for MMU:
- Changed out the pre-gcode and post-gcode from MMU version (to prime the Bowden tubes correctly.)
- Changed the filament gcode to make K 200 (for MMU)
- Changed Retraction settings to be MMU friendly (4mm and faster).
Model 2, 3: Printed a Benchy and a PolyPearl Tower (x1.5) to test overhangs, bridging.
Observations: Prints look great. Not as good as PLA. Bridging is a bit less clean. Steep overhangs on BACK of printer (no port from duct) is noticeably rougher than the other three sides. Structurally very strong. Surface is not a nice as PLA, but it seems very strong and dimensionally accurate.
CONCLUSION 1: Basic PC settings in Slic3r are problematic. Metacollin's crazy extrude (which is fast by the way) works well and makes structurally strong prints from polycarbonate (PC) and they look fine too.
CONCLUSION 2: Might need to increase fan speed a LITTLE for bridging/overhangs. Small objects (top of PolyPearlTower and smoke stack of Benchy need to be slowed down. Metacollin's setting were good, but I might slow those down a bit more.
CONCLUSION 3: PC sticks well to PEI with Gluestick.
CONCLUSION 4: MMU machine is capable of printing PC - no effect of Bowden setup.
CONCLUSION 5: Carbon Fiber in this filament hurts surface finish - I think I want to try regular PC next.
CONCLUSION 6: Need to purchase some of that clear PC.
Any advices given are offered in good faith. It is your responsibility to ensure that by following my advice you do not suffer or cause injury, damage or loss. If you solve your problem, please post the solution…
Re: Polycarbonate: Here's how to print it without warping, delamination, or an enclosure, with better-than-ABS results.
Crap, apparently there is a time limit on editing posts... I would have liked to add this to the top but it's too late =/.
Latest version can always be found at this link:
https://gist.github.com/metacollin/18ecb0a58fb475cfae86e0781bf51325
Change log:
Dec. 07 2017
- Now using 0.9mm extrusion width for nearly a 5:1 aspect ratio
- Bridge flow and overlap changed to compensate
- Bed adhesion notes added
Just wanted to say thank you again. After printing the above tests, I have gotten some black PC (no carbon fiber) and have printed some structural parts. Your method works very well. Again, thank you for posting this here.
Any advices given are offered in good faith. It is your responsibility to ensure that by following my advice you do not suffer or cause injury, damage or loss. If you solve your problem, please post the solution…
Re: Polycarbonate: Here's how to print it without warping, delamination, or an enclosure, with better-than-ABS results.
Yesterday was my second day of real printing with my Mk3 after assembly, and I tackled PC thanks to your guide and settings. I was amazed to see how easy it was! No warping, perfect adhesion both to he bed and between the layers... Fantastic! Thank you so much for sharing!
I only noticed some small artifacts (little blobs) along the layers... Not a problem as I am not needing this part for the aesthetics, but I think it might either be that Linear Advance is disabled in my firmware or just a bit of overextrusion. What do you think?
Re: Polycarbonate: Here's how to print it without warping, delamination, or an enclosure, with better-than-ABS results.
Change your seam setting so they are all in the same place. Apart from that the print looks really good.
I am really looking forward to trying these settings. Thank you MetaCollin for taking the time to put them up for others to use.
Re: Polycarbonate: Here's how to print it without warping, delamination, or an enclosure, with better-than-ABS results.
Thank's for sharing your experience. I will try some PC as soon it arrives.
Cheers,
Markus
Re: Polycarbonate: Here's how to print it without warping, delamination, or an enclosure, with better-than-ABS results.
Yesterday was my second day of real printing with my Mk3 after assembly, and I tackled PC thanks to your guide and settings. I was amazed to see how easy it was! No warping, perfect adhesion both to he bed and between the layers... Fantastic! Thank you so much for sharing!
I only noticed some small artifacts (little blobs) along the layers... Not a problem as I am not needing this part for the aesthetics, but I think it might either be that Linear Advance is disabled in my firmware or just a bit of overextrusion. What do you think?
PC.jpg
Did you change any of metacollin's slic3r settings when you printed on the mk3?
Specifically the extrusion multiplier of 0.93.
Was it enough to use a glue stick on the PEI coated metal print sheet?
Re: Polycarbonate: Here's how to print it without warping, delamination, or an enclosure, with better-than-ABS results.
Did you change any of metacollin's slic3r settings when you printed on the mk3?
Specifically the extrusion multiplier of 0.93.
Was it enough to use a glue stick on the PEI coated metal print sheet?
Sorry that I only reply now, but for some reasons I can't subscribe to topics, so I didn't see your post. No I didn't change anything and I printed on pei+glue stick and it worked perfectly.
Re: Polycarbonate: Here's how to print it without warping, delamination, or an enclosure, with better-than-ABS results.
Don't worry. Better late than never.
I did too succeed but I had to raise the nozzle temperature to 275.
And lowered the overall speed to 62 %.
Benchy came out nice, but the chimney was not strong as there were some delamination there.
Probably didn't the a new layer bound to the previous.
Any suggestion on a remedy; even higher temperature or higher extrusion rate multiplier?
It is now at 0.93.
Re: Polycarbonate: Here's how to print it without warping, delamination, or an enclosure, with better-than-ABS results.
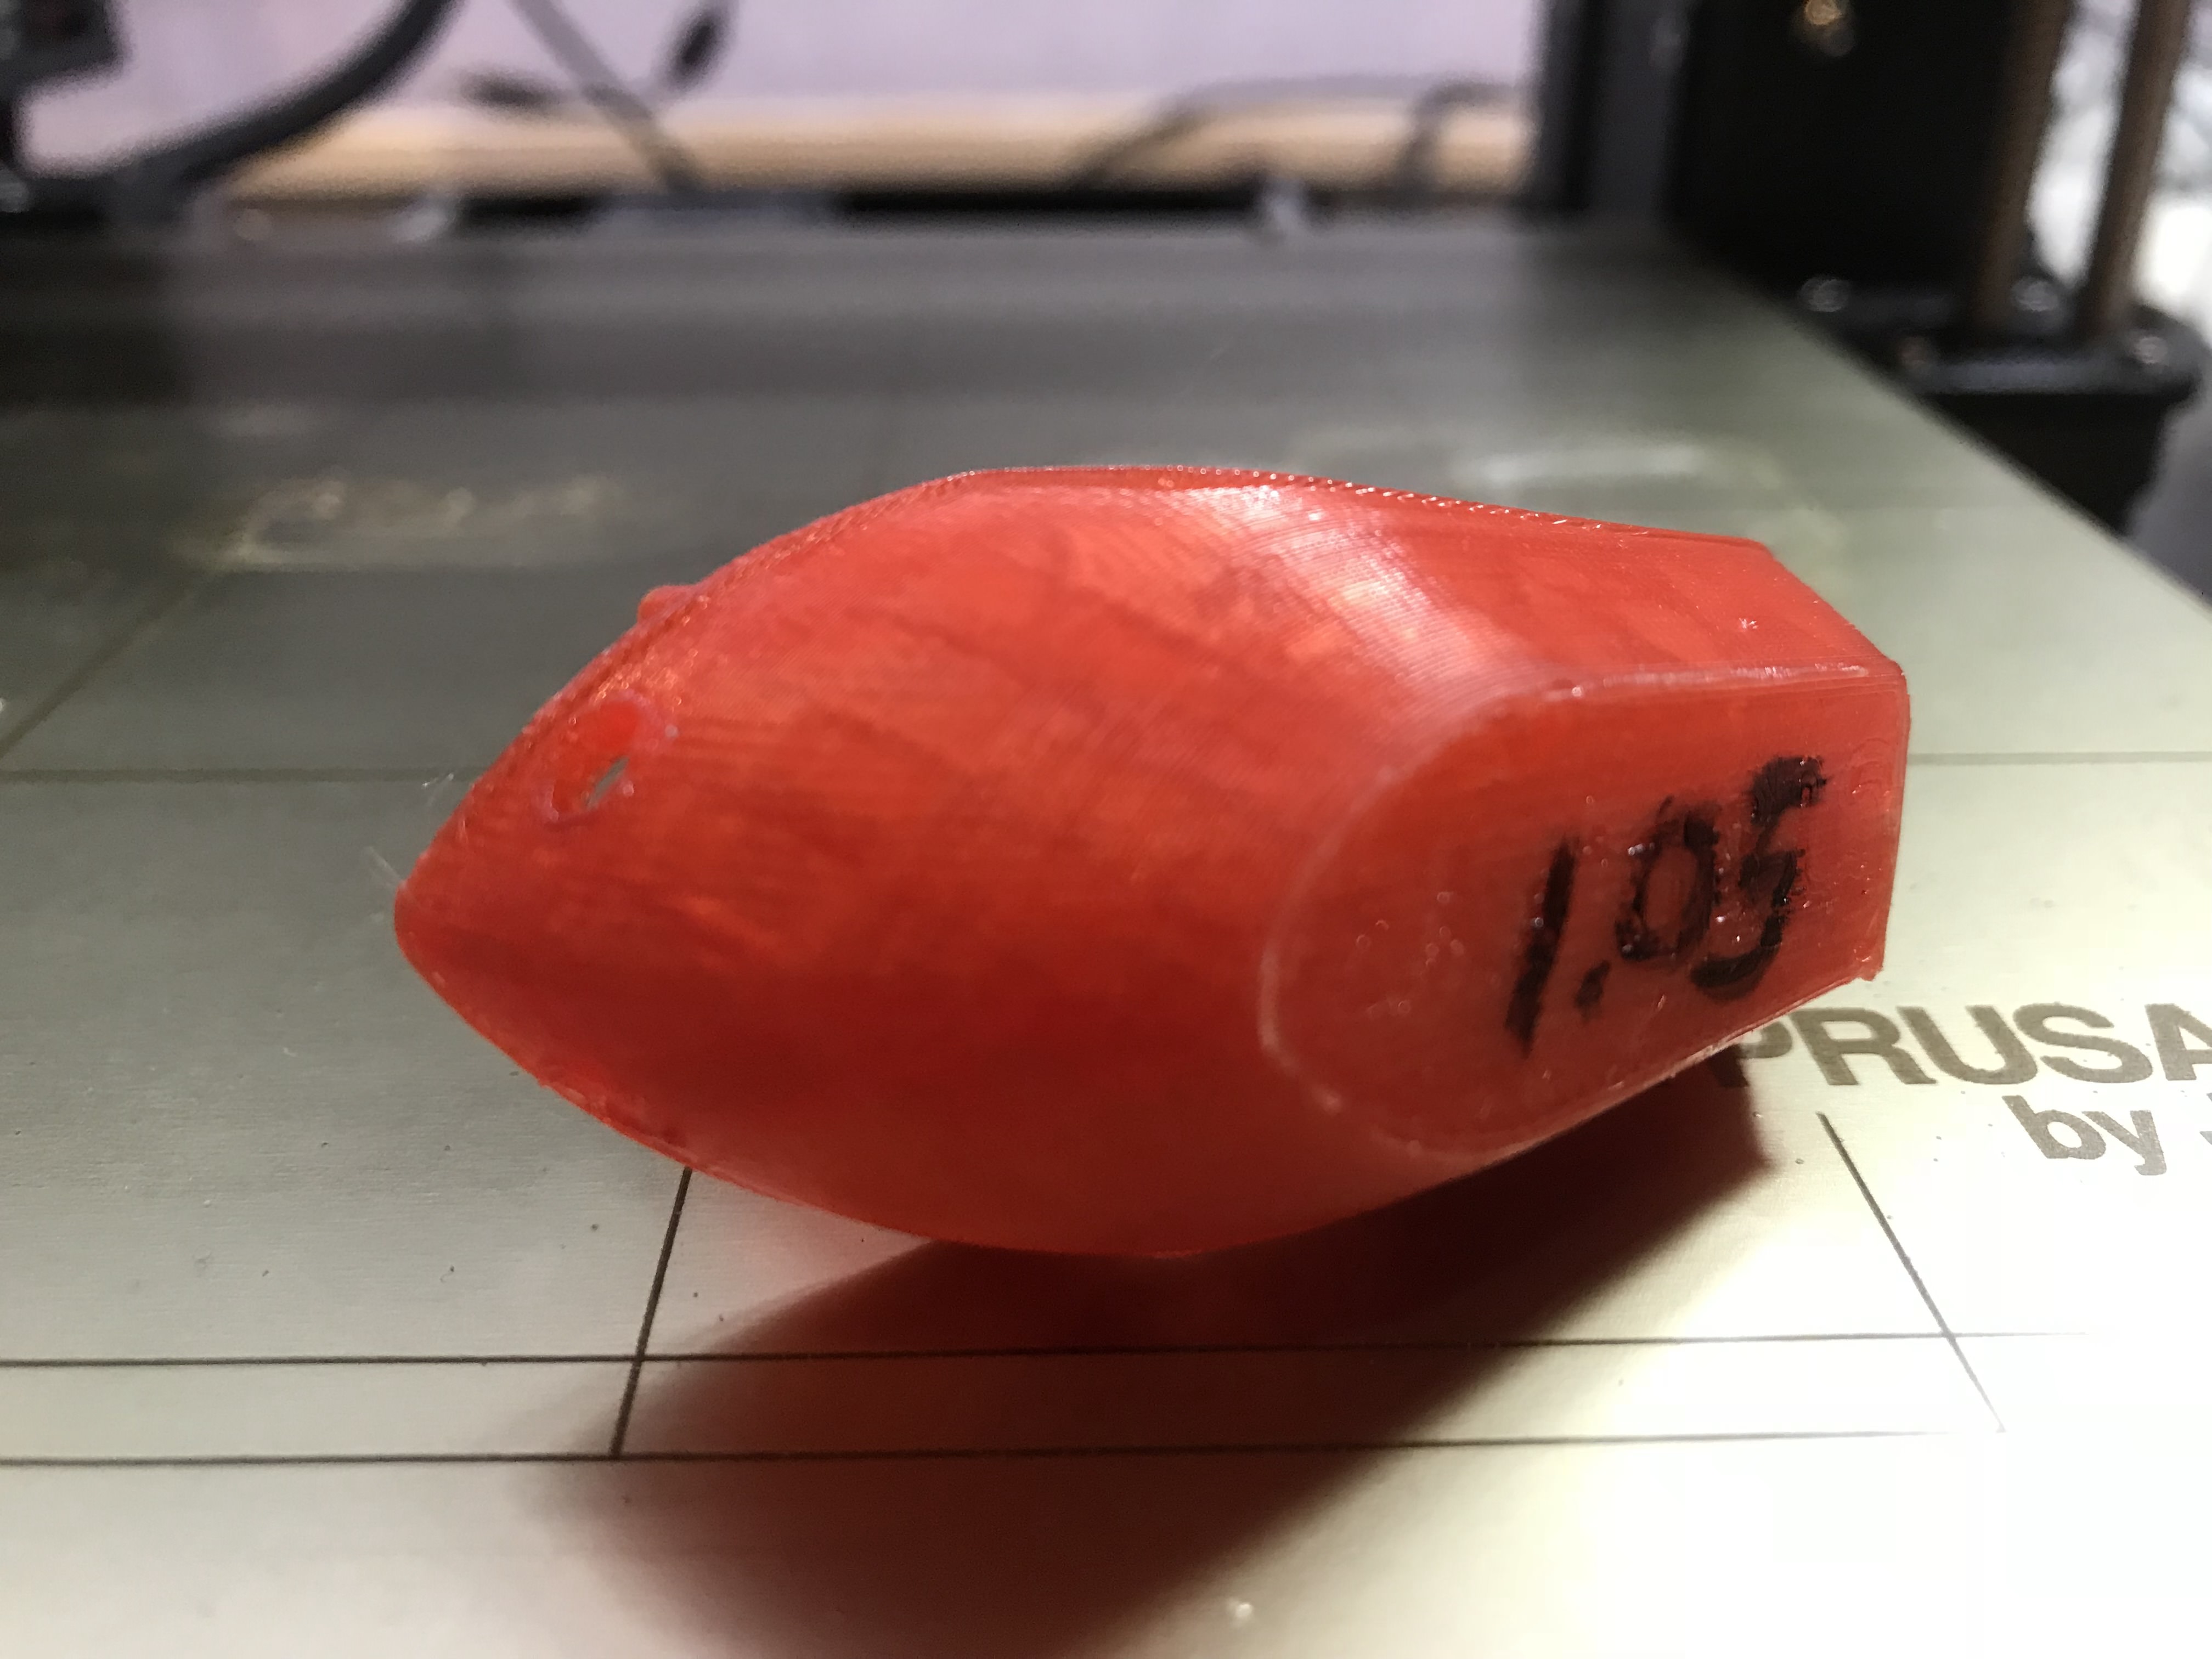
I took the standard Original Prusa i3 Mk3 as printer setting with 0,20 mm FAST Mk3 as print setting but with a brim of 5 mm
and the Polymaker PC-Max filament setting but with an Extrusion multiplier of 1.05 and
nozzle temperature of 275 degrees and 115 degrees bed temperature.
Glue stick on bed.
The filament was from Torwell.
I think Benchy came out really nice:
Re: Polycarbonate: Here's how to print it without warping, delamination, or an enclosure, with better-than-ABS results.
Just another thank you for the great guide. I have to order some PC and give it a try now. I need to print some black parts for my incoming Mk2.5 upgrade ...
Re: Polycarbonate: Here's how to print it without warping, delamination, or an enclosure, with better-than-ABS results.
Change your seam setting so they are all in the same place. Apart from that the print looks really good.
I am really looking forward to trying these settings. Thank you MetaCollin for taking the time to put them up for others to use.
Also, change your settings to print outer perimeter first and/or Avoid crossing Perimeters
Re: Polycarbonate: Here's how to print it without warping, delamination, or an enclosure, with better-than-ABS results.
Man, there's a lot of info on this but unfortunately, I'm a complete newb at 3D printing so hopefully I can form proper questions.
Scenario: I have the need to print a couple items that will be subjected to high temp, high gas pressure situations. How high, you ask? I'm not sure, not even a clue; but I'm certainly willing to try Polycarbonate as the material. Just last week, I received my first ever 3D printer, the Prusa i3 Mk3 and that will be what I want to print on.
I get a little confused because all the information out there suggests printing PC (yes, I'm slowly learning the lingo) is a pain and is problematic...except here. Here, on this thread, it appears to be easy, just use these settings and [possibly?] hardware?
So now that I've demonstrated my knowledge level, here are my questions:
Thanks in advance and sorry for the newb questions.
Re: Polycarbonate: Here's how to print it without warping, delamination, or an enclosure, with better-than-ABS results.
Scenario: I have the need to print a couple items that will be subjected to high temp, high gas pressure situations. How high, you ask? I'm not sure, not even a clue; but I'm certainly willing to try Polycarbonate as the material. Just last week, I received my first ever 3D printer, the Prusa i3 Mk3 and that will be what I want to print on.
Um, how high temperature and pressure? 3D printing really isn't suitable for this sort of thing, at least not the hobby-level variety. Small leaks are unavoidable, and I wouldn't trust a 3D printed part (even polycarbonate) for any kind of serious temperature and pressure.
Re: Polycarbonate: Here's how to print it without warping, delamination, or an enclosure, with better-than-ABS results.
mattb86 wrote: ↑
Tue Mar 27, 2018 5:36 pm
Scenario: I have the need to print a couple items that will be subjected to high temp, high gas pressure situations. How high, you ask? I'm not sure, not even a clue; but I'm certainly willing to try Polycarbonate as the material. Just last week, I received my first ever 3D printer, the Prusa i3 Mk3 and that will be what I want to print on.
Um, how high temperature and pressure? 3D printing really isn't suitable for this sort of thing, at least not the hobby-level variety. Small leaks are unavoidable, and I wouldn't trust a 3D printed part (even polycarbonate) for any kind of serious temperature and pressure.
I honestly don't know the precise values. I'm perfectly OK with my part blowing into pieces under the pressure. But I figure if you're going to print something and aim for pressurized gasses and high temps, probably best to use the strongest material out there.