Calibration in z
Hi,
I have a brand new Prusa i3 MK2S working at home. Neat thing, enjoying every moment with it. 🙂
But it seem to have a small problem with the z-calibration. The heatbed seem to be tilting a tiny amount in the horizontal plane. The first layer of printing looks perfect on the left side of the heatbed, but gradually get uglier towards the right side. I am pretty sure it is because the extruder gets closer to the heatbed on the left side. It is a really tiny difference, probably around 0.1 mm difference.
How can I make the printer "see" this difference? I mean, it has nine spots it is using for calibration.
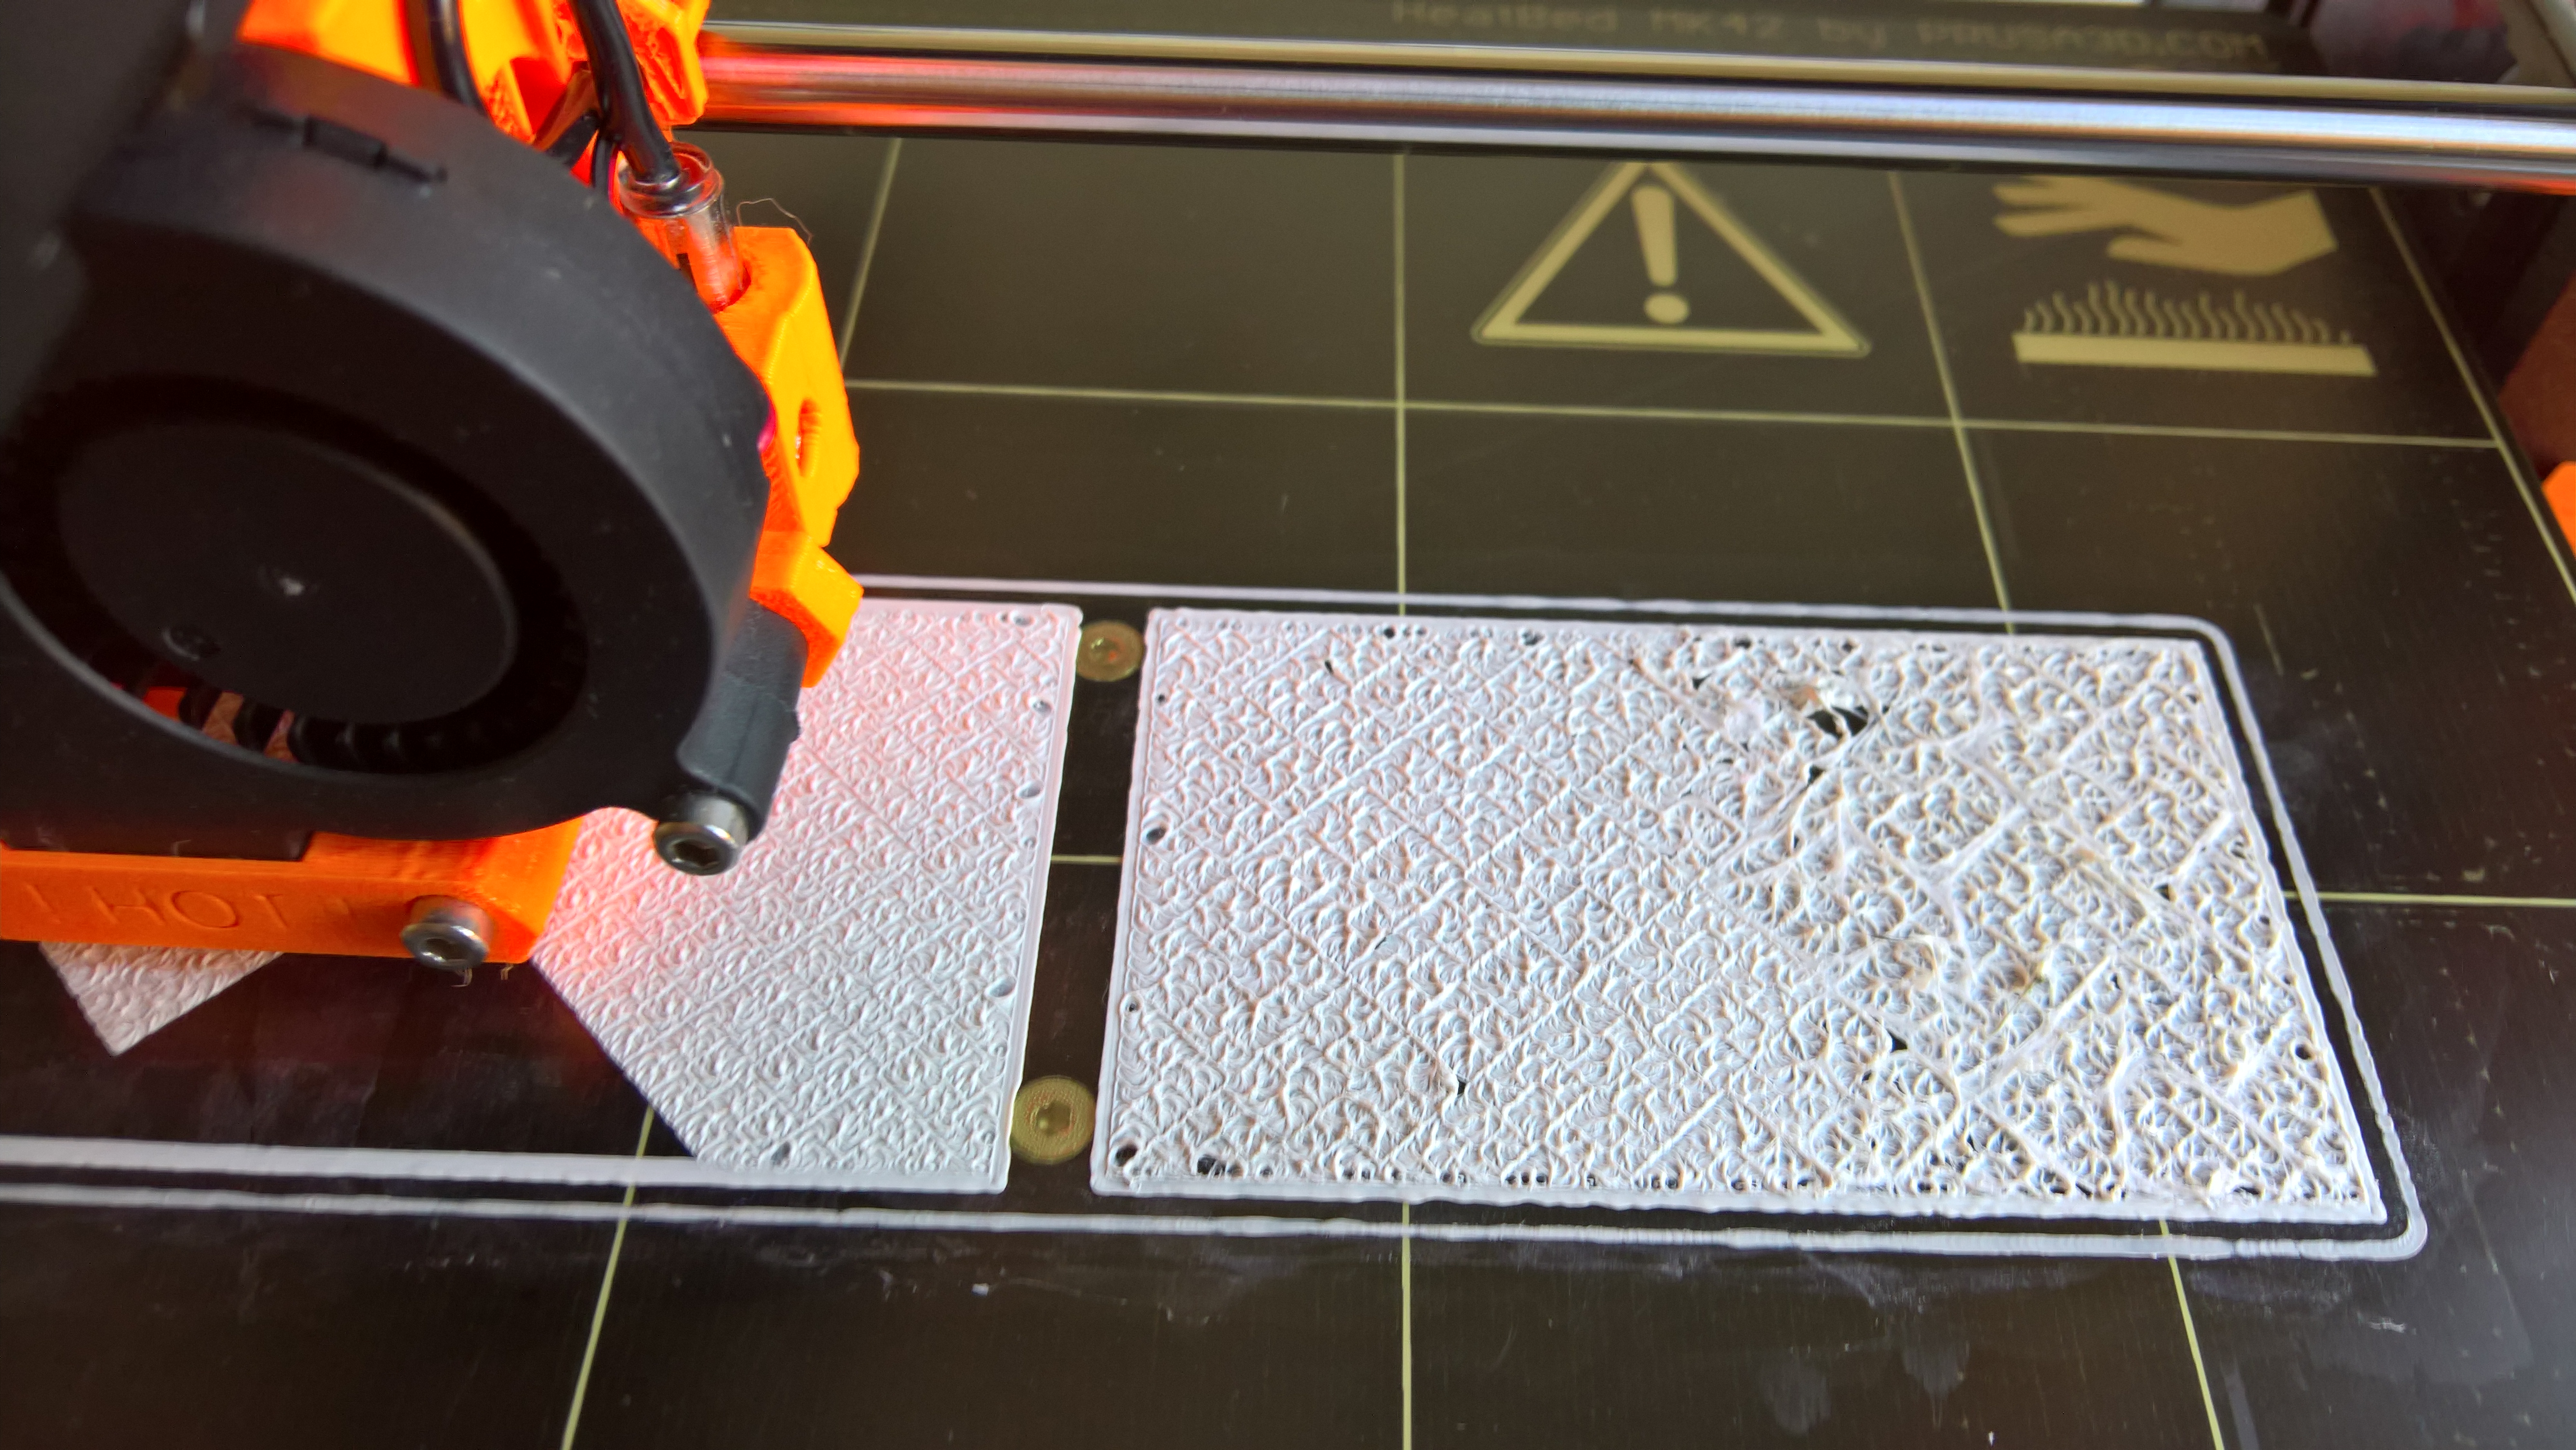
Please see the attached picture, you can clearly see the difference between the two cards I try to print. The card to the left are fine, while the card to the right gets really ugly. This first layer are set to be 0.2mm. I use the Hilbert Curve for the surface.
It seems the extruder gets really close to the heatbed on the right side.
Please advice, I have tried some of the options in the Calibration menu; the selftest, the Calibrate XYZ, the Calibrate Z, but no noticeable difference.
Re: Calibration in z
just looking at your print overall it looks like there may be an underlying problem. Your layer lines (even those from the outline it prints first) should be crisp and clear, yours are anything but. I could be wrong but from the poor quality of the lines that ARE going down, I'm thinking either your extruder temperature is too low, or your nozzle is too close to the bed.
Can you provide some details on material, temps and such that you are using?
Re: Calibration in z
Yep, here they are:
(Most are default)
Layer height: 0.1mm
First layer height 0.2mm
It's a 0.4 mm nozzle.
Filament
Diameter 1.75mm
Temperature
Extruder first layer 215, then 210
Bed first layer 55, then 45
Fan always on, auto cooling enabled, fan speed min 85, max 100%, fan disabled on first layer
Speed 60mm/s for perimeters, infill 100.
I am using colorfabb white (pla/pha) on the picture. I have not compared with another color, but white seem a bit more difficult sometimes.
On the roll with filament, it says 190/210C, HBP 50/60C, I guess it is recommended temperatures for nozzle and bed.
The difference of temperature from recommended can't really explain the differences on two sides of the board though.. Any idea?
Re: Calibration in z
Layer height 0.1mm and infill 100% !
What is it you want to print and why do you want to use these high values?
Bear MK3 with Bondtech extruder
Re: Calibration in z
I would recommend if you have not yet done so to print one of the test objects from the SD card using your white filiment.
If that test yields acceptable results, than you know the issue is with your slicing profile, or STL.
If that test yields bad results than you can focus your energy at either your filament and/or the machine itself.
Basically, using the process of elimination to narrow down where the issue could be.
Also worth nothing that you posted this in the MK3 forum instead of the MK2.
Re: Calibration in z
Thanks for all the tips.
No, it prints fine, I have printed several objects with no problem.
The problem is the first layer. Please look at the image to see the difference between the left and the right rectangle. The left side are _really_ messy, while the right side are fine.
Thank's for pointing it out Brian, I will re-post it on the MK2-board.
Re: Calibration in z
These steps fixed my problem:
1. I moved the sensor up a tiny amount by twisting it a quarter.
2. I did a reset, a re-calibration and finally a 'bed level correction'.
3. A tiny amount of manual z-calibration. (live adjust z)
Now the printing are much more even, nothing like the pictures on my first post.
Thank's again for tips and help!