Prusa + Box
Dears,
I have an idea to cover printer with acrilic box, transparent one. Approximate size 50x55x60, why 60 is because filament will be incide 😉 . Special door will be from front side of the box.
Reason:
1. Noise
2. Hot in the room
3. Dust protection
Question:
Is it OK to cover printer with closed box?
Is there additional ventilation required?
Rambo may be overhited or it is not possible in any temp?
Thank you very much for your ideas 😉
Re: Prusa + Box
Hi Yury,
You may want to look at some of the Ikea hacks as they are nice looking and less expensive. I built one with the Stuva frame, Sindvik glass door, and Besta soft closing hinges. I also added LED lighting to it. Just a suggestion.
As for temps, I wouldn't worry too much about the bed and the hot end as they will regulate their temps. However I have been concerned about the power supply and Rambo main board overheating. I intend to move the power supply outside of the box, attached to the back. I've noticed for other printer designs with a separate power supply attached only by wire to the printer, folks tend to run them outside as well.
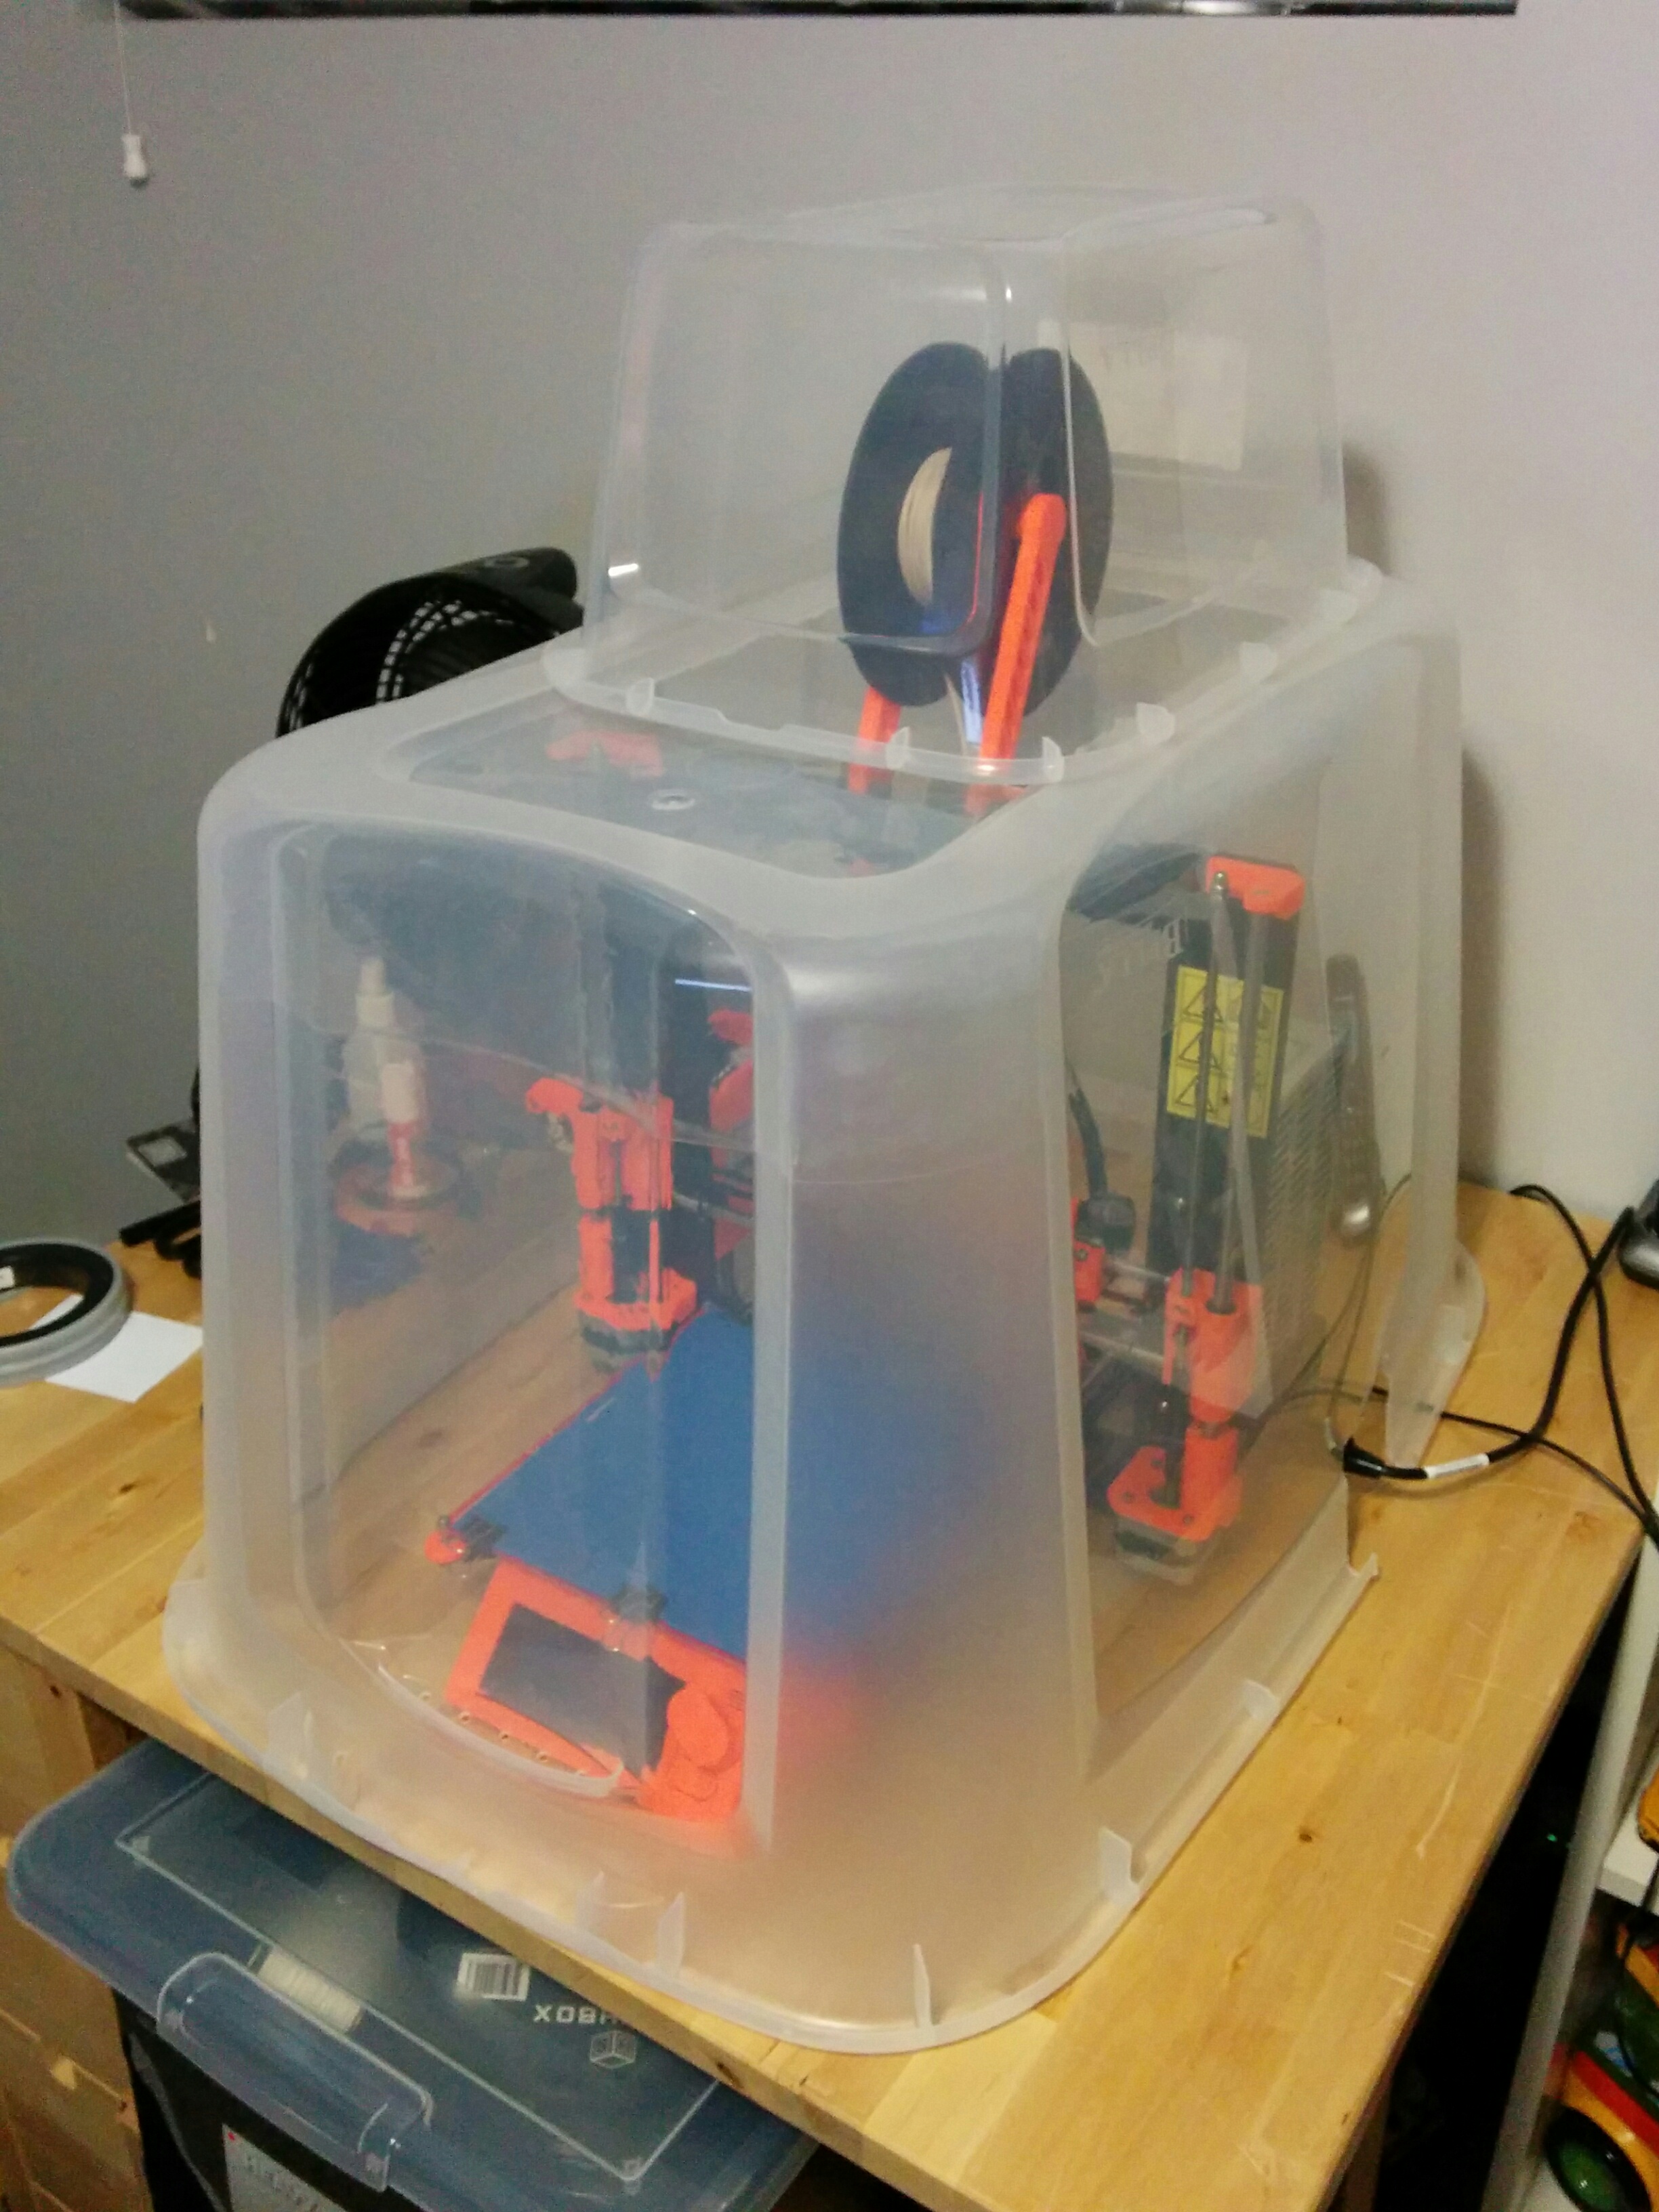
I have done quite a bit of printing with my cheap print enclosure (plastic tote) and haven't noticed anything too serious. The power supply definitely gets warm but not uncomfortably so based on touching the external housing. Not sure about the Rambo board. These print jobs were anywhere from 20 minutes to the longest being 37 hours.
If anyone knows for sure, I too would love an answer. I am not sure if in my new enclosure I should add fans and a temp monitor to control ambient temps.
Re: Prusa + Box
I've just started to look into this as well. The information is quite confusing and varies from person to person!
It seems to all be about keeping a stable temperature within the box, some use permanent vents, some fans, others nothing at all and make it sealed, some are even heated. Also what types of filament you will be using (Eg. PLA or ABS).
From what I can gather it all depends on the room temperature where the printer will be working and taking into account differences between summer and winter.
There are many things you could use to build it with from all wood, a plastic storage box turned upside down, re-purposed cabinets (even tables), Slotted Aluminium Extrusion Struts and acrylic sheets, etc. Bare in mind that if you are using acetone or ABS Juice, that this can melt some plastics.
I think the best idea is to do lots of reading on the net and then make a building plan. I usually search in Google for RepRap 3D Printer enclosure as RepRaps are fairly similar to the Prusa. You can always post your plans on her and I'm sure people will chip in with ideas... 🙂
At the moment I am thinking of following this guide for a simple cheap one: http://www.instructables.com/id/Enclosure-for-3d-printer-using-Ikea-box/?ALLSTEPS

Search instructables for Enclosure for 3d printer for other ideas...
Re: Prusa + Box
I love the picture 3Delight. In another thread I actually posted a picture of my enclosure on the cheap, which is exactly that. Plastic totes. It works really well for ABS. Though not as nice looking as my slightly more expensive Ikea cabinet. 😉 This is the guide I went with http://makerhacks.com/ikea-3dprinter-enclosure/ . I will take some pictures of the Ikea enclosure.
Now that is nice Willy! Are those the IKEA SAMLA boxes? If so can I ask what size one's you bought? That looks pretty much what I want to do! 😀
Re: Prusa + Box
Hi 3Delight. They are actually BELLA brand totes. I picked them up at Lowe's (Canada). I did some measurements and then spent hours finding one that would fit. They were the only ones that I found would fit. The bottom one is a 114.5 L or 121 qt. The top one is 37.8 L or 40 qt. The larger one measures 30.1 inches deep, 23.6 inches high, and 20.1 inches wide. They are nice as well because you can pop off the wheels and latching handles.
I placed the larger tote over the printer and marked my holes with a straight edge. I then used a cutting wheel (low RPM) and a Dremel tool to cut a square opening in the top for the spool holder. I also cut a square opening on the side for the power cable and power switch. I can take some more pictures of the setup. The top hole is big enough that if I turn the top tote sideways, I can slide it to create and adjust a ventilation gap if required. I hope that helps.
Re: Prusa + Box
Thanks for the info Willy, I'm now looking around locally to try to find some clear storage boxes the right size (IKEA charge a redunkulous amount of money for delivery - a £10 box + £35 for delivery?!)...
The Ikea cabinet idea looks good as well...
Re: Prusa + Box
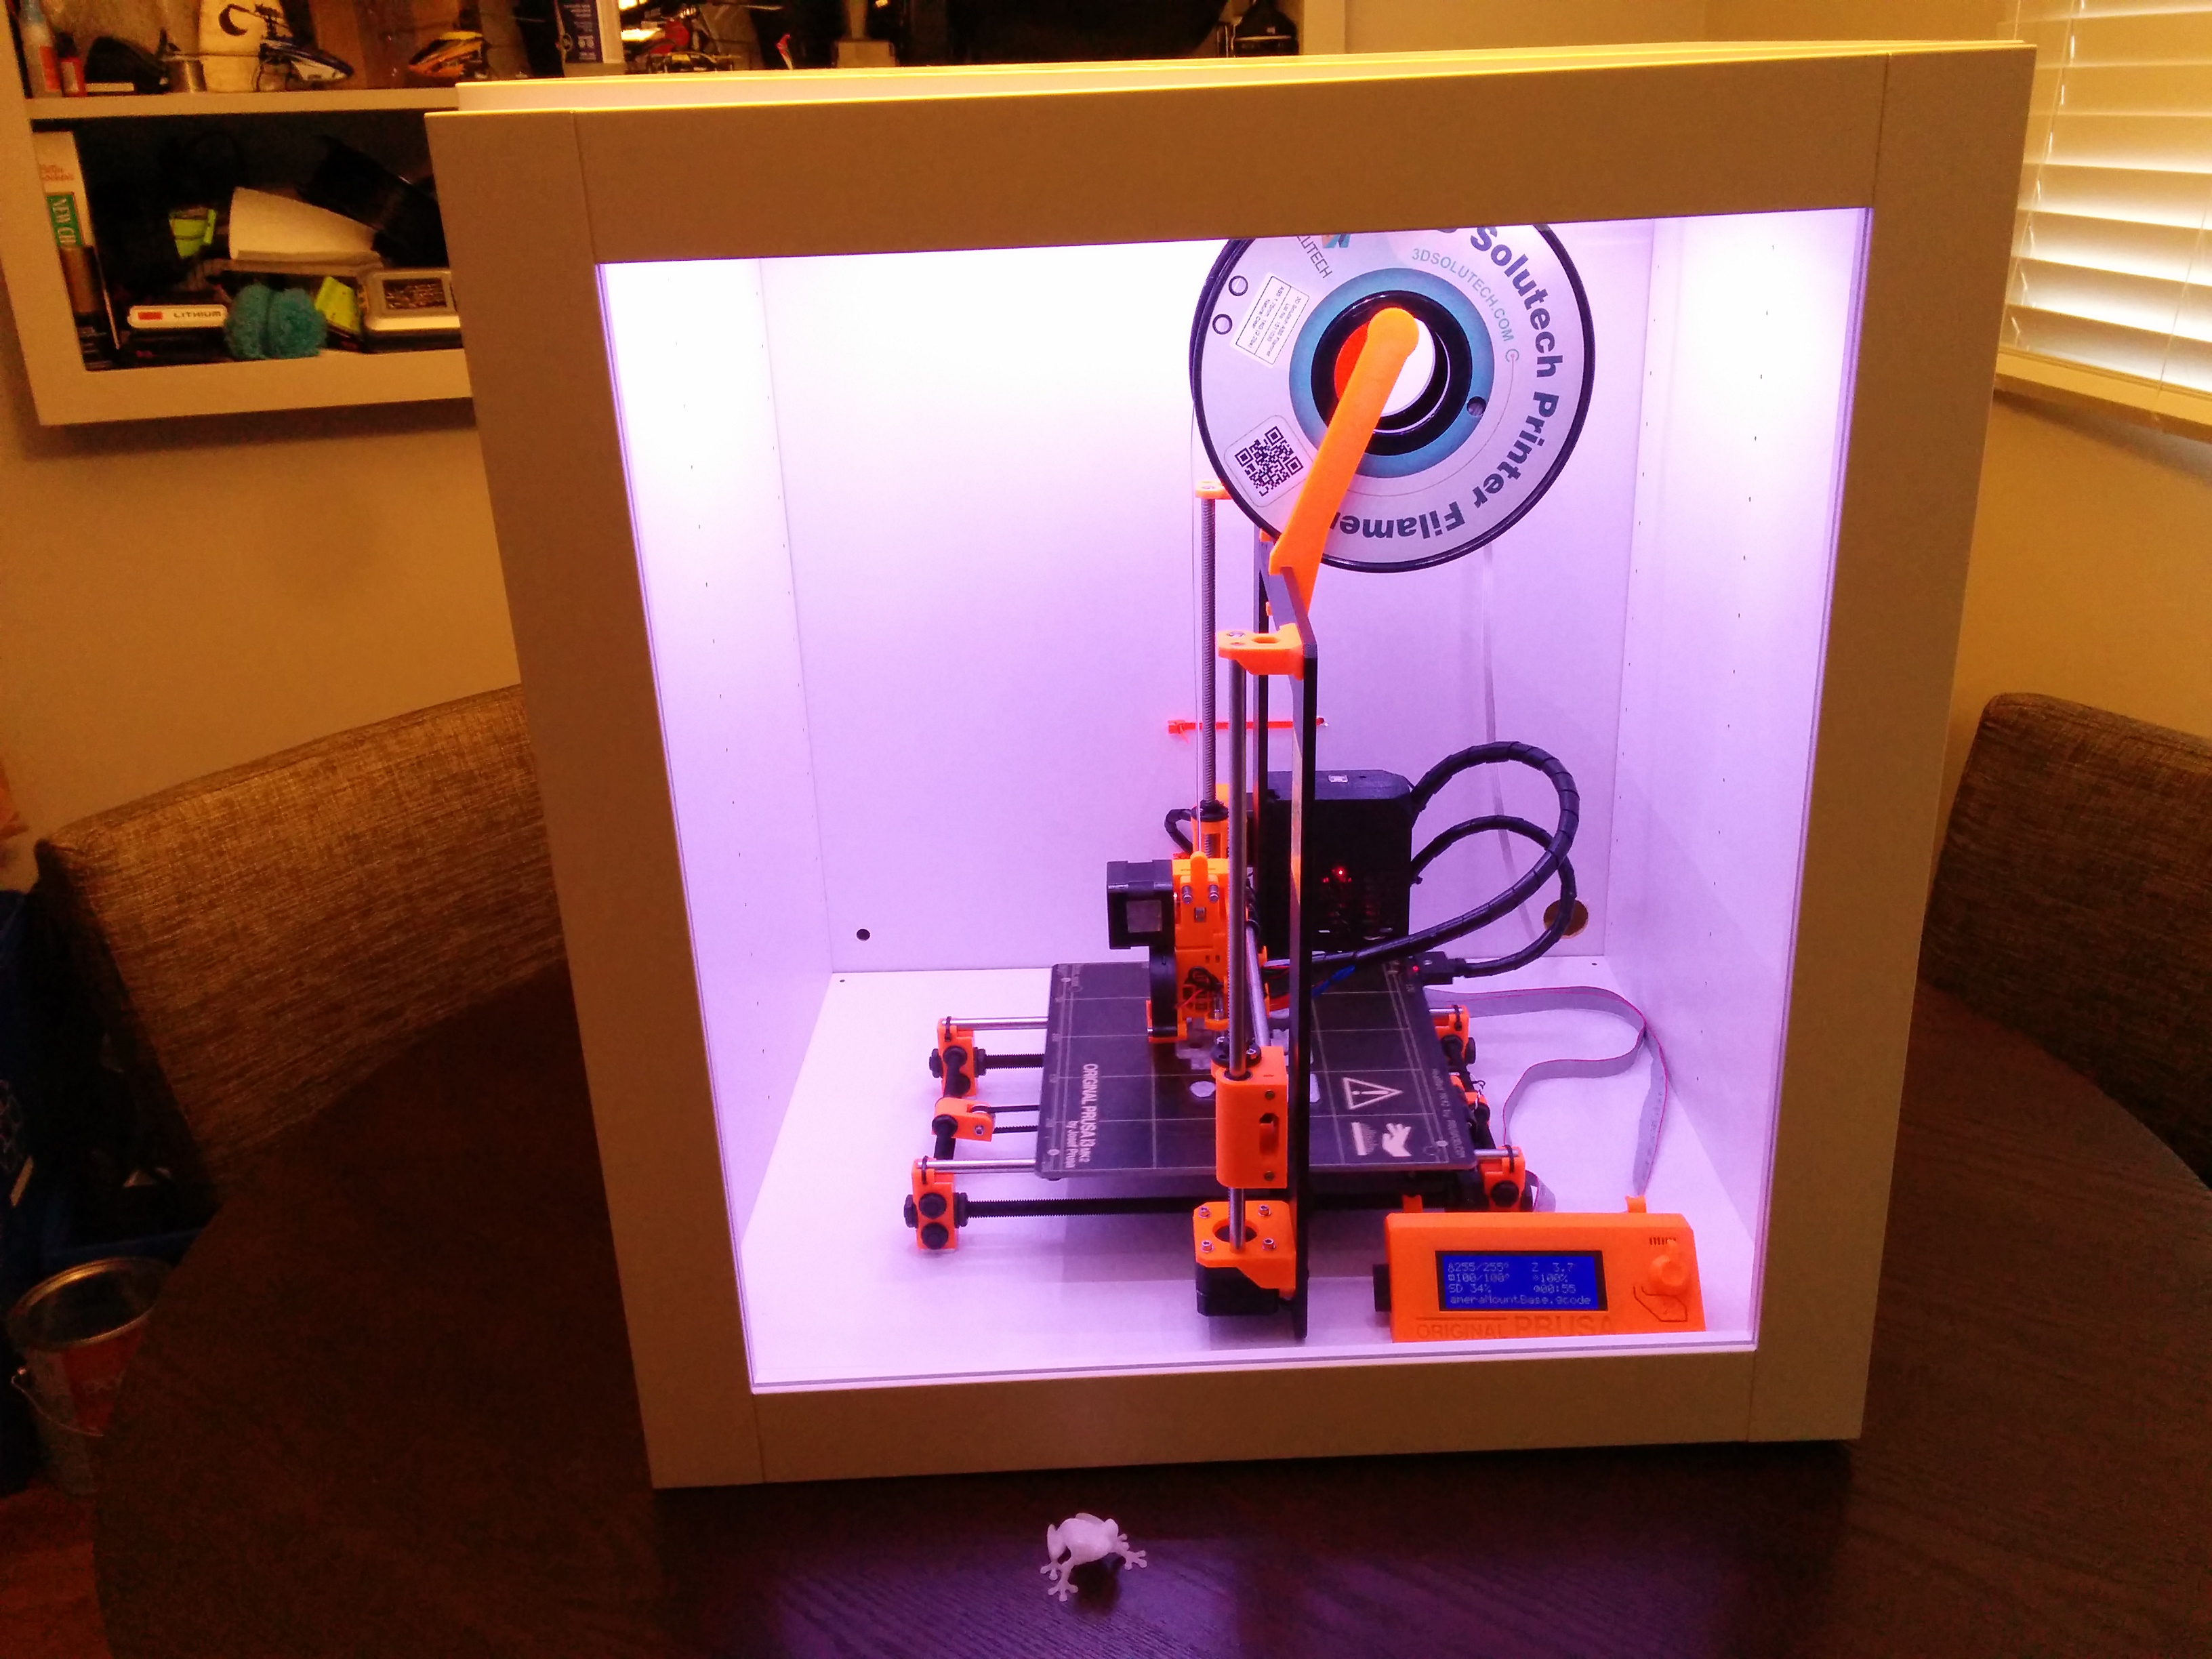
Finally finished my Mk2 upgrade and sorted out my Ikea enclosure. Here is a quick clip of it in action. Sorry in advance for the potato quality. I want to add a fan and some kind of temp control. I've moved the power supply to the back. It has RGB LEDs for that extra bling.
Re: Prusa + Box
Looks great Willy!
Re: Prusa + Box
Here are some pics that are a little clearer. I used quick release zip ties to hold the power supply, the lip of the shelf helps secure it as well. It allows me to remove it quickly if needed. I have to clean up the cabling a bit. Mount my Raspberry Pi and camera. I've also ordered a 12v PWM thermal fan controller to control the ambient temps. Like Yury, I'm still trying to find a definitive answer on temps.
Once I'm done I will post a build log with part numbers and links. The Original Prusa I3 Plus fit facing forward towards the glass door. However even with the LCD panel removed from the front, the new bed power connector makes the whole thing to big to fit that way. Which is why it now sits sideways in the enclosure.

Re: Prusa + Box
Wow. I am also very interested in building an enclosure for the printer. Much appreciated if you could share any extra details about yours, or where you found a guide, or anything. I like a lot the idea of putting the power source outside the box.
Also interested about the Rambo higher temperature effect, or even the motors higher temperature, if anyone can share their experience.
Thank you!
Re: Prusa + Box
Luis.r2, earlier this week I bought the following ikea parts, some are as listed by the article Willywidget linked to:
BESTÅ frame 60x40x64 cm white 302.458.50 bought the wrong one: this isn't the right part, its depth is insufficient, look at the Stuva 60x50x64 cm 301.281.77 instead. Guess I'll be driving back tomorow.
SINDVIK glass door 60x64 cm white 902.918.58
BESTÅ hinges 802.612.58
+ some optional stuff (door knobs, foam feet)
While there I also decided to buy a Samla box (39x28x28 cm/22 l 801.029.76) and lid (501.102.99) for filament storage. Throw the spools in there along with some bags of silica gel so the spools stay dry. That should prevent the filament from getting brittle.
I'm patiently waiting for my i3 mk2 to arrive before I'm assembling the case.
Re: Prusa + Box
I just cam across this 'Thing' on Thingiverse and thought it looked really stylish!
The link for it is here: http://www.thingiverse.com/thing:1685857
The IKEA Lack tables used are 55cmx55cm which are wide and deep enough, however the height is only 45cm which means the spool has to go outside. However it could easily sit on top and feed through the whole as shown. There are lots of printable spoolholders out there to use. If requited some sort of extra box could always be made to go on top to cover the spool.
I think the black and orange goes really well together just like on the Prusa printer, while the white sides prevent it from look gloomy and dull...
Lack tables are less than £10 each dependent on colour chosen, plus if you use 1 acrylic sheet for the door that's about £10 and corrugated plastic sheet is about £20 for 5 so that's £30, plus some screws... So the whole thing would cost no more than about £50!
So for the 3 most popular methods we are looking at maximums of about:
Each has it's advantages and disadvantages.
Re: Prusa + Box
Ah Lack tables, is there anything they can't do? NASA should blast some to Mars for a future mission.
If you invert a 22l samla box you could cover the spool, with room to spare. Throw in some silica gel bags to keep the filament in a dry environment as well.
For the stuva cabinet: do note the door wasn't designed for a stuva cabinet (though all the necessary holes are there in the cabinet) and its weight kinda "warps" the construction. This can be mitigated by putting something under the door so its weight doesn't rest on the hinges.
I've assembled my cabinet, the mk2 will be delivered Monday:


The raspberry pi camera (for Octoprint) isn't permanently affixed yet. There's a good chance I can use a shorter flex cable, which should produce a cleaner result. Do note: a raspberry pi camera is focused to infinity by default. You need to remove some adhesive from the lens assembly to be able to adjust that focus. It's a modification you do want to perform for a sharp image when observing through Octoprint. Otherwise items will be out of focus and appear quite blurry.
The USB flexlight can be turned off and on by unbinding the USB port (if anybody wants to do something similar, let me know and I'll send you the bash script I wrote)
Re: Prusa + Box
Looking good JohnnyricoMC!
The only thing I don't like with these cabinets is that the printer has to go in sideways, I prefer to have the printer facing forwards.
For those with enclosures who are concerned about the fumes I came across this on Thingiverse today: http://www.thingiverse.com/thing:1686959
It's an Active fume Exhaust for 3D printers. Just a few printed parts and some bits'n'bobs that some may have lying around and your all safe and sound!
Re: Prusa + Box
This is still a work in progress (need to figure out door + lighting + a few other wiring issues), but I'm using a Pax shelf. It's actually holding 2 printers, and the rest of the space will hold my other 3d printing supplies.
Obviously the sliding drawer allows me to pull the printer out and work on it, and I can push it back and the soft close closes it nicely.
I also prefer to hang my filament in a certain way, on ball bearings... protected from the elements.
Caveat: Prusa's stated dimensions for the I3 are NOT accurate, at least not if you intend to actually power the printer. The power plug juts out the right side effectively increasing the width by about 2 inches unless you use a low profile right angle plug like I did. It would be smarter if the I3 used the dead space more intelligently because there is a lot of dead space that just isn't used properly.
Re: Prusa + Box
Now that idea I'm liking gz1. A PAX single width wardrobe with door, one sliding shelf for the printer a vouple of fixed shelfs for filament, nozzles, tools etc... Keeps it all in one place and tidy. Stuff some Silica Gel pouches in there or a mini dehumidifier and Bob's your uncle! Bit more expensive than the other methods but very practicle and requires virtually no hacking! 😀
So the possibilities are:
SAMLA Boxes = £20 <-- Cheap and cheerful
Stuva Cabinet = £50 <-- Good, but printer sideways
Lake Tables = £50 <-- Nice, but lots of assembly required
Pax wardrobe = £180 <--Very nice but expensive
Food for thought...
Re: Prusa + Box
The components are available individually
$80 PAX, $40 door, 3x $20 sliding trays = $180, or about round up to 140£.
However, this has space for 3 printers. 140/3 = 46£ per printer.
I don't like their doors though; none have clear windows.
Re: Prusa + Box
I've looked at the idea of using Aluminium Extrusion T-Slot as well so now have a list of options like this:
Decisions, decisions!
Re: Prusa + Box
I've looked at the idea of using Aluminium Extrusion T-Slot as well so now have a list of options like this:
Decisions, decisions!