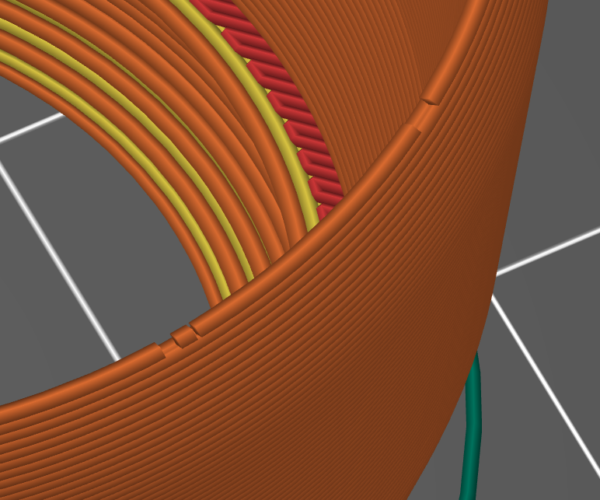
Strange artifact with TPU
Hi,
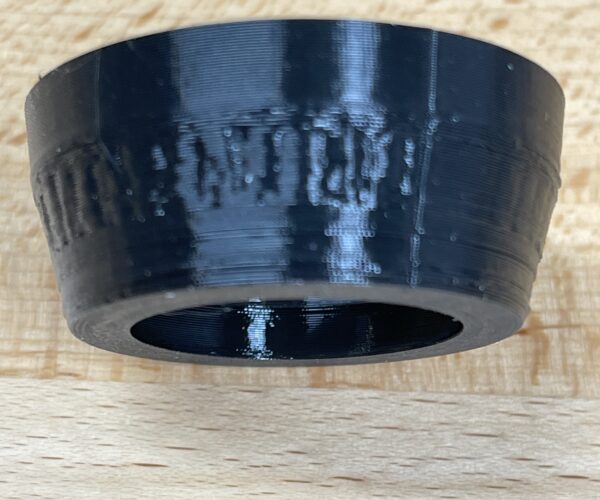
Here's another learning opportunity for me. I'm getting strange artifacts (what looks like hieroglyphs) trying to print this model I designed (Overture TPU).
I printed some copies a couple of weeks ago and they were smooth. The only thing (I think) that's different, this time I'm printing directly out of a dry box. But I can't explain why that would cause such a pattern. Just to test it, I'm printing right now without the dry box.
Here's the .3mf
Formerly known on this forum as @fuchsr -- https://foxrun3d.com/
I should add that I actually printed 9 copies simultaneously. All had the same artifacts.
Formerly known on this forum as @fuchsr -- https://foxrun3d.com/
Print without a dry box yielded the same result
Formerly known on this forum as @fuchsr -- https://foxrun3d.com/
As you are using 2.4 alpha it would make sense to report it as a possible bug.
Cheerio,
@fuchsr
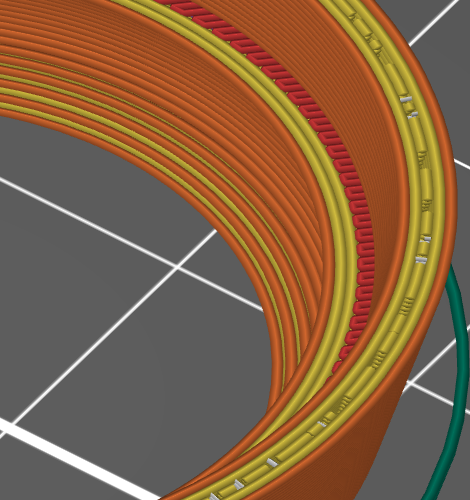
There is some "morsecode" in the centerline from layer 26 to 56, and layer 142. Some parts are gap fill and some parts are perimeter.
And there is also some really small gap fill parts that goes outwards, (or inwards) never seen it before 🤔
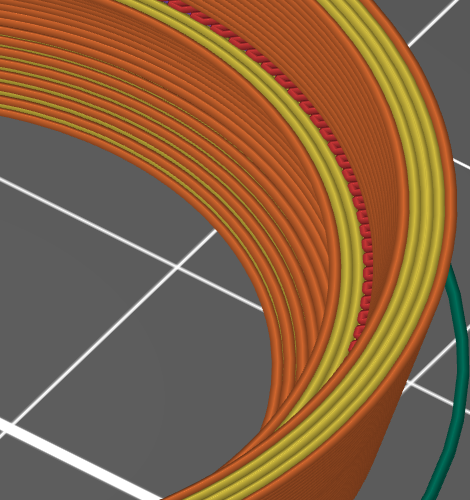
I changed extrusion width on those layers and it looks much better 😀
There is two copies on the sheet, one with modifiers and one without for comparing
I have PS 2.3.3 without "Generic TPU" installed so filament name is wrong.
In other words, Do Not Print the attached file if you don't change filament
Prusa i3 MK3S+ FW 3.11.0 (kit dec -20), PrusaSlicer 2.6.1+win64, Fusion 360, Windows 10
We're going to see so much of this untill 2.4 final is released.
It would make little to no sense to try and do a production run using an alpha software, stop it! go back to the finished version you are jumping the gun. this project has nothing new added why are you slicing it with alpha.
come on really?
Swiss_Cheese
The Filament Whisperer
while I'm chastising for using alpha 2.4_3 for this, Ringarn67's re-slice is good, and should probably work in a2.4_3 as well.
Regards
Swiss_Cheese
The Filament Whisperer
THANKS!!!
@swiss_cheese: Yeah, I know... and should have known better... Was slicing it on my dev computer, not on my production system, and should not have tried to print so many copies at once. Thanks for reminding me of why that's NOT a good idea ☹️ 😩
(I should point out that I see the same artifacts with v2.3.3)
@ringarn67: Your astute observation put me on the right track. There's indeed some weird "morse code" in the perimeter:
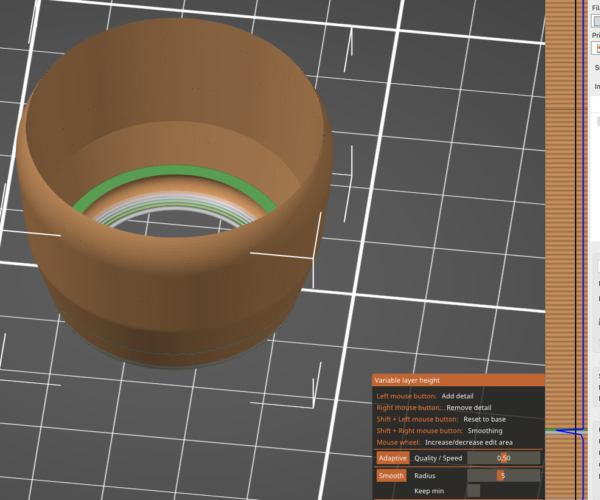
After seeing that, I discovered an alternative way to address this issue. First, I used variable layer height, and everything looked great in the preview.
However, I noticed that while trying some options I had apparently reset the seam to Nearest, which gave me an angled seam line. When I switched it to Aligned or Rear, I ended up with one single layer of morse code ☹️ But being on that track, I set layer height to 0.26m, and everything now looks good with a nice vertical seam line. For the intended purpose, that difference in vertical resolution has no practical impact.
For the fun of it, I tried slicing at a fixed 0.3mm. While the perimeters also look fine across the model, the very top layer though is now in morse code...
If anyone has any thoughts on what might cause any of this behavior (again, I see this as a learning opportunity), please don't hesitate to share.
For now, it looks like a have a working solution, and again thanks to everyone!
Formerly known on this forum as @fuchsr -- https://foxrun3d.com/
Its probably the triangles that inside and outside of the curve is made up of. The thickness of the wall will not be perfectly even all the way around due to the tessellation. This causes slightly thinner sections and slicer ends up doing that start/stop pattern or in some cases a mix of perimeter and gap fill. Its why there's usually a pattern to it. You could also have probably adjusted the perimeter extrusion widths to tune it too.
You could also have probably adjusted the perimeter extrusion widths to tune it too.
Yeah, that's what @ringarn67 suggested (for the regions that create problems). I printed his model also, and it looks just as nice.
Formerly known on this forum as @fuchsr -- https://foxrun3d.com/
