Problems with over extruding top layer
Hey, having trouble with a bigger print. I am trying to print a panel for my diy flight sim.
I've never encoutered any problems beforehand and also tried printing other parts + benchmark inbetween the failed parts with no problems.
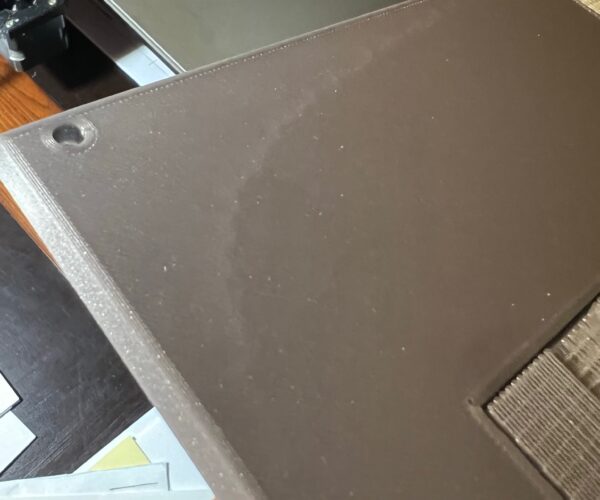
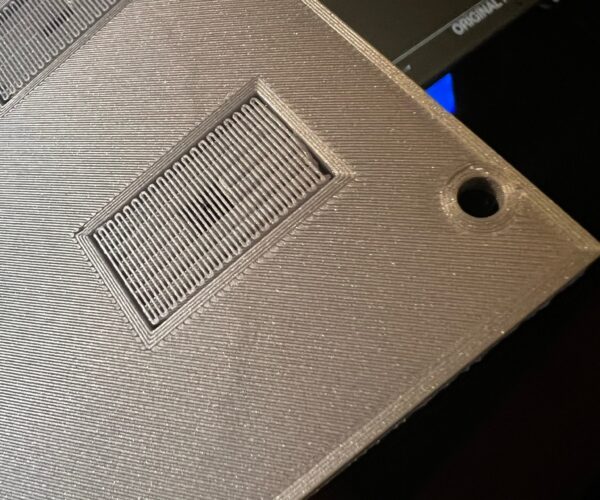
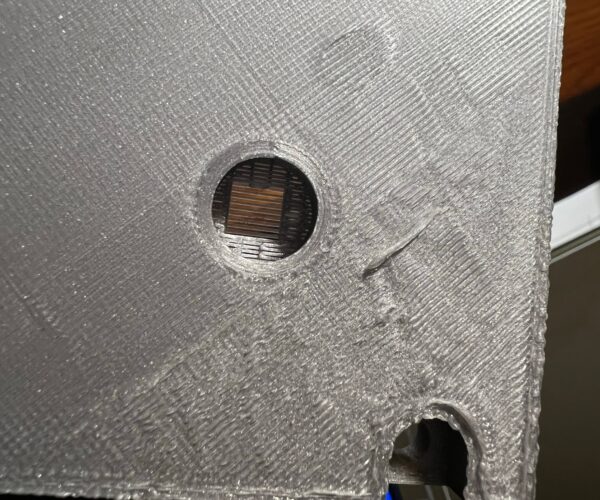
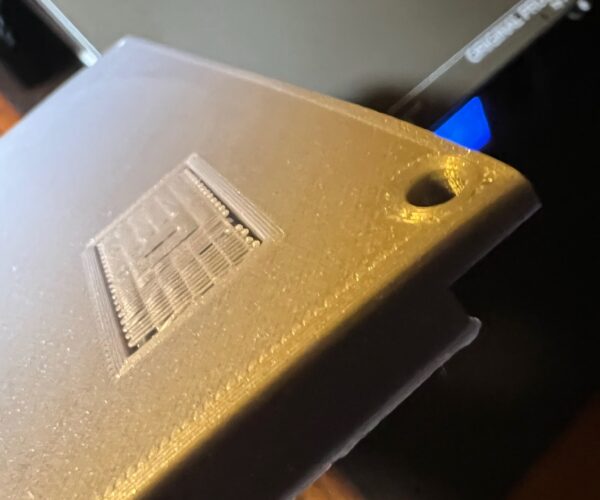
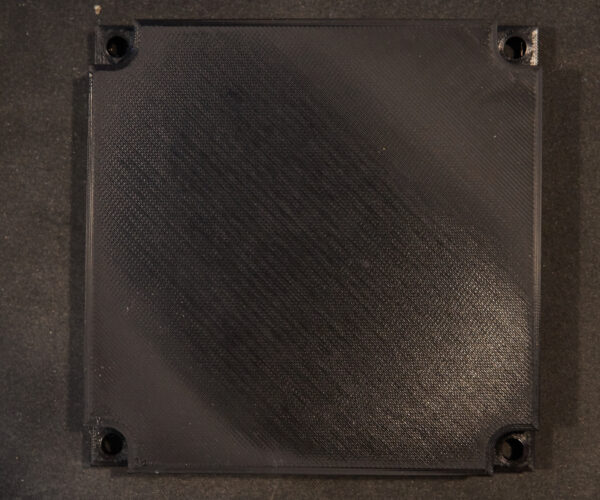
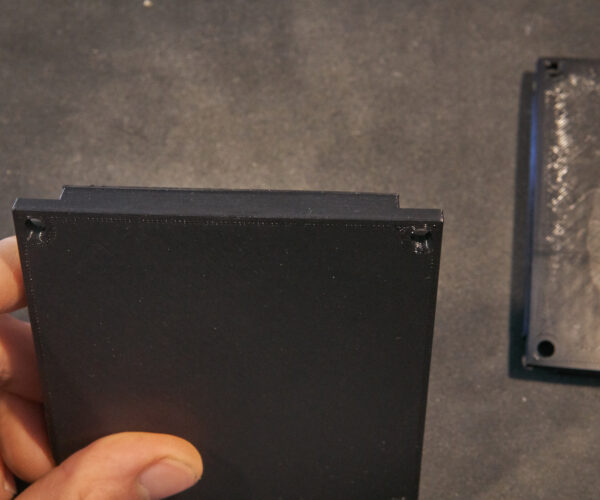
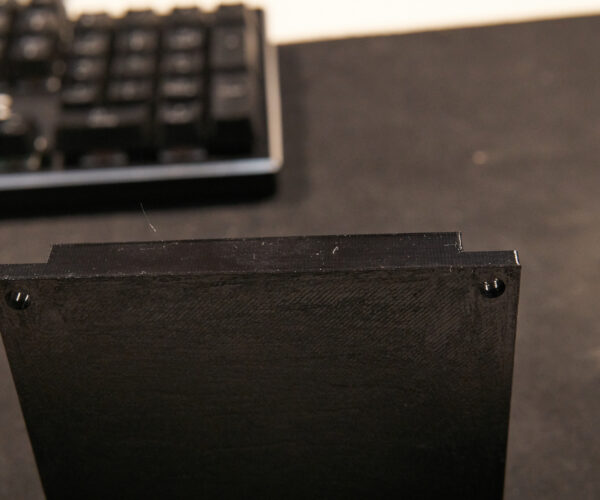
The part is mostly flat and has no complex shapes and workes fine till the printer comes to the top infill layers. It seems to be massivly over extruding or somehow setting the wrong layerhight. I stopped the prints before it could finish since the nozzle started scratching on the parts. Things I changed up between the two prints: Updated slicer and printed over SD card instead of Octopi. I also set the top Infill from 0.45 to 0.40. I also resliced the file and did not use the same gcode. Nothing changed in the print result. Also made sure that the part did not partially seperated from the print bed due to warping. I did observe some warping on the corners which did not go thorough all the layers which tells me it occured earlier in the print and did not interfere with the top layers.
Things I think are strange is that the outer perimeter works fine till till it comes to the top infill and then starts overextruding as well. To my unschooled eye it looks like the layerhight gets set to small for the top layers. In the slicer going through the layers it looks fine though. I usually slice with prusa slicer and use mostly default options. layerhight for all pictures is 0.15mm, 4 perimeter shells, rest stock settings. Printing with Prusamen PLA.
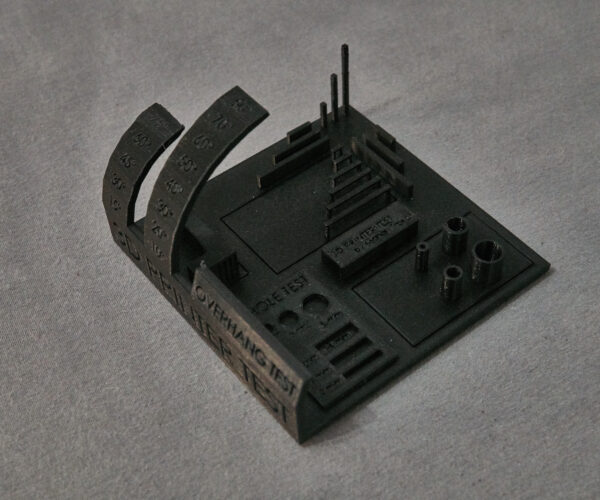
Test inbetween printes worked fine
Print 1
Print 1
Print 2
Print 2
Any help is welcome. Looking forward to a simple solution my head couldn't wrap around
Best Answer by RandyM9:
Hello @buergels -
@neophyl hit the nail on the head. The pics you posted of the print underside show the corners are lifting.
I printed your part today and effectively got the same results you did :-/
I don’t print a lot of PLA so I don’t tend to have the adhesion issues that seem common to this material. I also don’t own the smooth PEI sheet that seems to work best with PLA. I used the satin sheet and the Prusa Silver PLA to print your part.
I don’t recall when I last did a serious cleaning of the sheet, but I should have thought about it before I attempted this print. About 30% into the print I noticed the right front corner begin to lift slightly. This immediately made me think that, if the print finished, this would likely cause the the top layer(s) to over compress, creating the appearance you experienced. So I let it run, and it did finish.
In my print, I had three ‘bad’ corners on the top layers and I could see the beginnings of the rough finish with the third or fourth top layer during printing. When the print finished, I looked at the bottom of the model and it was clear as day that the worst of the top corners was above the greatest area of lift from the build plate. This was the front left corner but it wasn’t obvious at all during the print.
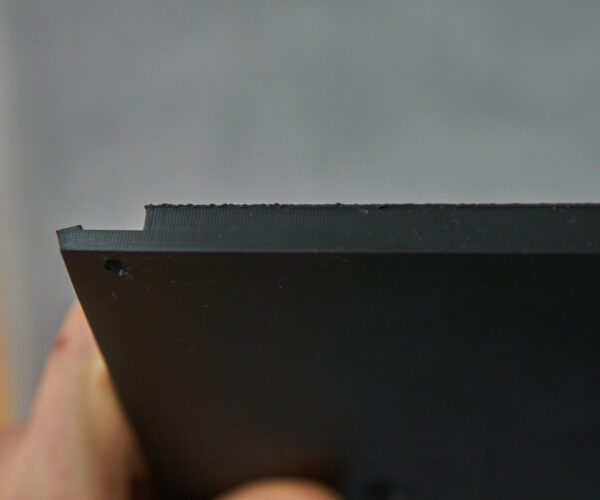
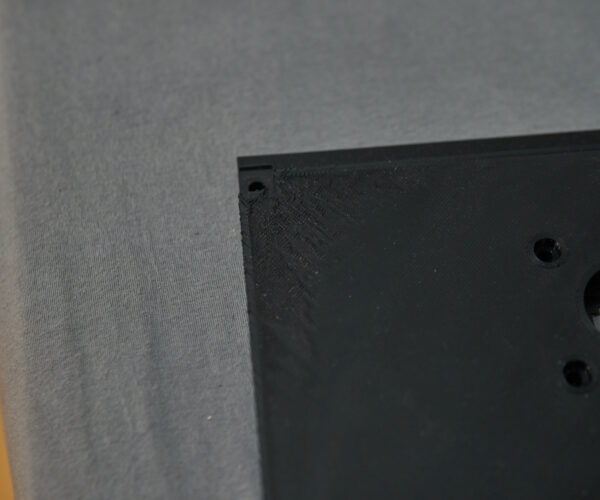
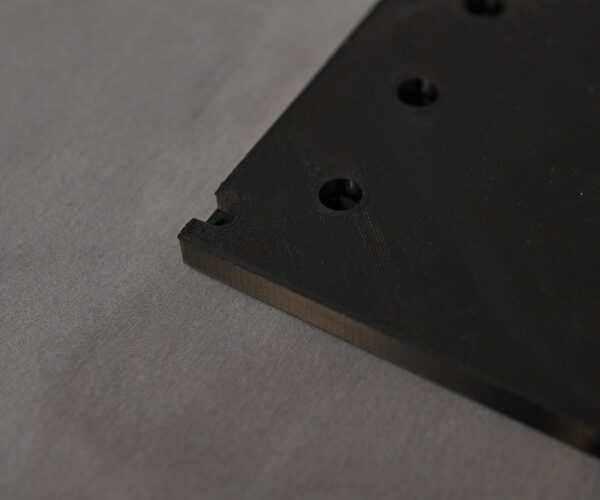
Pics below:
pic 1 - left front bottom
Pic 2 - left front top
Pic 3 - right rear bottom
Pic 4 - right rear top
Pic 5 - right front top
Pic 6 - right front bottom
You need to do a deep clean of your build plate. This means a trip to the sink with lots of hot hot water, Dawn (or Fairy) Dish Detergent, a new un-used ‘scotch-brite’ type sponge, clean paper towels, and handling the sheet by the edges only. No fingers on the clean sheet. I wrote a manifesto on this topic on another thread recently but I can’t recall where or I would link to it.
For a large print like yours, you will likely need an adhesion booster / release agent like layerneer or a glue-stick & alcohol rub. There are tons of posts here and YouTube videos where users share their best methods for this. I think the guy who does ‘Makers Muse’ has a good video on the subject.
Perhaps a brim or mouse-ears at the corners would help. Maybe a slightly higher bed temp. But again, I’m far from an expert, particularly where PLA is concerned so I encourage you to do some additional searches for best practices. You’ll no doubt find the right answer.
Anyway, good luck. I’ve learned something from this experience; I hope you have as well.
Cheers.
RE: Problems with over extruding top layer
I’m far from an expert but here are a few things I look at when I have a similar issue:
What infill pattern is in use and at what percentage? Some infill pattens, like ‘linear’ at a low percentage will cause sagging of the top layers. Other patterns where intersections occur can cause high spots that then interfere with smooth top layer results. Depending on the model, I’ve had good luck with the ‘3D octagonal’ pattern anywhere from 10-25%.
How many top layers are there? Generally the default is fine but sometimes it needs looking at.
What ‘top infill’ pattern is in use? For most prints I find ‘monotonic’ gives the best results.
Finally, nozzle temperature, cooling, and print speed may need to be tweaked for the final layer(s). Sometimes when a lot of filament is being put down in a small-ish area at normal speeds, too much localized heat build up can cause the area to warp. It looks like the worst part of your print is near the corner where this could be a contributing factor.
I'm not sure what’s happening at the perimeters but I would look at the number of perimeters and possibly at creating a height modifier for the top layers that prints the outer perimeters first. This is just a guess on my part, I’m sure someone with more experience will chime in with some better suggestions.
The real experts here will likely ask you to save your project file as a .3mf in PS, zip it up (because that’s what forum allows) and post it here.
Good luck. Please share back what worked for you.
RE: Problems with over extruding top layer
Thanks for the answer, some more information:
Fill pattern: Gyroid at 15%
Top fill pattern: Monotonic
Solid layers on top are 8
Zipped .3mf:
Will wait for some more ideas since it's a bigger print and I can't replicate it on smaller ones. Will keep updating when stuff works...
RE: Problems with over extruding top layer
There’s definitely something strange going on with this print. I’m away from my workspace on a mobile device and unable to open your file at the moment.
Have you tried drying the filament? This is generally the first thing most people will ask you. Filament that has absorbed moisture will give you all manner of trouble.
Have you tried rotating the model on the print bed by 45* for example to see if you get a different result? Or moving the entire print to a different location on the bed? If the problem always happens in the same area of the print, it’s possible you have a mechanical issue that only appears in that area of the bed.
One other thought - If memory serves there’s a setting to change the infill angle relative to the bed/model. I ‘think’ the default is 45*. If you leave the model in the original orientation and change the infill angle to 0* or 90* you will get a different result.
If you have access to the original model file you could clip the corner you’re having trouble with and print only that area of the model to save time and filament.
I’ll try your print when I get back to my machine.
RE: Problems with over extruding top layer
So, now that I can look at your model in PS, I can see that it is very large and there is no rotating it 45 degrees.
It appears that the problem top layer and ragged perimeter areas appear in opposite corners - diagonally: front left and rear right. Or, looking from above, south-west and north-east corners. This makes me wonder if a mechanical issue or bed leveling issue is at play rather than something in your settings; particularly because you state that you are able to produce other prints without similar errors.
Are you using 3x3 or 7x7 mesh bed leveling? If 3x3, suggest you change to 7x7. You'll find the setting for this in the printer LCD 'Settings" menu.
While it will be a tight fit, you can try rotating the model 90 degrees. The model will still fit on the plater and this orientation will change the location of the problem corners, which may alter the final appearance of the top layer(s).
While I don't think it will alter your results at all, I will just add that I am not a fan of the Gyroid infill selection. My aversion to Gyroid has nothing to do with it's suitability for its intended purpose, only that printing it makes my machine shake violently, which I can't imagine is healthy long term. Using 3D Honeycomb at 10% will give you roughly the same amount of support as Gyroid at 15%, with similar print times at the .15mm layer height you're using, with much less 'shake, rattle & roll' than Gyroid. Just sayin'.
I will try to make this print on my machine tomorrow if I can make the time.
RE: Problems with over extruding top layer
Could replicate the problem on a smaller print (still 5 hours though)
Print one in the middle of the Bed
Print 2 in the bottem right corner (picture is aligned)
Print 2 bottom side (Bottem right corner was at the bottem right of print bed)
Print 1 edge.
I printed both prints after recalibrating everything (excuse me for the not perfect first layer) and with 7x7 mesh bed leveling.
On print one I also tried to print the outer perimeter first with no difference. Print two got a lot worse due to it being on the very edge (I guess heating problems not sure if that is normal). Still the top right corner (normaly I would suspect the bottem right to be the worst since it is the corner of the bed) was the worst and I think there is a clear pattern of the top right and bottem left corner having the most problems.I guess the warping on Print 2 came from it being on the edge and the slightly too high first layer. Still on both prints the outer perimeter on the top layers is massively overextruded.
And thanks for the tip with the infill, should come out with the same structual properties and if it comes out to the same print time I'd be happy to be more gentel on my printer.
Really appreciate the help and just keep coming with the ideas.
Tempted to take the printer appart and see if the frame is slight bend or similar but since the problem only occures on the top layers I feel like the problem is somewhere else.
RE: Problems with over extruding top layer
From what I see in your pics the corners are lifting (its clearly evident from your bottom layer pics). This is causing compression at the upper layers which you are interpreting as over extrusion. While there may possibly be some you cant effectively tell until you sort out your part warping issues.
This is why getting your first layer and bed adhesion properly sorting is so vital. Without it you cant diagnose other things.
RE: Problems with over extruding top layer
Did another print with further adjusting of first layer hight, and with glue (I usually don't print with glue)
Warping reduced to a minimum
little to no difference from print 1 in my previous post. Same overextrusion on top right, bottem left corner.
Edge still overextruded only in the top layers.
Just as a reminder, artifacts might not seem too bad but are scaled up on my original print.
Kinda hoped it would only be a fist layer adhesion problem but it unfortuntely didn't fix it.
RE: Problems with over extruding top layer
Hello @buergels -
@neophyl hit the nail on the head. The pics you posted of the print underside show the corners are lifting.
I printed your part today and effectively got the same results you did :-/
I don’t print a lot of PLA so I don’t tend to have the adhesion issues that seem common to this material. I also don’t own the smooth PEI sheet that seems to work best with PLA. I used the satin sheet and the Prusa Silver PLA to print your part.
I don’t recall when I last did a serious cleaning of the sheet, but I should have thought about it before I attempted this print. About 30% into the print I noticed the right front corner begin to lift slightly. This immediately made me think that, if the print finished, this would likely cause the the top layer(s) to over compress, creating the appearance you experienced. So I let it run, and it did finish.
In my print, I had three ‘bad’ corners on the top layers and I could see the beginnings of the rough finish with the third or fourth top layer during printing. When the print finished, I looked at the bottom of the model and it was clear as day that the worst of the top corners was above the greatest area of lift from the build plate. This was the front left corner but it wasn’t obvious at all during the print.
Pics below:
pic 1 - left front bottom
Pic 2 - left front top
Pic 3 - right rear bottom
Pic 4 - right rear top
Pic 5 - right front top
Pic 6 - right front bottom
You need to do a deep clean of your build plate. This means a trip to the sink with lots of hot hot water, Dawn (or Fairy) Dish Detergent, a new un-used ‘scotch-brite’ type sponge, clean paper towels, and handling the sheet by the edges only. No fingers on the clean sheet. I wrote a manifesto on this topic on another thread recently but I can’t recall where or I would link to it.
For a large print like yours, you will likely need an adhesion booster / release agent like layerneer or a glue-stick & alcohol rub. There are tons of posts here and YouTube videos where users share their best methods for this. I think the guy who does ‘Makers Muse’ has a good video on the subject.
Perhaps a brim or mouse-ears at the corners would help. Maybe a slightly higher bed temp. But again, I’m far from an expert, particularly where PLA is concerned so I encourage you to do some additional searches for best practices. You’ll no doubt find the right answer.
Anyway, good luck. I’ve learned something from this experience; I hope you have as well.
Cheers.
RE: Problems with over extruding top layer
FWIW, my rant on sheet cleaning is the last post in this thread:
RE: Problems with over extruding top layer
Thanks a lot for your effort,
guess I will start cleaning now (only used to do it with window cleaner and paper towels)
Also guess cutting the print in half and adding in a few mounting holes will help the cause.
Really appreciate all the help and wish you troubleless printning
