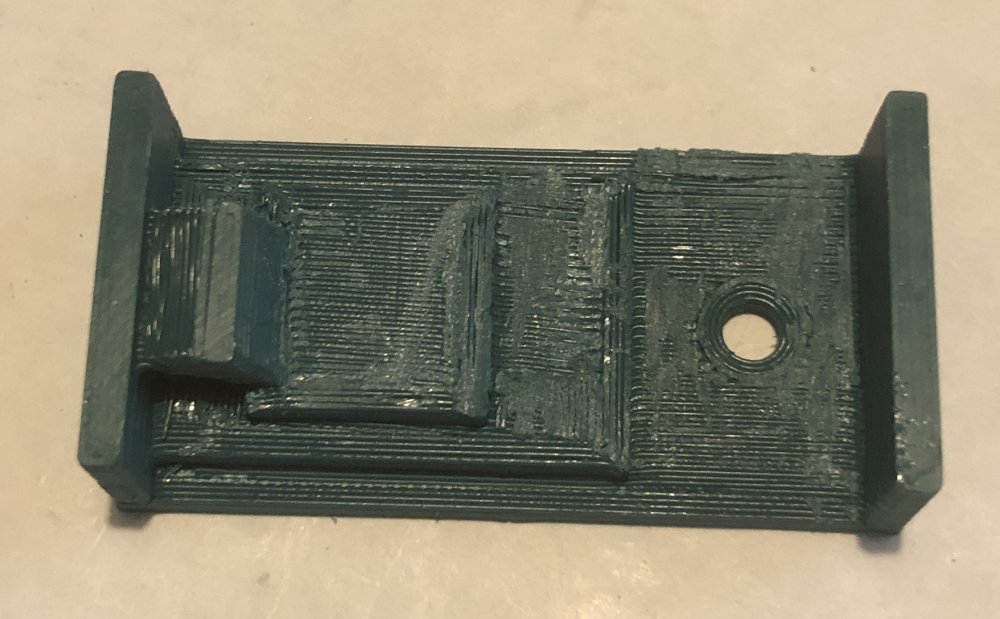
Printing with supports
Hi,
I have a couple of problems with my PLA prints.
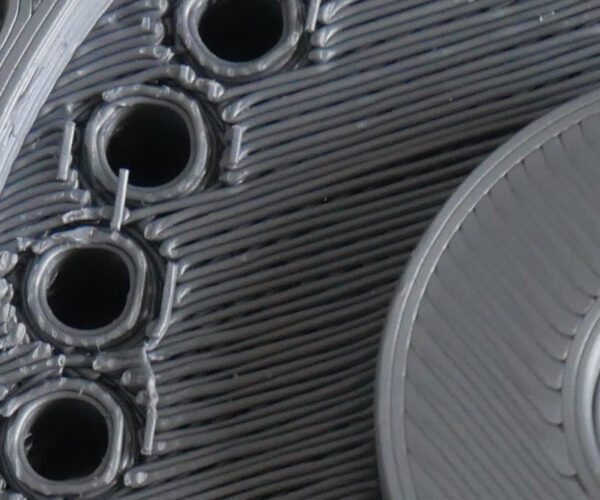
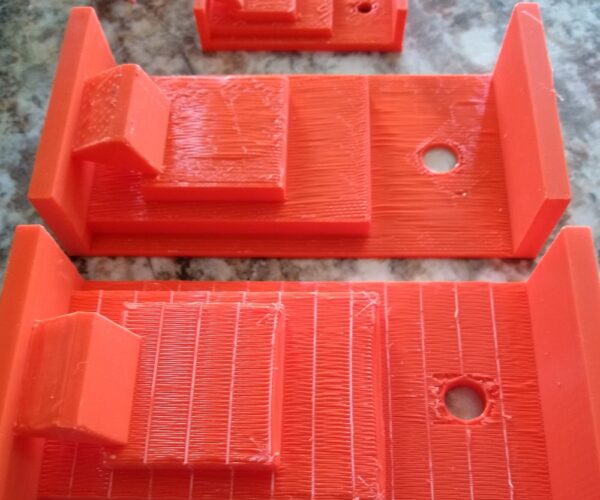
- The first happens when I use supports. The supporting parts break off normally, but whatever surface was printed on top of them looks terrible.
On the right-hand side is the first layer that was directly on the printer bed, on the left-hand side the area that was supported.
Is there any way to fix that, or is that to be expected with supports?
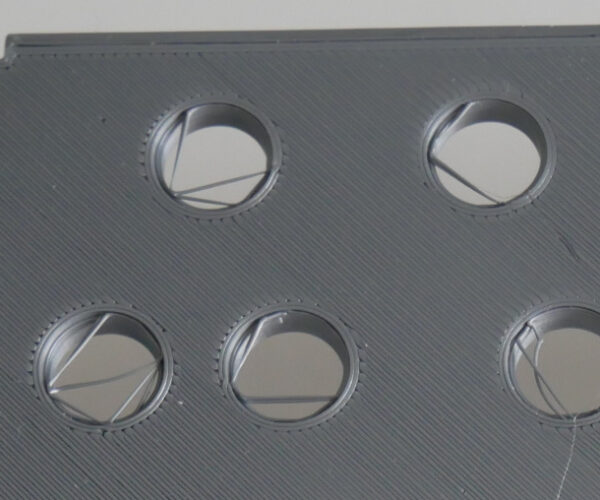
- The other problem is that whenever I print models with holes on the bottom, the brim of the holes doesn't stick.
This is the area that was on the printer bed. At first I thought my first layer calibration was too high, but if I lower it even just a bit the nozzle gets plastic all over it.
What could cause this?
Thanks.
RE: Printing with supports
Welcome to the world of non-dissolvable supports.
First the normal printing: It looks like your machine is underextruding - leaving gaps in layer one. So focus on getting layer 1 right, then mpove on to secondary issues.
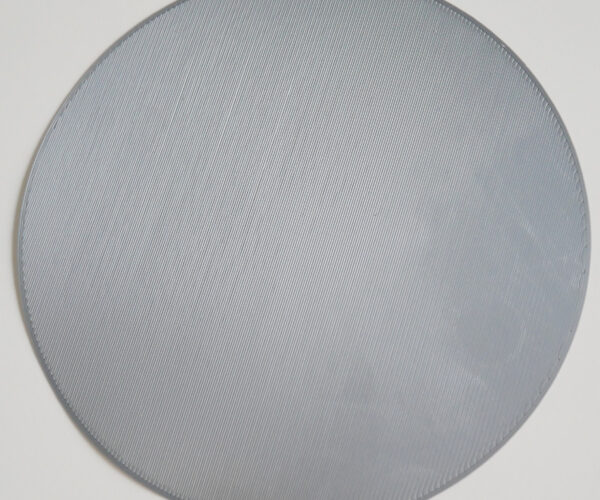
Print this test coupon - it should be 100% filled, 0.20 mm thick, and have no gaps. My print is shown for comparison (it has a couple very minor gaps).
Then move on to calibrating the extrusion multiplier ... or reverse the order and fine tune layer 1 after getting the extrusion rate correct.
https://help.prusa3d.com/en/article/extrusion-multiplier-calibration_2257
RE: Printing with supports
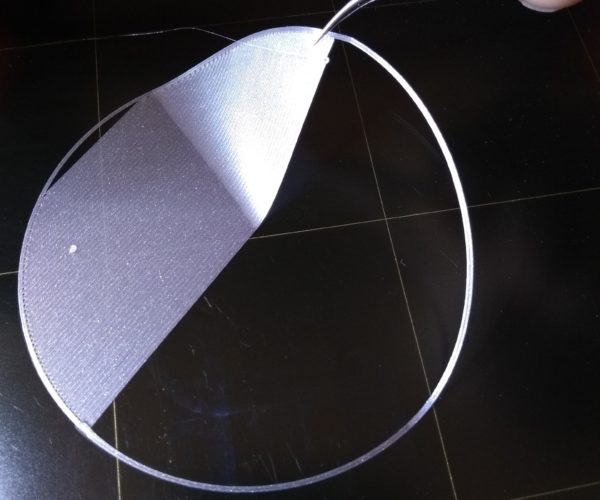
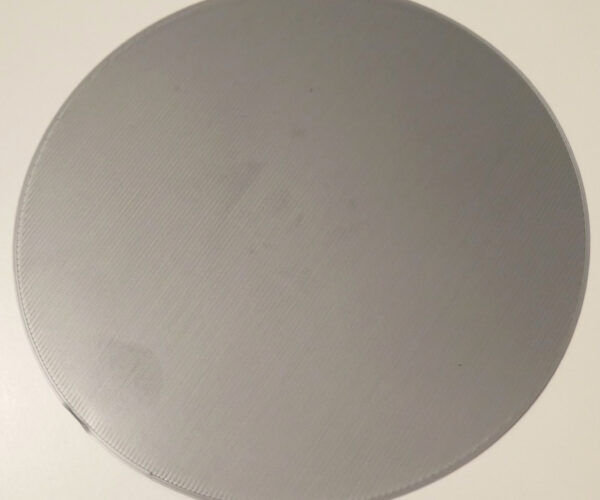
I've done the test. My (cheap) caliper says the circle is 0.2mm thick.
Here are the results:
one side (almost half) is very smooth and strong, the other has lines not sticking together.
I checked the bed with a spirit level and it was fine. I have 7x7 mesh leveling and magnetic compensation activated.
RE: Printing with supports
Try turning off magnet correction and use 5 samples to help increase accuracy. You may also want to run through and do bed level compensation to raise a side or three. Plus, there's always the PINDA temp comp issue when doing a succession of prints.
Here's my startup g-code routine:
M115 U3.7.1 ; tell printer latest fw version
G90 ; use absolute coordinates
M83 ; extruder relative mode

; cool down PINDA
M106 S255 ; turn on fan
M104 S0 ; turn off nozzle heat
M140 S0 ; turn off bed heat
M860 S35 ; wait until PINDA is less than 35C
M106 S0 ; turn off fan

; preheat nozzle to a low temp, get plastic mushy before driving into the bed with G28
M140 S[first_layer_bed_temperature] ; set bed temp
M109 S175 ; wait for extruder temp
M190 S[first_layer_bed_temperature] ; set & wait for bed temp
G28 W ; home all without mesh bed level

; soak PINDA then level
G0 X50 Y50 Z1 F3000; this is a good PINDA heating position
M860 S37.5 ; wait until PINDA is >= 35C in winter, 37.5C spring/fall, 40C summer
G80 N7 R5; mesh bed leveling

; heat to extrude temp
G0 X0 Y-3.0 Z10 F3000; this is a good nozzle heating position
M109 S[first_layer_temperature] ; set & wait extruder temp

; purge
G1 Y-3.0 Z0.20 F1000.0 ; go outside print area
G92 E0.0
G1 X1.0 Y-1.0 E0.5 F500.0 ; scribble 1
G1 X1.0 Y-3.0 E0.5 F500.0 ; scribble 1
G1 X2.0 Y-1.0 E0.5 F500.0 ; scribble 2
G1 X2.0 Y-3.0 E0.5 F500.0 ; scribble 2
G1 X3.0 Y-1.0 E0.5 F500.0 ; scribble 3
G1 X3.0 Y-3.0 E0.5 F500.0 ; scribble 3
G1 X60.0 E9.0 F1000.0 ; intro line
G1 X100.0 E12.0 F1200.0 ; intro line
G1 X97.0 F2000.0 ; wipe left
G1 X105.0 F3000.0 ; wipe right
G92 E0.0

M221 S{if layer_height<0.075}100{else}95{endif}

; end Printer Start gcode
RE: Printing with supports
ps: if you try the code above, the printer will be noticeably silent for quite a while during the PINDA warm up. This is expected. Be patient, it does work. You can use the menus to review the extruder temps while waiting, if you are curious things might be taking too long. If your home is kept cool: 68f, then reducing the M860 test to 35c may be better.
On the up side, prints are much more reliable and consistent.
RE: Printing with supports
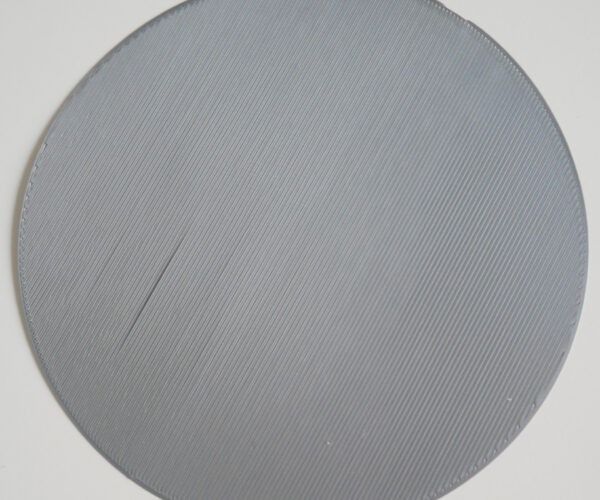
Thanks for your help. I turned off magnetic compensation and set z-probe samples to 5, and calibrated again, and what a change in the result!
It's smooth and the lines stick together, I guess I dont need bed level compensation? I started printing something with holes to see if that changed something there.
Re: your gcode, do you paste that at the beginning of every gcode you print?
RE: Printing with supports
The g-code goes into a printer startup gcode config once. Replace what's there with this code; save the profile (e.g., rename to MK3-mod). Slicer remembers the last selected printer and uses it. You can always go back to factory defaults by selecting the stock printer profile.
ps: excellent look layer one; makes me a bit jealous.
RE: Printing with supports
After you get a print back with the supported holes, that'll be another struggle. There is a fine line between supports you can remove, supports that tear off print layers, and supports that actually work. And it seems to be part specific. Having a flat surface to work with - as your part seems to have - can help. Adjusting interface layer spacing and separation are the two main adjustments to tune a build. 0.15 mm is a good starting point for part-interface separation; and I like changing the interface spacing to 0.5 to 1 mm. 0.2 mm is just too much interface material for 90% of my parts and it makes removing the support painful. Again - it seems to take a slightly different approach for every part.
RE: Printing with supports
For the problem with supports: I tried changing the interface spacing settings with your recommendations and I get the same results - the surface over the supports has round, spaced lines like you get when the printer is printing mid-air.
For the problem with holes: I made several more tests and also got the same results - the edges don't stick and lines "cross" the holes. I did notice that it doesn't happen immediately: the edges of the holes are properly made, then quickly enough the innermost lines have unstuck and moved. I wondered if it could be an adherence problem, but the layer sticks very well (and I've washed the bed with soap, and frequently with IPA). I thought the nozzle could be grabbing the rim of the holes and messing them so I raised the nozzle almost to the point where I'm printing harp strings, but no luck.
I'm out of ideas in both cases.
RE: Printing with supports
Think about the issue: when printing with supports, you want a spacing that allows for minimal adhesion between the support and the part (for support removal). This means the printer is indeed printing in mid air, but in a more controlled manner. A bad under surface is almost assured.
Structured supports are - by design - supposed to be dissolvable material and not have any gaps whatsoever. But, with a single nozzle printer, that isn't a practical solution. The MMU works around the one nozzle, but at the cost of a lot of wasted plastic.
So - you can do a couple of things: one is to design your parts for FDM printing. No overhangs that exceed the build angle of the printer: 65 to 70 degrees is the practical Mk3 limit; the second is to use supports, but tweak them such that they do what they need to do, yet have a minimal impact on surface quality.
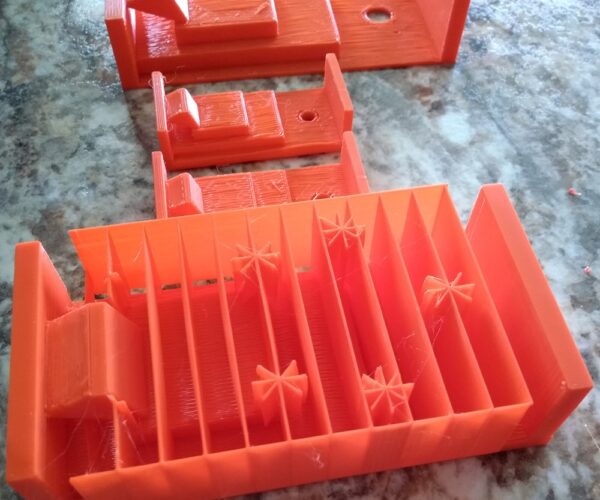
Here's an example of making a flat underside: It took quite a while to ferret out the best way to do this. The first is the part, no supports. The second the support I finally decided on. The third the final print.
It is a trade off of what my goal was, what the final quality could be, and whether or not it was even possible to do what I wanted.
ps: I should note there are many many tweaks to the settings to get that result. More than I can really go into here.
RE: Printing with supports
So I've tried many combinations of changes in the support settings, and I always get the same look on the supported surface (the supports themselves do look different) - I think I've tried all the support-related settings available in prusaslicer. Your supported surface look great! Do you use PS or another software? Did you design the support yourself like a stl model or is it automatically generated?
I plan to try a lower temperature and speed, and to print a different fan duct to improve cooling, maybe it will help?
RE: Printing with supports
Any chance of posting the model you are having trouble with ? That way someone can try it if they are up for the challenge. Dont forget to zip up the model or it wont attach to the forum.
RE: Printing with supports
Supporting a round hole on a flat bridged surface is not easy; nor is it easy; and did I mention it is hard to do? Your end result will look ugly and there is only one real option: soluble supports: or, redesign the part with chamfers, but even then you are printing in mid air and the initial layers will be ugly. Here's a few attempts at making a hole look better - all are generally fails.
RE: Printing with supports
I am having the same problem with supports. Terrible results with PrusaSlicer. Simplify3D is better. Neither is ideal.
--------------------
Chuck H
3D Printer Review Blog
RE: Printing with supports
Any chance of posting the model you are having trouble with ? That way someone can try it if they are up for the challenge. Dont forget to zip up the model or it wont attach to the forum.
I've tried the tests on a sample with a flat 90° overhang, attached (it looks bad even without the holes). Also attached is the test I use for holes flat on the bed.
RE: Printing with supports
@rogerdtt
When the printer is printing an overhang or any type, there is nothing to squish the plastic into a smooth flat extrusion. The bottom of the filament coming out of the extruder will be round, subject to gravity, and hot enough to stick to anything under it, like supports. The only way to make the bridge extrusion look "good" is to use a soluble support material in the build up - for 100% contact and squish. Anything else will be - and can only be - makeshift.
https://www.amazon.com/Polymaker-Filament-PolyDissolve-Dissolveable-PolySmooth/dp/B07MGL58SZ
RE: Printing with supports
@rogerdtt
Just printed off your 2 test parts. My printer is a MK3 with the extruder replaced by a Bunny & Bear geared extruder (as I wanted to still keep the Mk3 filament sensor rather than the MK3s one) Still with the e3d extruder and the normal parts fan but a Mk3 style fan shroud rather than the newer mk3s style.
I used my favorite fork of Prusa Slicer - Super Slicer. It has a couple of extra options available.
First off your hole test printed normally with no special settings, no support, just a normal 0.2mm layer height with 3 perimeters as thats what I use as standard.
The Supports stl with the overhanging section I added a support enforcer underneath, turned off dont support bridges, support settings with 4 interface layers and then set the 'bridge overlap' to 133%. Bridge overlap is a Super Slicer settings that allows you to control how much the bridge lines are squished sideways into the previous one. When combined with supports it can get you a better bottom surface. However removing the supports does take a bit of work lol.
Filament is just some recycled PLA from 3dJake (their own brand)
RE: Printing with supports
Just finished printing one of Tim's tests from the other thread using the same settings. The support was more difficult to remove and still needs a bit of clean up but you can clearly see that the bridges are much better. Basically if you are willing to spend the effort post processing you can get decent results.
I may also be able to tweak the support settings to make them easier to remove but with the settings I use (0.2 offset, 70% XY separation, 4 interface layers, 0.1 pattern spacing ) on normal parts they remove very easily.
RE: Printing with supports
Being able to set bridge overlap separate from everything else is a big help. But you can change overlap in the standard slicer builds from 25% to >50% and see improvements in bridges. The other thing that usually works is to set the contact Z to 0.05 and increase interface spacing to 0.5 or even 1 mm. Like everything else when printing supports, it is all a tradeoff somewhere: good support or easy to remove?
