printing tiny Adalinda
We tried to print a small Adalinda, I think scaled to about 20% or so. Using Prusa PLA with the default slic3r options it didn't adhere to the bed. I tried a few more times, including creating a large brim (like 10mm) and I still have adhesion problems. It got ~75% of the way through and then it detached and the fan blew it off the printer. Cleaned the bed well with acetone before the print and it didn't seem to help.
Why is this so hard to print? Why does it work for 75% and then fail instead of failing sooner? How can I make it work?
Re: printing tiny Adalinda
Show us your first layer.
Often linked posts:
Going small with MMU2
Real Multi Material
My prints on Instagram
Re: printing tiny Adalinda
Is there a way to extract information from a gcode file about things like the first layer?
I repeated what I think I did on the last trial, which---if my memory holds---was 20% scale and a 10mm brim. The resulting dimension is 22 x 21. And here's the first layer
Re: printing tiny Adalinda
I meant the printed object first layer 🙂
Often linked posts:
Going small with MMU2
Real Multi Material
My prints on Instagram
Re: printing tiny Adalinda
I reprinted from the same gcode that failed before. And this time it worked.
Re: printing tiny Adalinda
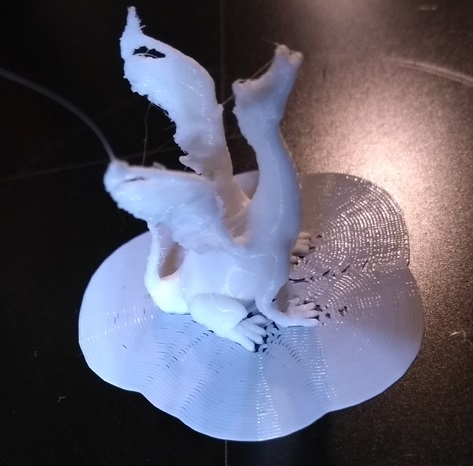
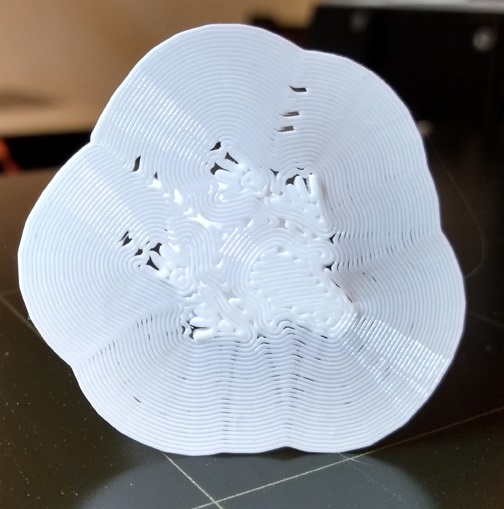
Here's how it came out. There are holes in the model, but they were put there by the slicer. I assume that the walls of the model got too thin? Is there a way to get the slicer to round up so I don't get holes?
Re: printing tiny Adalinda
Hello,
You could try printing with detect thin walls turned on. However looking at the size of the model compared to your finger you would be better of changing to a 0.25mm nozzle for this print.
Regards,
Martin
------------
Update just tried slicing with detect thin walls on. The result was unacceptable.
Martin Wolfe
Re: printing tiny Adalinda
If your using PLA, you could even try an experimental 0.15mm nozzle from E3D.
https://e3d-online.com/blog/2016/11/07/0-15mm-nozzles/
This would seem to be a good possibility for printing detailed D&D figurines or things like that.
Normal people believe that if it is not broke, do not fix it. Engineers believe that if it is not broke, it does not have enough features yet.
Re: printing tiny Adalinda
Hello,
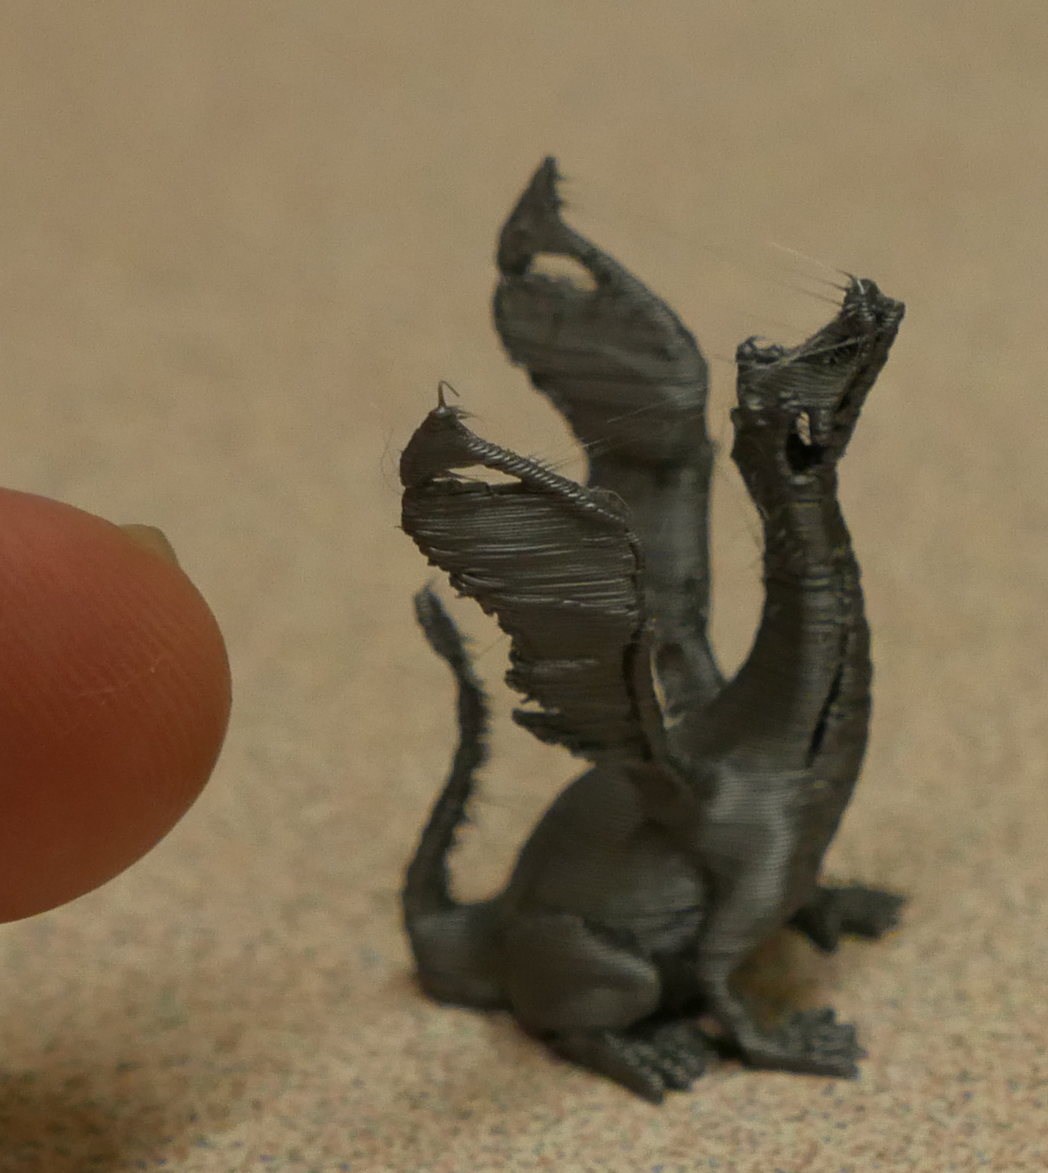
I have had a go at printing Adalinda at 20% size with a 0.25mm nozzle.
This is the first time I have printed with a 0.25mm nozzle. I printed in Sunlu PLA 0.05mm layer height with a 0.15mm first layer, print temperature 205/195 and bed at 60. For my first print in this nozzle size it came out better than I was expecting. The print was very hairy but I removed this with a heat gun in post processing. The front right leg was broken during printing and the from left broke during print removal.


I have now dropped my print temperature to 205/180 and using a brim I am printing it again. Hopefully there will be no broken legs and no stringing this time.
Regards,
Martin
Martin Wolfe
Re: printing tiny Adalinda
tiny Adalinda is a tough print.
tiny Adalinda full color with no purge tower is even harder to print. and frankly looks silly 😀
I have a Prusa,therefore I research.
Re: printing tiny Adalinda
That result looks pretty good. I used a huge brim (10mm) when I printed and the feet came out intact. But no matter what I do in slic3r I seem to get holes in the wings and neck. I tried turning on the "thin walls" option and it actually got worse (as viewed in slic3r---I didn't actually print) with more gaps in the structure. I tried sizing up to 30% and the wings filled in by the hole in the neck looks like it's still there.
I'm not really particularly interested in printing a lot of miniatures---my daughter wanted to print it small and I figured we'd give it a shot and see what happened, you know, to try to push the boundaries and learn what the machine can do. I think if the model were redesigned to be small, with thicker walls, it would actually work pretty well even with the default 0.45 nozzle. I'm more interested in changing to a hardened nozzle to print exotic stuff than printing really fine. Is swapping the nozzle a quick and easy thing, like say comparable to switching filament, or is it more of a pain?
Re: printing tiny Adalinda
Adalina is a hollow model, when you scale it down you will get thin walls that will not slice correctly. You need to use another tool to fill the model voids, then it will scale better.

Though detail like feet will still be challenging, and a 0.25 or even 0.15 nozzle can help.
ps:
Swapping a nozzle is easy, but two areas people fail at.
1) Heat the hot end to 280c when loosening or tightening the nozzle.
2) You MUST calibrate Z after a nozzle change.
Just read the instructions a few times before making the change. Have a 7mm hex socket or box wrench ready. I use an adjustable Crescent wrench to hold the heater block - adjusted to fit the front-back length; and a deep socket to unscrew the nozzle.
Re: printing tiny Adalinda
Reducing the nozzle temperature to 205/180 reduced the stringing and improved the detail. However both front legs were broken during print. A brim was not good enough. I suspect that a raft will be needed.
Regards,
Martin
Martin Wolfe
Re: printing tiny Adalinda
Perfect tools for nozzle change without burnt fingers.
https://www.amazon.co.uk/B20703-Thumb-Wrench-Multi-Colour-Piece/dp/B00AF0KLNG/ref=pd_sbs_60_2/262-0743899-8787932?_encoding=UTF8&pd_rd_i=B00AF0KLNG&pd_rd_r=f6375a9a-3153-11e9-862c-0b258d69bcd9&pd_rd_w=T0oQj&pd_rd_wg=Q7irF&pf_rd_p=18edf98b-139a-41ee-bb40-d725dd59d1d3&pf_rd_r=GRD0SAG7MPZ18XMWKYK7&psc=1&refRID=GRD0SAG7MPZ18XMWKYK7
You only need one of them, but they are useful, and
https://www.amazon.co.uk/Toolzone-8Pc-Shank-Drivers-5-11mm/dp/B002NH3XMK/ref=sr_1_11?s=diy&ie=UTF8&qid=1550257278&sr=1-11&keywords=7mm+nut+driver
You only need the 7mm one, but again, they are useful, plus you now have 2 drvers for them from the first link.
Plus a spanner, 16mm open ended, if you don't have one then
https://www.amazon.co.uk/Silverline-LS16-Combination-Spanner-16/dp/B000LFVJUY/ref=sr_1_5?s=diy&ie=UTF8&qid=1550257457&sr=1-5&keywords=16mm+spanner
(I have not looked where you are from so sorry that I have linked everything to Amazon UK)
With the wrench and nut driver shown, you do not risk dropping the hot nozzle, but make sure you have somewhere heat proof to put it once removed, the nut driver allows you to put the new nozzle in and holding the wrench only, screw the new nozzle in without having to put your fingers near the block as it holds the nozzle without it falling anywhere.
It only takes minutes to change the actual nozzle, more time prep and purging. If you don't already use a silicone sock, then I would really recommend it for keeping things clean down at the nozzle, refitting this takes a little longer as I allow the block to cool before fitting this.
Normal people believe that if it is not broke, do not fix it. Engineers believe that if it is not broke, it does not have enough features yet.
Re: printing tiny Adalinda
Thanks for the nozzle changing tips. I have never heard of the "silicone sock".
I took the solid model (how did you modify the stl to make it solid?) and it looked good in slic3r, so I tried to print an ultra-detail 0.05 version. It came off the bed. I tried another one and cleaning carefully with acetone. It came off the bed too.

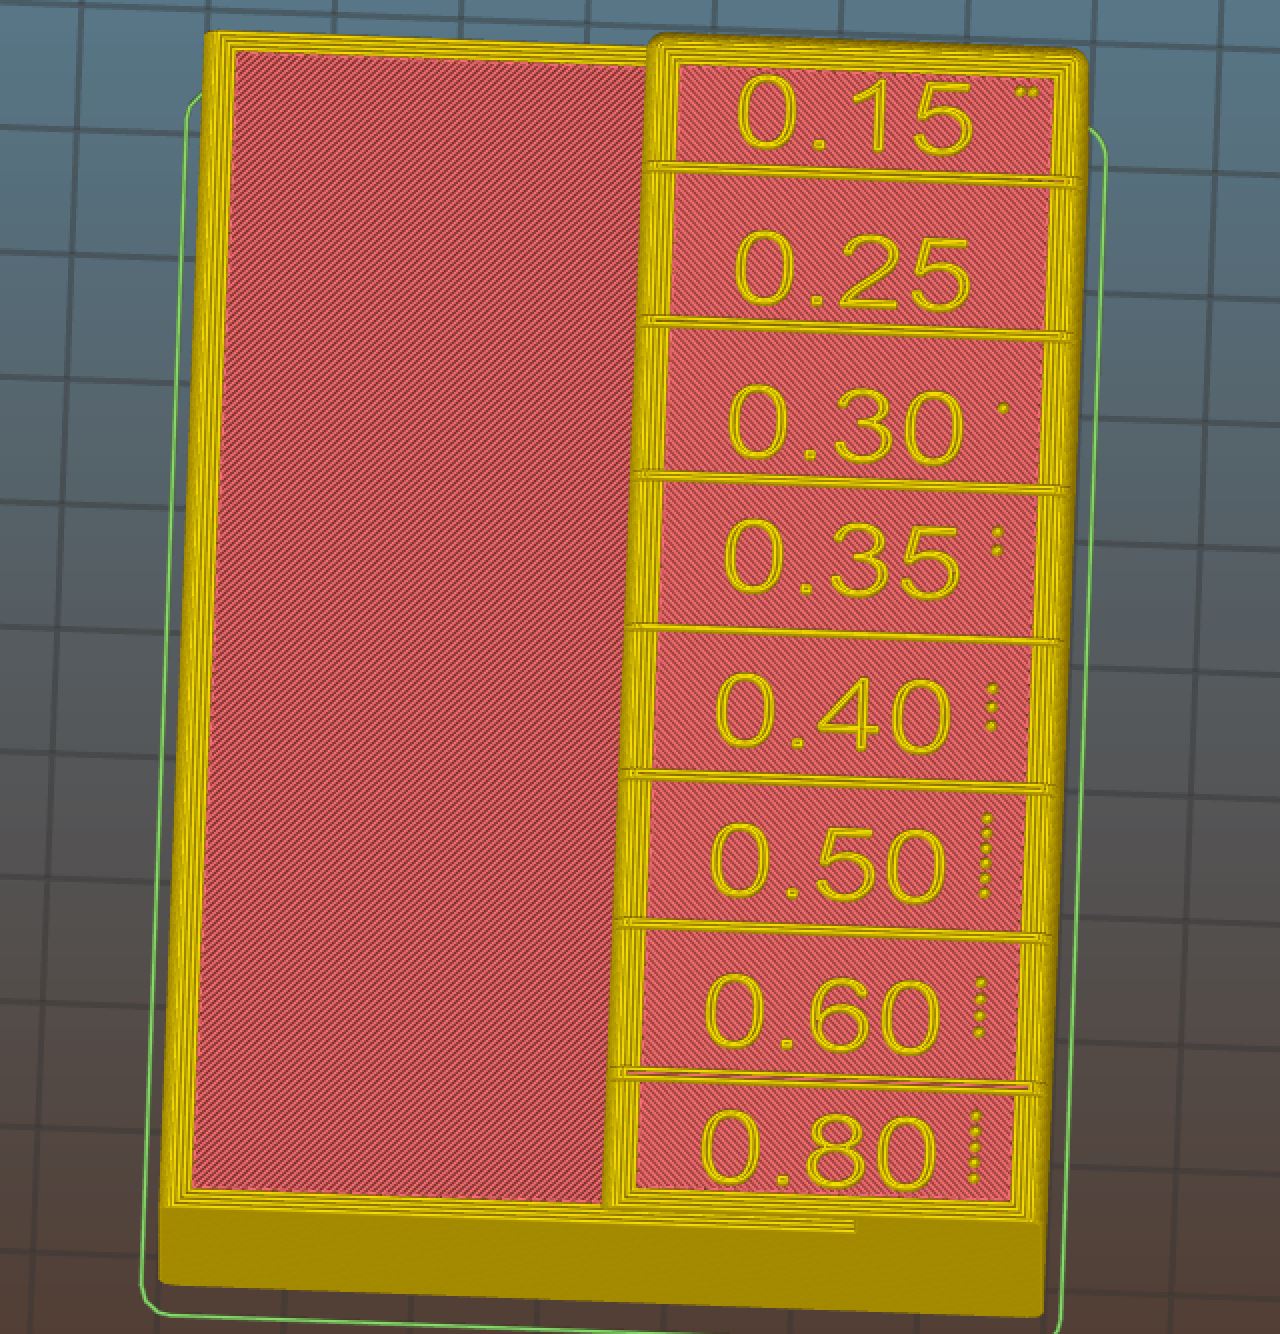
I speculated that maybe the layer thickness was somehow involved, so I printed at 0.15. This version started to come off the bed at about 90% completion. It sort of looked like somehow the nozzle was knocking into it. The nozzle would move and the back end would lift up. That happened a few times (and I think left some flaws in the print) and then it finished without any further incidents. So I don't really understand what is causing this behavior, or why it failed the first two times. Lots of stringing. This is printed in Prusament at the default settings.
Re: printing tiny Adalinda
I used Meshmixer ... the technique to fill voids is convoluted; but involves selecting a few triangle surfaces (shift-click), deleting them to separate the internal surface from the external surface; once the internal surface is segregated, selecting it, expanding to all connected triangles, deleting the selection, then repairing to recover a manifold external mesh without holes. I went in the mouth and selected a ring of triangles near the mouth, deleted them, selected a spot at the back of the throat, "Modify - expand to connected", and deleted the remaining internal surface; and a final Inspector to fill the hole left over.
There are tricks and traps involved ... so experimentation is recommended. Including a "feature" of Meshmixer where you can zoom in past a surface and select things "under" or inside it.
==
Your Z could be a little more squished to help adhesion... but the part should be sticking well enough with the brim.
The primary cause of PLA not sticking is contamination. Either of the filament or the bed. I once had a roll that had something on it that the first layer of the spool and simply failed. Once I worked past it the PLA started sticking again. You can try a trick I sometime use: get out the Windex and spritz the bed, and quickly scrub with a fresh paper towel. Using towels or sponges that have touched greasy pans is a bad idea (yep, been there). Hand lotions a no-no when handling the filament ... etc. OCD and paranoia help.
You can also move the part to a new or fresh area of the bed. If it sticks in one spot and not in another, well, it is bed contamination.
==
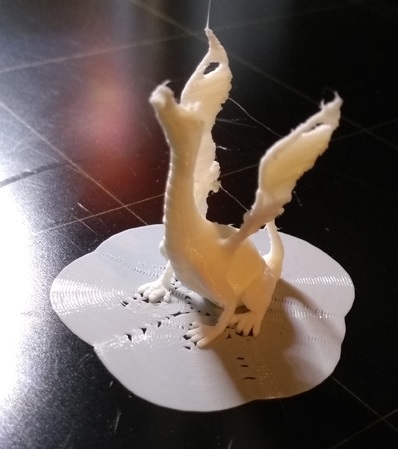
The tail of the beast at 20% is going to be hard to print well, imho, the fact yours looks that good is impressive.
The strings, spiderwebs, etc. Some filament just does it. You can fight it: adjust jerk, retraction, print speed, temps, and so on. A lot of work for a one off part, perhaps worth it if you are printing 1000 copies, or want a perfect print for something. The simple solution is a heat gun - but small parts are trouble - they can melt down along with the webs.
==
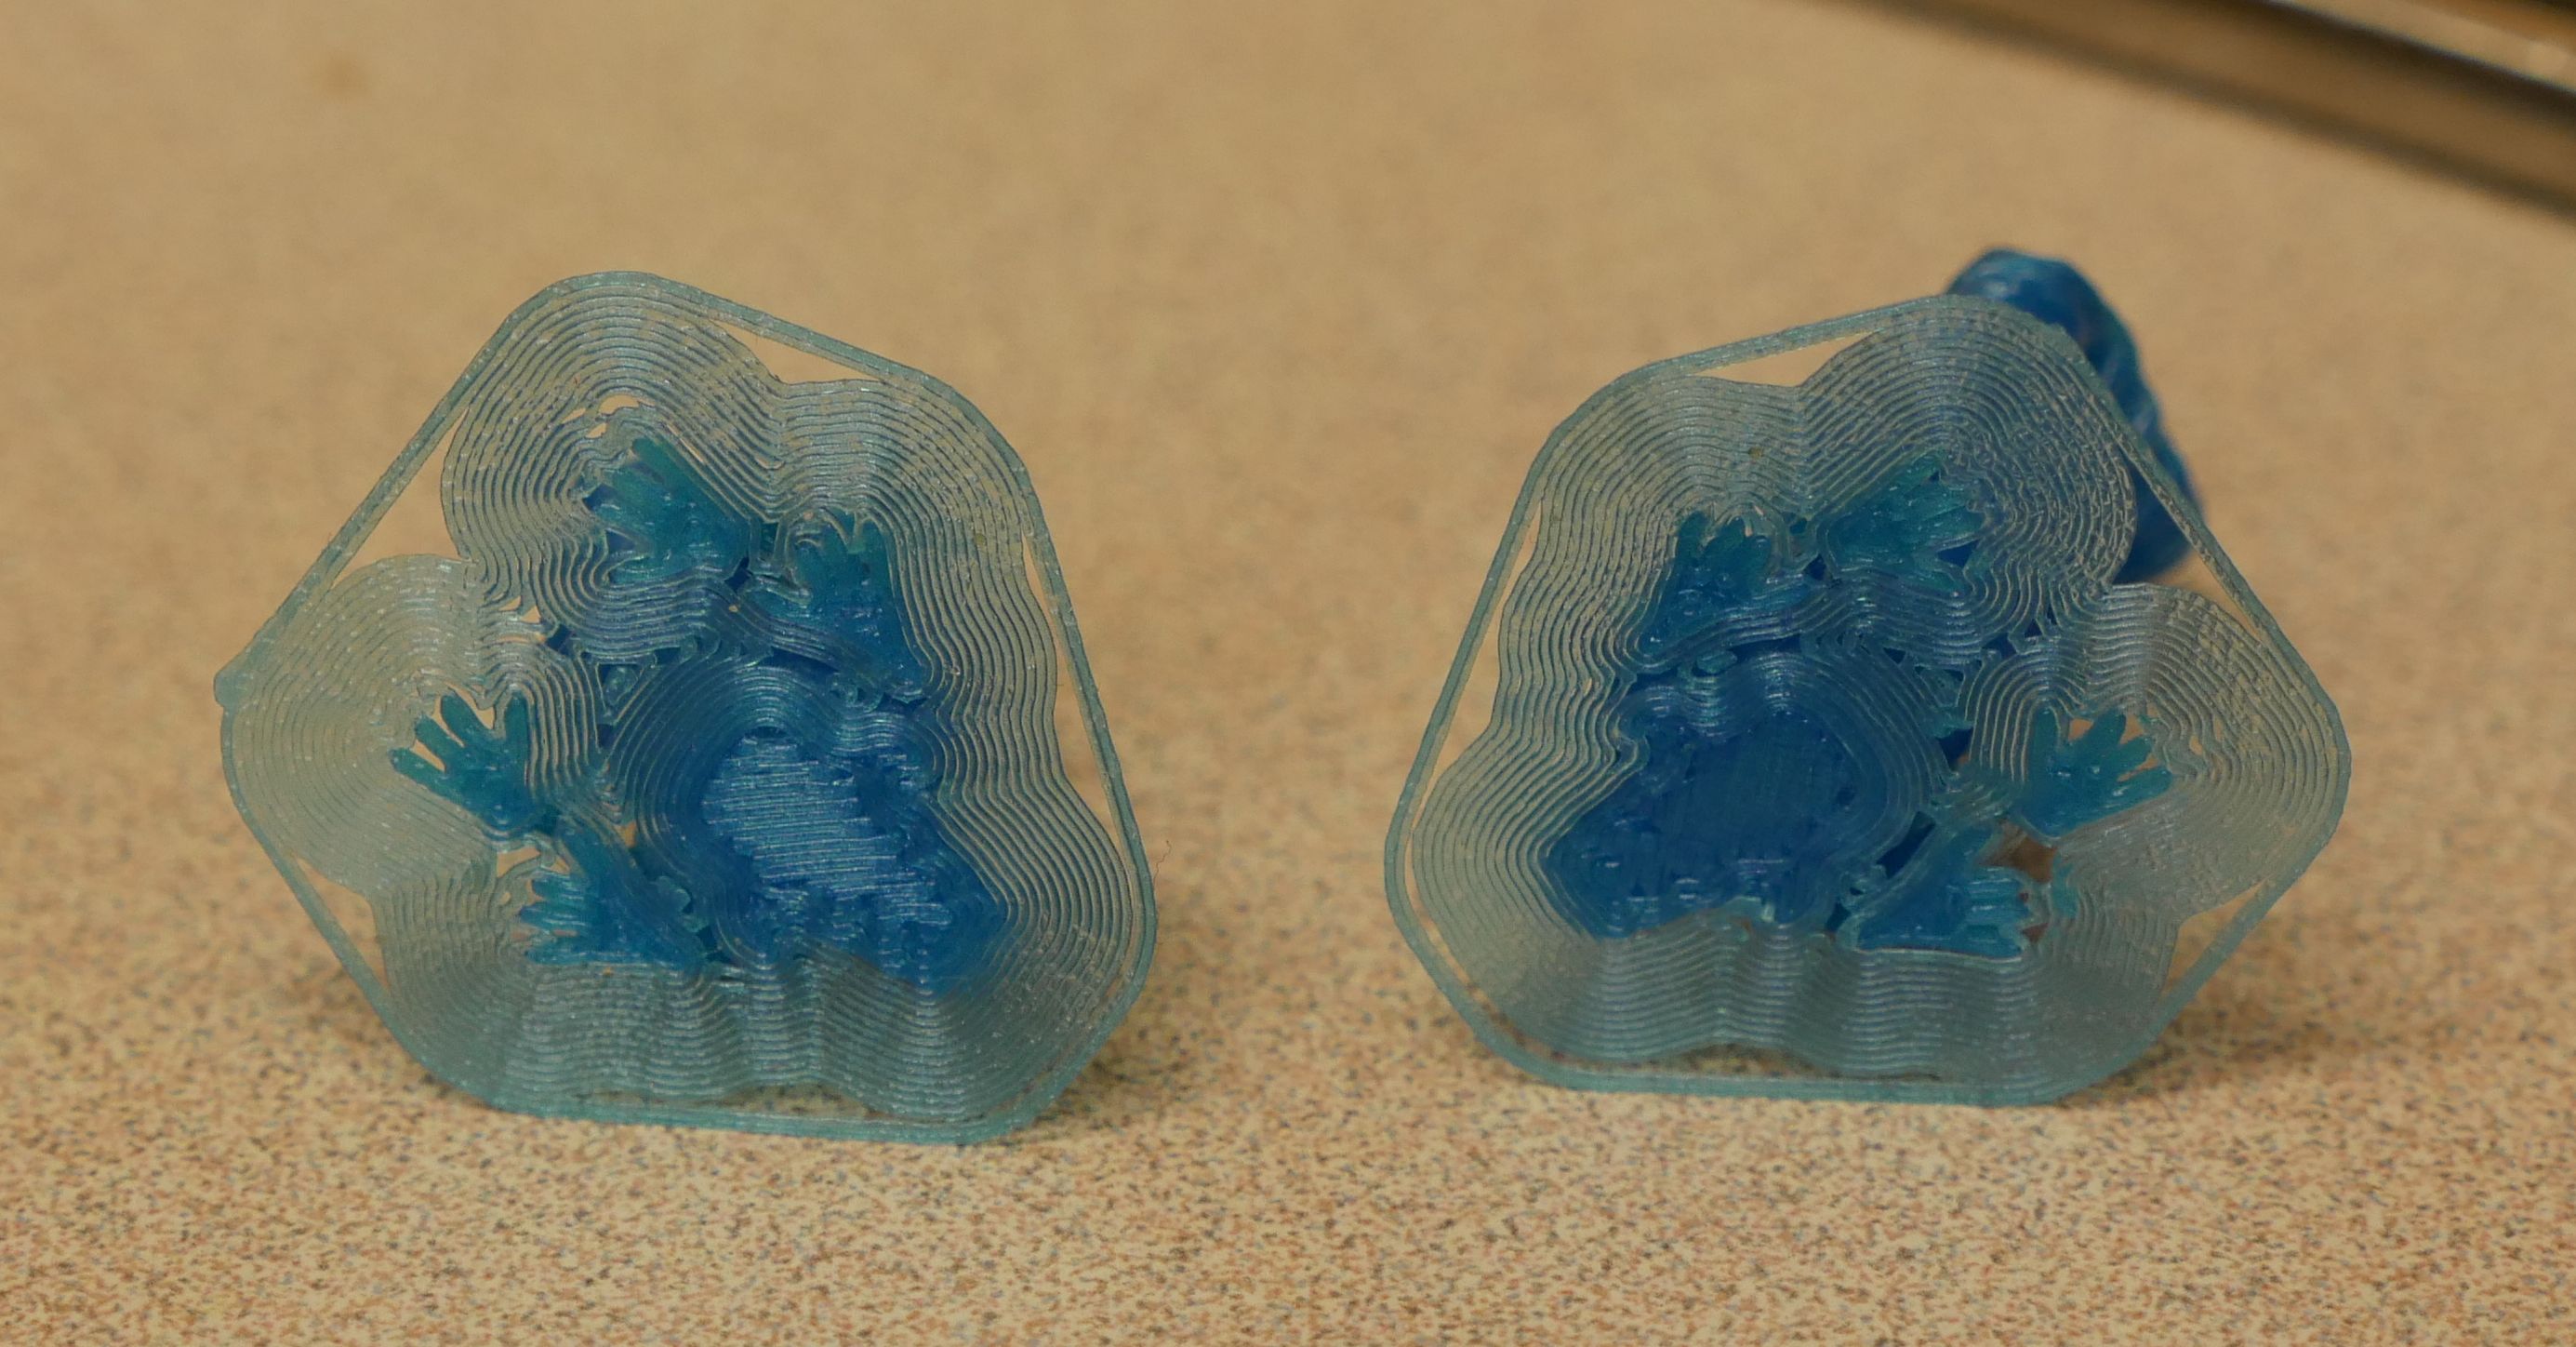
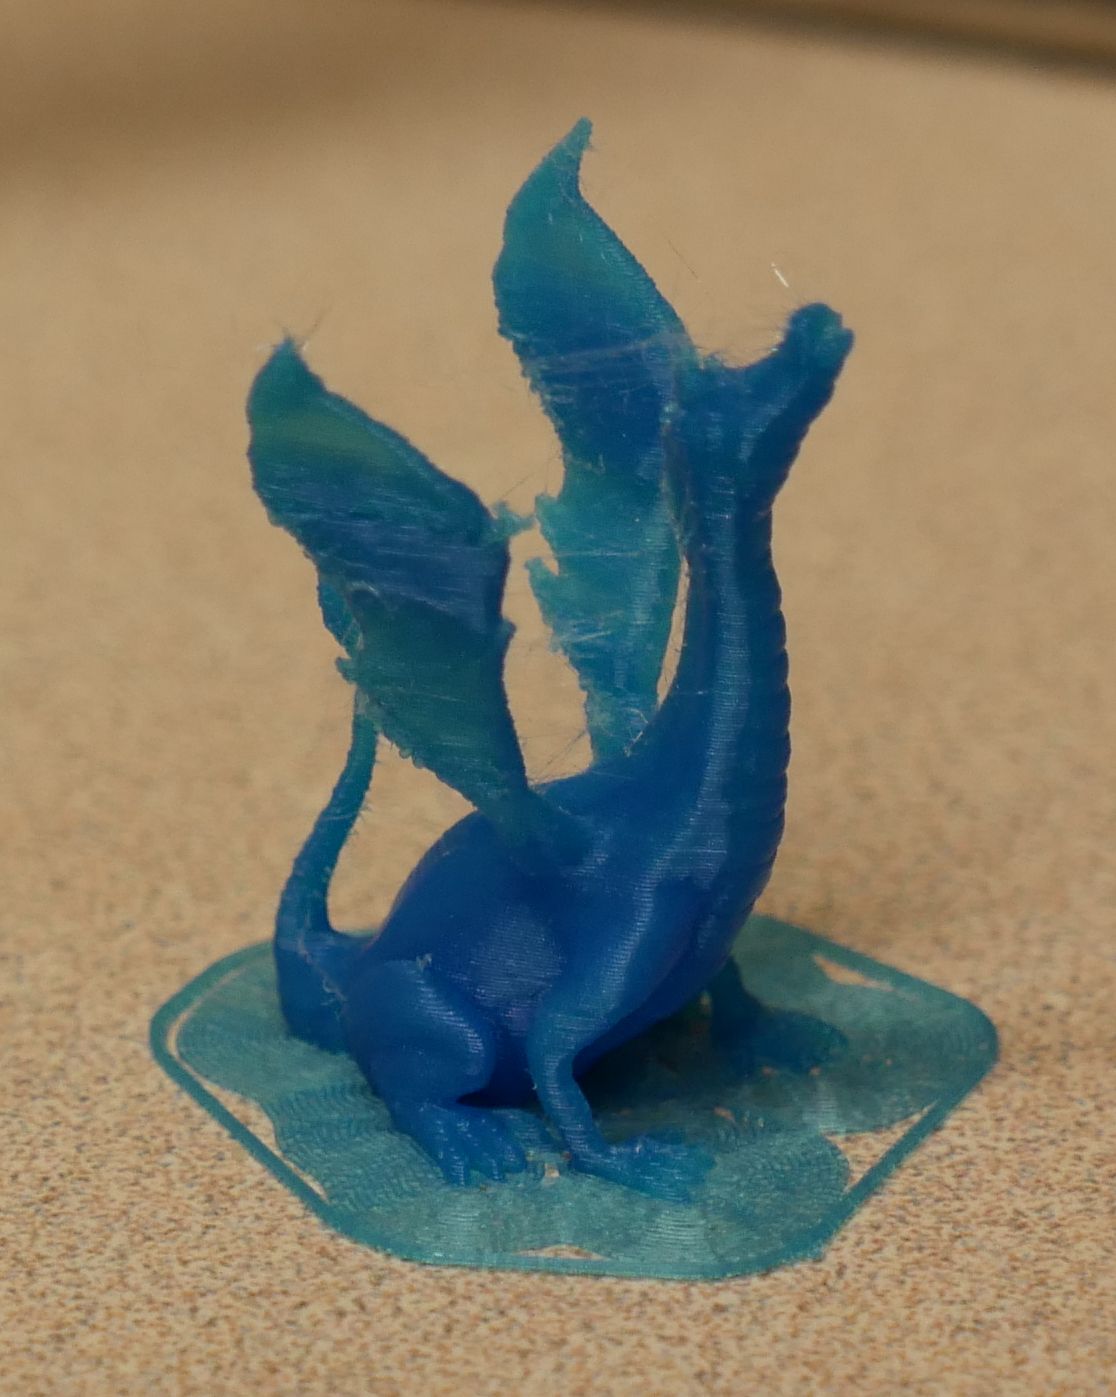
So I tried printing the dragon.stl ... my Z is off, like yours, it is too high in this print, but I still had to peel the brim up with needle point tweezers, then use a spudger to lift the part off the cool bed. I suspect a brim isn't needed. I am using a Prusa filament, default 0.15 settings, and it is NOT a stringy variety: yet, there are strings. Here are some images:
==
E3D-V6 Socks
https://e3d-online.com/v6-socks-pro-pack-of-3
Re: printing tiny Adalinda
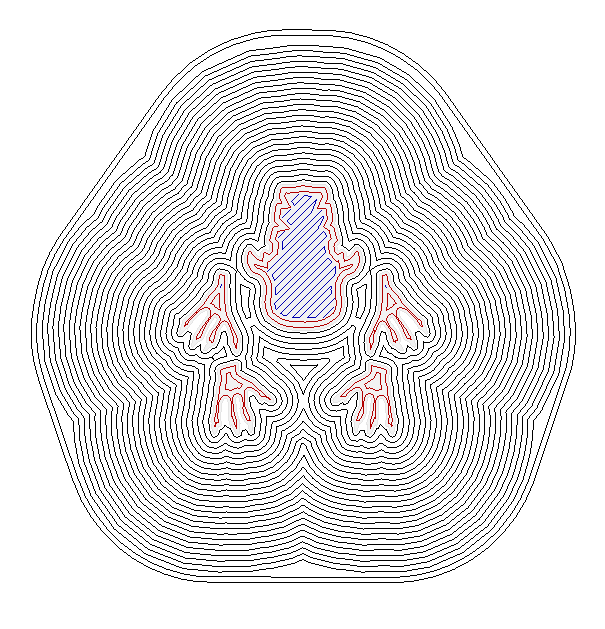
My slice looked like this:
Sliced for 0.4 mm nozzle:
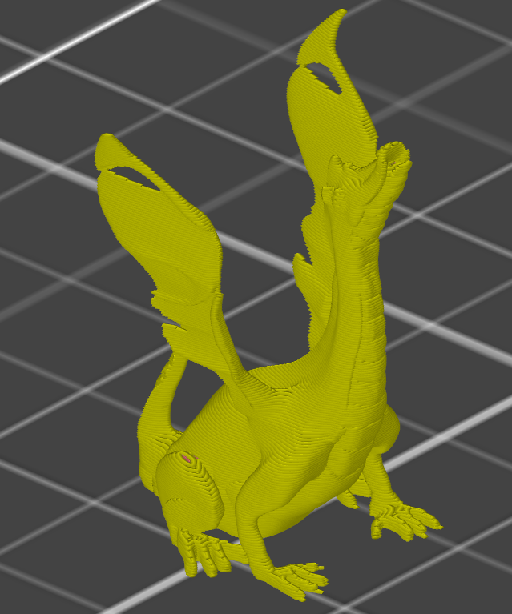
Sliced for 0.25 mm nozzle (but not printed):
Re: printing tiny Adalinda
I wonder why you got holes in the wings. Using your filled in STL fixed the holes in the wings for me.
I think that my print looks good overall. The pictures make it much larger and exaggerate imperfections that one doesn't see on casual inspection at the actual size. But the bed adhesion is a question. I haven't had problems with any other model, though maybe the smaller surface area is to blame? Note that the Adalinda full sized gcode supplied with the Prusa includes a brim---yes even at full size. The surface area without a brim is very tiny. I also feel like the 0.15 mm layer thickness version came out looking better (considering the parts that printed before the model detached). Yeah, the 0.05 mm version has smooth sides at the haunch, but there was a lot more stringing. At the 0.15 mm thickness the body printed very nicely. The blue I used was Prusament, by the way. But why would it detach from the bed at 0.05 mm and stay on better at the thicker layer? Live Z adjustment? First layer not squished enough for the thinner layer? There's not a huge difference: brim was 0.58 mm thick vs 0.38 mm thick for the two cases.
I thought windex spray was to contaminate the bed so that PETG would come off, and that for PLA you were supposed to clean with isopropanol regularly and acetone if you thought things were bad. Cleaning with these solvents didn't seem to help. I suppose I could try a different part of the bed, or the other side.
Re: printing tiny Adalinda
I have just recently started to print with a 0.25 nozzle and found that small detail had too much heat and caused distortion and melting, much like I see in the failed prints, I turned the cooling up and so far the first prints have come out much better.
This isn't the be all and end all to your issues, as it looks lie the slicer is loosing detail, but it is something to look at which may affect the quality of the finished print, Oh and the purge line!, you will need to turn this right down in the Printer settings Custom G-code. Look for
G1 X60.0 E9.0 F1000.0 ; intro line
G1 X100.0 E12.0 F1000.0 ; intro line
and change these to
G1 X60.0 E5.0 F1000.0 ; intro line
G1 X100.0 E8.0 F1000.0 ; intro line
maybe even
G1 X60.0 E4.5 F1000.0 ; intro line
G1 X100.0 E6.0 F1000.0 ; intro line
This will stop the extruder clicks during the intro line.
Normal people believe that if it is not broke, do not fix it. Engineers believe that if it is not broke, it does not have enough features yet.
Re: printing tiny Adalinda
@adrian.m14: Windex is used for reducing PETG adhesion, but for that use folks spray the bed and then let the liquid evaporate to dry as a very even soap film. Multiple coats as needed. Think of it as painting the bed with Windex.
When I use Windex to clean, I'll spray on a bit and immediately wipe dry with a paper towel. This takes up most of the soap, along with most oils the ammonia helps pick up. I'll sometimes follow with alcohol for a streak test. I can't really explain how my PEI sheet gets so many fingerprints. I am religious about keeping my hands away, yet once in a while one pops up that kills a print. I'd like to blame my cats, but they usually leave dust tracks, not oily prints.