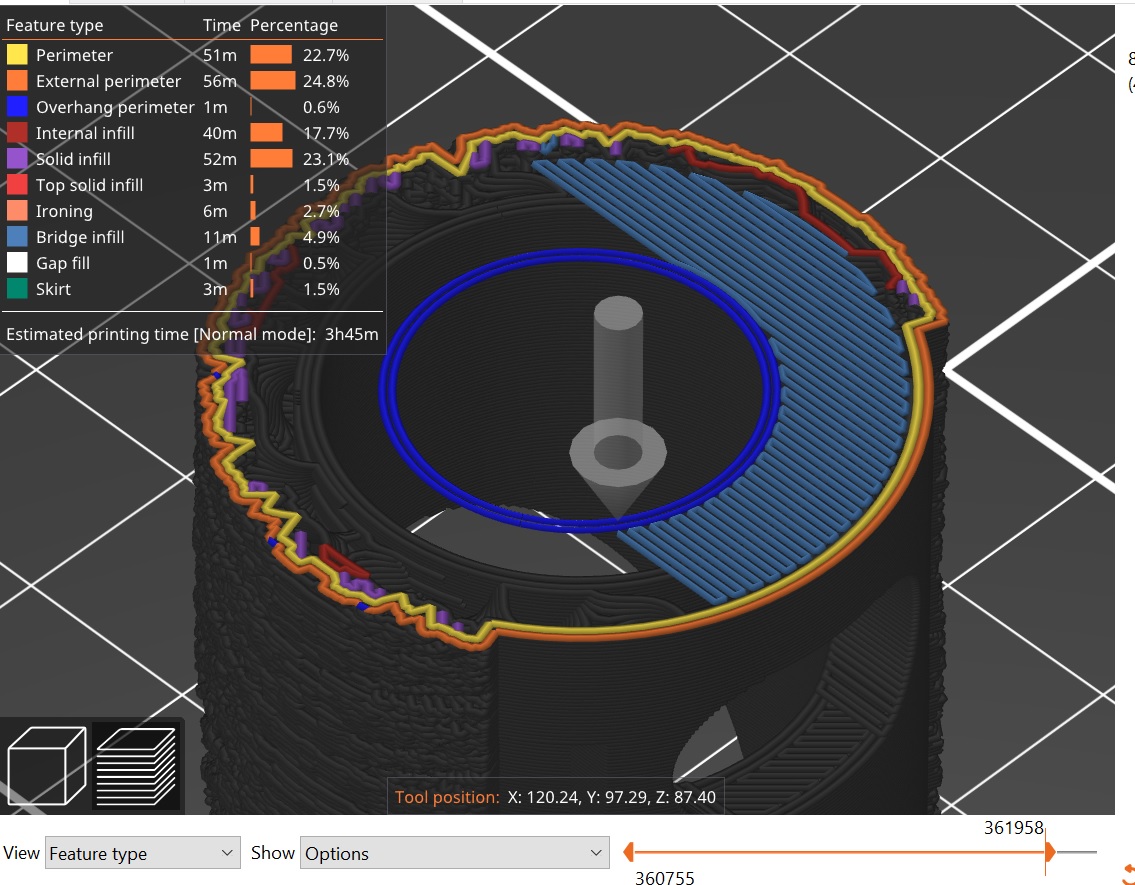
Overhang as an island.
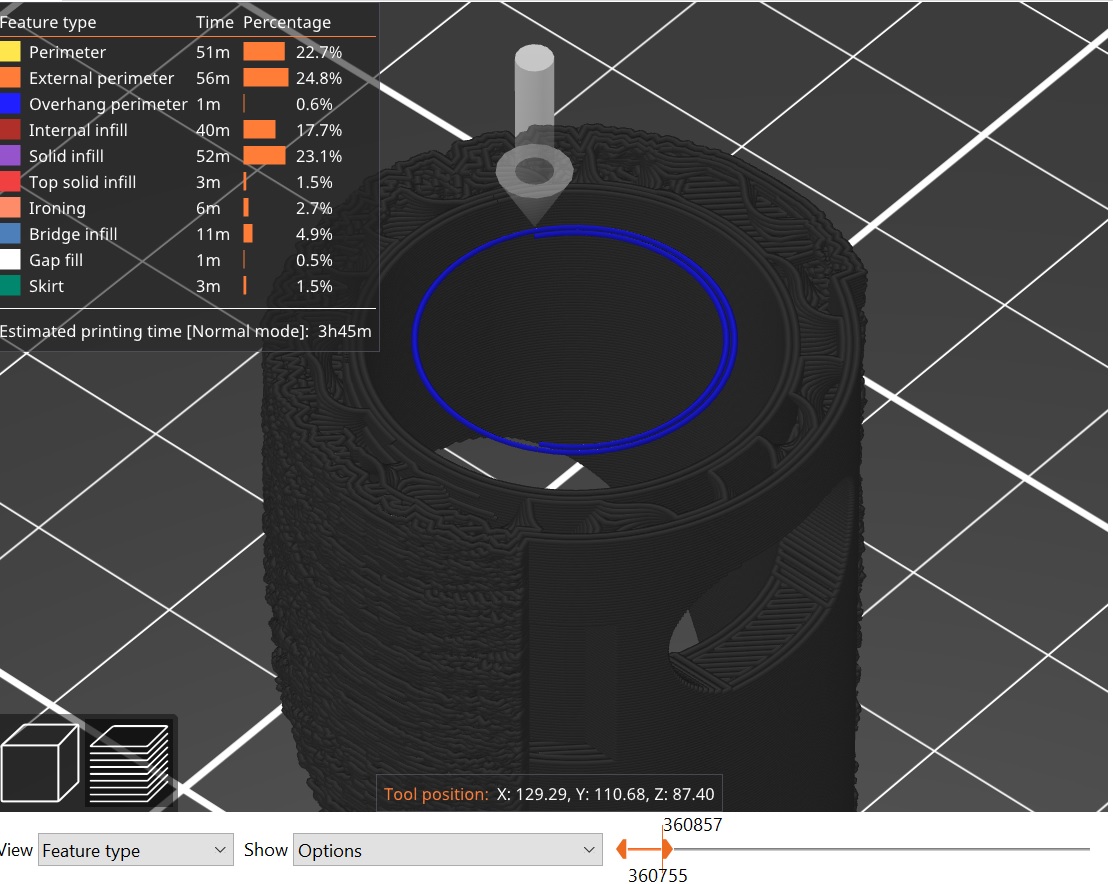
As you can see above, the printer is trying to print an overhang mid air. The thing is that if he did that last at that specific layer building, it would have a support as you can see in the second image. So how do i tell it to build first the bridge infill and then the overhang perimeter as it says at the left? I hope i use the term right at the title of the topic 🙂 .
re
I don't know how to do exactly that, but this video might give you a good solution to the problem.
Mk3S+,SL1S
Can't do that.
Thank you very much for your reply Sylvia but i don't know how to edit the design to do what is shown in the video. Isn't there a way to just tell the printer what to do first? Shouldn't the slicer know that what is gonna be printed will it be midair?
re
Oh, I see. In that case it would be helpful for you to zip your 3mf file and attach it to a post.
Mk3S+,SL1S
re
Unfortunately this print will it be part of a product that is going to be on sale. So for obvious reasons i can't do that. Was there a specific reason you wanted to see the 3mf file(specific setting)?
re
It is easier to look for a solution if we can see your settings and tinker, but I understand. Perhaps a smaller layer height or variable layer height would give you more successful bridging.
Mk3S+,SL1S
re
Just tried the variable layer height. It doesn't work. I have the same problem.
You can’t. Prusa Slicer has no option for that. Not many slicers do. Normally you would have to use support. Even if it printed the bridging first a lot of it would still fall down as it’s unsupported. The only other usual option is to either modify the model or model in your own support which you have already said you can’t do. Your options are limited, beyond learning new skills to allow you to do the modifications if you won’t let anyone else help you either.
Supports?
Is there a reason you aren't printing this with supports? The kind that you remove after the print?
Mk3S+,SL1S
re
Yes there is. Time, as it will add a lot of time to build all these supports from the bottom of the cylinder to almost the top(87.4mm to be precise) and secondly i will not be able to remove them easily as the hole of the cylinder is too small and i can't use a tool into there.
re
You can’t. Prusa Slicer has no option for that. Not many slicers do. Normally you would have to use support. Even if it printed the bridging first a lot of it would still fall down as it’s unsupported. The only other usual option is to either modify the model or model in your own support which you have already said you can’t do. Your options are limited, beyond learning new skills to allow you to do the modifications if you won’t let anyone else help you either.
Ok. So i can't tell the slicer what to do. But, again, shouldn't the slicer already know the problem? Also this doesn't create a printing failure but nonetheless, is wrong. So i'm trying to solve this.
I think I understand what you wish for, but I think that wouldn't work either -because half of bridge infill is in mid air too. Open PrusaSlicer, select Expert mode, open Print Settings tab, select Infill section and look after Infill before perimeters -I never used that option, so I can't say what impact that will have on your print object.
Slicer of course knows what is about to be printed in mid air -that's why there are Supports options. Keep in mind, that not every object can be printed perfectly in one piece (supports help most of the time, though). Anyway, if creator of the object expect that the object will be printed on FDM printer, the he usually design it in the way that is preferable for printer.
[Mini+] [MK3S+BEAR]
Worked
Oh it worked but now i have the opposite problem on another part of the print. So how can i enable this option for a specific layer height? The option says "Parameter name: infill_first". Can i use that as a g-code command, somehow?
3MF gives us the whole picture
[...] Was there a specific reason you wanted to see the 3mf file(specific setting)?
By looking at the 3MF, we can both examine the part to see if simply reorienting the part will make it easier to print, and also look at your settings to see if there's anything simple that can be adjusted. Looking at your pictures, the hole in the side is likely also going to be a problem. Without seeing the entire part, it's hard to say whether something simple like rotating it will help.
and miscellaneous other tech projects
He is intelligent, but not experienced. His pattern indicates two dimensional thinking. -- Spock in Star Trek: The Wrath of Khan Unfortunately,…
re
[...] Was there a specific reason you wanted to see the 3mf file(specific setting)?
By looking at the 3MF, we can both examine the part to see if simply reorienting the part will make it easier to print, and also look at your settings to see if there's anything simple that can be adjusted. Looking at your pictures, the hole in the side is likely also going to be a problem. Without seeing the entire part, it's hard to say whether something simple like rotating it will help.
It can't be reoriented , i have tried that and i have problems. The hole at the picture is no problem as it will not be visible in the end. As i said above i just need to add that option as a command to that specific layer. How can i do that? What is the command?
You could try either a layer height modifier or just a normal modifier mesh. Need see if that option is available. I’m not at my pc currently so can’t check if it’s there. Many are, if you go into the extra ones and not just the basic list.
It’s for reasons such as this that models really need to be designed properly for the medium used to produce them. With a 1 layer ‘patch’ over that hole it would print perfectly and you could just poke the 1 layer thick patch out. Minimal effort for maximum gain.
re
You could try either a layer height modifier or just a normal modifier mesh. Need see if that option is available. I’m not at my pc currently so can’t check if it’s there. Many are, if you go into the extra ones and not just the basic list.
It’s for reasons such as this that models really need to be designed properly for the medium used to produce them. With a 1 layer ‘patch’ over that hole it would print perfectly and you could just poke the 1 layer thick patch out. Minimal effort for maximum gain.
I tried layer height modifier and it didn't work. As i said the problem is solved, i just need the command to enable that option at that specific layer height.
RE: Overhang as an island.
No read again. Layer height modifier is NOT the same as variable layer height. A layer height modifier allows you to apply modifiers to particulars layers/range of layers. A modifier mesh allows you to apply them to specific areas.
https://help.prusa3d.com/en/article/modifiers_1767
Doesn't matter anyway as Im back at my pc and the option is not available so you are out of luck applying it to certain areas.
re
No read again. Layer height modifier is NOT the same as variable layer height. A layer height modifier allows you to apply modifiers to particulars layers/range of layers. A modifier mesh allows you to apply them to specific areas.
https://help.prusa3d.com/en/article/modifiers_1767
Oh i didn't know that. I messes those things up, sorry. I'll try it now and see if it can be done.
.
No read again. Layer height modifier is NOT the same as variable layer height. A layer height modifier allows you to apply modifiers to particulars layers/range of layers. A modifier mesh allows you to apply them to specific areas.
https://help.prusa3d.com/en/article/modifiers_1767Doesn't matter anyway as Im back at my pc and the option is not available so you are out of luck applying it to certain areas.
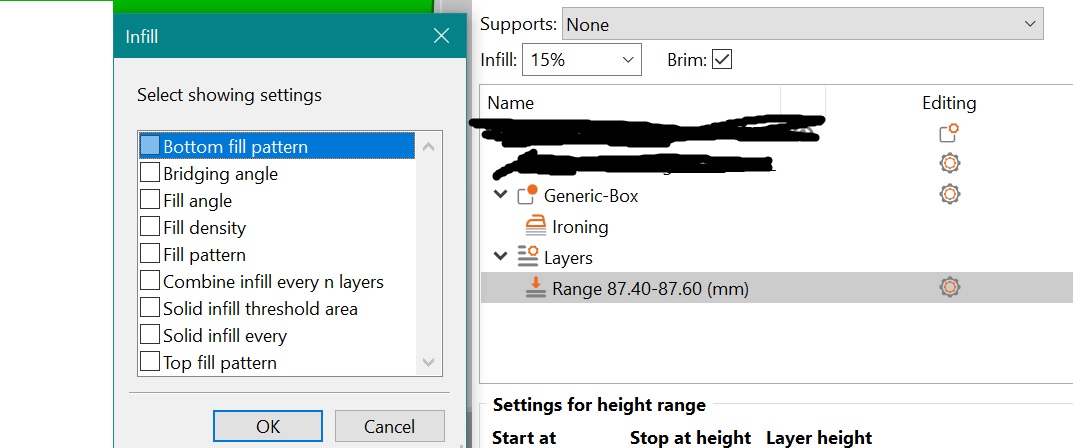
If i am doing it right, i can't see the "infill before perimeters" as an option.