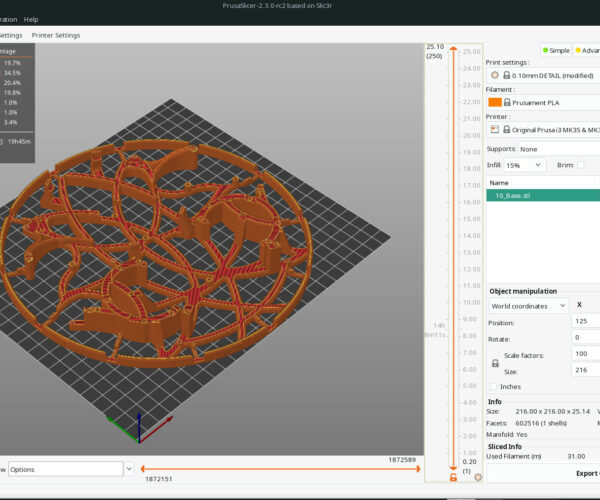
Need to print Ø216mm footprint on I3MK3S+
Hi guys,
I bought this mechanical clock:
I made the first printings and everythings is ok with a super smooth finiture of the printings. Nothing to say about.
But now I need to print the base of the clock that is Ø216mm as a footprint. Unfortunately I don't understand how to set the printer options in order to do that. Even following what the designer of the clock says about options of Prusa printers.
Anyone canhelp me?
Thank you in advance.
RE: Need to print Ø216mm footprint on I3MK3S+
216mm isn't going to fit - but you knew that.
Unless you can somehow lose the excess width, perhaps remove half the extra from each side, you will have to split the part and join it somehow.
If the part is structural you will want as much overlap as possible, my first approach would be something like:
In your CAD app make two copies of the part, from each part cut a third, and then halve the thickness of the next third - allow about one layer thickness extra for tolerance, print and join the overlapping parts with glue, screws, or whatever method is appropriate.
There is another option, the MK3 can print a few mm wider in the y direction than the official settings but you would have to pause the print to remove the introline and you will require custom gcode... You are a new member; if you are also new to 3d printing this is risky. There is a chance that you might damage the printer or at least mess up the calibration if you get this even slightly off. Until you are extremely confident and experienced, stay with splitting the part.
RE: Need to print Ø216mm footprint on I3MK3S+
Scale everything?
RE: Need to print Ø216mm footprint on I3MK3S+
Remember to disable brim and skirt to save a few mm.
and miscellaneous other tech projects
He is intelligent, but not experienced. His pattern indicates two dimensional thinking. -- Spock in Star Trek: The Wrath of Khan Unfortunately,…
RE: Need to print Ø216mm footprint on I3MK3S+
I made a quick 216mm model and tried it in PrusaSlicer. The only way to get it to slice is by placing it on its side and cut 3 mm from the top and bottom. Than place it flat again and don't use a skirt or brim.
I'm curious what instructions the designer gave for printing on a Prusa. Not sure if you can or want to post those instructions as you say you bought the design.
RE: Need to print Ø216mm footprint on I3MK3S+
I found the instructions and a sample file on myminifactory.com
With these instructions:
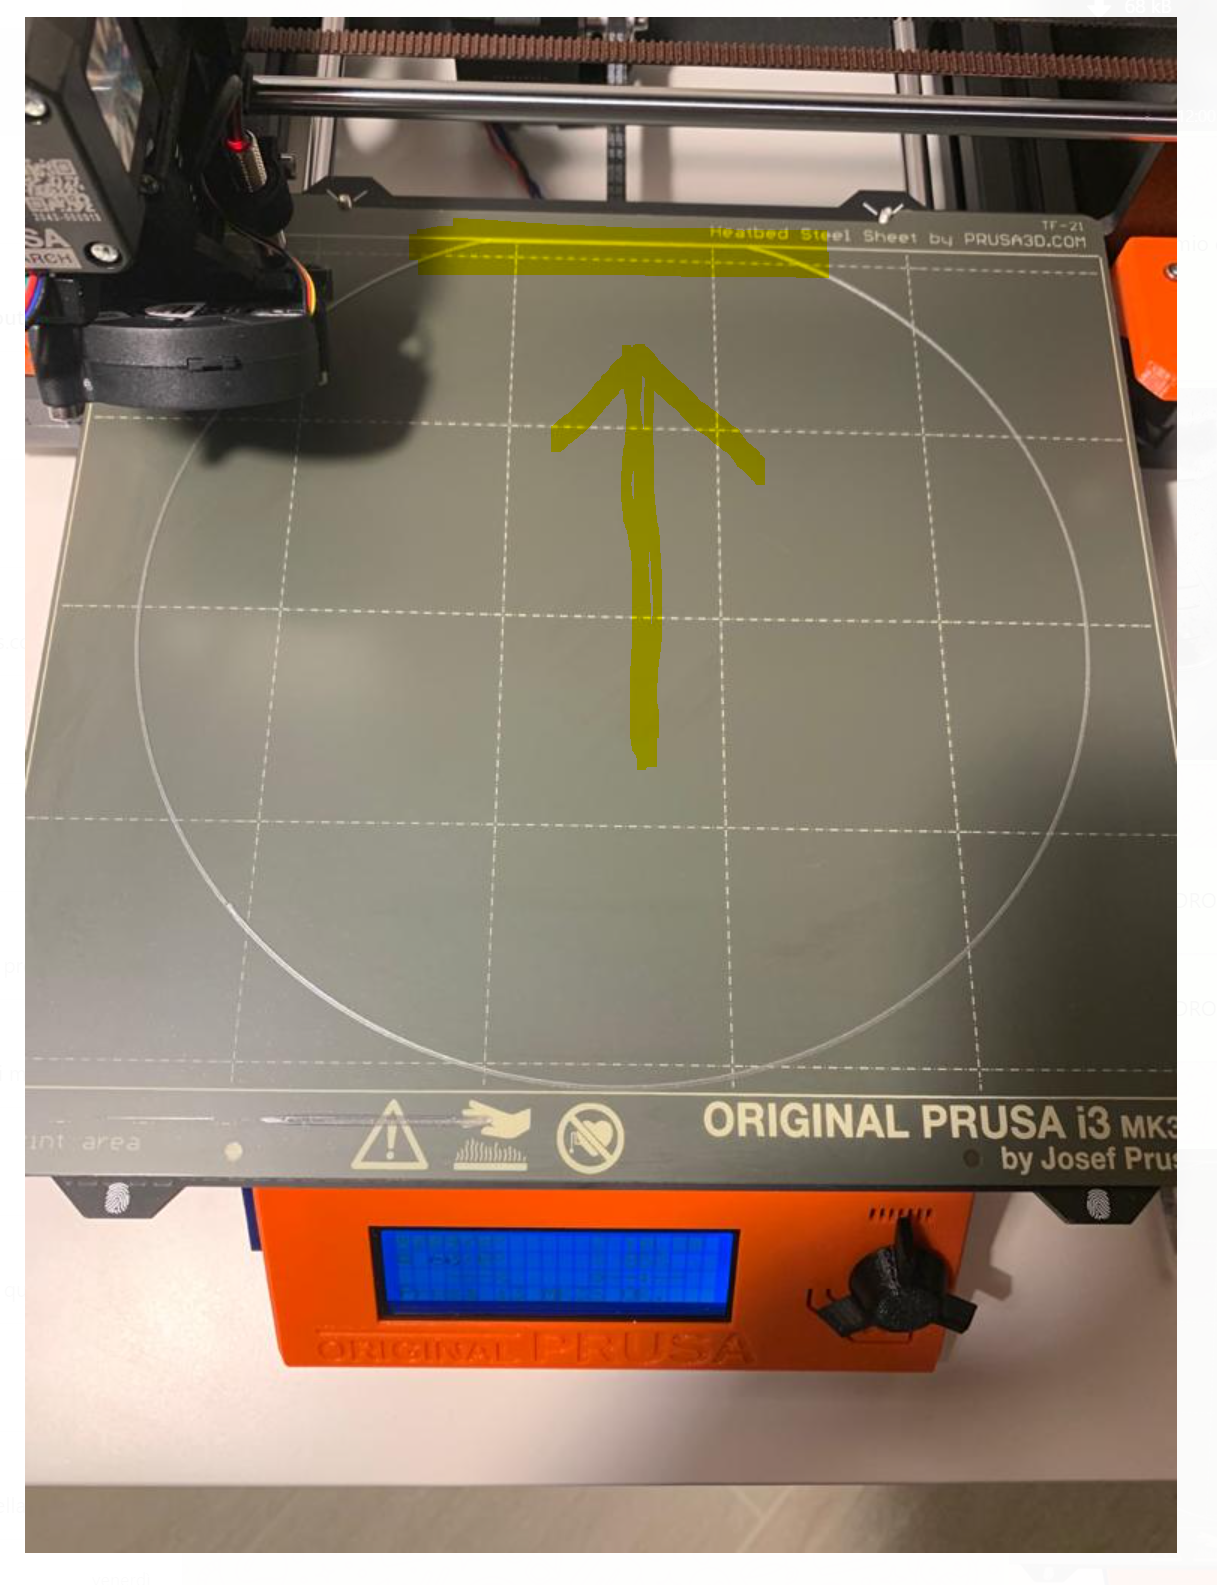
Its possible to print the base on the 250x210 rated build size by setting the the plate at 250x216 in your slicer stting and moving the starting point at 0 - 3 the last 6mm are printed on the wiping area. You need to remove the skirt as well.
And changing the bed size (bed shape) in prusaslicer like in the picture I got it to slice oke. You may have to be in expert mode to make the changes and slice without a skirt.
I haven't tried printing it.
RE: Need to print Ø216mm footprint on I3MK3S+
I tried printing it, but that didn't work. It cuts of a part at the back of the bed.
RE: Need to print Ø216mm footprint on I3MK3S+
Scale everything?
What about scaling, as mentioned above? Just scale all parts down to some 90% to fit the print bed. Scaling can be done in the PrusaSlicer directly and I have found it to be pretty accurate in similar circumstances. Just remember to scale all parts.....
Other than that, cut it into nice parts - the slicer does that as well - and print in parts and then glue the parts. However cutting into the teeth of the big part will be a bitch...
I try to give answers to the best of my ability, but I am not a 3D printing pro by any means, and anything you do you do at your own risk. BTW: I have no food for…
RE: Need to print Ø216mm footprint on I3MK3S+
I tried printing it, but that didn't work. It cuts of a part at the back of the bed.
I think part of the problem is making those settings changes in the slicer doesn't do anything in the printer. I suspect what you need to do is send gcode the position the nozzle to X0,Y-4 and then issue M92 X0 Y0 gcode to reset that as the 0,0 position (perhaps in startup gcode). Otherwise, the printer is still going to the correct 0,0 position.
Moving the Y axis manually via the printer menu, it will position from Y-4 to Y212 successfully, so this might be doable. I have not tested it myself. FWIW, X can similarly be moved from X0 to X254 on my Mk3.
You need to be sure the removable print sheet is carefully placed to cover the full range if trying anything like this.
and miscellaneous other tech projects
He is intelligent, but not experienced. His pattern indicates two dimensional thinking. -- Spock in Star Trek: The Wrath of Khan Unfortunately,…
RE: Need to print Ø216mm footprint on I3MK3S+
I tried it again with -3 instead of the 3 in the picture I posted. That moved every thing more to the front of that print bed and now I could make a 216 mm circle.
The Y origin has to be set to -3 and you should be able to print this.
Here is a picture of my print test.
RE: Need to print Ø216mm footprint on I3MK3S+
I tried it again with -3 instead of the 3 in the picture I posted. That moved every thing more to the front of that print bed and now I could make a 216 mm circle.
I am surprised that worked... but I guess it makes sense if you can change the origin. Good test!
and miscellaneous other tech projects
He is intelligent, but not experienced. His pattern indicates two dimensional thinking. -- Spock in Star Trek: The Wrath of Khan Unfortunately,…
RE: Need to print Ø216mm footprint on I3MK3S+
Scale everything?
What about scaling, as mentioned above? Just scale all parts down to some 90% to fit the print bed. Scaling can be done in the PrusaSlicer directly and I have found it to be pretty accurate in similar circumstances. Just remember to scale all parts.....
Other than that, cut it into nice parts - the slicer does that as well - and print in parts and then glue the parts. However cutting into the teeth of the big part will be a bitch...
No scaling admitted: there are several commercial items and i should modify all the 3d models for these items fitting (i.e. housings, screws nuts, etc.)
RE: Need to print Ø216mm footprint on I3MK3S+
@baklin
OK OK OK 😀 but why for me is not working that? 😯 😱
Tried a lot of times with this. Actually even the manual said to move the origin @0; -3 I did that but for me nothing happens.
Maybe new firmware over the printer installed? I Shoud have 3.9.2 or something like that.
Soon I'll post what for me happens.
RE: Need to print Ø216mm footprint on I3MK3S+
That is why I wanted to test it too. I don't think I will ever need it, but it is good to know it can be done.
RE: Need to print Ø216mm footprint on I3MK3S+
Actually Prusa Slicer 2.3 RC2 cannot permit to slice a circle of Ø216 which is exactly of the same dimension of the new bed dimensions (250x216).
So I'll try a walk around reducing unproportionally the Y axel like the pic below plus the editing of the bed dimensions and the new coordinates of the origin. Doing this I can fortunately slice.
RE: Need to print Ø216mm footprint on I3MK3S+
If you've got it working then this is irrelevant but what about M206 - Set Home Offsets
RE: Need to print Ø216mm footprint on I3MK3S+
@baklin
Ciao baklin... Unfortunately for me the same problem and i'm getting crazy!! 😥 🤬 🤬 🤬 🤬
Have a look on the pic below. I assure you that the settings are the same of yours!
What am I doing wrong?? 😓
Any suggestion more?
RE: Need to print Ø216mm footprint on I3MK3S+
If you've got it working then this is irrelevant but what about M206 - Set Home Offsets
Ciao Towlerg,
could you please explain how to shift the model wherever you want with M206 command?
Thanks in advance
RE: Need to print Ø216mm footprint on I3MK3S+
@alessandro
M206 does not shift the model, it persistently shifts the XY origin. Obviously not going to work if you have hard endstops but I seem to remember (I do not own a Prusa but thats another story ..) MK3s uses inductive stops, may be wrong.
In effect, some portion of the negative X and Y border becomes normal positive bed expanding the total size of the bed.


