Brim vs. Raft
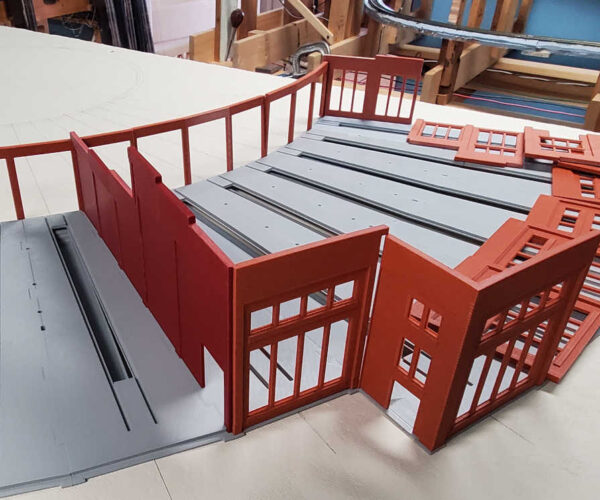
I'm printing several items that have a small footprint, but are fairly tall (see photo).
I've had a problem with them partially pulling off the build plate so I'm experimenting with adding a raft. But later I read a Prusa post where it recommended a brim around parts with this problem. It there a benefit to one over the other?
Thanks
Bill Lugg
RE:
A brim forms around the first layer when removed there may be a need to take the sharp edge off with a deburring tool, sharp knife or sandpaper
the under side of the model will be as smooth as the build plate surface~
with a raft you build a section of extruded filament that is usually several layers thick and wider than the base of the model, then the model is printed on top of the raft,
this always uses more filament waste, and often causes the bottom of the model to be rough, it may well cause inferior rigidity because the raft to model bond is purposely poor, to allow for subsequent removal.
even then, sometimes removing the raft can be difficult.
If you can arrange the model orientation so that the long edge is in line with the 'Y axis' there is technically more chance of success than if the long edge is across the X axis

aligned as per the image above the forward and backward motion of the bed will have little impact on the stability of the model

aligned as per the image above the forward and backward motion of the bed will have greater impact on the stability of the model
if printing in PLA, you may well find a higher bed temperature assists with first layer bonding,
I use 70C
regards Joan
I try to make safe suggestions,You should understand the context and ensure you are happy that they are safe before attempting to apply my suggestions, what you do, is YOUR responsibility.Location Halifax UK
RE: Brim vs. Raft
Thanks for the reply. I have found the undesirable effects of the raft. I have also increased the build plate temp to 65 degrees and found it helps a bit, but not as much as I'd like. I'll try your suggestions and see if I have better luck.
Thanks again.
Bill Lugg
RE: Brim vs. Raft
Good Luck Bill,
regards Joan
I try to make safe suggestions,You should understand the context and ensure you are happy that they are safe before attempting to apply my suggestions, what you do, is YOUR responsibility.Location Halifax UK
RE: Brim vs. Raft
Looks like you're doing some model railroad work. That's what got me into 3d printing.
I draft most of my stuff to print flat, but when I need the support, I almost always use the brim instead of the raft. Sometimes I will add in a break-away or cut-away tab.
RE:
Looks like you're doing some model railroad work. That's what got me into 3d printing.
I draft most of my stuff to print flat, but when I need the support, I almost always use the brim instead of the raft. Sometimes I will add in a break-away or cut-away tab.
Yes, I'm working on a model of the roundhouse that stood in Laramie, Wyoming as late as the 1950's in HO.
I would print these wall sections flat, but the brick detail doesn't print well that way, so vertical it is. The approach @JoanTabb presented was working perfectly...right up until we had a power failure. For some reason, the printer didn't recover from it, so I will start again.
Bill Lugg
RE: Brim vs. Raft
Rafts go back to the days before mesh bed leveling as they can help deal with variations in the bed height. With a Prusa, I hardly see a reason for using a raft as opposed to a brim.
Formerly known on this forum as @fuchsr -- https://foxrun3d.com/
RE: Brim vs. Raft
Rafts go back to the days before mesh bed leveling as they can help deal with variations in the bed height. With a Prusa, I hardly see a reason for using a raft as opposed to a brim.
With my most recent, near perfect print using a brim, reorienting the object on the build plate and increasing the plate temperature, I can see your point.
Thanks to all for your help on this.
Bill Lugg
RE: Brim vs. Raft
🙂
I try to make safe suggestions,You should understand the context and ensure you are happy that they are safe before attempting to apply my suggestions, what you do, is YOUR responsibility.Location Halifax UK
RE: Brim vs. Raft
I use a UPS as well...
1500 va ups, covers short power outages...
regards Joan
I try to make safe suggestions,You should understand the context and ensure you are happy that they are safe before attempting to apply my suggestions, what you do, is YOUR responsibility.Location Halifax UK
RE: Brim vs. Raft
I use a UPS as well...
1500 va ups, covers short power outages...
regards Joan
Yep, I've been thinking about adding one to my setup, but haven't pulled the trigger yet. I guess I need to move forward with that, especially since I live in a rural environment. We've clocked winds over 70 mph on occasion out here in the winter and the power can get a little shaky at times.
Bill Lugg
RE: Brim vs. Raft
That's strange. I've always gotten great brick/block detailing by printing pieces flat.
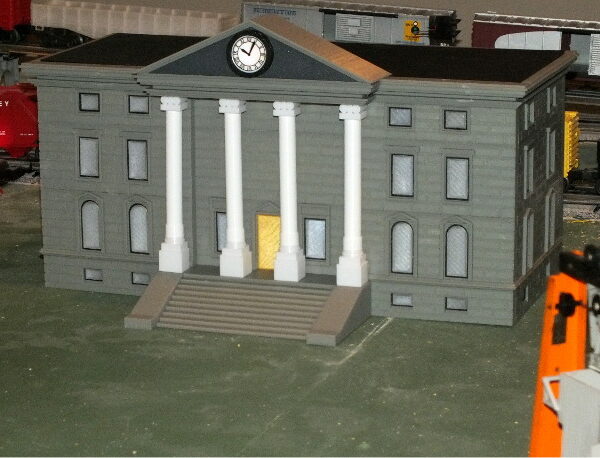
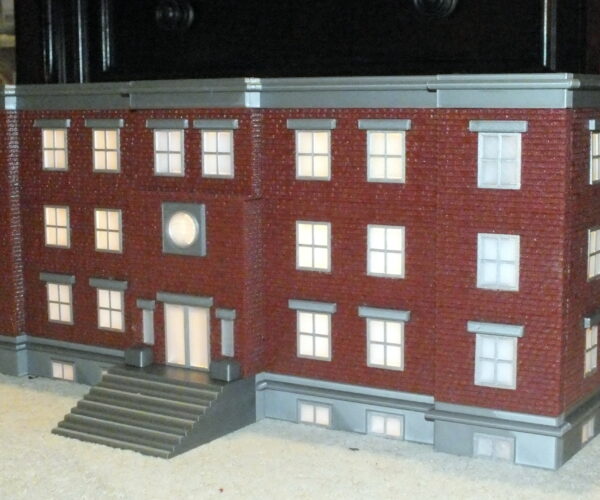
If you look at the two items below, the pieces were printed flat against the build plate. Some of the brick/block detailing is on the side of the pieces, and they blend well with the other wall sections printed flat with the detail upward. These are O scale.
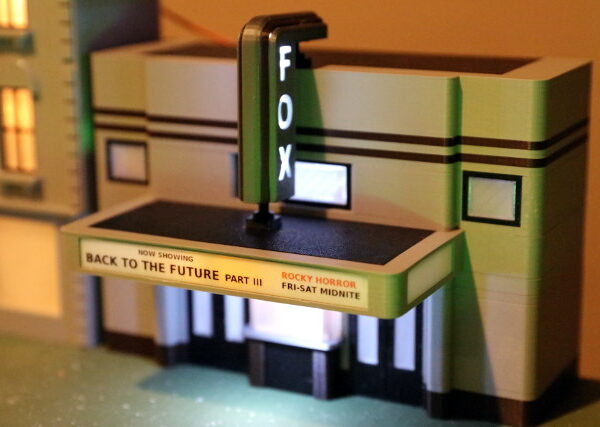
Care to guess what the building in the top photo was modeled after? (Hint: Look at the time.) 😉
Looks like you're doing some model railroad work. That's what got me into 3d printing.
I draft most of my stuff to print flat, but when I need the support, I almost always use the brim instead of the raft. Sometimes I will add in a break-away or cut-away tab.
Yes, I'm working on a model of the roundhouse that stood in Laramie, Wyoming as late as the 1950's in HO.
I would print these wall sections flat, but the brick detail doesn't print well that way, so vertical it is. The approach @JoanTabb presented was working perfectly...right up until we had a power failure. For some reason, the printer didn't recover from it, so I will start again.
Bill Lugg
RE:
@jsw, Is that the one from Back to the Future?
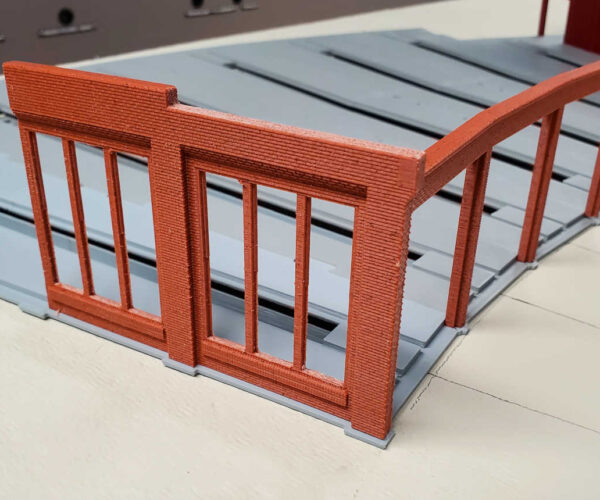
I'm guessing the difference is the scale. I'm printing these walls in HO, so the bricks are about half the size, with half the "relief", of yours. the depth of the mortar lines are only 0.5 scale inches deep and I've chamfered the edges of the bricks to give a little more space for the mortar material to settle into. I tried printing one wall flat and it just came out ugly.
Here's a close-up of the front corner of stall 1 of the roundhouse:
The other issue I have is that most of the walls have brick detail on both sides since they stick up above the roof. That adds an additional complication to the mix.
Your buildings are quite impressive looking. You've done a great job of hiding the joints in the walls.
Bill Lugg
RE:
It actually looks very nice, and if it works better for you printing upright all the better. People who 3d print find their own best ways for doing things, and not everybody does everything the same.
Thanks, but you can see the joints if you look closely. No joints are obvious at maybe 6 feet away or so.
Yes, the building is modeled after the facade on the Universal lot which was used in BTTF. One user here said I should put a model DeLorean in front of it, but I don't want to OD on that theme. 😉
I did, however, include this on the local theater.
RE: Brim vs. Raft
How is the printing going?
I had to print similar for a friend. In the end, I added a small triangle piece at the hidden end at 90 degrees to the wall. It was attached with only a tiny bit at the bottom, and a tiny bit at the top of the triangle so easy to trim off. Hard to explain in text but hopefully you get what I mean. If viewed from above it makes a T shape with the triangle being the top of the T. This gives support and extra grip to the bed. Easy to add, easy to trim and made printing very easy.
Yes, I understand what you mean, though I hadn't thought of it - good idea.
Printing so far has been going well. I've printed three wall sections with the new configuration and every one has come out perfect. Another side effect is that the "snug" supports in the window openings are easier to remove and the tiny ridges that will provide the backing to keep the window frames in place are printing with more definition.
So It's a win all around.
Bill Lugg
