Extruder issues and PETG everywhere
Hi everyone.
I have recently upgraded my MK3 to a MK3s + nozzle X from E3D.
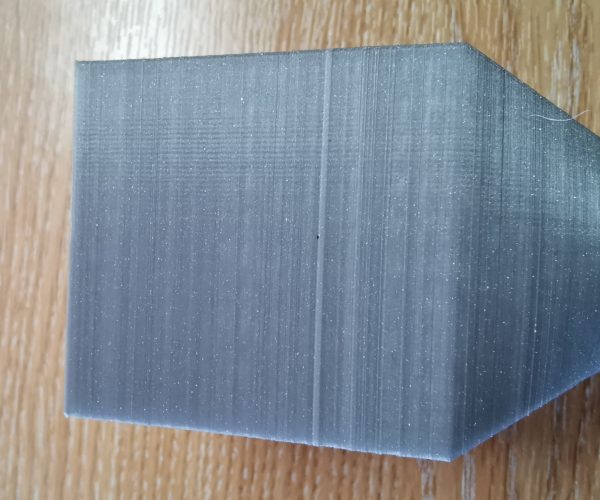
Recently I have noticed that the extrusion and the layer lines are a bit inconsistent, event on the 0.1 DETAIL settings with PLA, so extremely low external perimeter speeds. Photos:
So I tensioned the belts and moved the printer to an extremely stable table but only got a slight improvement in the print quality.
Upon further investigating this issue, I found that there was a big blob of material between the heater block and the heatsink, so the temperature of it was quite high. In fact, so high that some of the PETG printed extruder parts have deformed and the mount for the PINDA probe have almost broken off. Sorry for the photo quality, don't want to stop the print. Might make another one when done.
So I cleaned off the blob (of what seems to be PETG) and tried again but did not get much of an improvement.
I am currently printing the extruder body and the extruder cover out of ABS and planning to thoroughly clean the heater block before reassembling the extruder.
Any other advice on what should be reprinted or done to avoid such issues? Anything else that I should check before reassembling the extruder
RE: Extruder issues and PETG everywhere
Biggest clue was where you said you changed the nozzle and now have blobs of plastic. That's an almost certain indication that you didnt re-assemble properly following the e3d nozzle guide. https://wiki.e3d-online.com/E3D-v6_Assembly
The inside flat end of the nozzle has to be sealed against the bottom of the heatbreak. The heater block acts like a big long nut allowing that to happen. Final tightening also has to be done at full temp around 285 degrees too. If you dont then plastic works its way out. The other side effect is that it makes your extrusion flow inconsistent so you get worse quality.
I think you need to disassemble it again and make sure the heatbreak is screwed into the heatblock enough that when the nozzle is tightened it can seal properly.
RE: Extruder issues and PETG everywhere
@neophyl
I think you are be right, I might have under-tightened the nozzle. I did the swap the nozzle in the already assembled hotend using the Prusa guide, at 250-260 degree if I remember correctly. But the guide might be slightly misleading on the difficulty of the process.
I will definitely re-tighten it in the disassembled state and at 280 degrees.
RE: Extruder issues and PETG everywhere
It isn't only the temp; you must ensure the nozzle is torquing against the heat break and NOT the heater block.
RE: Extruder issues and PETG everywhere
Solved. Just did a test print and the quality is back to being great.
To summarize:
Absolutely make sure that the nozzle and the heatbreak are pushing against each other and there is no plastic coming out of the top. Follow the E3D guide (thanks @neophyl and @tim-m30) and be wary when using Prusas "simple" nozzle swap technique from this video
The fan shroud gets in the way as well as the PINDA probe. This guide is much better than the video, but I think there can still be a bit of improvement done on it. https://help.prusa3d.com/article/fJa7GxLSG6-changing-or-replacing-nozzle
Since I had plastic on top of the heatblock I removed the heatsink and used a brass brush to clean any plastic all around the block.
Another change that I noticed is that I went from gen3 to gen4 parts and R4 has a thicker wall used to hold the hotend in place.
It also did not hurt that I printed some of the parts out of ABS, went 100.5% on X and Y to compensate for shrinkage -- worked like a charm. ABS also does not make the terrible squeaky sound when tapping into with screws 🙂 .

