Bad overhangs, chamfers, fillets.
Hardware: MK3S+, nyloc nut mod(perfectly level bed), E3D nozzle x, E3D sock pro, Lack enclosure. Firmware up to date
Filament: Prusa red pla, overture white pla
Software: Prusaslicer latest version, Prusaslicer default print settings in .2, .15, and .1 layer heights, also tried increasing heat, decreasing heat, adding extra perimeter, reducing elephant foot compensation to 0
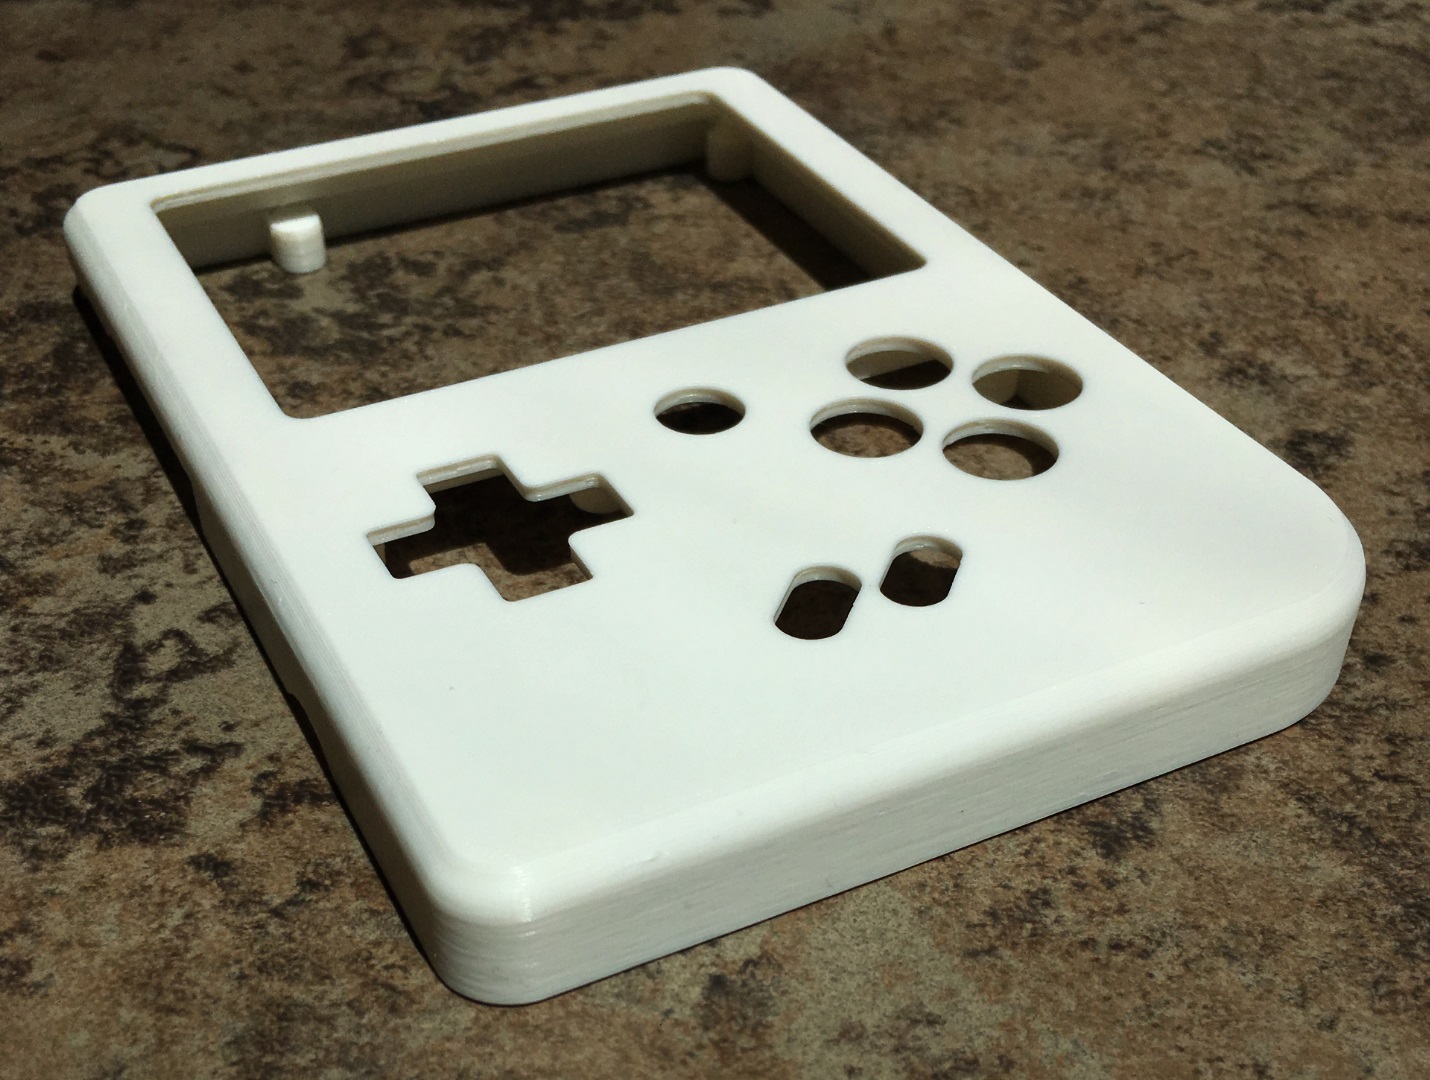
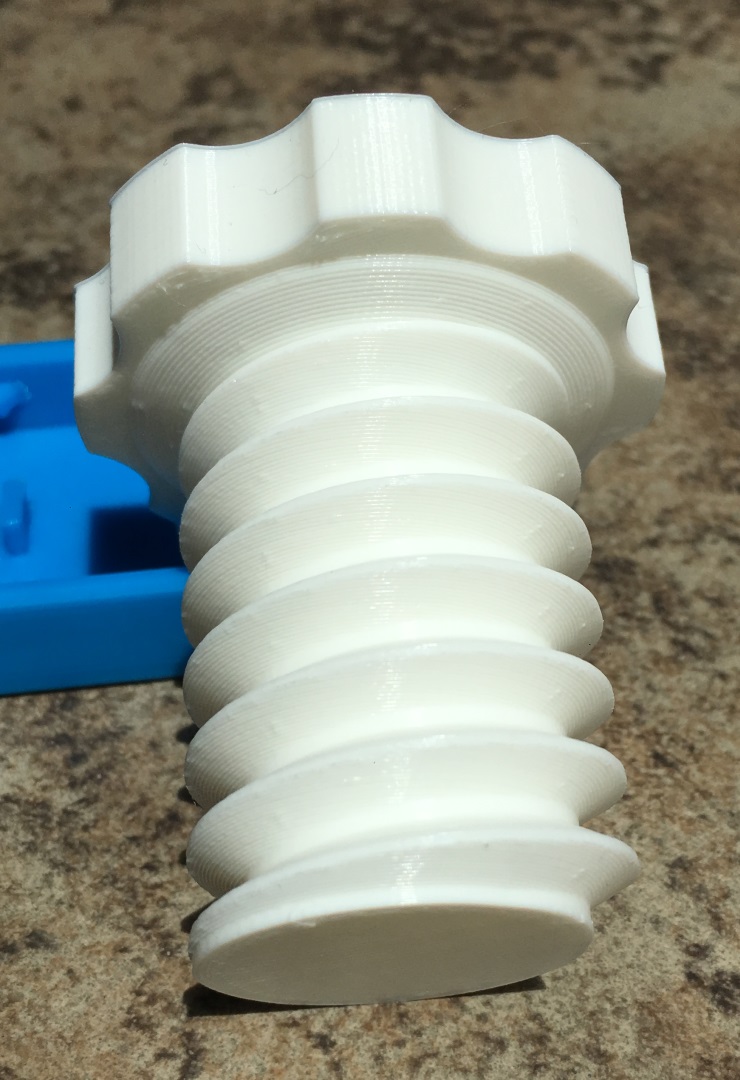
For the most part the printer performs incredibly well but I can’t seem to dial in the overhangs. It’s doing a poor job with even the easiest parts like the headphone mount I tried out from thingiverse. What am I missing? Pictures attached.

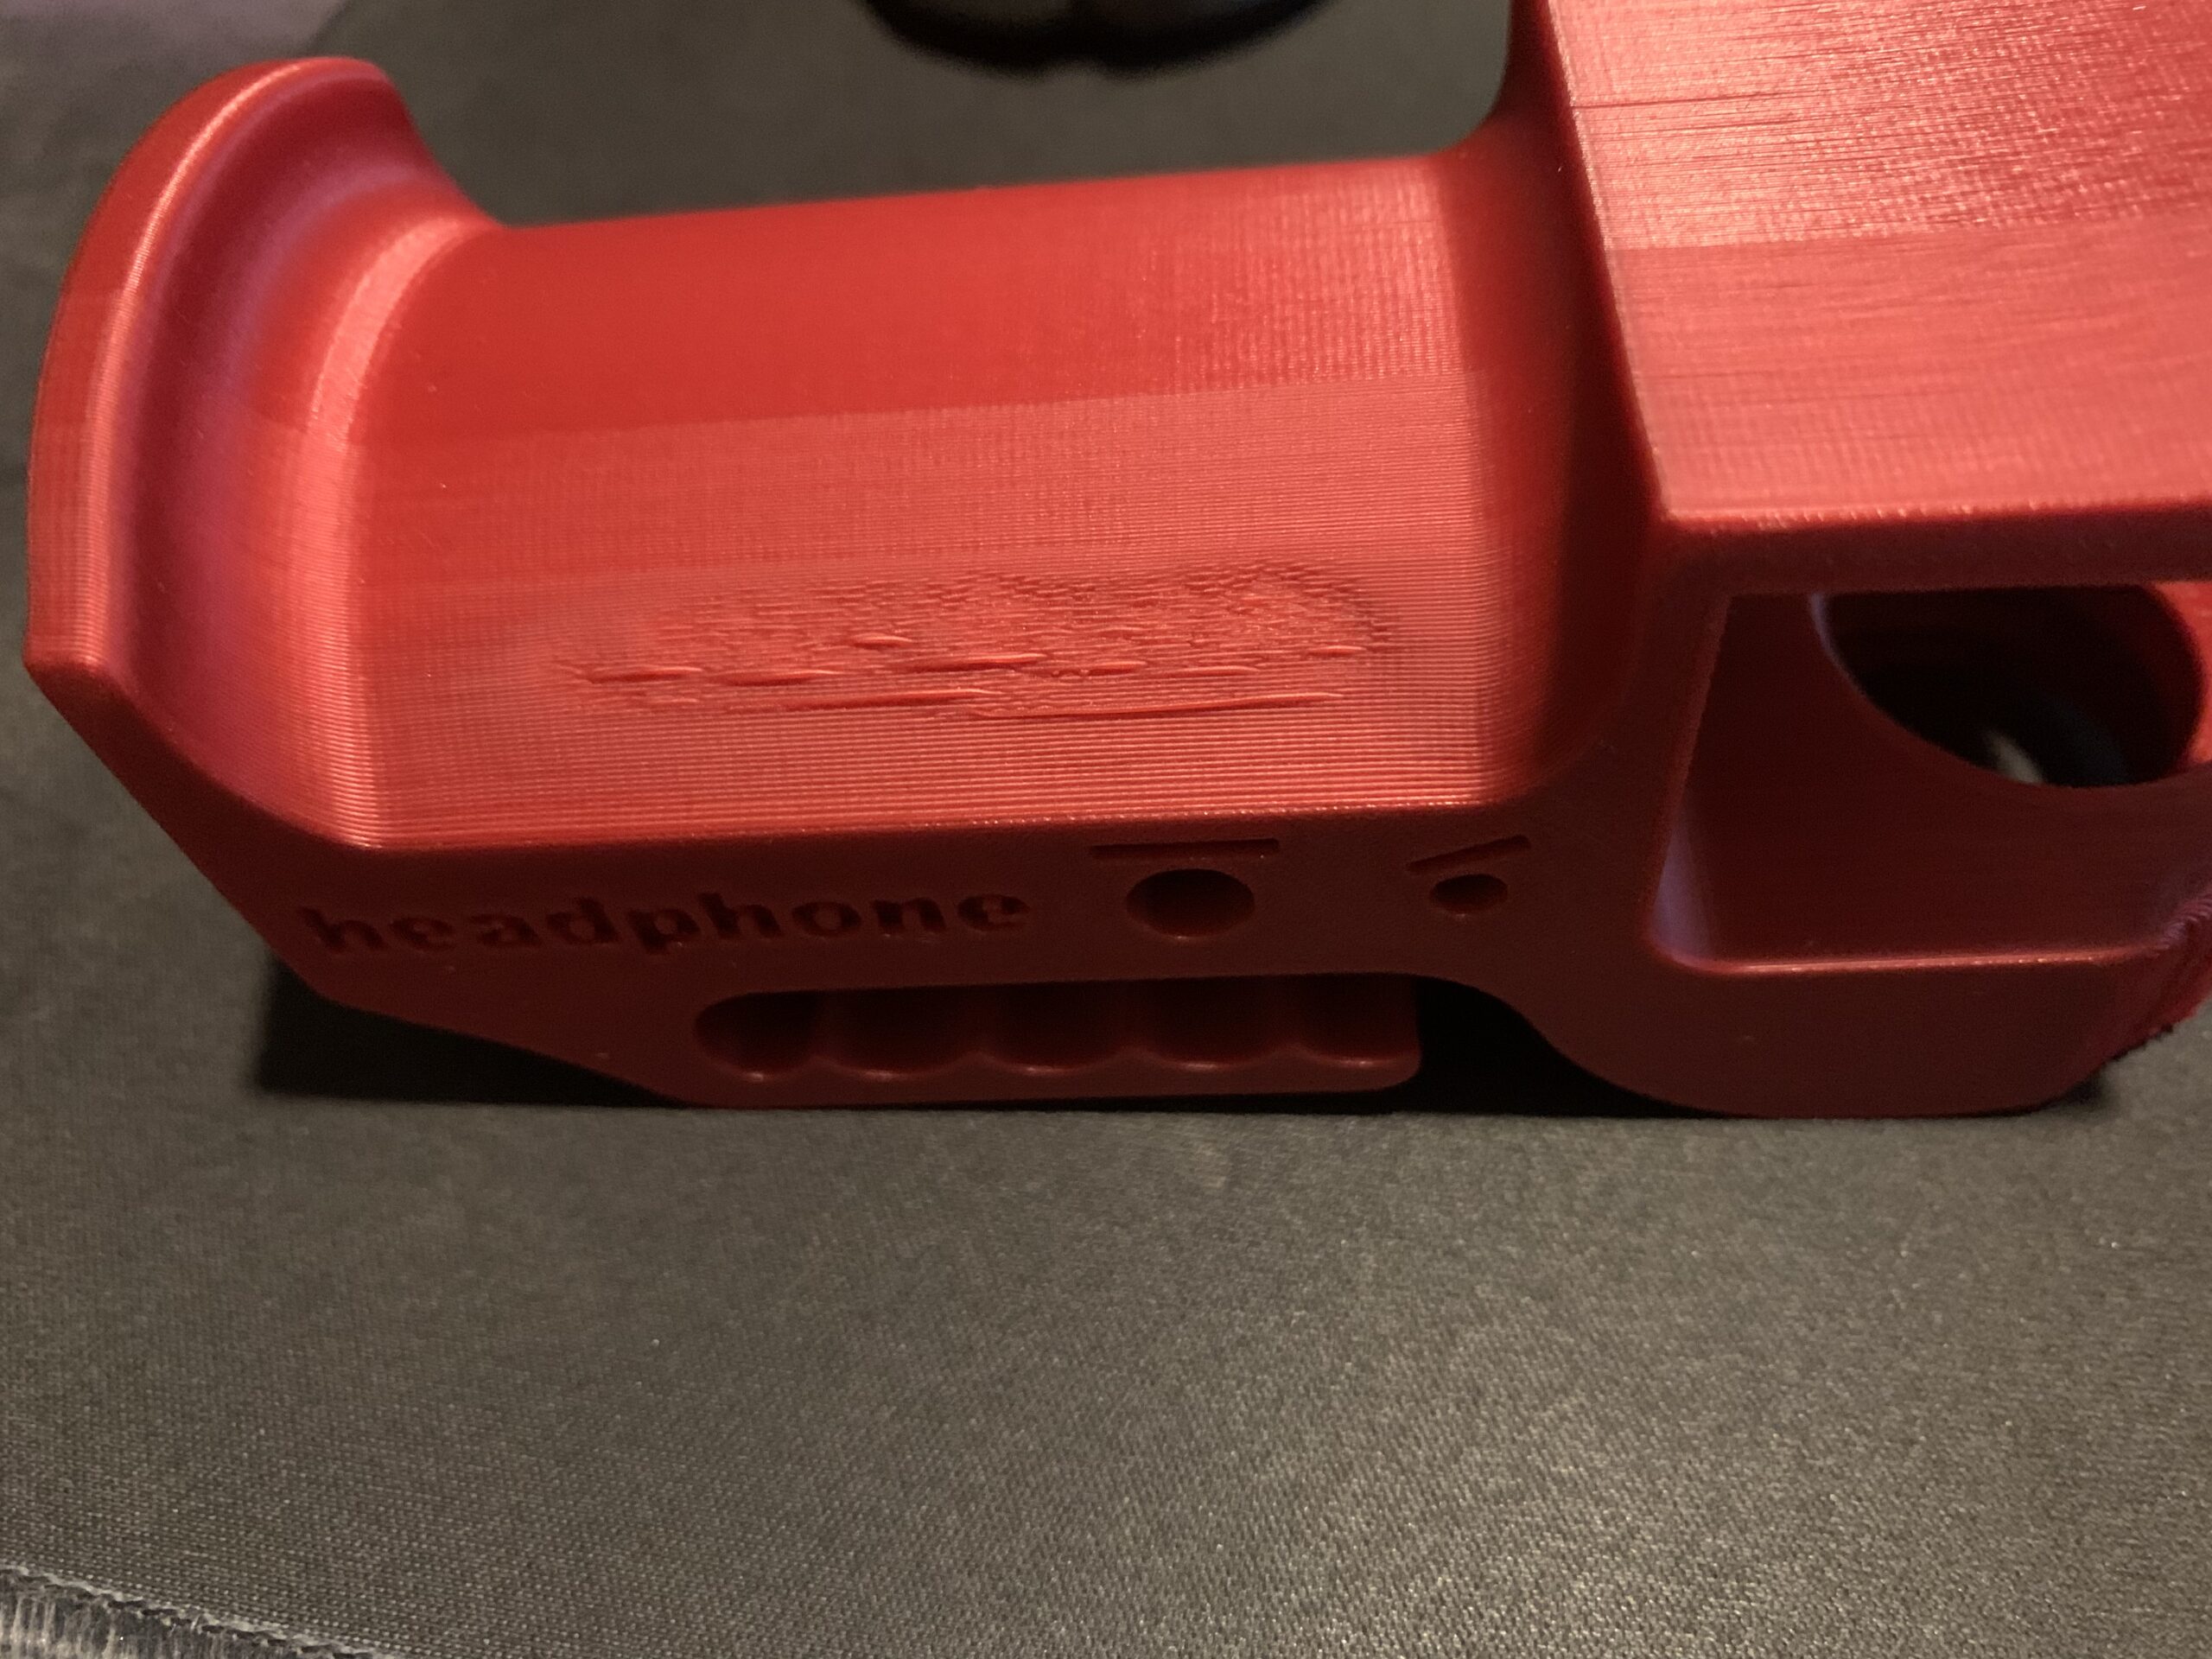


What is causing this to happen?
Are these with or without support?
Cheerio,
Check your cooling
@asemer
These appear to be cooling issues, if your using an enclosure leave it open as much as possible while printing PLA also be aware of the printed parts placement relative to the cooling fan, and check to see that the fan speed is proper for the application (normally 100% for PLA).
check the temperature of the hot end and if needed reduce the bed temp to a lower point for example 55C instead of 60C, also try lowering the temp of the hot end most PLA's have a reasonable range at which they can be printed, try printing a temp tower for the filament to get a better idea of the best temp to print it at and keep in mind the enclosure will affect that number.
Good Luck
Swiss_Cheese
The Filament Whisperer
No supports.
No support. These prints shouldn’t need supports.
@swiss_cheese
@swiss_cheese
I do have an enclosure and these were all printed with the enclosure open. These are all printed in PLA with the fan at 100%. I’m wondering if I need to get a better cooling fan. I’m running the stock prusa cooling fan. Today I tried printing the same part out of PETG and the results were much better although still not perfect.
@asemer
Is it possible for you to upload a zipped up .3mf project file of the the headphone clamp or the gameboy cover with all the settings you are using currently so we can look over it for possible settings changes?
Regards
Swiss_Cheese
The Filament Whisperer
I see; the underlying problem is that object was not designed for FDM printing. It could be rescued if you have access to the source files but like far too many projects on the web it cannot have been properly tested.
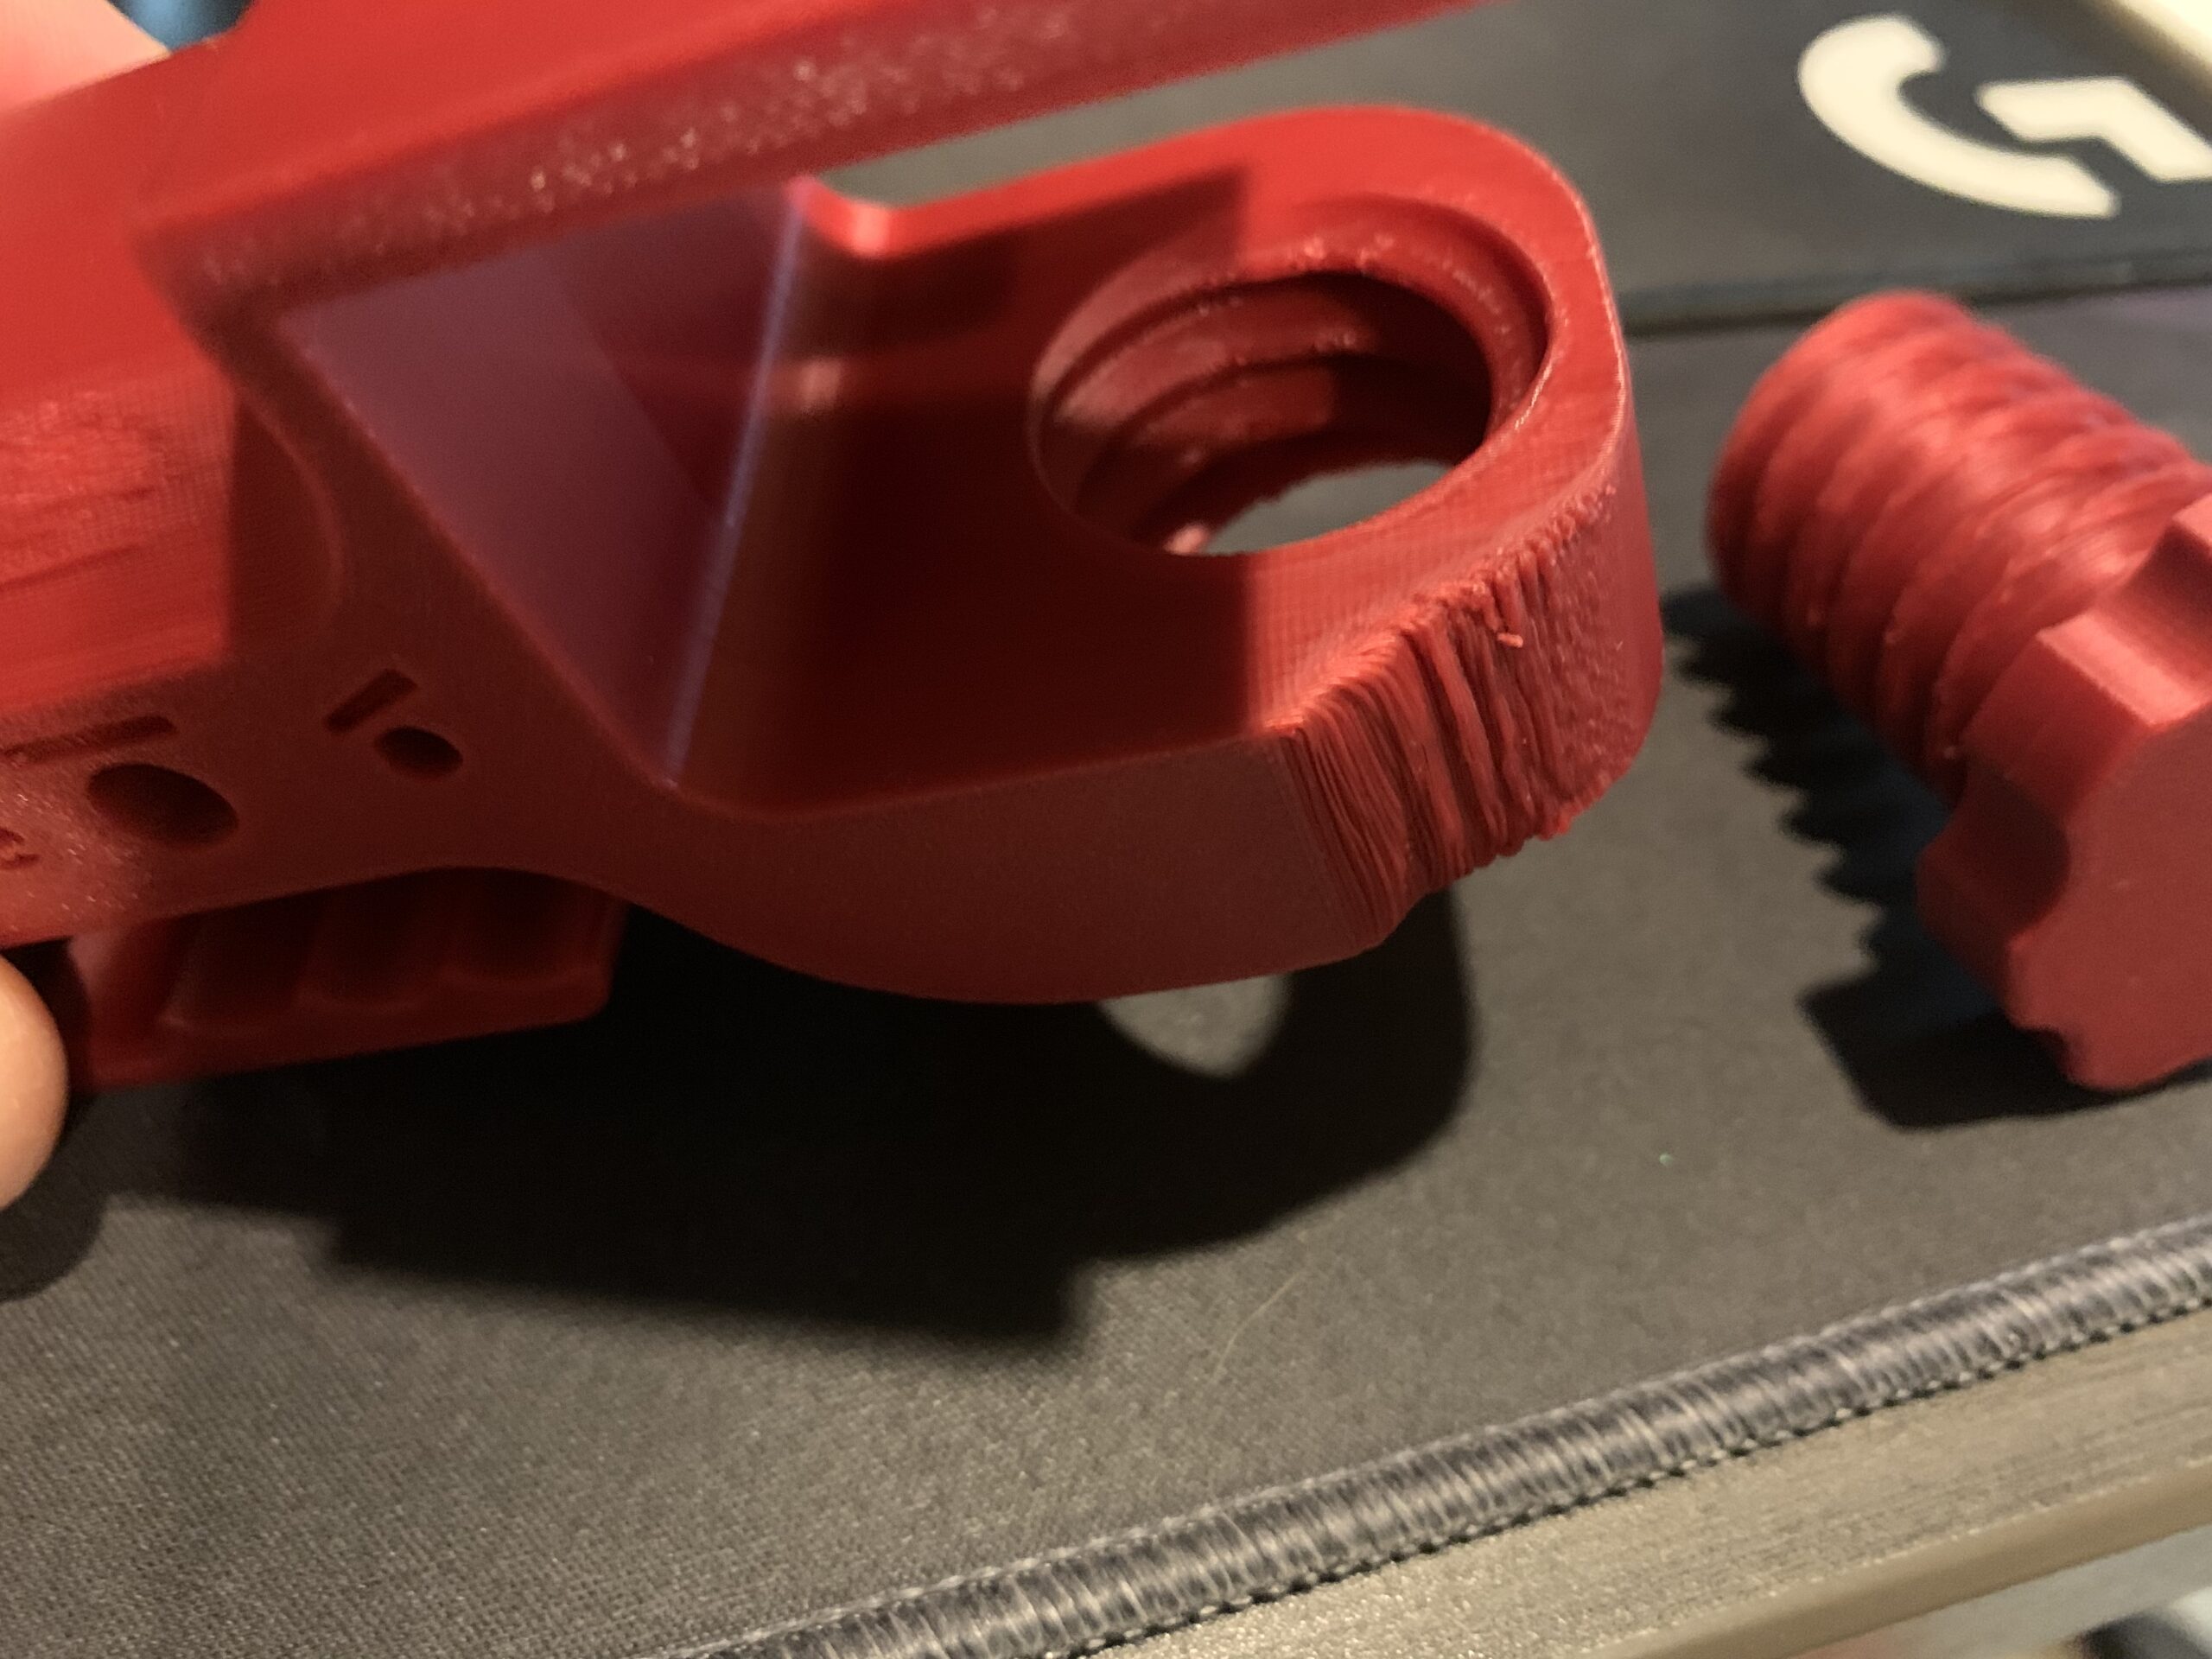
The filets on the bottom of the curves can never be printed smoothly and should be replaced by chamfers. The thread is too deeply cut and, as it is printed in two orientations, it will need a fairly generous tolerance allowance.
As it is, it would probably be possible to print a functional object with enough tweaking and post processing but to get an acceptable cosmetic finish you would need an MMU and soluble supports, even then you might be a little disappionted.
There are lots of similar holders out there, search for one that has lots of pictures of successful prints.
Likewise the electronics cover I'm afraid...
Cheerio,
Thank you
@swiss_cheese thank you for taking a look at them for me. I was so frustrated with these prints because I can get a perfect benchy at 200% speed but was still having trouble with these seemingly simple prints.
@asemer
your welcome,
I've got a couple examples printing and will post the results when finished.
Regards
Swiss_Cheese
The Filament Whisperer
@asemer
I made some adjustments to the .3mf files you posted to demonstrate ways to overcome some of the short comings of these designs, just to be clear Diem is correct these files were not well designed for FDM/FFF printing, however most of these issues can be overcome.
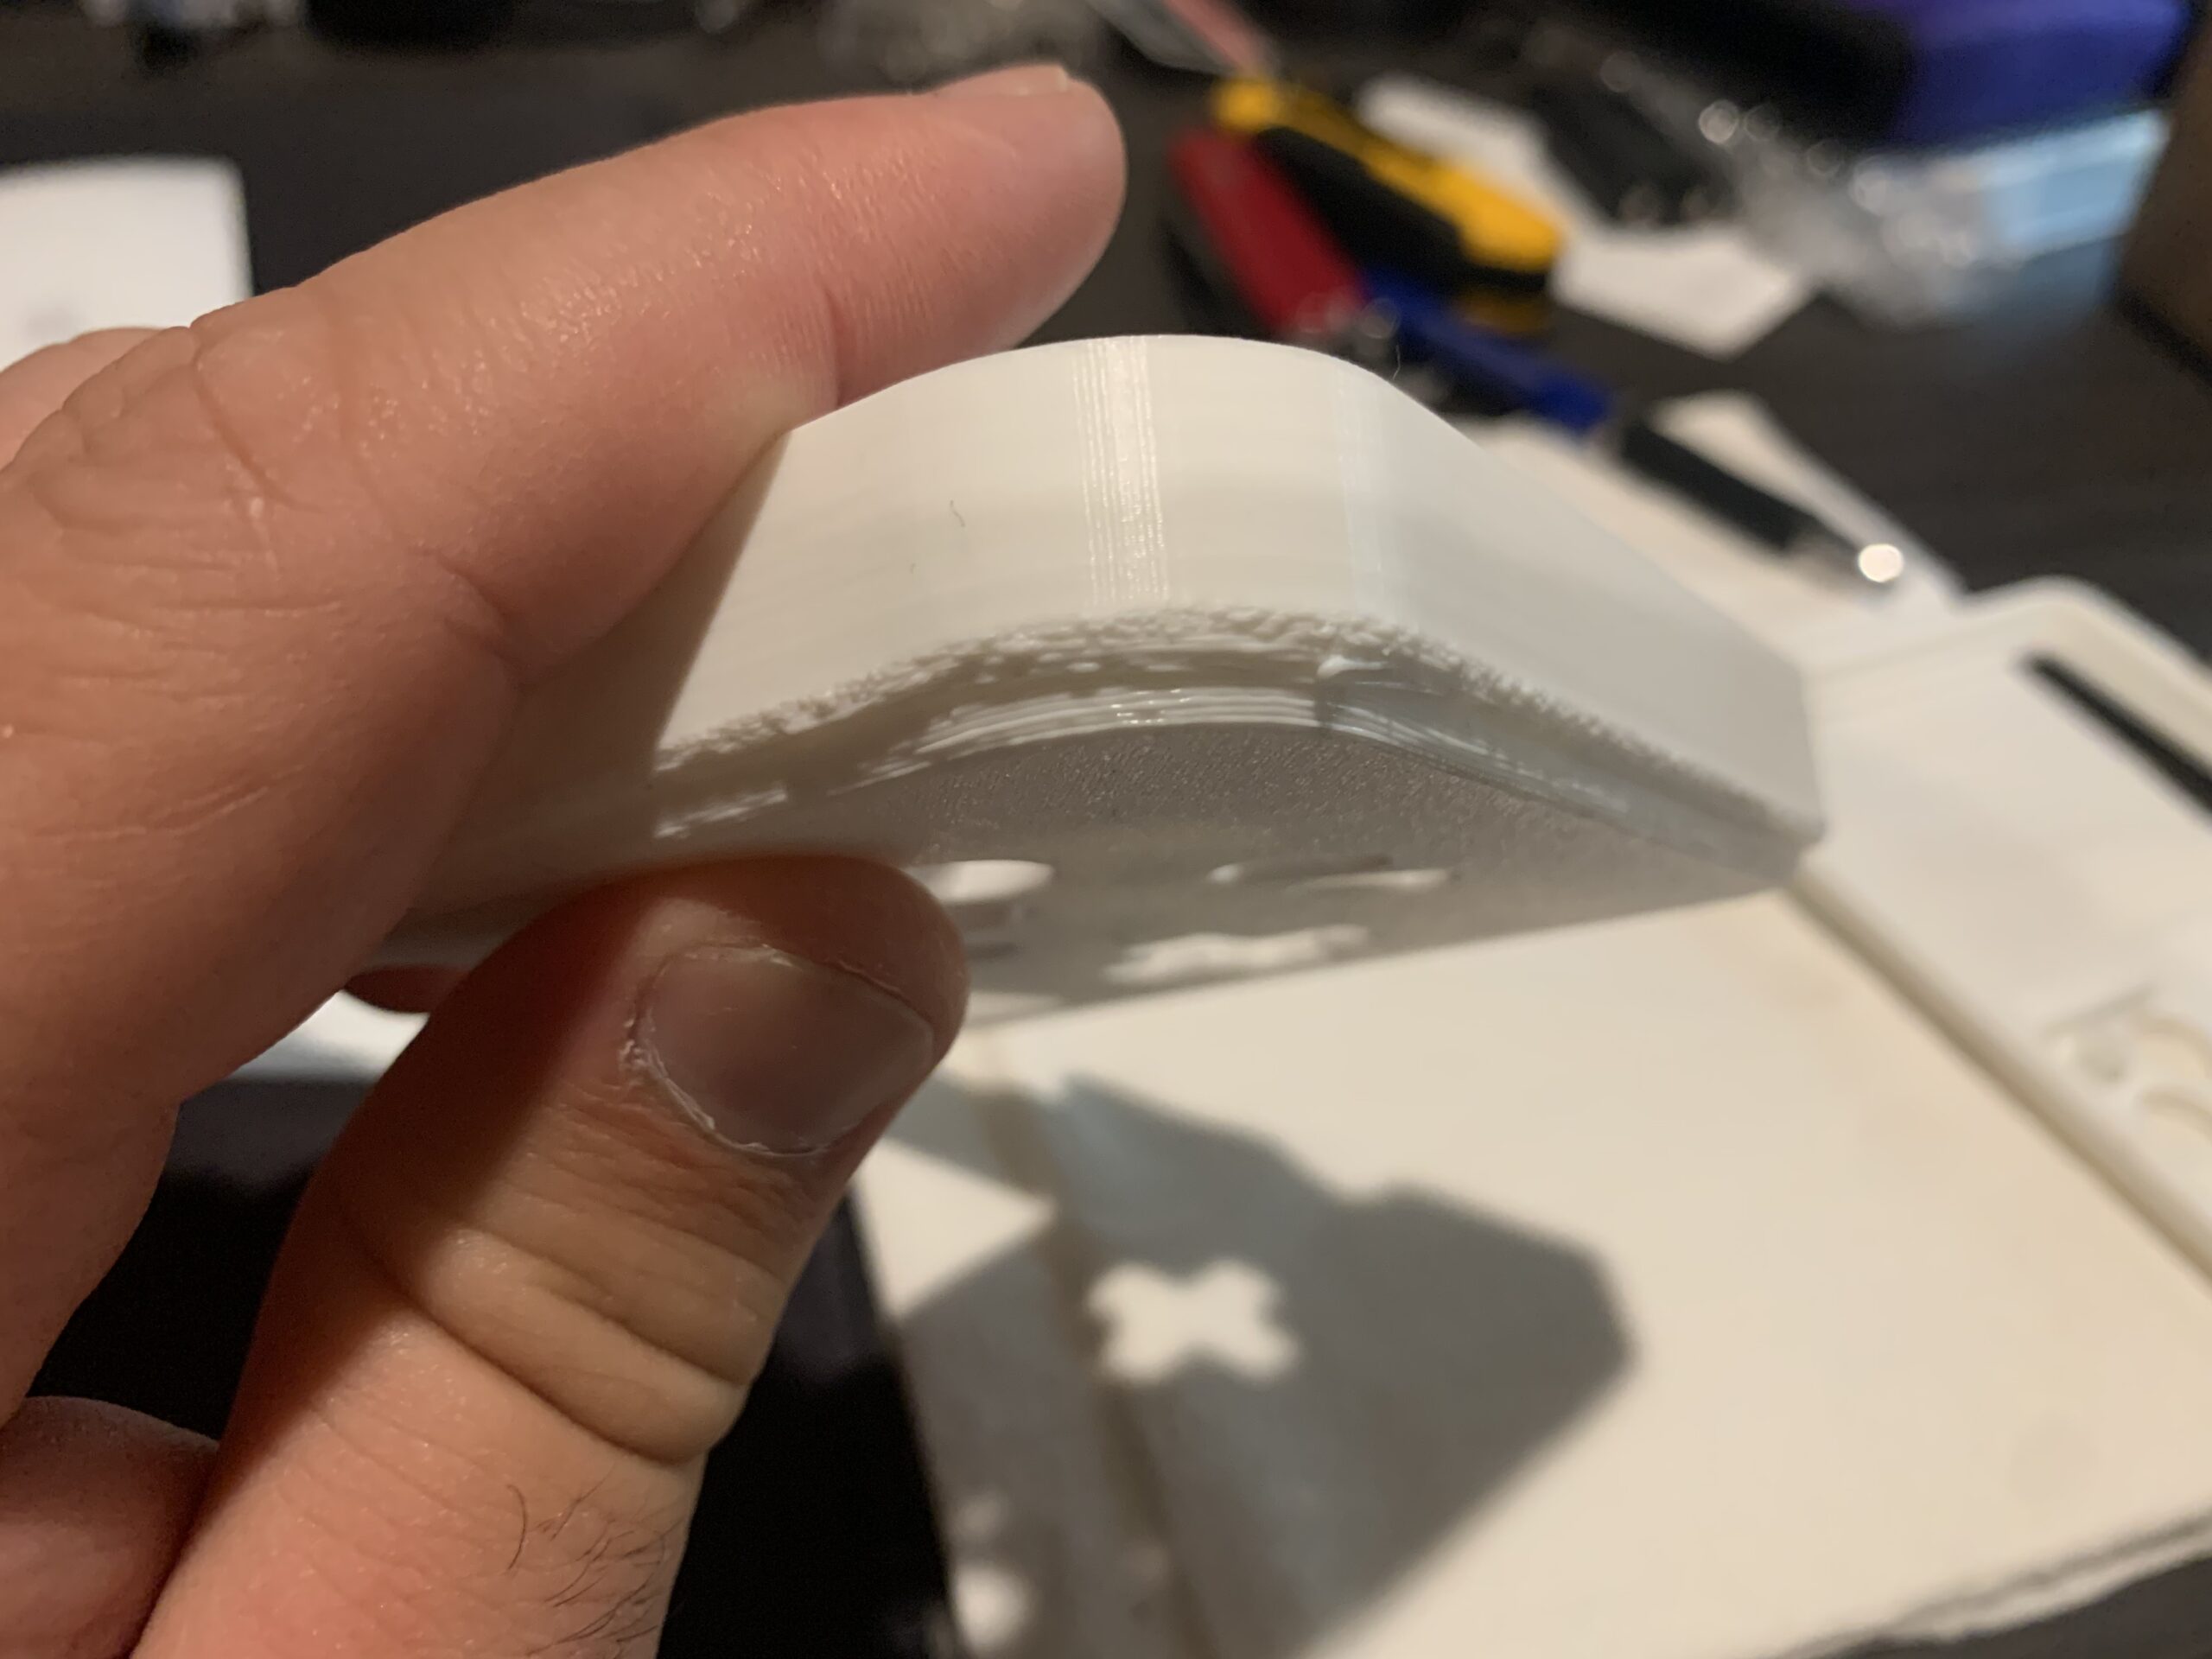
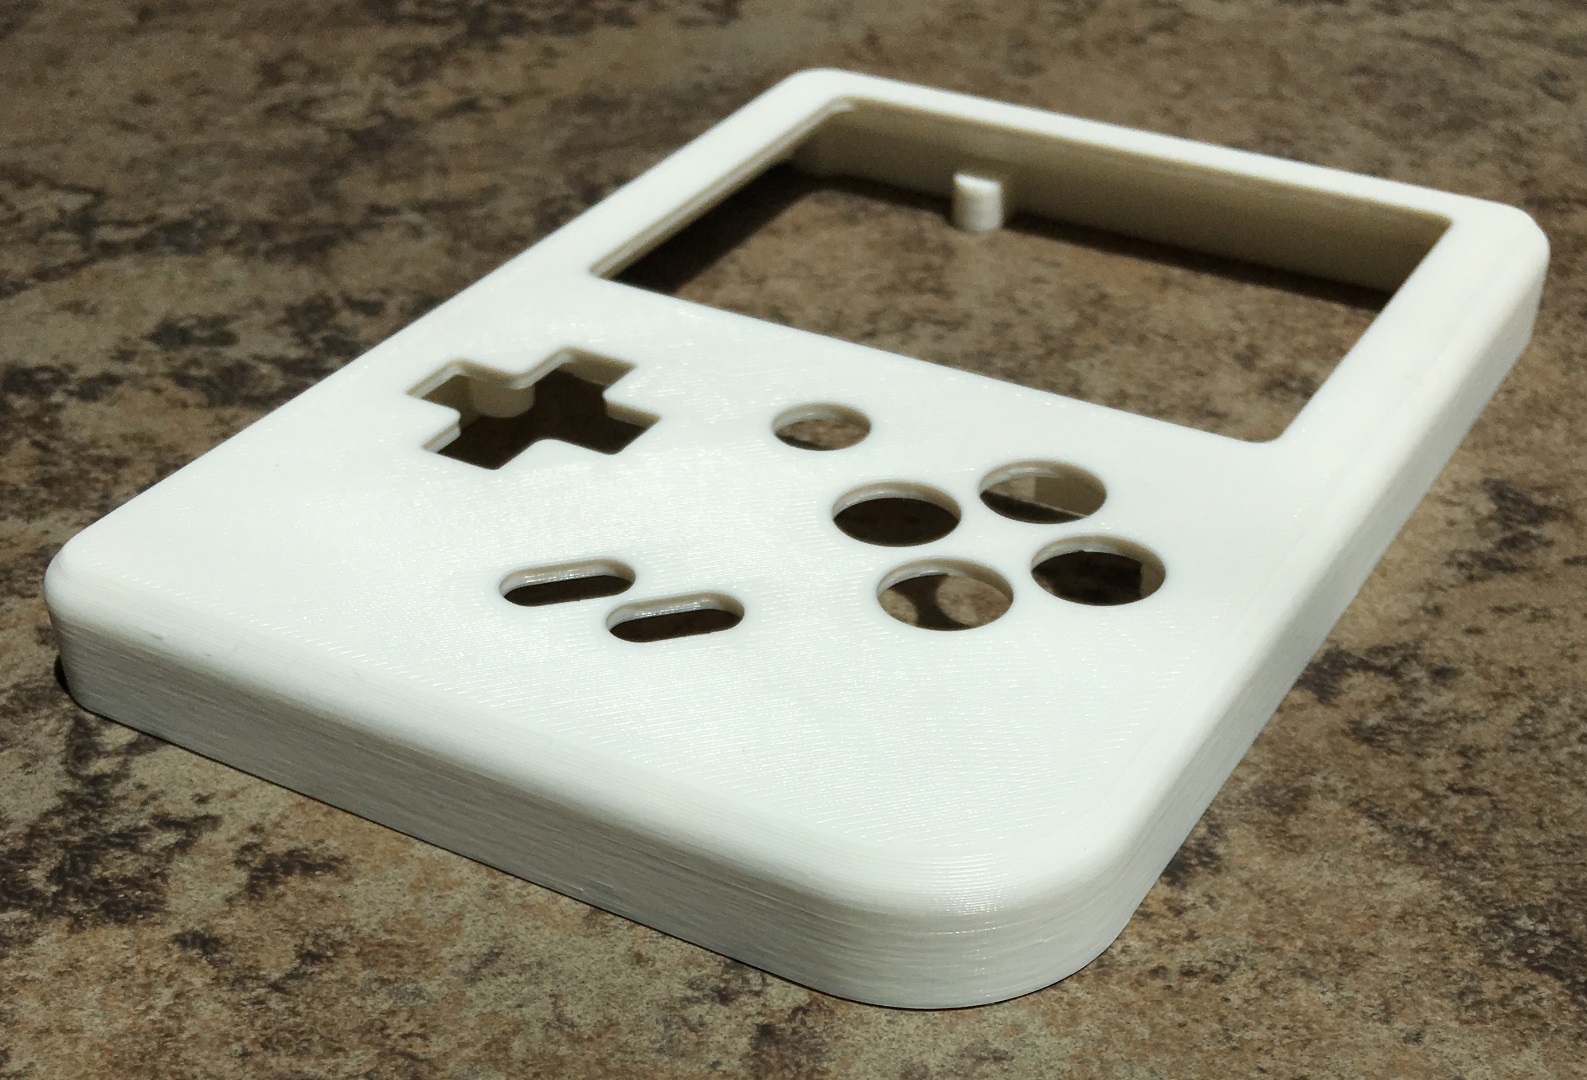
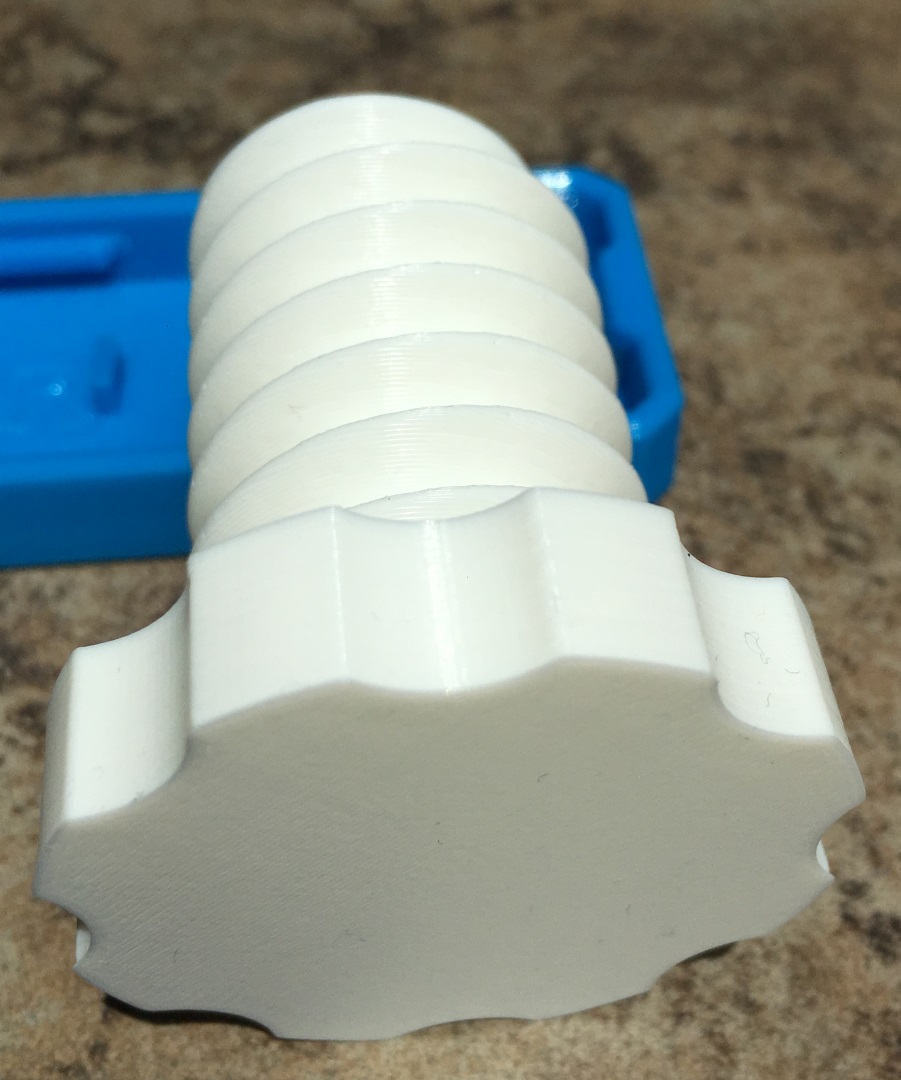
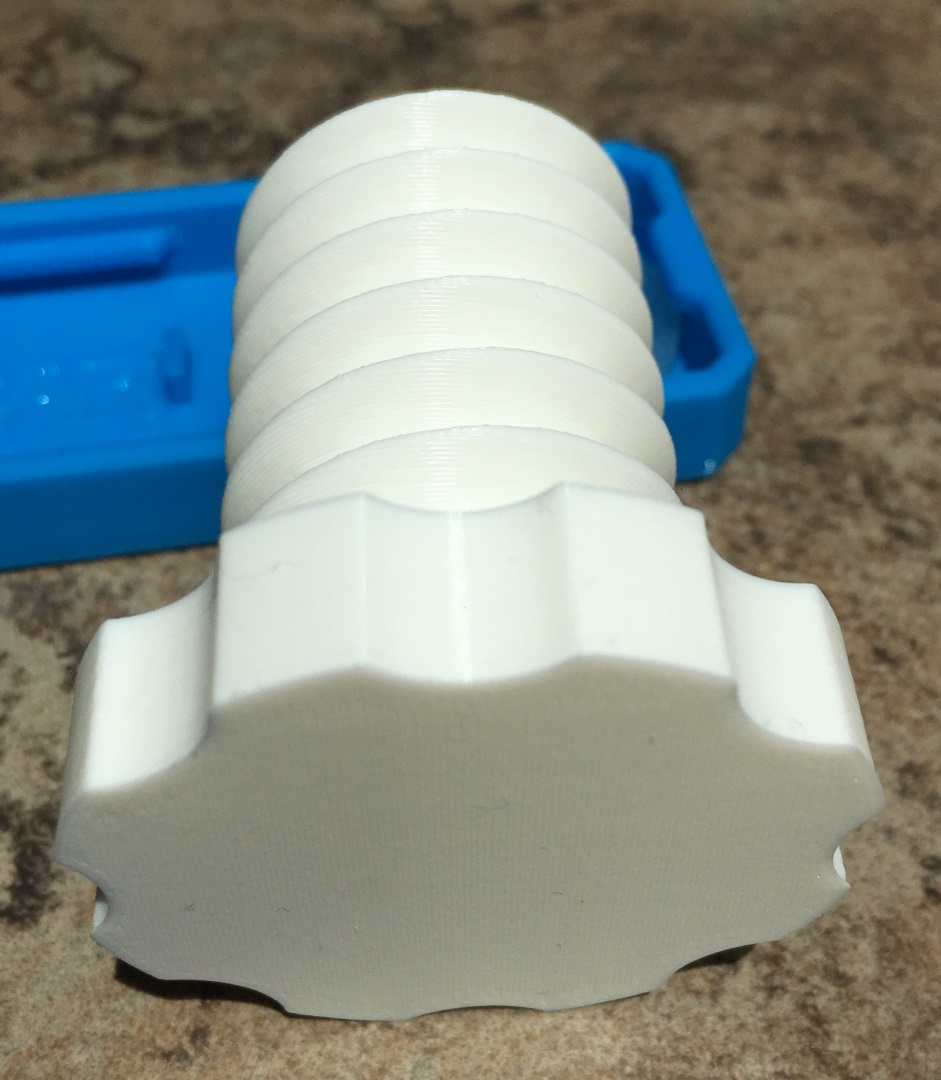
The GameBoy cover will print completely usable but because of the extreme round on the bottom edge it deforms slightly, I tuned it to a point that I believe many would find acceptable. The clamp screw was no problem at all and prints very well, the problem there seems to be an excessive amount of material being added and the heat that went along with it, as slicer was viewing all the threaded area as top and bottom layers because of the thread angle, to resolve this I removed the top and bottom layers and added them back in where needed using height range modifiers and added a third perimeter for strength. I didn't have time to tackle the Clamp itself, it's been a busy week and I worked this weekend.
These were made with PrusaSlicer V2.3.2
printed with Overture White PLA on an MK3 printer (satin sheet)
I stopped the print once I was sure it was going to properly, so its missing the last few layers.
with supports removed
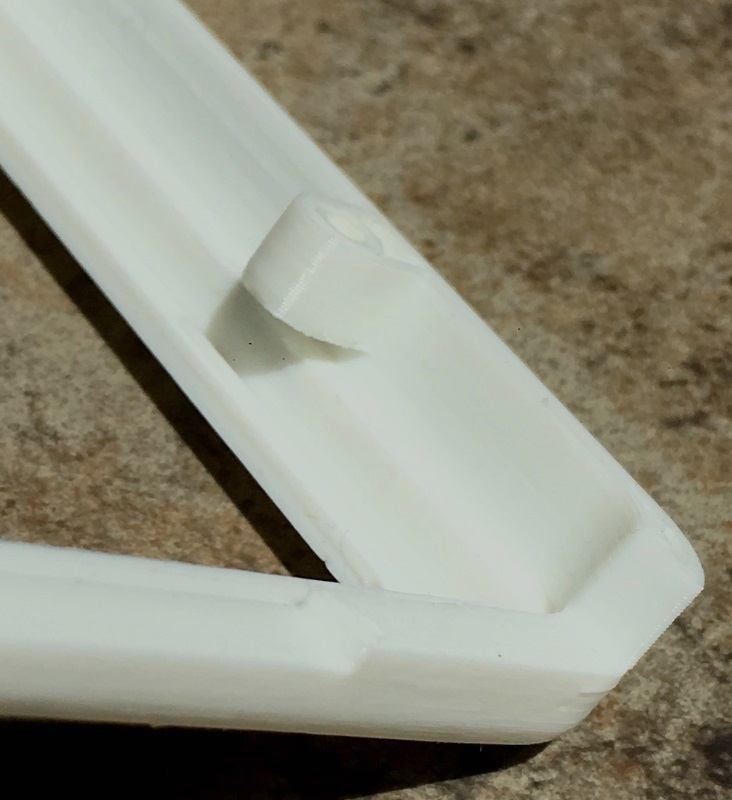
Profile of the rounded area as printed by FDM/FFF
these files could be tuned more for some improvement, but I had to draw the line somewhere (time constraints)

Front
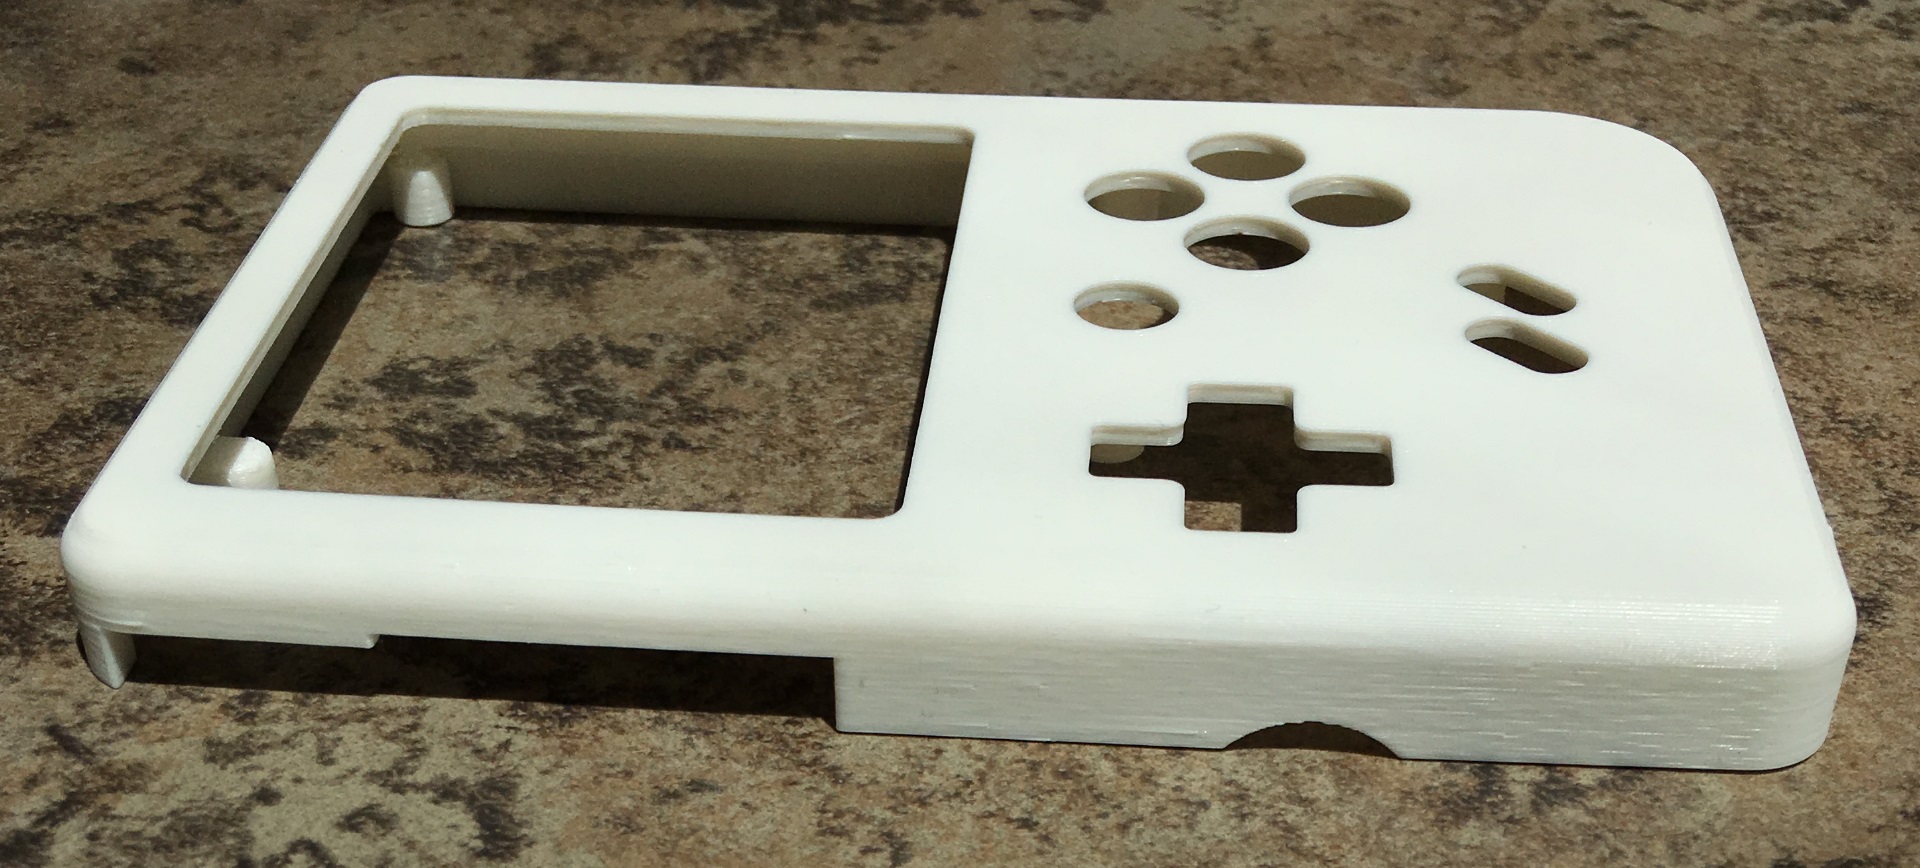
Back

Please show your results, if you have questions I'll do my best to answer, I encourage you to explore what I've done in these .3mf's and make an effort to understand whats been done and how, I'm not sure what your skill level is but these is a thing or two to learn in them.
Good Luck,
Swiss_Cheese
The Filament Whisperer
@swiss_cheese
I reprinted the pi boy part with default prusa PETG settings and it came out pretty nice so it looks like it’s just an issue with pla.
I’m impressed with the quality you were able to achieve so I’ll definitely take a look at those files you sent and try them again with PLA. I appreciate you going to so much trouble to help me.
@swiss_cheese
however most of these issues can be overcome.
But the degree of tweaking, for a relatively simple object, is excessive. This is one of many designs that just haven't been properly tested before posting where people who don't have your skill are likely to download it. This is an eternal problem and must deter many newcomers to 3D printing. I admit I have no idea how to address it.
Cheerio,
Not designed for FDM, nonetheless necessary
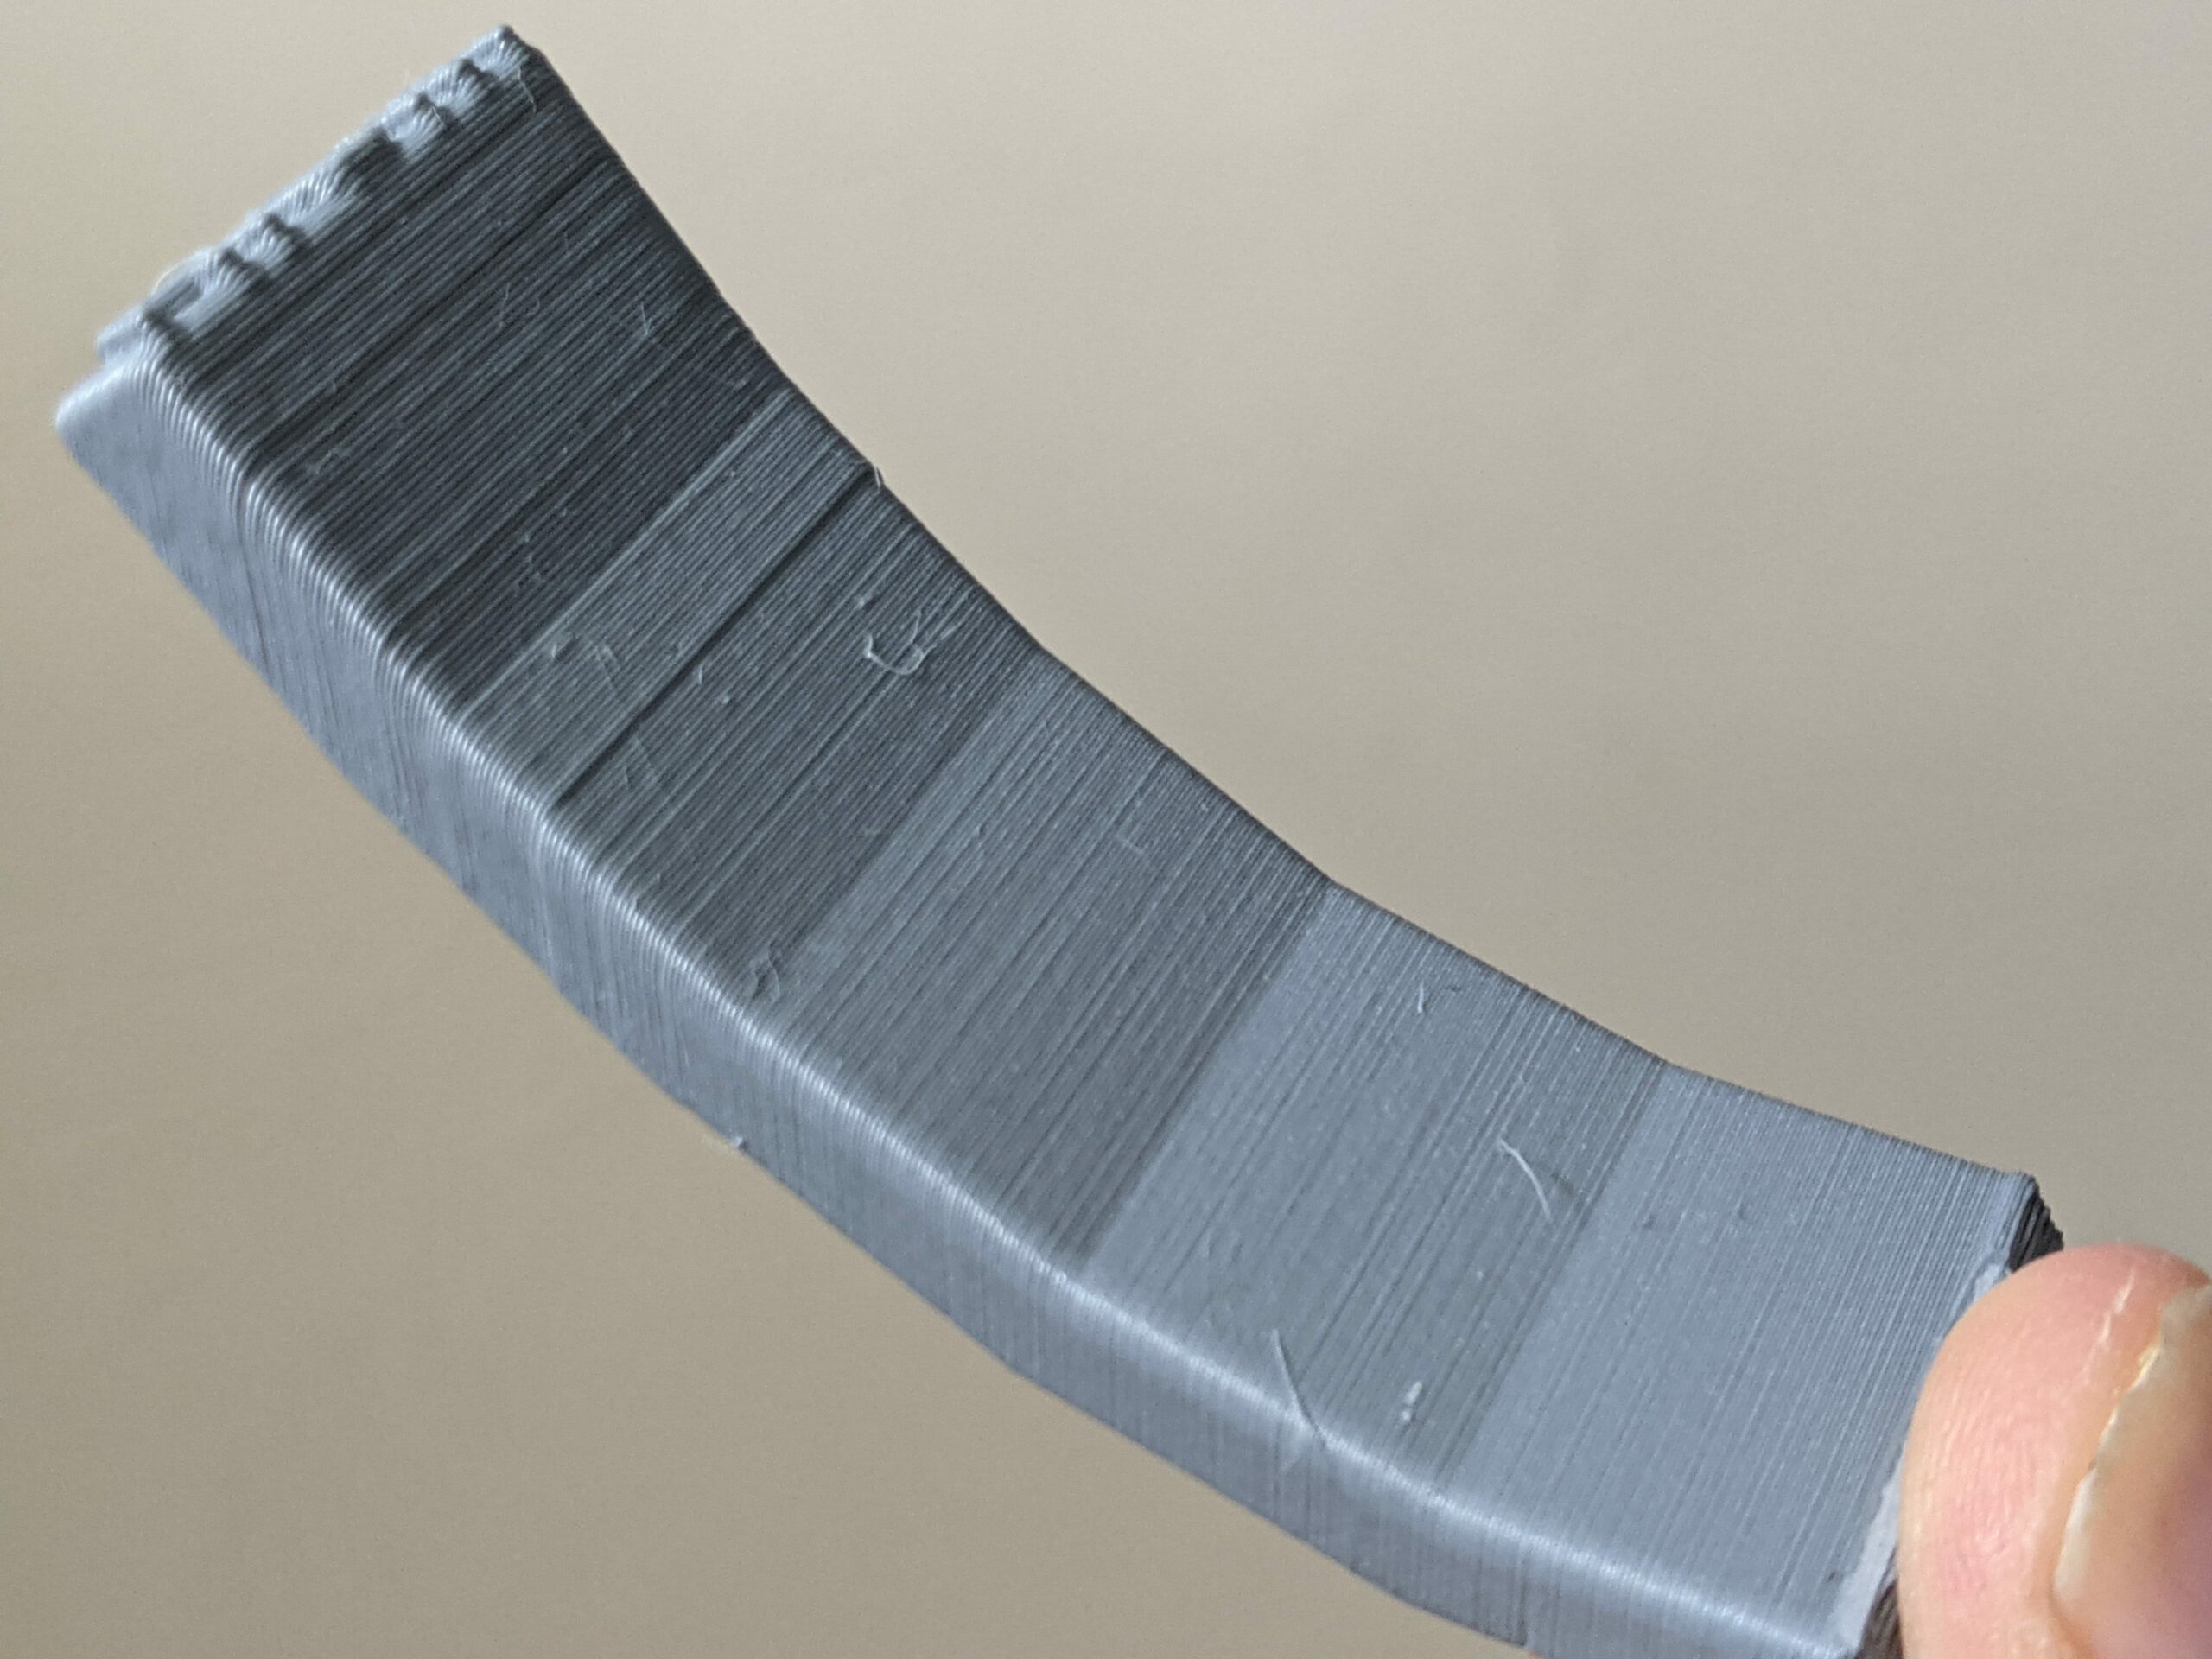
This is sth. I am struggling with too. Basically: Fillets that build up. As someone said: this is not designed for FDM, which is true. However, in some cases it is not possible. For instance if you build scale models these kinds of situation occur.
In the picture you see a cabin of an old excavator. It is printed in a few parts. Due to the form of the roof printing parts on the side is the only option. But there is this 5mm radius fillet. I ended up taking out the radius corner and print this standing and glued it in.
I still don't really understand why this is so difficult. When I look at the support structure I saw that PRUSA Slicer (latest version) does not provide support for the first couple of layers. But this is where the problems starts. I think that fillets / radii must be supported. But support must do this in particular in the first couple of layers.
Any other thoughts?
RE: Poor 3D design doesn't play well with gravity
[...] I still don't really understand why this is so difficult. When I look at the support structure I saw that PRUSA Slicer (latest version) does not provide support for the first couple of layers. But this is where the problems starts. I think that fillets / radii must be supported. But support must do this in particular in the first couple of layers.
A big part of the problem is that we, as consumers of STL designs, are trying to fix design issues in the slicer. You can do this with mixed amounts of technique, patience, and success by twiddling slicer settings. There are some shapes that are fundamentally a problem for 3D printing. Remember that the slicer is digitizing a design, trying to approximate a shape using layers of plastic. There are resolution (layer height & perimeter width) issues that affect how close you can get. The problem is that some shapes don't lend themselves well due to physics and the limitations of FFF printing. Here's an example showing an STL underside with a fillet (in blue) and the slicer's attempts to replicate that curve with perimeters (in yellow & orange):
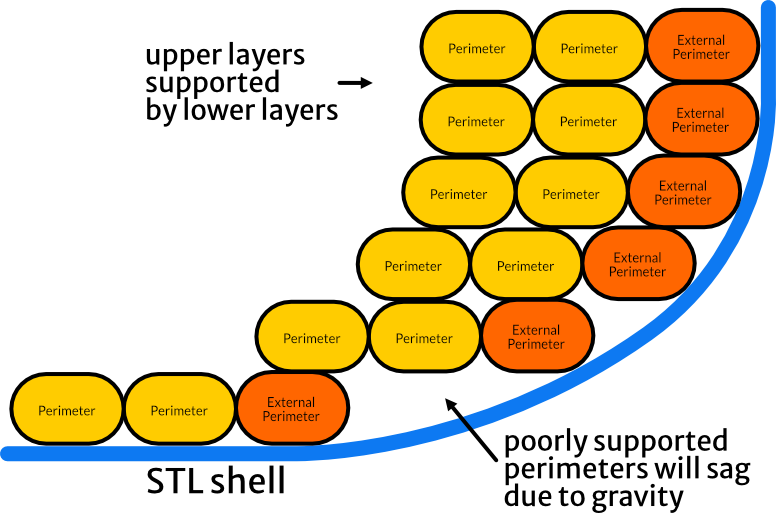
At the lowest layers with the most severe (near horizontal) overhang, the slicer tries to honor the curve of the filleted underside, and as a result, perimeters are -- quite literally -- printing in air. Although our 3D printers can do surprisingly well with overhangs, there are limits. Thanks to gravity, the resulting layers will tend to sag and due to lack of layers beneath to squish against, look rounded and stringy. This is why the lowest layers in such prints can look so bad. You can stick supports underneath, but the extrusions are still going to be rough in comparison to the rest of the wall. Wider extrusion widths can help to a point, but again, there are limits.
At the top of the fillet, layers begin printing with more support from the previous layer, so you get the proper amount of squish and corresponding inter-layer adhesion. Extrusions take on the desired oval/stadium cross-section and vertical wall appearance improves.
Angus put out an excellent video on this topic on his Maker's Muse YouTube channel back in 2019. He not only shows a fix but also spends time explaining exactly what the challenges are and a few techniques to avoid (if you're designing) and improve (if you're slicing) fillets & chamfers.
You'll find a fair amount of slicer arm waving and voodoo that use techniques that Angus covered years ago. He's one of the (very young) grand old men of 3D printing techniques. He spends a lot of time not only fixing problems but shows how he's fixed them and how you can identify them in your slicer (even using variable layer heights in 2018) and avoid the problems in designs. He's other great videos on designing proper 3D printed holes and 3D printing tips & tricks for your designs.
If you're getting started with 3D printing models of physical devices, his videos are well worth watching. If you're getting into 3D design, Lars Christensen is also an excellent teacher. I like reasonable challenges, but only have so much patience with a poor design. At some point, I'm going to just redesign the part myself to avoid the stupid issues.
What is poor design?
Thanks a lot for that answer. I, of course follow Angus and Lars. Learned a lot from the two. One of the things was: Don't use fillets on the bed. In my own design I use chamfers only and I am pretty good at avoiding support w/ chamfers and so on. But as with that excavator you cannot just use a chamfer or a sharp edge instead of the radius that the original machine had.
I will review Angus' video that I saw earlier and see if this will indeed bring a solution in case it must be. Lying fillets / radii are a real life problem and cannot always be avoided. Hence, I am reluctant to call this "poor design". If you are in charge of designing sth. then I am totally with you. But if you build scale models, like me from time to time. Fillets and radii are there and we need to tackle them.
@bobstro
That's a really good picture, and explanation!
And it makes me want "Section Analysis" in PrusaSlicer.
Yes, I will go to Github and make a wish.
@alexander-3
Yes, the designs are there, and as you say, they are what they are and there is nothing you could do about it.
But from a 3d print perspective it is a bad design.
For example, a M1,6x0,35 nut is what it is, and if all you have is a 3dprinter with a 0,4mm nozzle it is a bad design
Prusa i3 MK3S+ FW 3.11.0 (kit dec -20), PrusaSlicer 2.6.1+win64, Fusion 360, Windows 10
How about "a physical design that is difficult to replicate using current FFF 3D printing"?
[...] I will review Angus' video that I saw earlier and see if this will indeed bring a solution in case it must be. Lying fillets / radii are a real life problem and cannot always be avoided. Hence, I am reluctant to call this "poor design".
Perhaps a "physical design that is difficult to replicate with FFF 3D printing techniques. I'm reminded of the resolution issues that were common in the early days of digital photography. Your $1,000 computer had a hard time replicating a pleasing image that a $15 Instamatic camera could produce. The level of resolution and techniques simply weren't there for the average consumer.
If you are in charge of designing sth. then I am totally with you. But if you build scale models, like me from time to time. Fillets and radii are there and we need to tackle them.
Oh, I agree 100%. That's why I always try to distinguish between the design and slicing phases. If you want to replicate a famous sculpture, you're limited in what you can change.
One "trick" that took me a bit to appreciate is that I don't need to print in the final part orientation. Here's a print of the famous "ATOM" 80 degree overhang test:
The 80 degree overhang is very difficult to print as an 80 degree overhang. However, if I tilt the print back a few degrees, it's an easy print. Sure, I could spend an hour wiggling settings and orientation and get a "better" result than the default, but that still won't look as smooth as a simple tilt. When it's done printing, pop it off the build plate and position it with the overhang in the original position. As a modeler, this is perfectly fine.
Every now and then, there's a part that's simply difficult to 3D print. Someone issued a challenge to print a 40mm sphere for example. One clever member just sliced the damn thing in half and glued it after printing. The result was excellent and took a fraction of the time of endless slicer twiddling and test prints. Not everything has to be printed as one piece.
Basically, I'm just suggesting that not every model has to be an epic 3D printing challenge. We can reduce it down to a few simpler challenges that produce a superior result. I remember enough from my model kit bashing days to know that once everything is assembled, sanded, and painted, that's good enough.
Can you provide a link to the excavator model? Always fun to try out a real problem.
Corrected figure
Here's an updated figure illustrating the overhang challenge:

overhang
A great illustration of the parameter. I cannot agree with changing the orientation is the key to success with a design with a larger overhang.
--------------------
Chuck H
3D Printer Review Blog