Source of warping on this object
I had an interesting situation. Prior to this print my prints had never any warping and I am wondering what have lead to this and how to mitigate it.
The object was sliced with the 0.2 mm fast profile for PLA and has a fully flat ground surface.
I heavily cleaned the build plate with IPA wipes (no acetone yet) and I printed with default PLA setting with 60°C bed temp.
Here is an animation of the slices and the position on the bed (done with ScreenToGif):
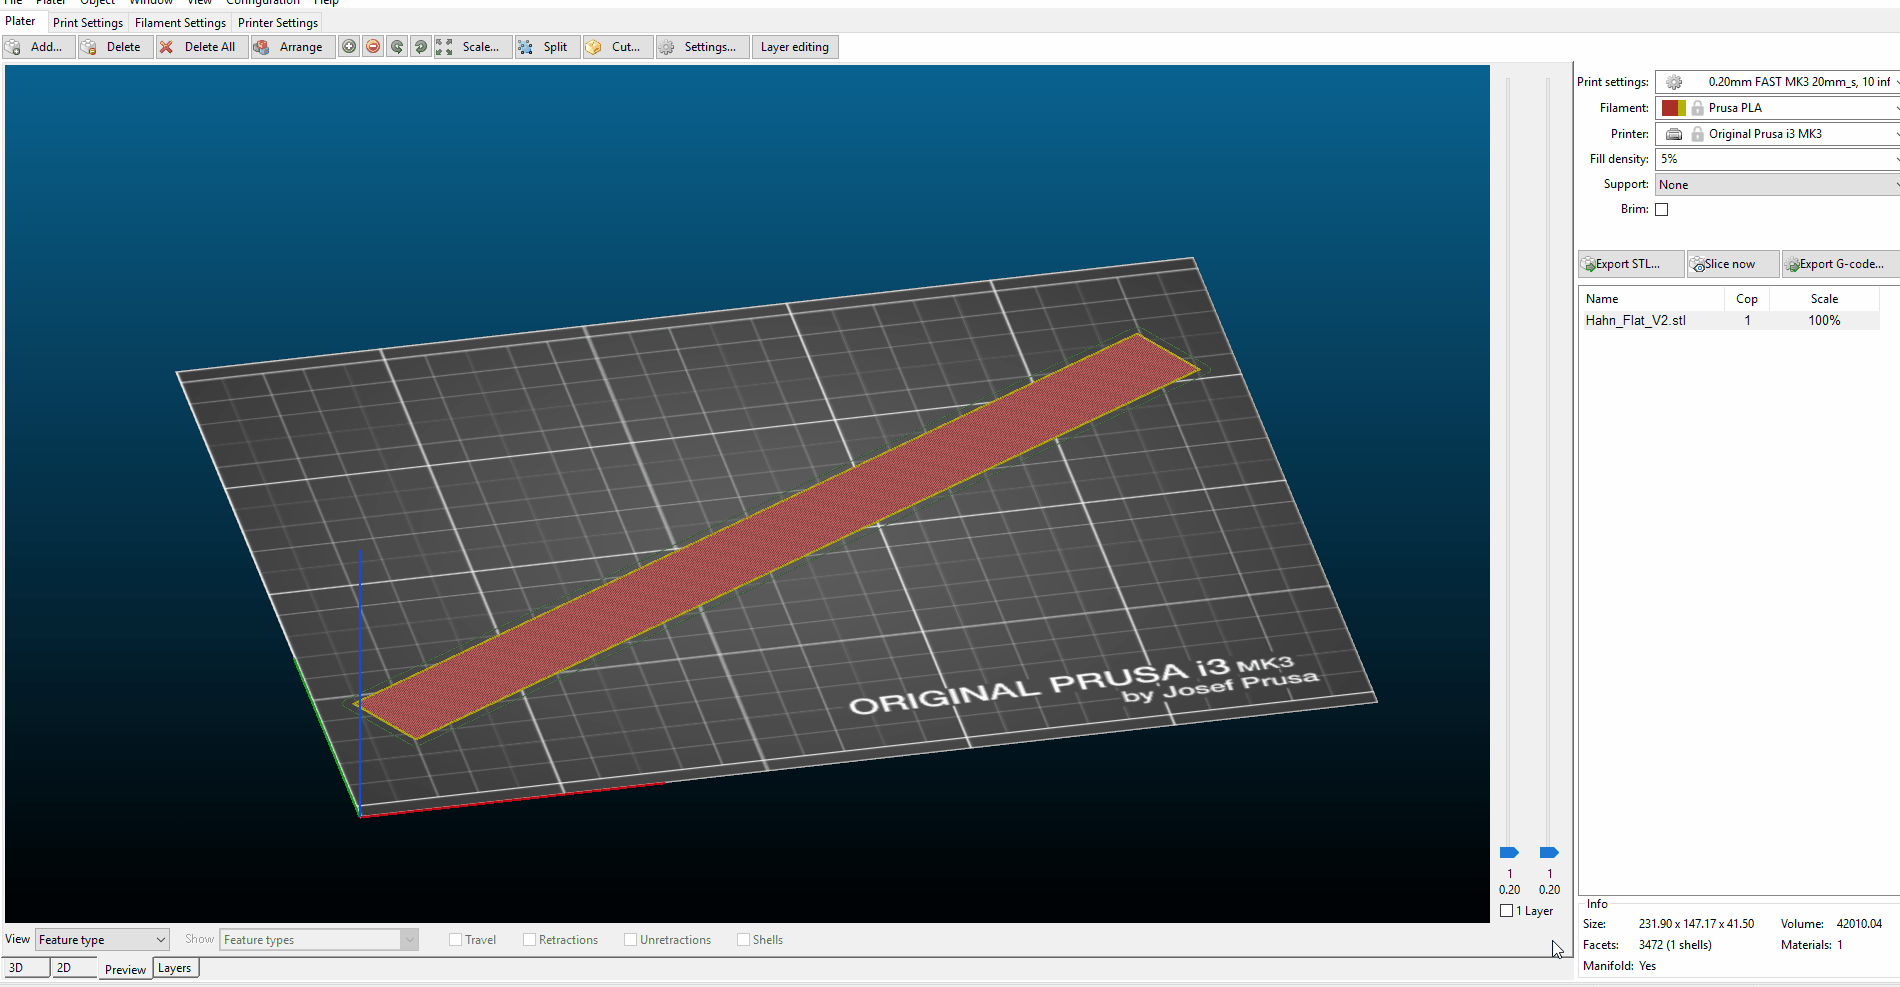
AFAIK this doesn't look that bad.
When printing however, this location started to warp heavily
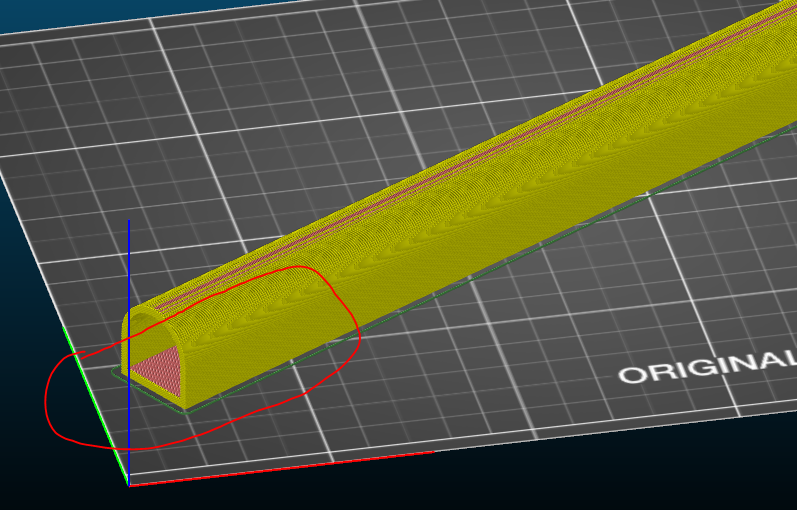
The other end too but much less pronounced.
Here is a picture, although it looks like basic warping
While the window was open during the print, the doors were closed so there should be no draft and the outside temperature was above room temp. There were no brim or supports because I reckoned that the contact surface was very good.
The first layer was printed with 20mm sec, very slow and looked very good. As I mentioned: the fact that I knew where the location of the print will be, I cleansed the area very thoroughly.
Regardless of the cleaning 3 hours later the part came loose.
What would you tweak to prevent this happening again? Was the bed temperature actually too hot? Do I really need an acetone rub after printing 52 prints on this machine (a month old one)?
I am impressed by the amount of warping and since PLA tend to warp a lot less then ABS I would be curious what ABS would have done here 🙂
Re: Source of warping on this object
Maybe it's the photo angle and the lighting, but it almost looks like the flat first layer stayed in place on the bed, and the walls above the base pulled away. If that was indeed the case, was the object splitting away due to layer separation in the VERTICAL direction?
Or did the walls pull up and away from the base and the bed because they were not stuck adequately to the base in the HORIZONTAL direction? If it was the latter, then I'd suggest reviewing your first-layer Z setting. If you use the built-in program in the control panel to Calibrate First Layer, it lays down several single-wide traces but then it ends up printing a single-layer square. When you peel that square up off the bed, it should come up as a unit; if it comes up as a zig-zag of single-wide traces then your live Z adjustment is still too high; go to a more negative number.
And if your Z adjustment needs to be more negative than -0.9 or -1.0mm, then you should re-adjust the placement of your PINDA probe a little closer to the bed and start over.
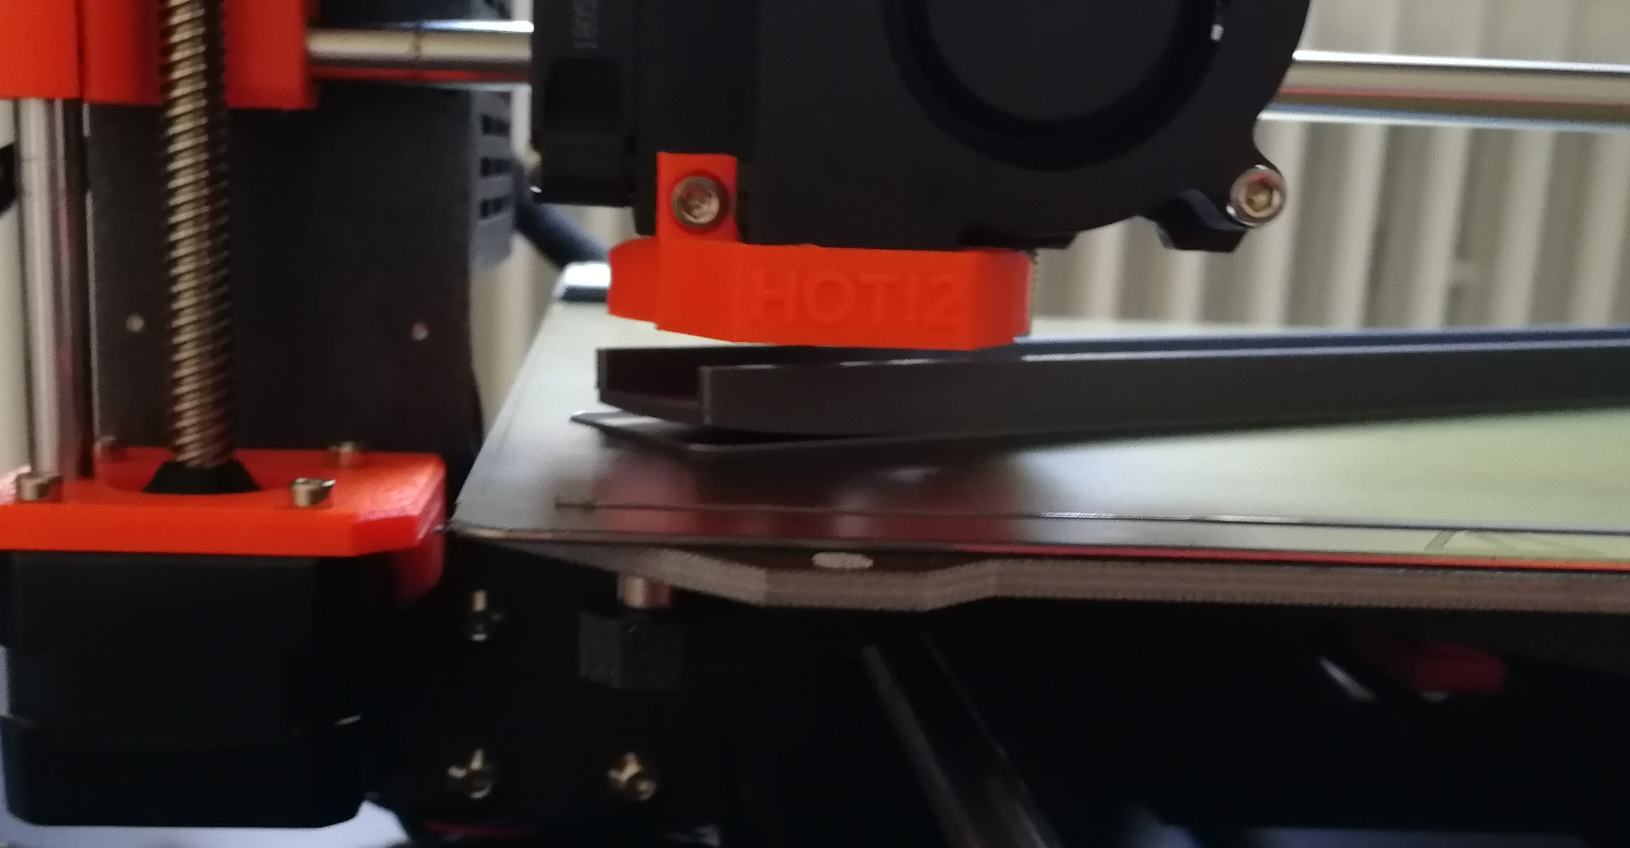
Sorry for the potato quality, the part came up as a whole, the thing remaining is this one or two layer skirt that Slic3r PE tends to generate.
I will redo the First Layer calibration. The last time I checked I was very satisfied with the denseness of the layers, they looked quite well and plenty of other prints had a very strong first layer adhesion. I don't know whether I have some weird skew due to the orientation of the print but calibration was no problem yet.
I realized that I am cleaning with 70% IPA, whereas Prusa recommends at least 90%, I will try that and also acetone.
Re: Source of warping on this object
I have had this same issue when I print large flat parts for example a dice tray that I was printing. All four corners peel up over time.
I added a 10mm brim around the part and increased the bed temperature and while this greatly improved the curling the very tip of the corners still curled up. I even tried taping the brim to the build plate with painters tape and it still curled up a bit.
I believe this is being caused by the cooling of several of the layers above the bed and that is pulling on the lower layers that are attached to the bed. I have built an enclosure to see if I can better control the ambient air temperature and hopefully get a more even cooling with no curl. I just finished assembling everything and I am going to print a test part this evening. I will let you know how it goes.
Re: Source of warping on this object
I have similar issues on a large objects that extend all the way to the sides of the bed. An IR thermometer shows a consistent temperature across the entire bed. My suspicion is the same as Sean, the ambient air temperature drops off near the edges. I am curious to hear if the enclosure helps.
Steve
Re: Source of warping on this object
I have had this same issue when I print large flat parts for example a dice tray that I was printing. All four corners peel up over time.
I added a 10mm brim around the part and increased the bed temperature and while this greatly improved the curling the very tip of the corners still curled up. I even tried taping the brim to the build plate with painters tape and it still curled up a bit.
I believe this is being caused by the cooling of several of the layers above the bed and that is pulling on the lower layers that are attached to the bed. I have built an enclosure to see if I can better control the ambient air temperature and hopefully get a more even cooling with no curl. I just finished assembling everything and I am going to print a test part this evening. I will let you know how it goes.
You never came back and mentioned if your enclosure was successful or not 😯
I hope it is successful, as I'm not sure why mine would be doing this if it's not something like that.
Re: Source of warping on this object
with PLA the problem is mostly heat related. PLA doesnt need to need hot or kept hot. Cooling is what is needed. The bed temp needs to be as low as possible or even off if you can get away with it. This does create a problem of keeping the part stuck to the plate. usually a glue stick is needed to prep the built plate, just the pei plate on its own is not enough. You may also need to lower the hot end temperature by 5 degrees as at a time and see how that goes. A brim also improves the adhesion to the plate.
Re: Source of warping on this object
If you succeed in getting warping with PLA (which is extremely rare) then this will depend on a dirty bed.
Even if you have washed the bed with different chemicals, it does not help.
The absolute best thing is to wash the bed with detergent and warm water. So give it a try before you do any other action.
Bear MK3 with Bondtech extruder
Re: Source of warping on this object
I am also having the same issue. I am trying to print rectangular storage containers that go from one side of the bed to the other side and both ends start to warp up after 3-4 hours of printing. i don't know how to fix this. I will double check everything (i.e. first layer calibration, cleaning the bed with detergent and using glue (which i have used on previous prints but did not work).
Re: Source of warping on this object
Please post an image with the first (bottom) layer of this object.
If you have such a big warping with PLA, there are only 3 possible issues:
-> Live-Z is way to low / nozzle to high. Bad contact between filament and the bed
-> Bed is dirty. Bad contact between filament and the bed
-> This is not pure PLA
Often linked posts:
Going small with MMU2
Real Multi Material
My prints on Instagram
Re: Source of warping on this object
Hey guys, sorry that took me weeks! It ended up being one big giant project rat hole after another.
So I built the enclosure and then once I had that well I screwed up and ran PLA at PETG temp and had a huge mess all over the build plate. I ended up having to rebuild the extruder. sucked but it is over with!
Once I had the enclosure well then I decided I had to add RGB lights to it and well that just took me forever too.
Anyway, it is all done and I have not had any issues with part lifting since. I have read what other people are commenting on here about the bed being dirty or crap PLA and all I can say is that is not what is causing this in my case... it was the upper layers cooling and pulling the bottom layer off of the build plate. It happened even when I added a brim and taped the brim to the plate... that certainly is not dirt. Let me add that my printer is in my workshop in the basement so the ambient temp is probably around 17c or 18c (like 64f).
Another part that liked to warp on me was the Waves add on for Benchy. I'm going to go print that and I'll post pics of a failed lifted part vs this one in the enclosure.
here are some pics of what I made. I used the design from the guys over at haribo 3030 and I am very happy with it.
Let me tell you something... you haven't seen that Prusa Orange until you back-lit it with blue leds!