Magnets on the Print Bed
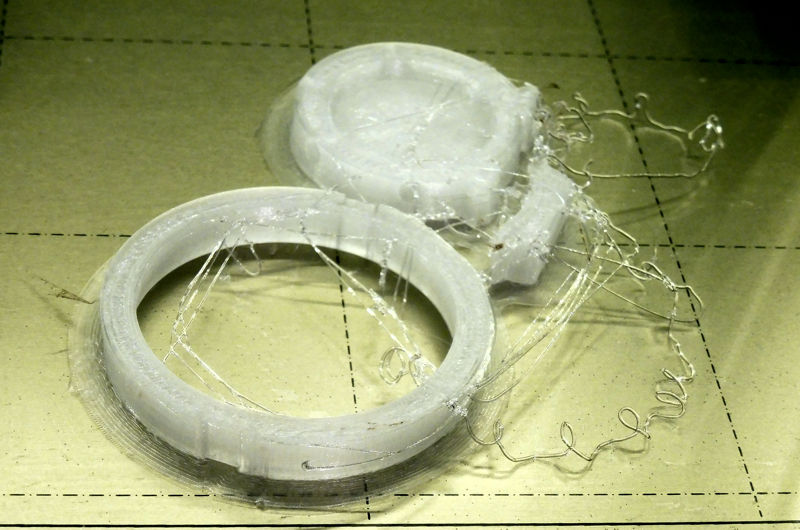
It’s been air-print hell for the last few days. Moved from PLA to nGen, which has more shrinkage issues. Also, the specter a strong grip on the print bed destroying my unobtanium PEI Spring Steel Sheet.
To avoid disaster, I’ve used Magigoo first (two failures), then Windex Original liquid spray (one failure) on my 14-hour print.
All prints have “slipped the surly bonds of the PEI bed and take flight” after an hour or two, leaving the extruder to do its Air Print Parody Dance.
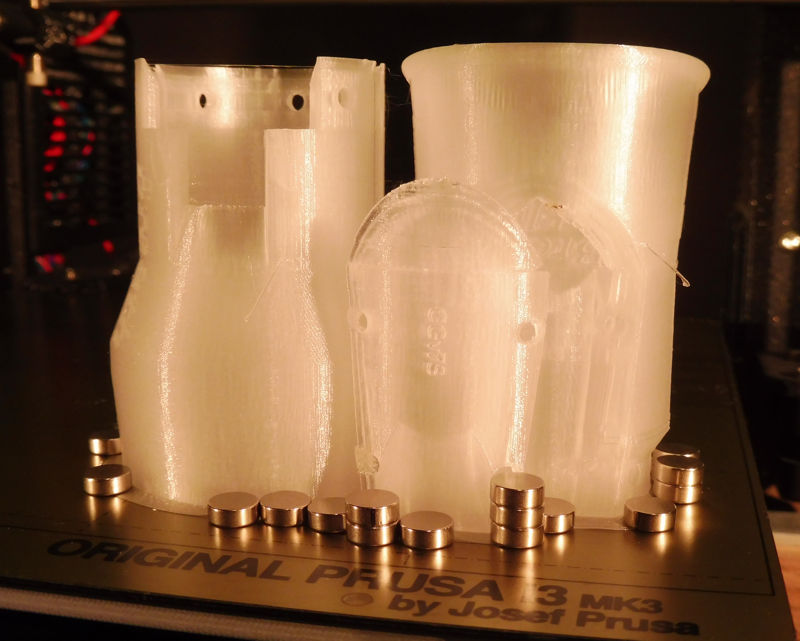
On print #4, I hit on an idea: Magnets. I’ve got a pile of spare 8mm x 3mm rare earth magnets left over from the rotation visualizer project. My print has a 10-perimeter, one-layer brim, so I pause the print and add a few magnets to the brim. Seems nice and secure.
However, notice the green arrow, where the brim is visibly stuck to the bed, versus the red arrows where the brim seems to have separated.
Fast forward 8 hours … the extruder starts banging into the print … one side has lifted off and two of the magnets are off the brim. I strike back with a barrage of 20 more magnets. Some grab onto others and stack themselves up two or three-high. No problem!
Print finished, with some damage during the banging phase. This is beginning to seem like a viable technique (although I’m sure it will be laughable in 30 years, when we have turn-key, sub-second fabrication).
I’m now surfing for appropriately sized Rare Earth magnets. Round ones are available in thicknesses of 3mm (0.12”), 1.5mm (0.06”) and 1/32” (0.8mm).
Has anyone else gone down this road?? Any thoughts, ideas, advice would be welcome!!
-- Clint Goss
Re: Magnets on the Print Bed
I would try to refresh your PEI surface by using #000 steel wool and then wipe down with acetone. You should be able to get it to stick without extraordinary measures. You could also try upping the heatbed temp a bit. I know a lot of folks use that filament successfully.
If it's not sticking even with a Brim, then the bed isn't clean enough. Iso cannot get oils from your hand of the bed, but acetone can.
There are some things to do when having a PEI bed:
Always wipe with 99% Iso after a print
Never touch the bed with your hand
Use Acetone on every 5th or 10th print, only when PEI is cold
Never use acetone when the PEI is above 60 degrees
Never use sandpaper or any other substance to rough up your bed.
Acetone damages PEI when it's hot, but not when it's cold; sandpaper roughs up the bed a lot, giving PETG a very good chance to rip out chunks from the PEI, because these small cracks give PETG that extra footing it needs to permanently fuse with the PEI (they are very similar in structure)
I've been using 3 Prusas for two years now, and still have the vanilla PEI beds.
Re: Magnets on the Print Bed
Always wipe with 99% Iso after a print
Never touch the bed with your hand
Use Acetone on every 5th or 10th print, only when PEI is cold. Never ... when the PEI is above 60 degrees. Acetone damages PEI [only] when it's hot ...
Never use sandpaper or any other substance to rough up your bed.
Thank you for this!
I've been pouring over Material Science articles and Organic Chemistry references for the last 24 hours, and have found lots of support and nothing to contradict this advice. It's now printed and tacked to my bulletin board ...
So why is there such a wide range of contradictory advice in this area?
-- Clint Goss
Re: Magnets on the Print Bed
Has anyone else gone down this road?? Any thoughts, ideas, advice would be welcome!!
absolutely. I buy the cheap stacks of magnets off amazon since they'll be ruined eventually. Obviously getting it to stick in the first place is ideal but if its comes loose mid print theres no other option...
Re: Magnets on the Print Bed
Thank you for this!
I've been pouring over Material Science articles and Organic Chemistry references for the last 24 hours, and have found lots of support and nothing to contradict this advice. It's now printed and tacked to my bulletin board ...
So why is there such a wide range of contradictory advice in this area?
My guess is that people don't bother cross-checking if it's really true, and take up what others spew out without question.
Especially Youtubers, like Sanladerer's video said that you should rough up your bed with fine sandpaper. Yeah right.
Props to you for actually cross checking my advice for polyetherimide's actual properties and not blindly believing it.
That's the way it should be done 😆
Re: Magnets on the Print Bed
FWIW, if you switch to PETG, then with little effort you'll have guaranteed no problem with your prints sticking to the bed. It adheres very strongly to PEI.
Big prints like you're doing will flex off the bed with PETG. If you're doing something quite small.... well, getting that off could be a challenge!
Anyhow, 100 points for your magnet solution. I enjoyed your narrative. Very nice outside the box thinking.
Re: Magnets on the Print Bed
... Sanladerer's video said that you should rough up your bed with fine sandpaper...
Yes, Tom actually demos using fine steel wool on the bed, while it's on the machine, with metal flecks and dust flying everywhere. I didn't need a double-blinded clinical trial to tell me that metal shards + electronics are a bad combo.
I do like Tom's efforts in general, but this recommendation appears to be a miss-step.
-- Clint Goss
Re: Magnets on the Print Bed
I have a sharp scraper that I sharpen myself and instead of using steel wool nor sandpaper, I just ran the sharp scraper's sharp end on the pei surface and let it scrape it to make it rough, same thing like using steel wool and sandpaper. I recommend doing it in circular motion.
My brim setting often at 10-15mm(slic3r) and often print with abs but of course, can't do big prints with abs... =D
To be honest, I disliked the pei sheet and been waiting my upgrade kit just to get the textured instead of smooth type.


