getting a 3d printer...
Hello,
For some time now, I've been considering getting a 3D printer and I think I have decided I will get one. Practical issues allow me to get it after New Year, but it means I have plenty of time to read up on it, and determine my needs.
My main purpose would be to print board-game components: we are avid boardgamers and love to customize our boardgames by increasing the quality of the tokens and boardgame pieces, but also having fun making the components. Size of objects would be limited from something that fits in a 1.5x1.5x1.5cm to something that fits in around 8x8x8cm. Realistically I think that SLA may be better suited to get higher detail, but I'd don't want to get started with all those chemicals and am willing to accept that fdm may not allow for so much detail and perhaps needs more manual finishing. In addition, fdm printers offer perhaps some more freedom to print additional objects that could be useful (other boardgame accessories such as boxes, ... but also other objects).
Of course I was drawn to the cheap 3D printers you can find all over the place, but I fear I may end up more disappointed; the more I read about it, the more they are a bit hit-and-miss or require a lot of tweaking and tuning. I'm quite a handy computerscientist and know there is a learning curve to the 3D printing process, but feel that tweaking something unknown just to make it do something simple adds an additional learning curve that may not be what I'm looking for (the device should do its shop, learning curve to me is how to use it). So reading reviews and comments I ended up here. 🙂
I'm looking at the Prusa mk3 kit as a first printer and have a feeling it may suit my purpose. From what I gather, some dry storage solution for filament and some diy enclosure should be high on the list of things to get. I have a Raspberry Pi 3b+ with touchscreen lying around, so that could very well be used for Octiprint.
Any comments/suggestions?
Anything else?
The more and more possibilities for multi-material printing are interesting and it would be nice to be able to expand later. For sure it works with the Prusa MMU2.0 for 5 filaments, but does the board support other solutions (e.g. mixing extruders such as: diamond full colour hot-end, upcoming m3d quad, ...)? Is there any point in looking for compatibility with that, or will at worst it just require a board upgrade?
Thanks!
Jörg
Re: getting a 3d printer...
Hi jorg.
Sla does seem to be a smelly messy option at the moment.
Enclosures are useually needed for ABS
. Exotic filaments OR COLD environments
Board game pieces dont normally need to be ABS OR EXOTIC... PLA Should be fine
Low humidity storage is reccommended..
But less of an issue with PLA.
Colour mixing needs more motor drivers than the einsy can support
However as time progresses. The prusa platform is a good starting place for upgrades
Colour printing can be complex
Take time to become comfortable with simple printing before delving into colour printing
The mmu v1 was quite finniky. Hopefully the mmu v2 will be easier to use. And the original prusa mk3 is the ideal platform for adding mmuv2
Regards Joan
I try to make safe suggestions,You should understand the context and ensure you are happy that they are safe before attempting to apply my suggestions, what you do, is YOUR responsibility. Location Halifax UK
Re: getting a 3d printer...
Thanks for the concise replies!
Enclosures are useually needed for ABS . Exotic filaments OR COLD environments
Board game pieces dont normally need to be ABS OR EXOTIC... PLA Should be fine
Well, we would like them to be a bit more luxurious in look and feel, so wood filament may be interesting for some pieces but I gather that one is not so exotic when it comes to its usage... Metal filament could also be nice, but for that one I will need more experience as it is abrasive (but one of the reasons I want a printer where it is easy to replace/upgrade things).
Low humidity storage is reccommended.. But less of an issue with PLA.
True, but a small investment in it may prevent a lot of frustration and failed prints. I feel that particularly as a beginner, doing everything write and still have the print fail due to external factors would be frustrating.
Colour mixing needs more motor drivers than the einsy can support
However as time progresses. The prusa platform is a good starting place for upgrades
Thanks for confirming this.
Colour printing can be complex
Take time to become comfortable with simple printing before delving into colour printing
The mmu v1 was quite finniky. Hopefully the mmu v2 will be easier to use. And the original prusa mk3 is the ideal platform for adding mmuv2
While mixing seems great, I feel it is still too early. Full colour seems still quite wasteful (purge block) and I wonder if this will change (it is not a big cost, but psychologically it would bother me :)). The biggest appeal at this time to multi-filament (from what I read and for me) is the water-soluble filament for supports, so even with e.g. some dual extruder without mixing one might get far.
I'm still on the fence on getting either 1. a simple ready-to use consumer device (cheap but some limitations in software/filament + not expandable), 2. a cheap clone (cheap, expandable, but likely an additional learning curve and maybe limited in print quality), or 4. start a more expensive open platform (Prusa). 1 and 2 one might even consider replacing altogether when my skills/needs improve, and just not bother with the upgrades. But it feels a bit wasteful and I may feel too limited/frustrated after a relatively short time. Option 3 would suit me ok now, but is quite rigid; 4. would give me good quality now and flexibility later.
Difficult as I know nobody with a printer, and something I will have to decide on. I keep searching back for option 2, but keep ending up finding recommendations for Prusa... I also keep looking back at option 3, but feel I may be annoyed if in one year or so I would want to go to more filaments and then be blocked with the dual model... Option 1 feels ok for a short-term thing, but it may limit me early and then I would feel guilty in having to buy another device... 🙂
Re: getting a 3d printer...
Hi jorg
Do you have any maker spaces or hacker spaces near you?
Or perhaps a library with a printer near you
These may be able to help
Or if you put your rough location on here and ask nicely there may be someone near you with a prusa.
I bought a chinese printer and its not good... time has moved on. So things may have improved.
A friend bought an entry level xyz davinci. But the filament cartridges are chipped and bypassing the chip is fiddly so they dont use it anymore
Another friend bought a higher spec davinci with an integrated scanner
It develooed a fault and he has been unable to get support so he has scrapped it and is looking at a prusa
I scrounged the higher spec davinci and recycled it to my local hack space. Where i found that they had recently bought an original prusa mk3 and the comment was that they had done more printing in two months with the mk3
Than they had done in the past 12 months with their other printers
Woodfill filament and other filled filaments tend to clog nozzles so a bigger nozzel might be a benefit
The prusa has profiles for .25mm, .4mm And .6mm
Glow in the dark. Carbon fibre and metal fill filaments tend to be abrasive so hardened nozzles may be useful too
Most nozzles are cheap
Think twice and read all the reviews before shelling out for a ruby nozzle
Some folk love them. Others have nothing good to say for then
Ruby is brittle
If you have difficulty clearing a blockage you may chip the ruby and destroy its performance
The hackspace got a 0.4mm tungsten nozzle given to them. And they use that for everything. Wv
Even with nmultiple users
Some folk just buy lots of brass nozzles and throw them away when they wear
You have time to relax and review before making a decision
Regards Joan
I try to make safe suggestions,You should understand the context and ensure you are happy that they are safe before attempting to apply my suggestions, what you do, is YOUR responsibility. Location Halifax UK
Re: getting a 3d printer...
Do you have any maker spaces or hacker spaces near you?
Or perhaps a library with a printer near you
Not really.... The fact that I'm not in my home country also complicates matters. 🙂
I bought a chinese printer and its not good... time has moved on. So things may have improved.
I guess they may be ok if you are lucky and could be nice as a cheap platform to really customize and enjoy doing that, but that is not what I'm after...
A friend bought an entry level xyz davinci. But the filament cartridges are chipped and bypassing the chip is fiddly so they dont use it anymore
Another friend bought a higher spec davinci with an integrated scanner
I looked at those, even thinking that an all-in-one model could later still serve as just scanner/laser etcher. But the comments on its scanning functions are not that good (better use photogrammetry and software)... and I don't really need a laser etcher... So then again... what's the point...
Woodfill filament and other filled filaments tend to clog nozzles so a bigger nozzel might be a benefit
The prusa has profiles for .25mm, .4mm And .6mm
Glow in the dark. Carbon fibre and metal fill filaments tend to be abrasive so hardened nozzles may be useful too
Most nozzles are cheap
Yes, those are things to learn, but that is normal.
At the moment I'm tempted to get the best single filament printer in my budget, which is the mk3; learn with that one, expand later with other materials and see what comes regarding multi colour or even mixing. For sure there will be options: MMU, M3d Quad fusion (4 filament mixing head coming out, and while they also develop their own printer, they show videos where they test it on the Prusa, among others), Palette+ , ..., But that seems to say to me: get the good platform now, with a focus on print quality and resolution, expansion will be possible...
Perhaps a strange question... How good is the 3d printer (e.g. the mk3) at printing things to inlay other printed objects: you print one object with a hollow space and print a second object that fits in that space. I've seen it done for some multicolor models (to make them on a single filament printer). But what size of inlay-objects would be achievable? Most likely it will also depend on the plane in which you have the hollow part: XY may allow different tolerances than XZ plane, or any random oriented plane, but just to have some idea, so e.g. let's say on the XY plane, for PLA, would a hollow space the size of something like 1mm x 3mm be possible to fill with an another object you have printed (ok, this example could be achieved with filament swapping, but as an example)? How narrow can the walls be (e.g. if they are max. 1 mm tall)? They would be small objects to handle, but for some of my applications, that could be interesting...
Re: getting a 3d printer...
[...] Well, we would like them to be a bit more luxurious in look and feel, so wood filament may be interesting for some pieces but I gather that one is not so exotic when it comes to its usage... Metal filament could also be nice, but for that one I will need more experience as it is abrasive (but one of the reasons I want a printer where it is easy to replace/upgrade things).
I've purchased 0.40mm and 0.60mm hardened steel nozzles, and am having no issues using them with everyday as well as abrasive materials. I do use a plated nickel 0.25mm nozzle for detail prints, but the cheap brass 0.30-0.8mm work just fine for normal PLA printing. Plated steel nozzles are just as effective as the Ruby for PLA materials, and you would be better off with a variety of different sized hardened steel than a single fragile ruby. Starting out, I'd suggest a 0.25, 0.40mm and 0.60mm set of nozzles, with hardened steel for the larger sizes. You'll be out less than US$50 for original E3D nozzles.
Keep in mind, none of the filled PLA materials are going to look "luxurious" straight off the printer. You need to expect to do some post-processing. However, the results can be spectacular. I've played a bit with copper and steel fill, and with a bit of sanding and polishing, large flat surfaces do look like metal. Vertical sides printed as layers are a lot more work. Getting into crevices to polish is nearly impossible. They tend to look a bit crusty. One technique is to fill those with black or brown finish which hides the effect somewhat. Smaller details are harder to work with.
There's nothing wrong with buying or building a dryer, but I wouldn't consider it urgent. I toss every spool into a 2 gallon ziplock bag with refreshed desiccant and have not had any issues through the New England spring and summer. Starting out, I thought this was going to be a much bigger issue. I'm using PLA, PETG and NGEN and have stored each for several months without issue. Drying filament out is a good thing though, so prioritize according to funds available. I'd buy other things 1st though.
[...] True, but a small investment in it may prevent a lot of frustration and failed prints. I feel that particularly as a beginner, doing everything write and still have the print fail due to external factors would be frustrating.
With the advances Prusa is working on, MMUv2 may actually be less wasteful than some other techniques for multi-color printing. Using infill and a waste object for the color change is brilliant.
[...] While mixing seems great, I feel it is still too early. Full colour seems still quite wasteful (purge block) and I wonder if this will change (it is not a big cost, but psychologically it would bother me :)). The biggest appeal at this time to multi-filament (from what I read and for me) is the water-soluble filament for supports, so even with e.g. some dual extruder without mixing one might get far.
I'm still on the fence on getting either 1. a simple ready-to use consumer device (cheap but some limitations in software/filament + not expandable), 2. a cheap clone (cheap, expandable, but likely an additional learning curve and maybe limited in print quality), or 4. start a more expensive open platform (Prusa). 1 and 2 one might even consider replacing altogether when my skills/needs improve, and just not bother with the upgrades. But it feels a bit wasteful and I may feel too limited/frustrated after a relatively short time. Option 3 would suit me ok now, but is quite rigid; 4. would give me good quality now and flexibility later.
Joan has shared some good first-hand experience. I'd also suggest watching the review videos of some of the "prints just as well as a Prusa" printers. They may print as well, but lack a lot of other features. When they get to talking about the blue tape on the print bed, and chiseling at prints with a spatula for removal, I'm always glad I went with a Prusa. The bed leveling process is also interesting to watch. Then listen as they describe the "essential" parts they had to print and replace to get things printing safely & well. Finally, look carefully as they show off the "smooth as a baby's butt" surfaces and pause frequently. They're usually not all that glass-like.
Difficult as I know nobody with a printer, and something I will have to decide on. I keep searching back for option 2, but keep ending up finding recommendations for Prusa... I also keep looking back at option 3, but feel I may be annoyed if in one year or so I would want to go to more filaments and then be blocked with the dual model... Option 1 feels ok for a short-term thing, but it may limit me early and then I would feel guilty in having to buy another device... 🙂
Factor in the value of your time. If you enjoy the process of working on the printer itself, this may matter less. If you want to get things printed and start playing, that time spent getting the printer up to speed may be a frustration.
and miscellaneous other tech projects
He is intelligent, but not experienced. His pattern indicates two dimensional thinking. -- Spock in Star Trek: The Wrath of Khan
Re: getting a 3d printer...
I've purchased 0.40mm and 0.60mm hardened steel nozzles, and am having no issues using them with everyday as well as abrasive materials. I do use a plated nickel 0.25mm nozzle for detail prints, but the cheap brass 0.30-0.8mm work just fine for normal PLA printing. Plated steel nozzles are just as effective as the Ruby for PLA materials, and you would be better off with a variety of different sized hardened steel than a single fragile ruby. Starting out, I'd suggest a 0.25, 0.40mm and 0.60mm set of nozzles, with hardened steel for the larger sizes. You'll be out less than US$50 for original E3D nozzles.
Thanks, I'll keep that in mind!
Keep in mind, none of the filled PLA materials are going to look "luxurious" straight off the printer. You need to expect to do some post-processing. However, the results can be spectacular. I've played a bit with copper and steel fill, and with a bit of sanding and polishing, large flat surfaces do look like metal. Vertical sides printed as layers are a lot more work. Getting into crevices to polish is nearly impossible. They tend to look a bit crusty. One technique is to fill those with black or brown finish which hides the effect somewhat. Smaller details are harder to work with.
Yes, a bit of a problem is assessing what comes out of the printer. I have some sample prints, that know where not processed, but I have no idea on what printer they were made and with which settings. Quite often you see photos of results that people have, but they do not say how much work went into after printing. Lastly, people post close-ups of objects where some imperfection or so may be visible, but in reality you are never going to look at it that close. It is like examining a 24 megapixel photo at pixel level: ok for benchmarking, but not that relevant in reality, where the global result is what matters.
In this thread on printing minifigures you posted some prints of tanks. How much was done after printing?
For sure post-processing is necessary to make it look more "luxurious", but at least the 3D print gives you something to start with. 🙂
There's nothing wrong with buying or building a dryer, but I wouldn't consider it urgent. I toss every spool into a 2 gallon ziplock bag with refreshed desiccant and have not had any issues through the New England spring and summer. Starting out, I thought this was going to be a much bigger issue. I'm using PLA, PETG and NGEN and have stored each for several months without issue. Drying filament out is a good thing though, so prioritize according to funds available. I'd buy other things 1st though.
Getting some ziplock bags (or airtight boxes), desiccant, and similar small stuff is what I considered the "small investment" that may prevent frustration. 🙂 I wasn't thinking of dryers or so... (sorry if I gave that impression)
With the advances Prusa is working on, MMUv2 may actually be less wasteful than some other techniques for multi-color printing. Using infill and a waste object for the color change is brilliant.
Yes, I agree, but you can't get rid of it completely. And I believe it cannot mix. But things are going so fast that perhaps other systems are developed that prevent the need of a purge tower. I could not find info, but I think the Palette+ system may result in a smaller purge tower - correct me if I'm wrong. So perhaps something like that could become MMU3.0, or perhaps something completely different.
Joan has shared some good first-hand experience. I'd also suggest watching the review videos of some of the "prints just as well as a Prusa" printers. They may print as well, but lack a lot of other features. When they get to talking about the blue tape on the print bed, and chiseling at prints with a spatula for removal, I'm always glad I went with a Prusa. The bed leveling process is also interesting to watch. Then listen as they describe the "essential" parts they had to print and replace to get things printing safely & well. Finally, look carefully as they show off the "smooth as a baby's butt" surfaces and pause frequently. They're usually not all that glass-like.
Yes, given all I read, I figured I would be best off with something that has a heated bed and auto leveling. And that increases the price, and before you know it, you are back in Prusa territory. 🙂
Factor in the value of your time. If you enjoy the process of working on the printer itself, this may matter less. If you want to get things printed and start playing, that time spent getting the printer up to speed may be a frustration.
I first want to get things printed and start playing with printing itself... Setting up the printer may be also interesting fun, but I feel that you need some first hand printing experience.
Can you comment on my inlay question?
If you print an object with a (not sure about the English word) section missing (like it was cut out), and then print a second object that can fit in that missing section (e.g. different colour or material), what sizes are reasonably possible? I assume it will be easier to the part with the missing section than the part that you expect to fit inside it.
As an example (for one of our boardgames), you could consider printing a pirate ship and leave some round openings on the sides. Then print some canons that fit in those openings. What diameter of cannon would still be possible? Would e.g. 2mm be feasible? Or even smaller?
Re: getting a 3d printer...
Hi Jorg,
My main purpose would be to print board-game components:
That's the main reason I got into this as well; once I get this MK3 shaken out, I'll be prototyping board game ideas I've been incubating for years/decades. 😀
(the device should do its shop, learning curve to me is how to use it).
IMO, that level of "plug & play" may not be achievable short of a machine costing 4-5 figures (USD). I'm ok with the quality of prints possible at this level for board game parts/prototyping.
Perhaps a strange question... How good is the 3d printer (e.g. the mk3) at printing things to inlay other printed objects: you print one object with a hollow space and print a second object that fits in that space. I've seen it done for some multicolor models (to make them on a single filament printer). But what size of inlay-objects would be achievable? Most likely it will also depend on the plane in which you have the hollow part: XY may allow different tolerances than XZ plane, or any random oriented plane, but just to have some idea, so e.g. let's say on the XY plane, for PLA, would a hollow space the size of something like 1mm x 3mm be possible to fill with an another object you have printed (ok, this example could be achieved with filament swapping, but as an example)? How narrow can the walls be (e.g. if they are max. 1 mm tall)? They would be small objects to handle, but for some of my applications, that could be interesting...
I think I know where you're coming from here; this was one of the criteria that led me to the MK3 and--when it gets here--MMU2.
I would say... it depends. For example, I wouldn't try to inlay text/numbers or anything of similar detail without mult-color capability. Printing the inlay separately is not much different than printing other parts that need to fit/work together. As you say, it comes down to tolerances. There are plenty of vids on this on YT. I've already learned that for many things I want to do I'm going to have to invest in smaller nozzles (than the standard/supplied 0.4mm) and practice my patience--some pieces/parts will have to be printed at pretty small layer heights and slower speeds, requiring substantially more time. Fortunately, Slic3r PE has a "Smooth Variable Layer Height" feature that... well, check it out.
https://www.prusaprinters.org/smooth-variable-layer-height-awesome-supports-slic3r-prusa-edition/
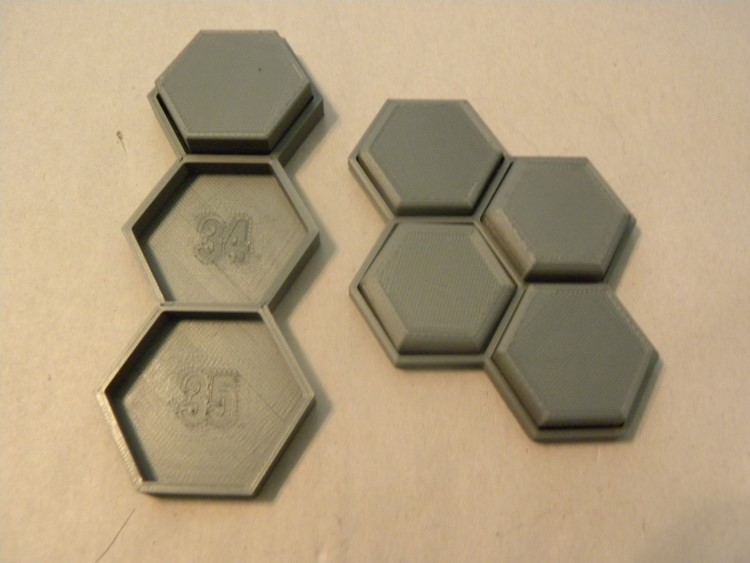
Here's a sample of what I've been able to achieve so far using standard settings (except smoothing on one token).
I used the aforementioned "smoothing" on the token on the bottom right. (The tokens are of different heights & edge rounds) It was better, but IMO not enough to warrant use in this application. The numbers were recessed by 0.1 or 0.2mm (I forget which). As can be seen, this caused some artifacts around the numbers (ghosting?) Hopefully, I'll be able to tweak this out. EDIT: when I can inlay a different color into the recesses via the MMU! 😀
I'd also suggest (if you haven't already) checking out "board games" on Thingiverse. Most are accessories for existing miniature & card games, but there are a few originals...
I echo what bobstro & joan.t have already said.
That's "MISTER Old Fart" to you!
Re: getting a 3d printer...
Almost nothing. A bit of scraping with my fingernail and some plier work to remove supports. Those are pretty raw prints.
[...] In this thread on printing minifigures you posted some prints of tanks. How much was done after printing?
One correction: I wrote plated nozzles are fine for both filled abrasive material and regular materials. I meant hardened steel.
and miscellaneous other tech projects
He is intelligent, but not experienced. His pattern indicates two dimensional thinking. -- Spock in Star Trek: The Wrath of Khan
Re: getting a 3d printer...
As an example (for one of our boardgames), you could consider printing a pirate ship and leave some round openings on the sides. Then print some canons that fit in those openings. What diameter of cannon would still be possible? Would e.g. 2mm be feasible? Or even smaller?
In my own limited experience, that would be pushing it; I'm not sure a 2mm disc as a separate object would be enough to stick to the print bed while printing (but I defer to others' experience/wisdom). As a compromise, I might try modeling the cannon into the ship and painting it afterward. On a detail that small, it would be difficult to tell the difference.
That's "MISTER Old Fart" to you!
Re: getting a 3d printer...
Thanks!
That's the main reason I got into this as well; once I get this MK3 shaken out, I'll be prototyping board game ideas I've been incubating for years/decades. 😀
Interesting!
(the device should do its shop, learning curve to me is how to use it).
IMO, that level of "plug & play" may not be achievable short of a machine costing 4-5 figures (USD). I'm ok with the quality of prints possible at this level for board game parts/prototyping.
(typing error, should have been JOB, not SHOP 😳 )
Well, I mean that it should print. Problems that could occur should be due to wrong print settings, filament choices/manipulation, nozzle choices, etc; not due the printer not behaving correctly (exceptions are possible of course, a normal printer also suffers the occasional paper jam).
I would say... it depends. For example, I wouldn't try to inlay text/numbers or anything of similar detail without mult-color capability. Printing the inlay separately is not much different than printing other parts that need to fit/work together. As you say, it comes down to tolerances. There are plenty of vids on this on YT. I've already learned that for many things I want to do I'm going to have to invest in smaller nozzles (than the standard/supplied 0.4mm) and practice my patience--some pieces/parts will have to be printed at pretty small layer heights and slower speeds, requiring substantially more time.
Ok, so another comment for additional nozzles! 🙂
I have read article where they used nail polish to fill shallow areas to achieve a multi-color effect. Not sure how well it works and holds of course, but it is an idea. The inlay idea would be something to try, but apparently I should not expect too much if it is intended to be something very visual. But if the inlay thing does not work out well, there is always paint. 🙂
As an example (for one of our boardgames), you could consider printing a pirate ship and leave some round openings on the sides. Then print some canons that fit in those openings. What diameter of cannon would still be possible? Would e.g. 2mm be feasible? Or even smaller?
In my own limited experience, that would be pushing it; I'm not sure a 2mm disc as a separate object would be enough to stick to the print bed while printing (but I defer to others' experience/wisdom). As a compromise, I might try modeling the cannon into the ship and painting it afterward. On a detail that small, it would be difficult to tell the difference.
3d printing tolerances
The link has interesting information (I quickly glanced at it). The section of negative space seems to indicate that at least size-wise, an opening like that is very well possible. As to printing the canon itself, if you need a number of them, it is probably better to group them in one object to have a bigger base and then just cut them off (one side would be hidden). But yes, if it does not work, there is always painting!
(I know they may be stupid questions, but I prefer to know what is and is not possible, just not to have my hopes up too high with false expectations)
Here's a sample of what I've been able to achieve so far using standard settings (except smoothing on one token).
How big is the side of such a hexagon?
I'd also suggest (if you haven't already) checking out "board games" on Thingiverse. Most are accessories for existing miniature & card games, but there are a few originals...
Their number of page hits skyrocketed the last couple of days... as did those of many similar sites. 😀
[...] In this thread on printing minifigures you posted some prints of tanks. How much was done after printing?
Almost nothing. A bit of scraping with my fingernail and some plier work to remove supports. Those are pretty raw prints.
One correction: I wrote plated nozzles are fine for both filled abrasive material and regular materials. I meant hardened steel.
Thanks for the correction!
Those prints look awesome! For sure it takes a bit of knowing your equipment to get to that level, but it is nice to see it is technically possible. When you write "15mm miniatures", do you mean the height?
Re: getting a 3d printer...
The hexagonal game tokens are... (let's see...) 17.321mm on a side, but I never thought of them that way. I designed them as 30mm flat side to flat side. I had originally conceived them as larger, but the board would have been too big to print.
Those prints are strictly proof of concept, to test different diameters, heights, rounding (for look & feel of the tokens) grid wall dimensions, and a few other variables.
Jorg wrote:
When you write "15mm miniatures", do you mean the height?
IME, yes. In my own RPG years (talk about "A long time ago in a galaxy far, far away....") we used 25mm figures for AD&D, etc. I had a friend that played historical tabletop war games with 30mm figures (close enough to mix with 25mm), and games that used tanks & such were usually 15mm. None of these really fit well with HO gauge trains, but that's a whole 'nother ball-o-worms... 🙄
That's "MISTER Old Fart" to you!
Re: getting a 3d printer...
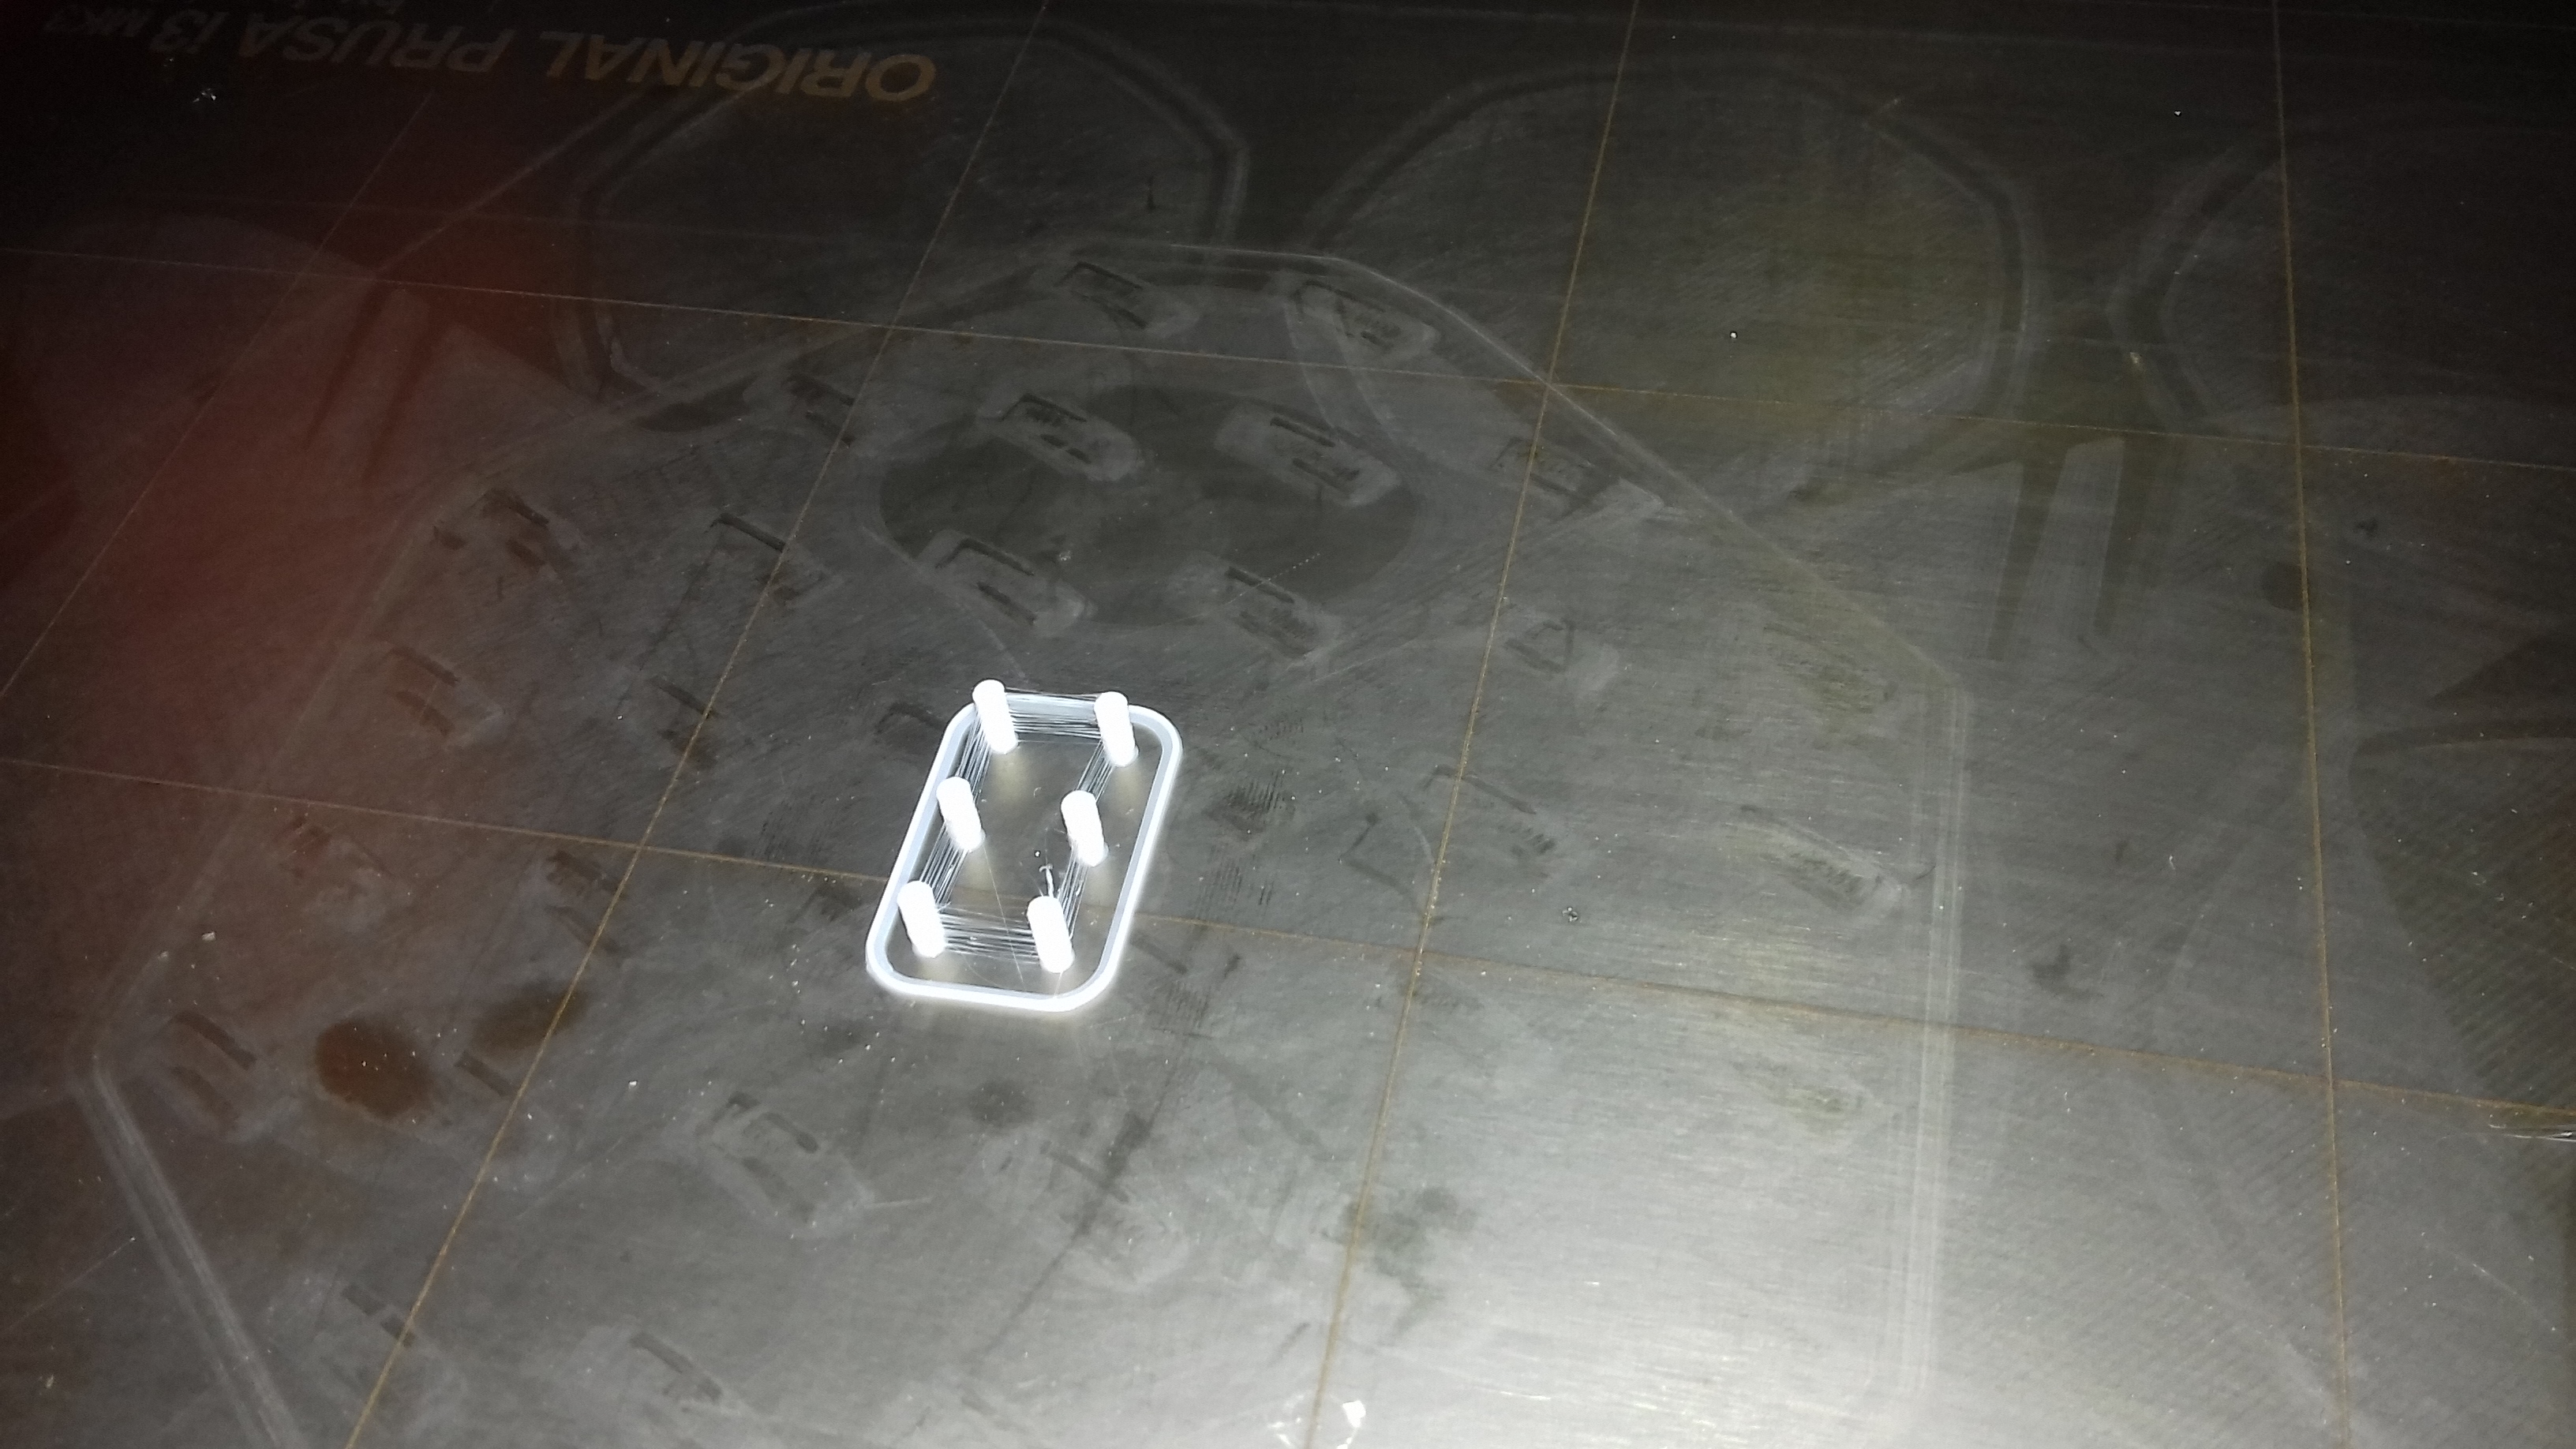
2mm discs?
how about 2mm towers 10 mm tall
first cluster lots of stringing, standard prusa pla 0.2mm layer height settings.... filament is old and has never been in a dehumidifier, today's relative humidity currently showing just under 80%
second cluster, spread out and 195centigrade for all layers 0.2mm layer height
much less stringing...
if this was what you need to do, I expect you could tune it in better... 😀
I try to make safe suggestions,You should understand the context and ensure you are happy that they are safe before attempting to apply my suggestions, what you do, is YOUR responsibility. Location Halifax UK
Re: getting a 3d printer...
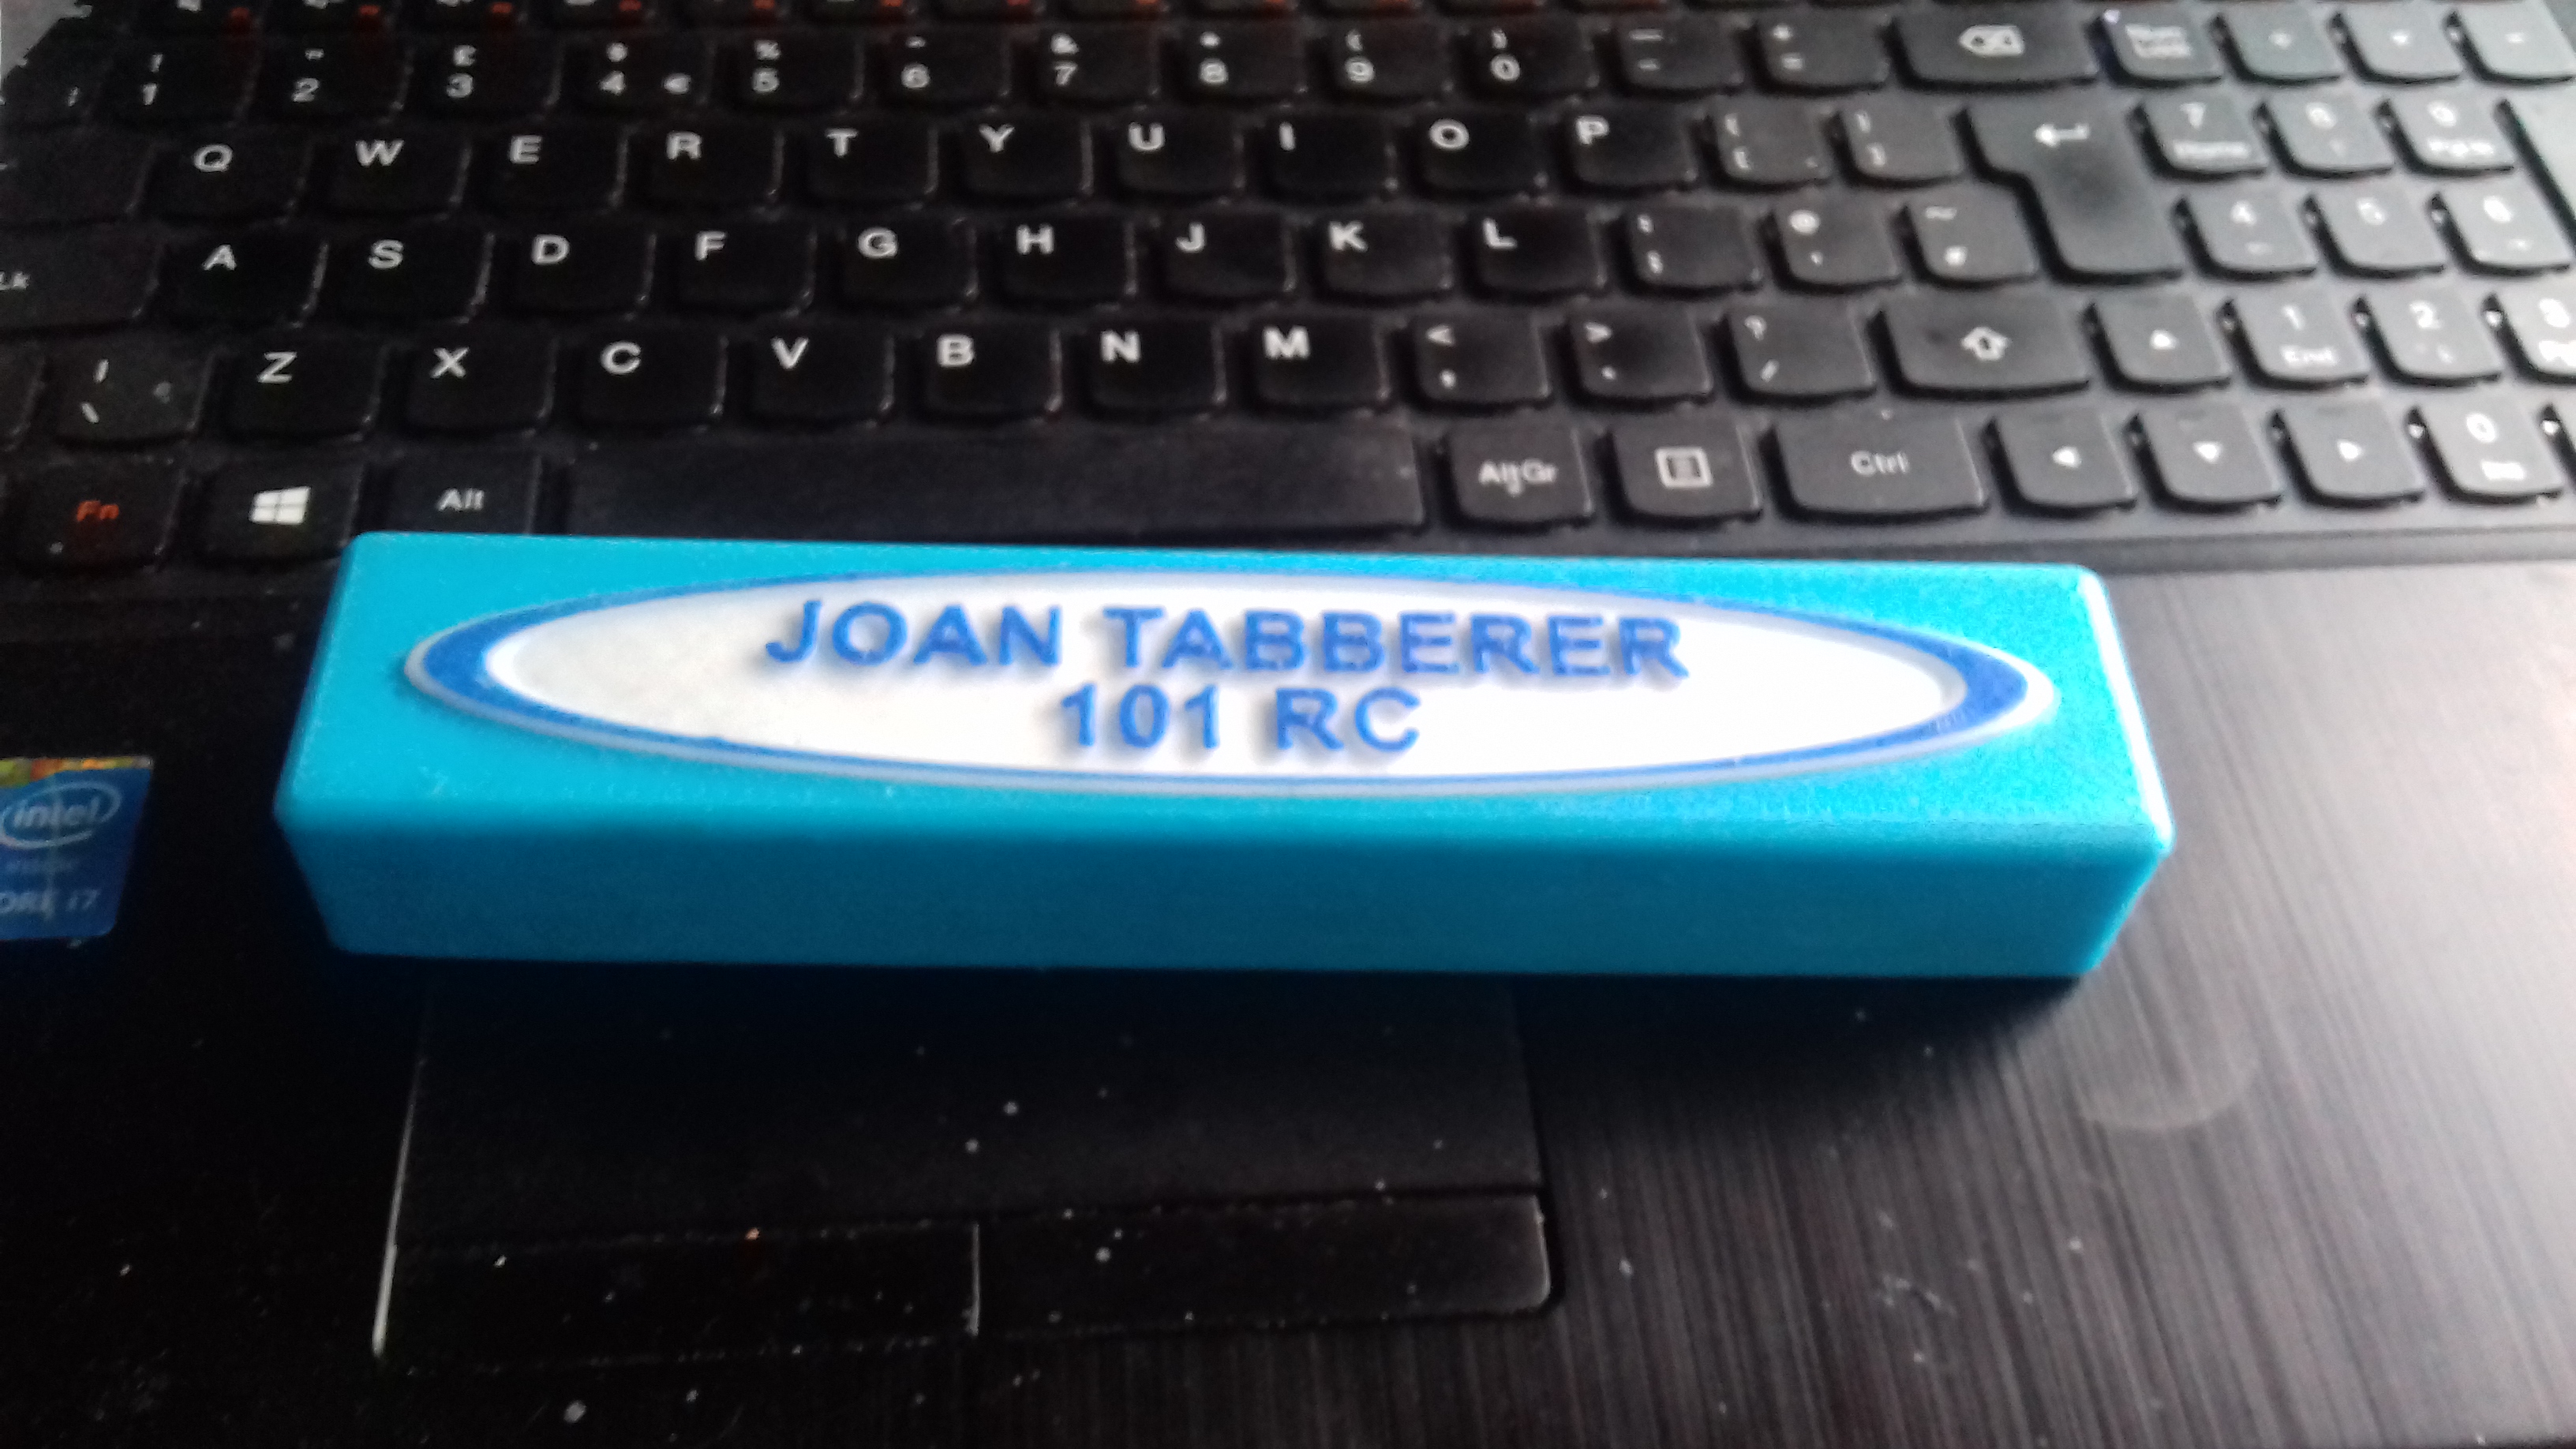
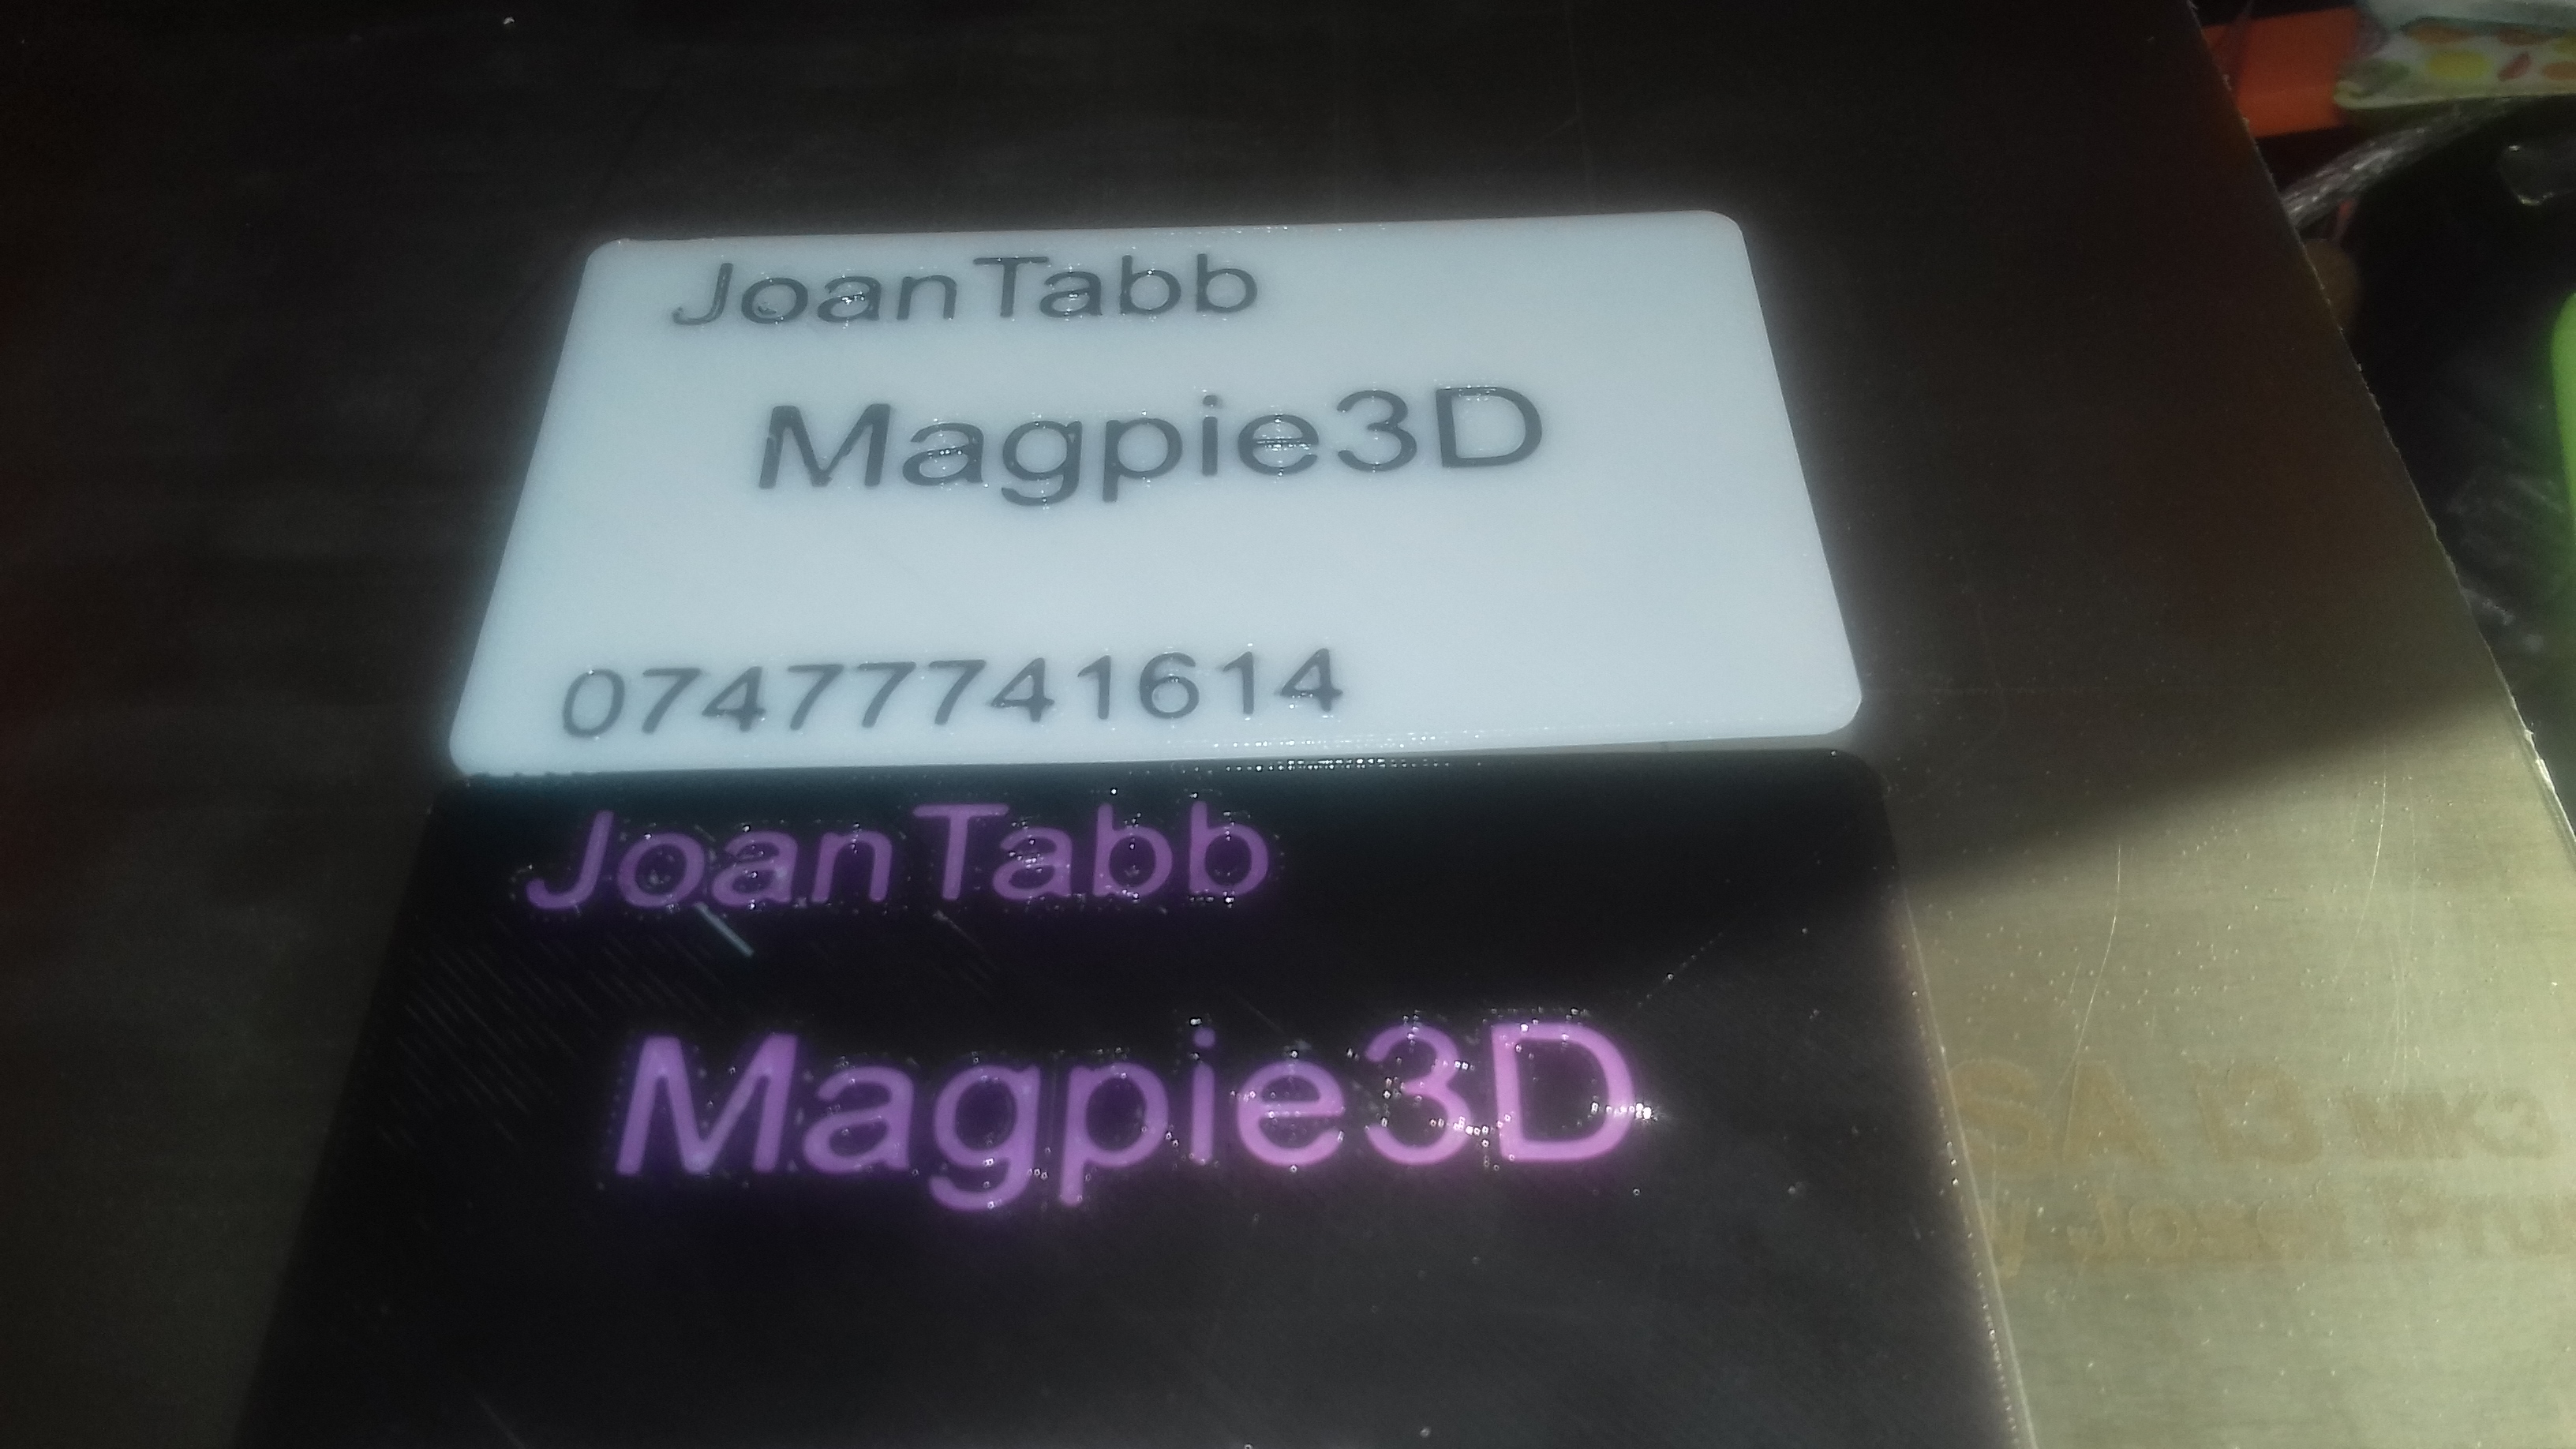
the blue box lid has a recess for the white oval, and the outline and text are printed in a different colour using layer height separation... this was done on my original Prusa Mk1, years ago
the business card was a lash together to prove a point.
the text is one layer thick
it was printed on my mk3, single colour printer
the front of the card was on the build plate surface
in both cases the background colour printed first, then the letters filled the spaces left in the background, then the remaining three layers were printed in the body colour
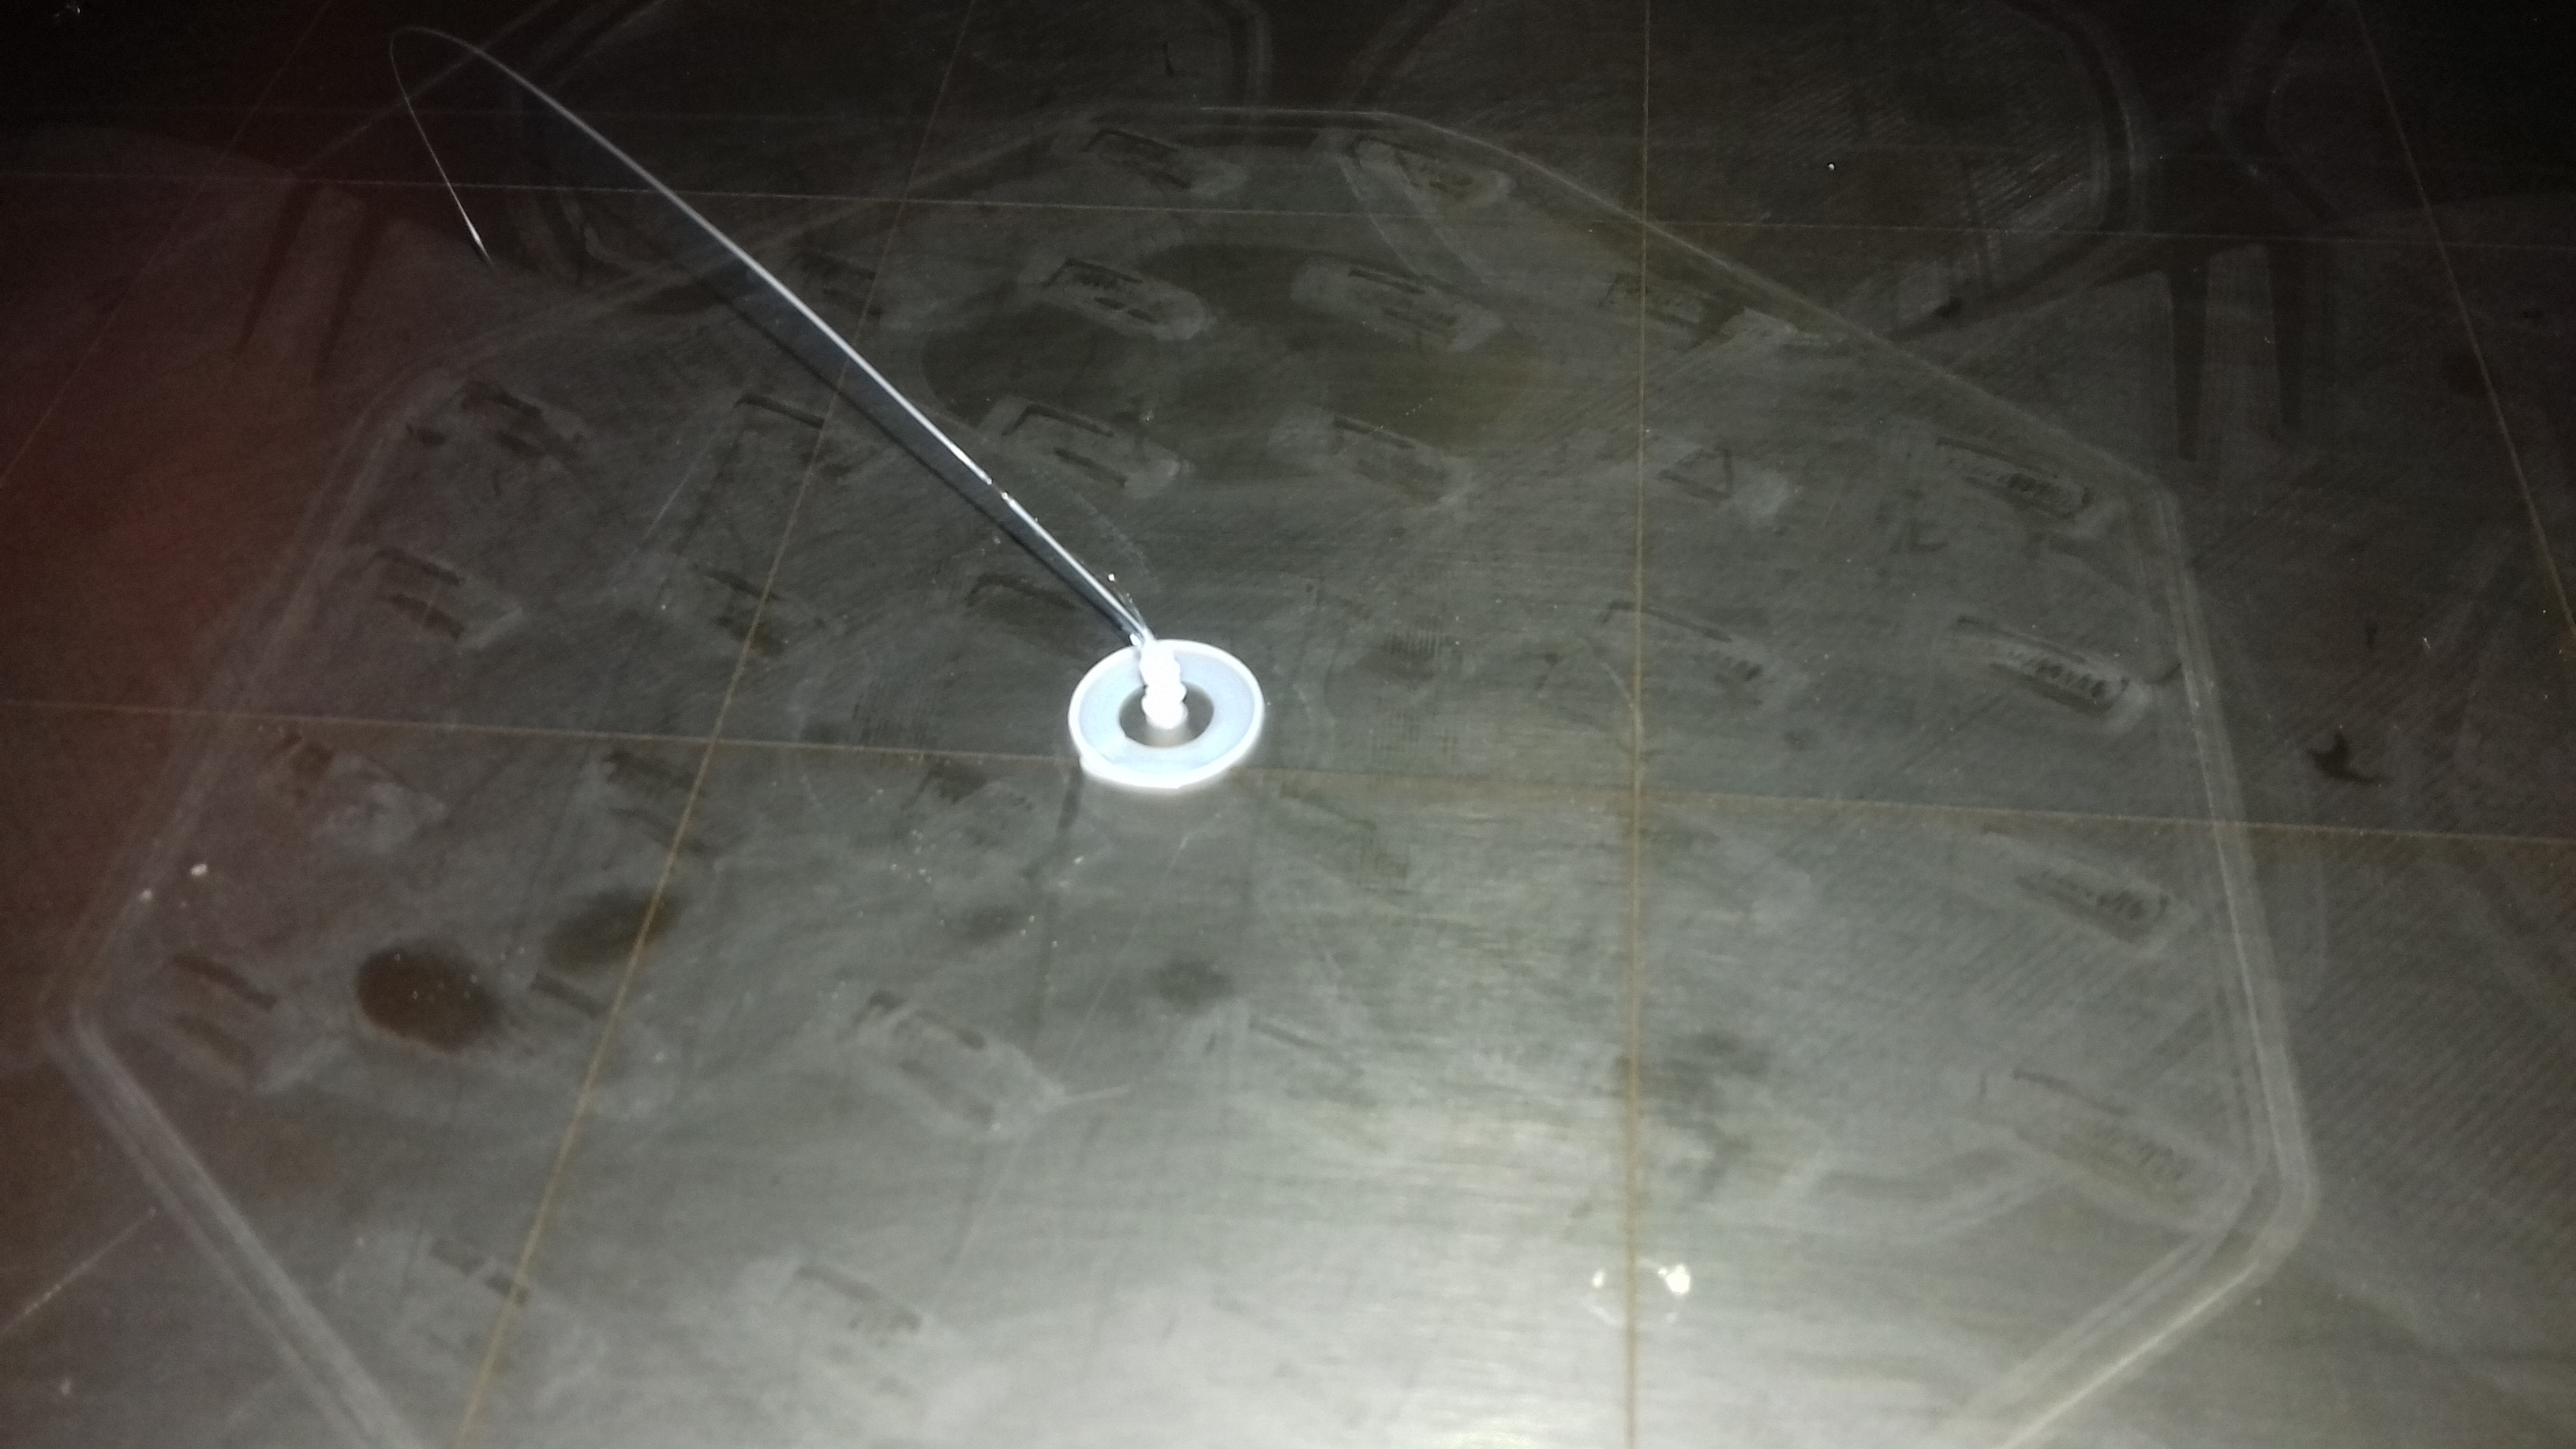
almost forgot... first print of 2mm tower... failed
maybe got a bit hot...
no idea why I got the wide outline... was expecting a single line three layers high...
regards Joan
I try to make safe suggestions,You should understand the context and ensure you are happy that they are safe before attempting to apply my suggestions, what you do, is YOUR responsibility. Location Halifax UK
Re: getting a 3d printer...
The hexagonal game tokens are... (let's see...) 17.321mm on a side, but I never thought of them that way. I designed them as 30mm flat side to flat side. I had originally conceived them as larger, but the board would have been too big to print.
Those prints are strictly proof of concept, to test different diameters, heights, rounding (for look & feel of the tokens) grid wall dimensions, and a few other variables.
Yes, but they look nice !
When you write "15mm miniatures", do you mean the height?
IME, yes. In my own RPG years (talk about "A long time ago in a galaxy far, far away....") we used 25mm figures for AD&D, etc. I had a friend that played historical tabletop war games with 30mm figures (close enough to mix with 25mm), and games that used tanks & such were usually 15mm. None of these really fit well with HO gauge trains, but that's a whole 'nother ball-o-worms... 🙄
[/quote]
Ok... there is much more detail than I would have expected. Especially when comparing the sample prints I have (brought back from a a scientific conference where there was a printer, no idea about printer or settings). It looks amazing! And at 1.5mm scale that gives me a sense of idea what amount of detail is possible for the things I want.
how about 2mm towers 10 mm tall
first cluster lots of stringing, standard prusa pla 0.2mm layer height settings.... filament is old and has never been in a dehumidifier, today's relative humidity currently showing just under 80%
second cluster, spread out and 195centigrade for all layers 0.2mm layer height
Wow... 😯 you printed that especially for me? 😎 Thank you so much! Nice to see even the 2mm diameter sticks to the bed... Amazing...
Funny, you posted the image I was just about to ask you about while I was typing this reply... About the business-card print you posted in this thread... Without the technical details, do I understand correctly that it is one black layer, then a filament swap to get a purple layer with the letters and then another filament swap to get a white layer (with cutouts for the letters)?
And that for the blue box you printed the blue box with a recess and the printed the white shape that fits in it? Whereas the other colours on the blue box and on the white shape were done through changing the filament for the layer?
Thanks!
I'm so beginning to regret I started looking/inquiring so early... it is physically impossible for me to get the printer before New Year... but seeing all this.... I want it now! 🙂
Re: getting a 3d printer...
Hi Jorg,
yes you understand correctly
card was 0.8mm thick total
each card had two filament changes
if it was a real job, I would have used at least 2 layers of colours and maybe a 0.25mm nozzle or similar
regards Joan
I try to make safe suggestions,You should understand the context and ensure you are happy that they are safe before attempting to apply my suggestions, what you do, is YOUR responsibility. Location Halifax UK
Re: getting a 3d printer...
Thanks!
(sorry for asking the confirmation, but still a bit new to the terminology and non-native English :))
Now that I reread what I wrote, I noticed I wrote it wrong... First you print the front of the card (with the holes for the letters), then filament swap, then the letters and then the filament swap for the back of the card. I assume you print the card upside down to have the nicest (flattest) side as the front of the card...
I'm surprised how nice that comes out... I did not expect such a nice resolution for this. It gives me more ideas for things to make... 🙂
Re: getting a 3d printer...
Surprisingly little work, to be honest. I tend to print those tanks instead of Benchys for testing, but I'm still new to all this. Still very much experimenting and learning.
[...] Those prints look awesome! For sure it takes a bit of knowing your equipment to get to that level, but it is nice to see it is technically possible.
When you write "15mm miniatures", do you mean the height?
War gaming scales are quaint, going back to the 1950s and before. Among the various quirky scales was using the measurement from the base to the eyes of the "average" human figure as the scale. Minis in the same scale vary widely depending on manufacturer, but 15mm is roughly the same as 1:100 scale. Vehicles are usually sold as 1:100 scale, figures as 15mm. Add in non-linear table scales and varying ground scales, and it can be very confusing. I do miss it sometimes.
and miscellaneous other tech projects
He is intelligent, but not experienced. His pattern indicates two dimensional thinking. -- Spock in Star Trek: The Wrath of Khan
Re: getting a 3d printer...
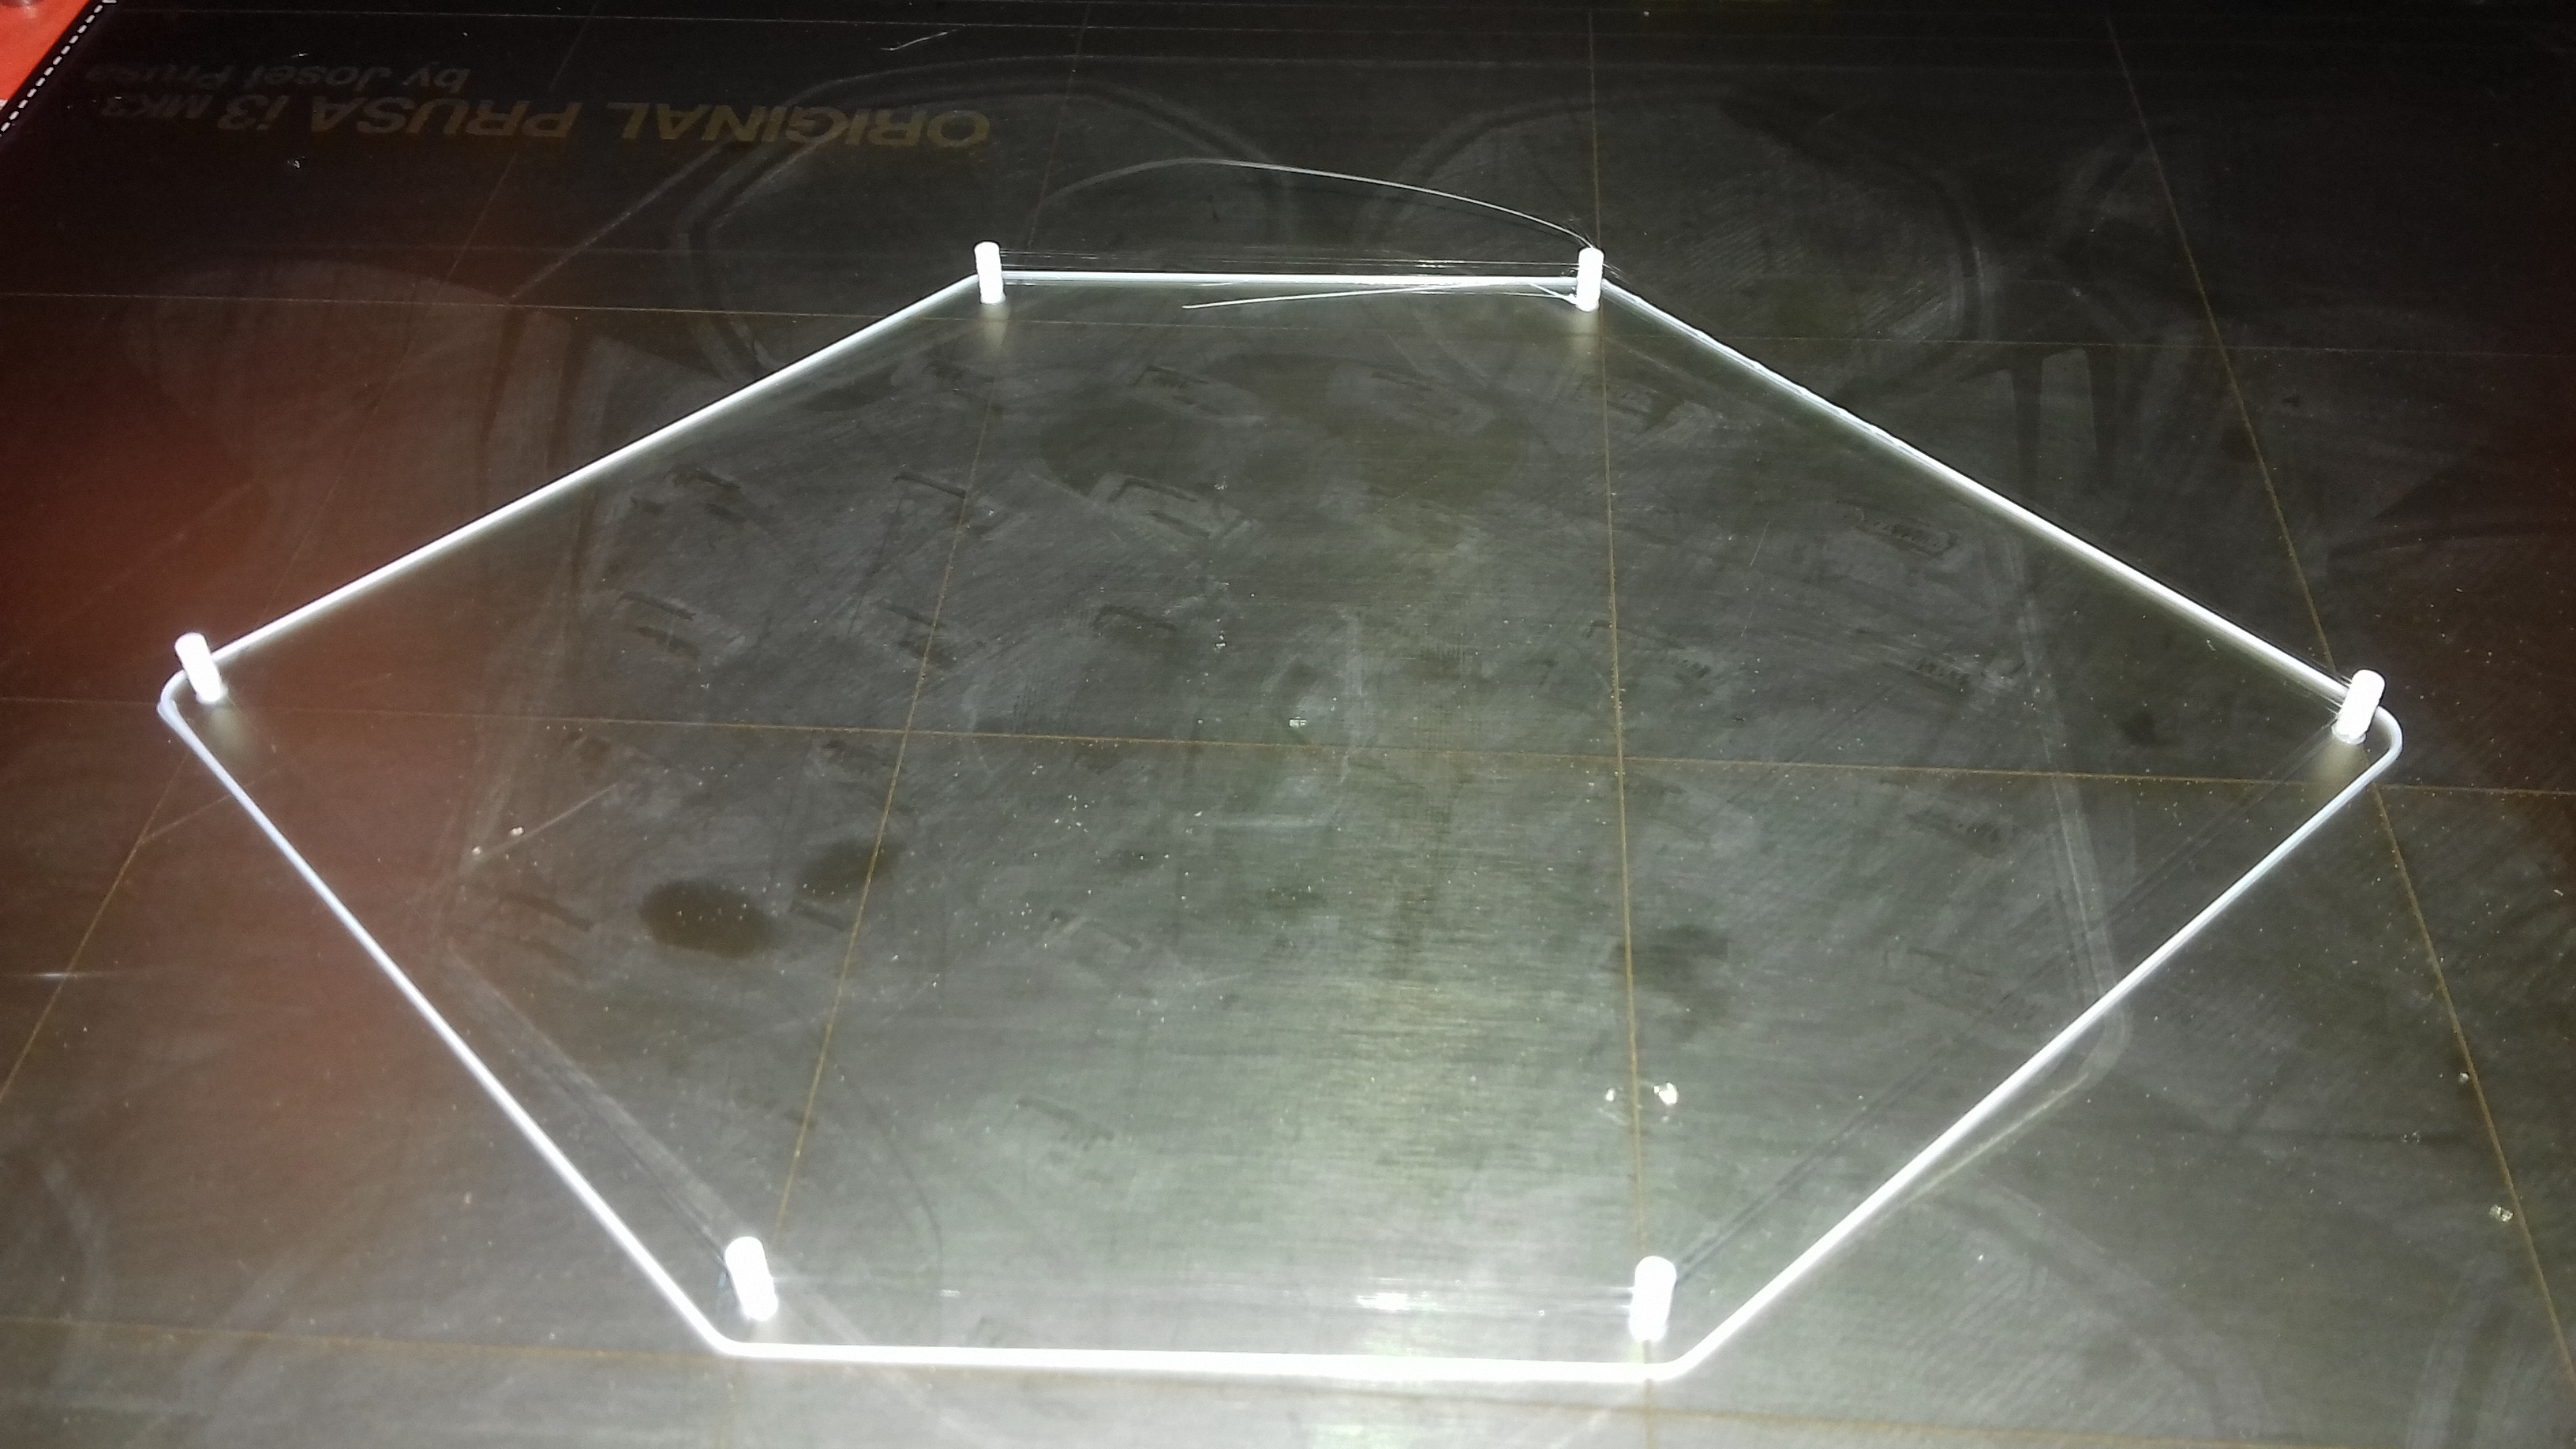
Sorry guys I mis informed you
those 2mm towes were only 5mm tall...
so I had another go at 10mm tall...
one tower fell at 6.2mm, that caused build up of waste on the next tower which fell at 7.8mm, and that, plus the waste from two missing towers stacked up against the next tower... the remaining four towers did indeed stand to 10mm height... I was amazed 😯
[attachment=0]20180728_010249[1].jpg[/attachment]
Joan
I try to make safe suggestions,You should understand the context and ensure you are happy that they are safe before attempting to apply my suggestions, what you do, is YOUR responsibility. Location Halifax UK
