Stuck in the Print
I ran the wizard on my MK3 and successfully tuned my 1st layer squish. I then started printing following the advise of the Video linked on the calibration page and "Watch before you print"
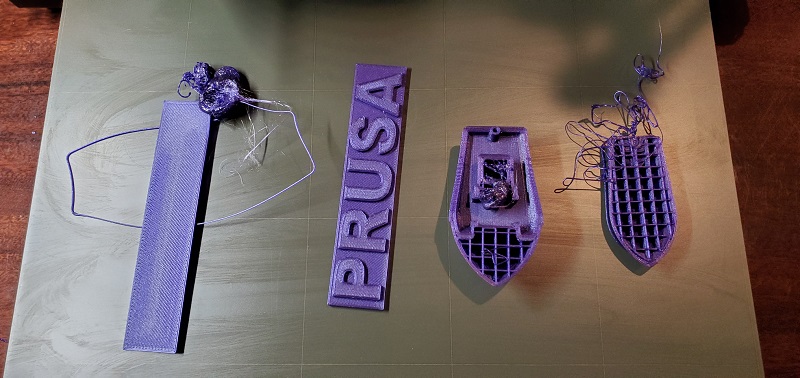
The attached photo will follow along with my description starting with the left print as #1 and so on as you move right.
1. Starting with the recommended "Prusa tag" my printer worked perfectly until about the 5th layer. It looks as if the hotend gets stuck in the print, rips the print off the bed, and continues to drag the print along as it moves, all the while dumping PLA in one spot.
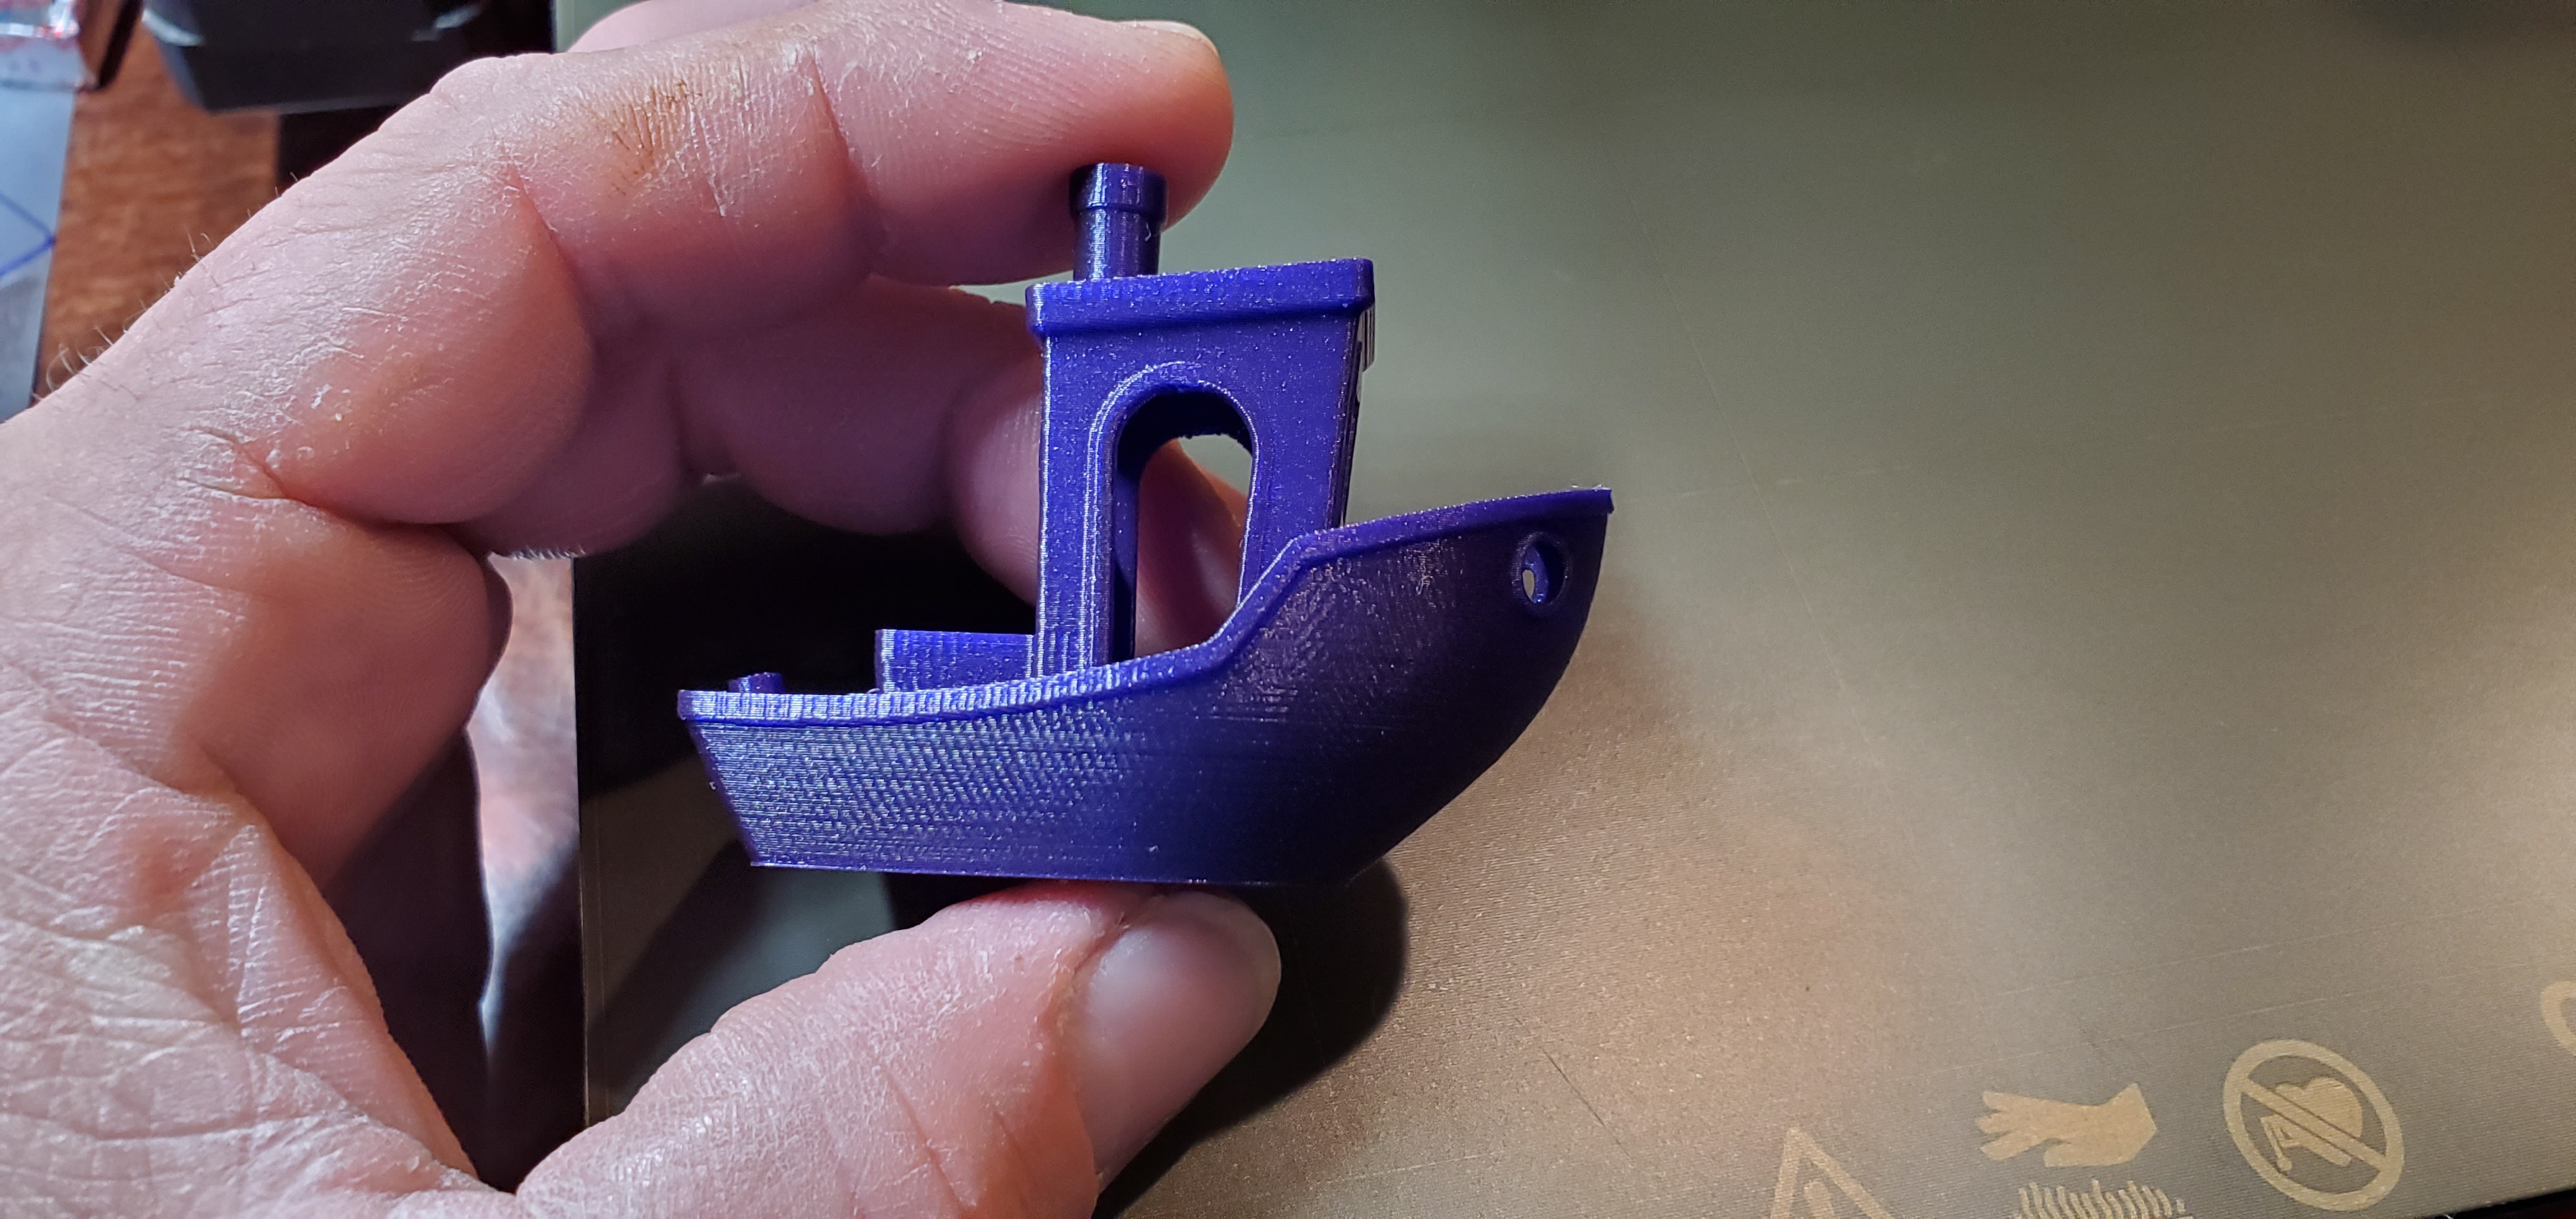
2. My second attempt resulted in a nice clean print, very minor issues. I was extremely satisfied with the print, especially for it being my first successful print.
3. Next I decided to see what this printer is capable of and attempted to print the Benchy that is pre-loadedd on the included SD card. I got quite far and then again the hotend seems to grab the print jerk it off the bed then move it around as the print head moves. All the while again dumping PLA in a single spot.
4. Cleaned the bed and attempted the Benchy same result only much sooner in the print.
Any advice on Whats causing this and how to stop this from happening would be very much depreciated.
RE: Stuck in the Print
Your photo says it all, the streaks on your bed mean it's still contaminated with something, probably oil of some kind. End result: poor adhesion.
Maybe Bobstro or Tim will be along and paste their excellent info-posts, but if not, see post number 3 here. Clean your bed thoroughly with dish soap and water as advised. Do NOT use IPA after this, only use IPA if you need to do a quick clean in between washings for minor contamination. And most importantly, do not touch the face of bed with bare hands - edges only! Finger print oil wreaks havoc for PLA adhesion, and the way most people use IPA it does nothing other than spread it around.
RE: Stuck in the Print
[...] Maybe Bobstro or Tim will be along and paste their excellent info-posts, but if not, see post number 3 here.
You summoned me? 😀 Here's the copypasta...
-
A dirty PEI print surface. Even if you don't think this is the cause, it's always a good idea to make sure your PEI surface is clean before trying any other fixes. If it's a smooth PEI sheet, take it to the kitchen sink and give it a good dunk with Dawn (original formula, no vinegar or hand softener variants) dishwashing soap or your local equivalent (e.g. Fairy in UK). Use a clean paper towel to clean it off, and another to dry it. Avoid using any sponge or cloth that has been in contact with grease. Above all else, avoid touching the PEI print surface. Once it's good and clean, you should be able to use 91%+ isopropyl alcohol between prints, 100% acetone when that fails , and another dunk when acetone fails. Worst-case, use a 3M 7445 ScotchBrite pad or equivalent on smooth PEI to give it a very light buff, but only infrequently. If you've got a textured powder-coated PEI print surface, the official instructions are to use 91%+ isopropyl alcohol on it only. Rumors persist that some tribes deep in the jungle have had good luck getting started with these sheets by giving them a wipe with 100% acetone and a dunk with Dawn. Either way, there's no real warranty on these sheets. YMMV.
-
If you have not already done so, try using Jeff Jordan's "Life Adjust" procedure for calibrating your Live-Z setting. It is much easier to use and understand than the on-board routine. It's much easier to make mid-print adjustments accurately with. In general, start high (less negative) and work lower (more negative) in large increments (e.g. 0.1mm) until the filament starts to stick on its own. When you've got your Live-Z setting adjusted properly, you should be able to gently rub the extruded lines on the PEI surface without dislodging them. Then start lowering (more negative) the level until there are no gaps between layers.
and miscellaneous other tech projects
He is intelligent, but not experienced. His pattern indicates two dimensional thinking. -- Spock in Star Trek: The Wrath of Khan Unfortunately,…
RE: Stuck in the Print
Ditto what Bob said.
Sorry for the large image - the forum has changed its mind on which image sizes to post.
The circle should print with no gaps and no ridges between extrusion strands. And the print should peel off of the bed as if it were high quality masking tape. If it lifts off easily, or has spots under the plastic while printing, the bed is dirty.

Here's an example of bed contamination: the white spots are finger prints I didn't quite get cleaned off. One is bad enough the heat of printing caused it to boil and the print actually lifted and broke.

Here's another ultra clean looking bed with a microscopic oil layer (scrupulously cleaned with alcohol):

RE: Stuck in the Print
Thanks guys. I washed the plate between the 1st and second print. And 91% isopropyl between the other prints. The board has had that streak look since the first time I wiped isopropyl across it. So if the issue is what you guys have said. I will go back and rewash the board. Maybe it has a huge layer of oil from production that still has yet to be removed.
Thanks again.
RE: Stuck in the Print
Soap and hot water at a sink with 3 gpm flow - scrub with fresh paper towels and a drop or two of plain dish soap (no dish cloths for washing or drying). Fresh, new, plain paper towels (not lint cleaning towels). Never touch the print surface with fingers - ever.
Rinse in the hottest water available, and rinse water should bead and sheet off the print sheet, leaving little to dry with the paper towel. Handle only by the edges, place back on printer.
Once in a great while, I use acetone to strip oxides that do form after weeks of printing, then I wash the residue off. Soap and water is my last step in cleaning.
RE: Stuck in the Print
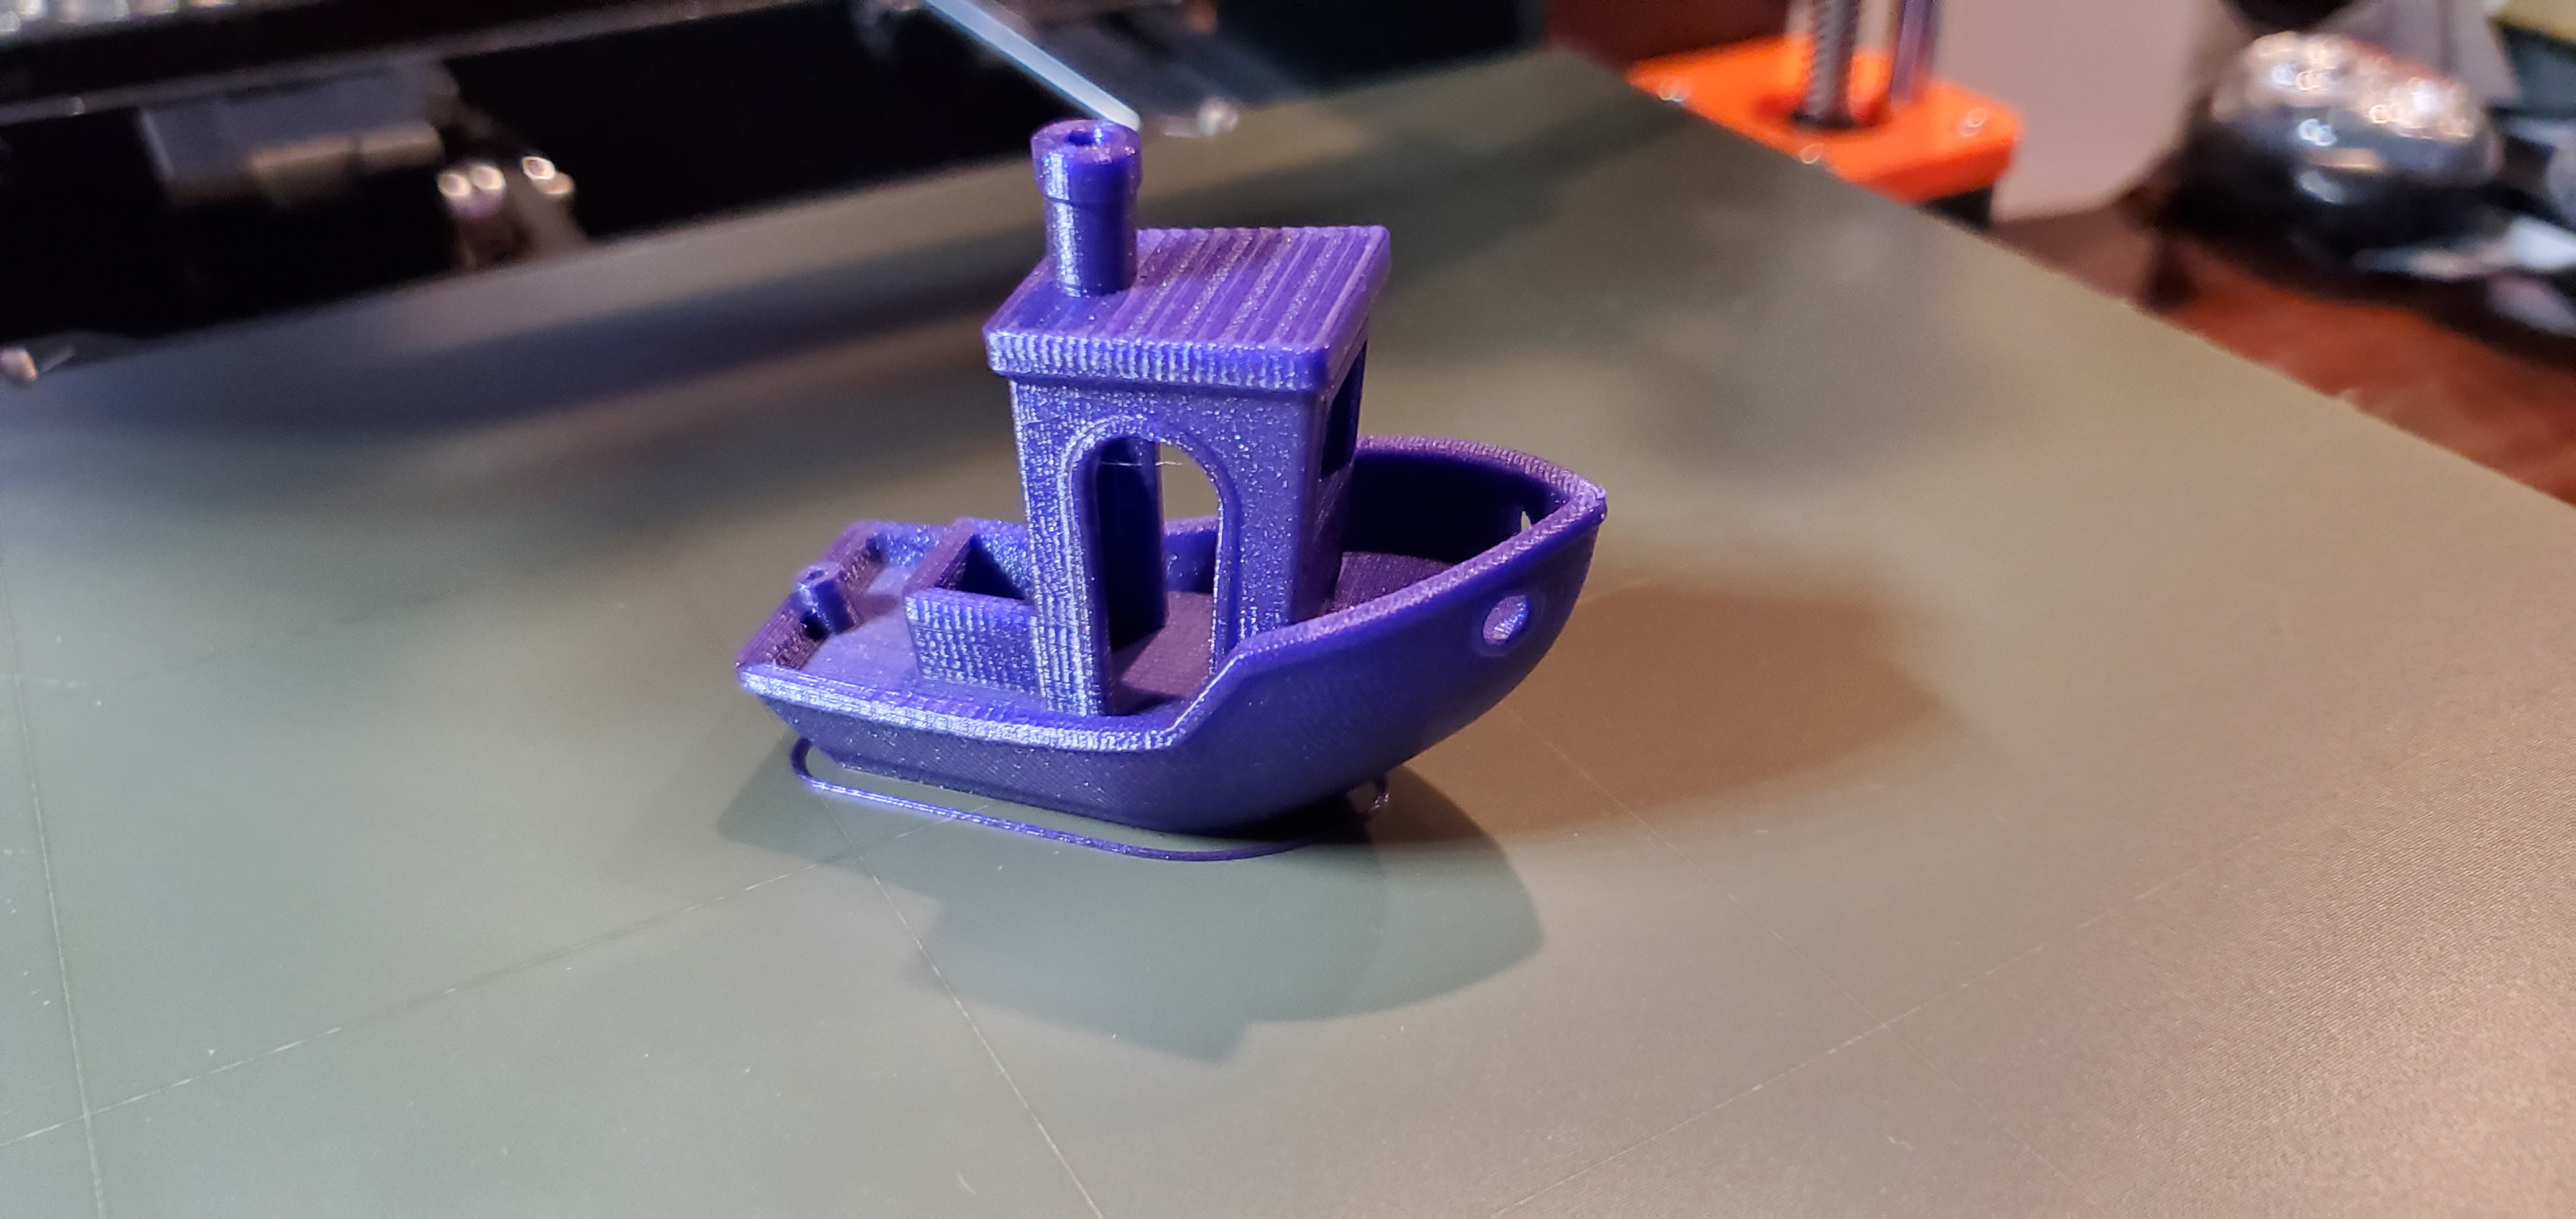
I cleaned the PEI sheet with soap and water again tonight. and tried again. Presto! thanks so much for your help. Benchy turned out pretty good. a few minor issues, a little more tuning as i go.
Thanks again.
RE: Stuck in the Print
Very nice! Congrats on getting it fixed, and welcome to the club 🙂
Just be careful, there's rabbit holes of printer mods on your left, print quality on the right, and a VFA hole dead ahead so watch where you're going and don't fall in (YET) XD
RE: Stuck in the Print
Thanks, but for some reason, maybe it's the high quality out the gate without any adjustments, but I don't think I'm going to be doing a ton of upgrades to this printer any time soon, Just the MMU2 I have sitting off to the side of my desk, eventually. Otherwise Ill be upgrading my old POS Tevo Tarantula Circa 2016. 4 years and it still doesn't run even half as good as this one, when it runs at all. One day I'll get to installing the box of upgrades I have for it. but for now. I'm so happy with the Prusa I may just strip the Tarantula for parts for future builds. Intend to build a CoreXY 3' x 3' x 4' Huge printer for huge prints one day.
Thanks again everyone.
RE: Stuck in the Print
Hehe, no worries. I was much the same mindset; I haven't gone super crazy on mods in the past year but I did do a few tweaks to get rid of E-cycle noise VFAs and quiet down the printer (0.9 degree steppers, skelestruder, vesconite bushings). The surface finish is now superb. But I do like to tinker. 🙂