plugin aligner ? .stl Chapter 32 - part 23
Hello,
I'm currently working on the printer together.
I need the 'plugin aligner'. He was not in my kit yet.
Unfortunately, I find no File for printing.
Who can help.
Thanks and greetings from Berlin, Reinhard
Re: plugin aligner ? .stl Chapter 32 - part 23
could you clarify what part of the manual you're looking at? mine only has 9 sections.
Re: plug aligner ? .stl Chapter 32 - part 23
Hallo, it was in
Chapter 8 electronic assembly (B7/R3 design)
Step 32.
It's a "plug aligner" for the Filament sensor.
The color is "prusa orange"
Greets from Germany, Berlin
Re: plugin aligner ? .stl Chapter 32 - part 23
the STL may not yet be available if it is needed in your kit it should have been sent with it
the manual says
STL file for the plug-aligner will be soon available in the MK3 package at prusa3d.com/prusa-i3-printable-parts/
This is an addition since I built my printer and at the end of September no aligner was used just care to be sure each connection was made carefully
IMPORTANT: Connecting the filament cable sensor properly is crucial. If you don't follow the instructions properly, you will burn the sensor!!!
To ensure the cable is connected properly we are introducing a new part called "plug-aligner", which is now distributed with all MK3 printers leaving the factory.
In case the plug-aligner falls out during the transport, gently push it back in. The notch should be oriented up, like in the picture.
The last picture is showing, how to plug the cable with the plug-aligner present, but wait for the next step 😉
STL file for the plug-aligner will be soon available in the MK3 package at prusa3d.com/prusa-i3-printable-parts/
https://manual.prusa3d.com/Guide/8.+Electronics+assembly+(B7-R3+design)/823?lang=en
the german version of this page has not yet been updated
Step 32 Connecting the extruder cable bundle (part 4) [Übersetzung in Arbeit]
Re: plugin aligner ? .stl Chapter 32 - part 23
Yes, I am looking for exactly this component.
But it does not seem to be available yet.
It would have been nice.
Re: plugin aligner ? .stl Chapter 32 - part 23
as I said it looks to be an update to insure that you can not insert the connector offset by one pin and burn out the sensor.... if it worries you go to the live chat by logging in to one of the store pages and selecting chat in the lower right corner... if your kit needs it I am sure they will mail you one
unless the connector on your kit has been changed in some way to keep you from using it with out the aligner just plug in with care.
Re: plugin aligner ? .stl Chapter 32 - part 23
Has anyone got any hints on how to get plug-aligner.stl correctly sliced?
It's in the latest package of printable parts at https://www.prusa3d.com/download-printable-parts-stl-mk3
Slic3r with any of the default prusa settings just generates three pillars and no perimeter
Re: plugin aligner ? .stl Chapter 32 - part 23
Has anyone got any hints on how to get plug-aligner.stl correctly sliced?
...
Slic3r with any of the default prusa settings just generates three pillars and no perimeter
Probably with a smaller nozzle setting (for details in the xy-plane, like 0.25mm) ... I guess your example was sliced with 0.4mm nozzle settings?
———————————————
MK3 kit B7-R3 / custom FW v3.5.1 with 7x7 MBL
Slic3r PE v1.41.2
Re: plugin aligner ? .stl Chapter 32 - part 23
Yes with the default 0.4mm nozzle although changing it to 0.25mm in Slic3r doesn't make a difference
The minimum wall thickness in the stp file is 0.4mm according to fusion 360
Re: plugin aligner ? .stl Chapter 32 - part 23
If anyone have trouble printing the plugin aligner, I found a way to print it.
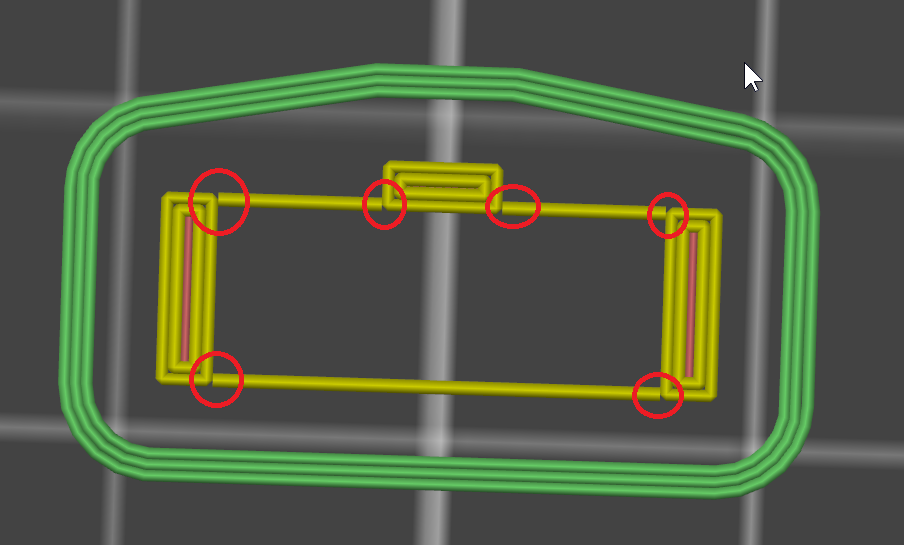
First, I tried to only use 'Detect Thin Wall' but it created an almost detached wall:
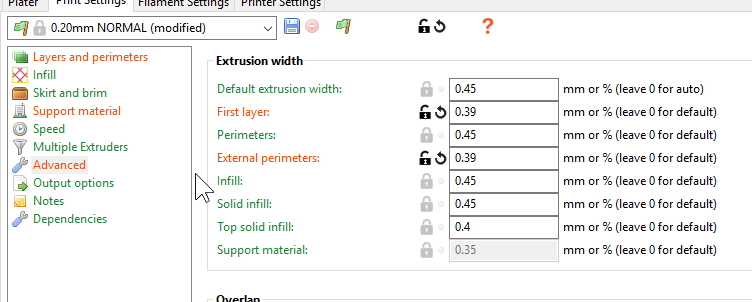
Instead I changed the extrusion width to 0.39 for First Layer and External perimiters:
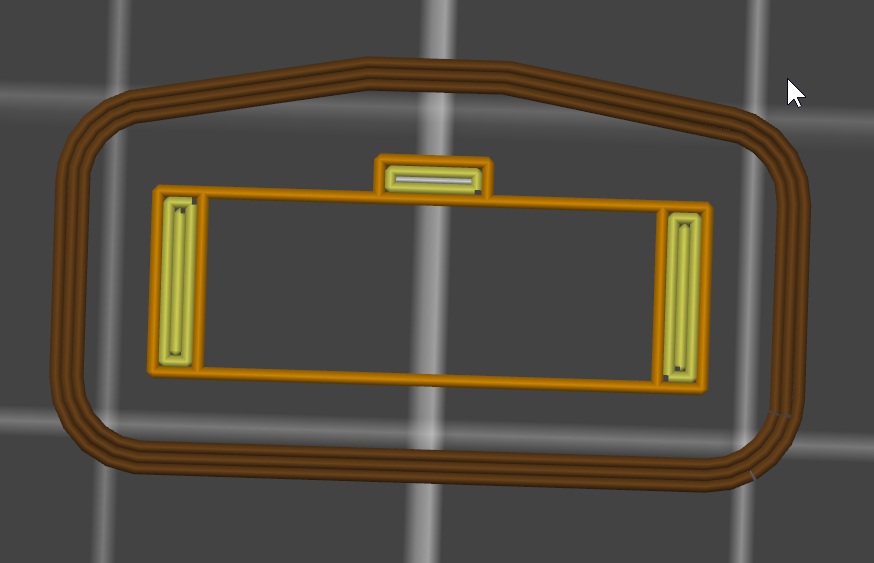
With that change, I get a continuous external wall:
I'm don't think this tweak would be a good idea for a large print but, for something this small, it seem fine.
RE: plugin aligner ? .stl Chapter 32 - part 23
Hello guys,
I know it's hard to generate the code for this small aligner...so I want to help..here is the g-code :
Hope this helps some of you.
Enjoy 😀
P.S. I hope I didn't violate any rule. 😬


