RE: life adjust Z - my way
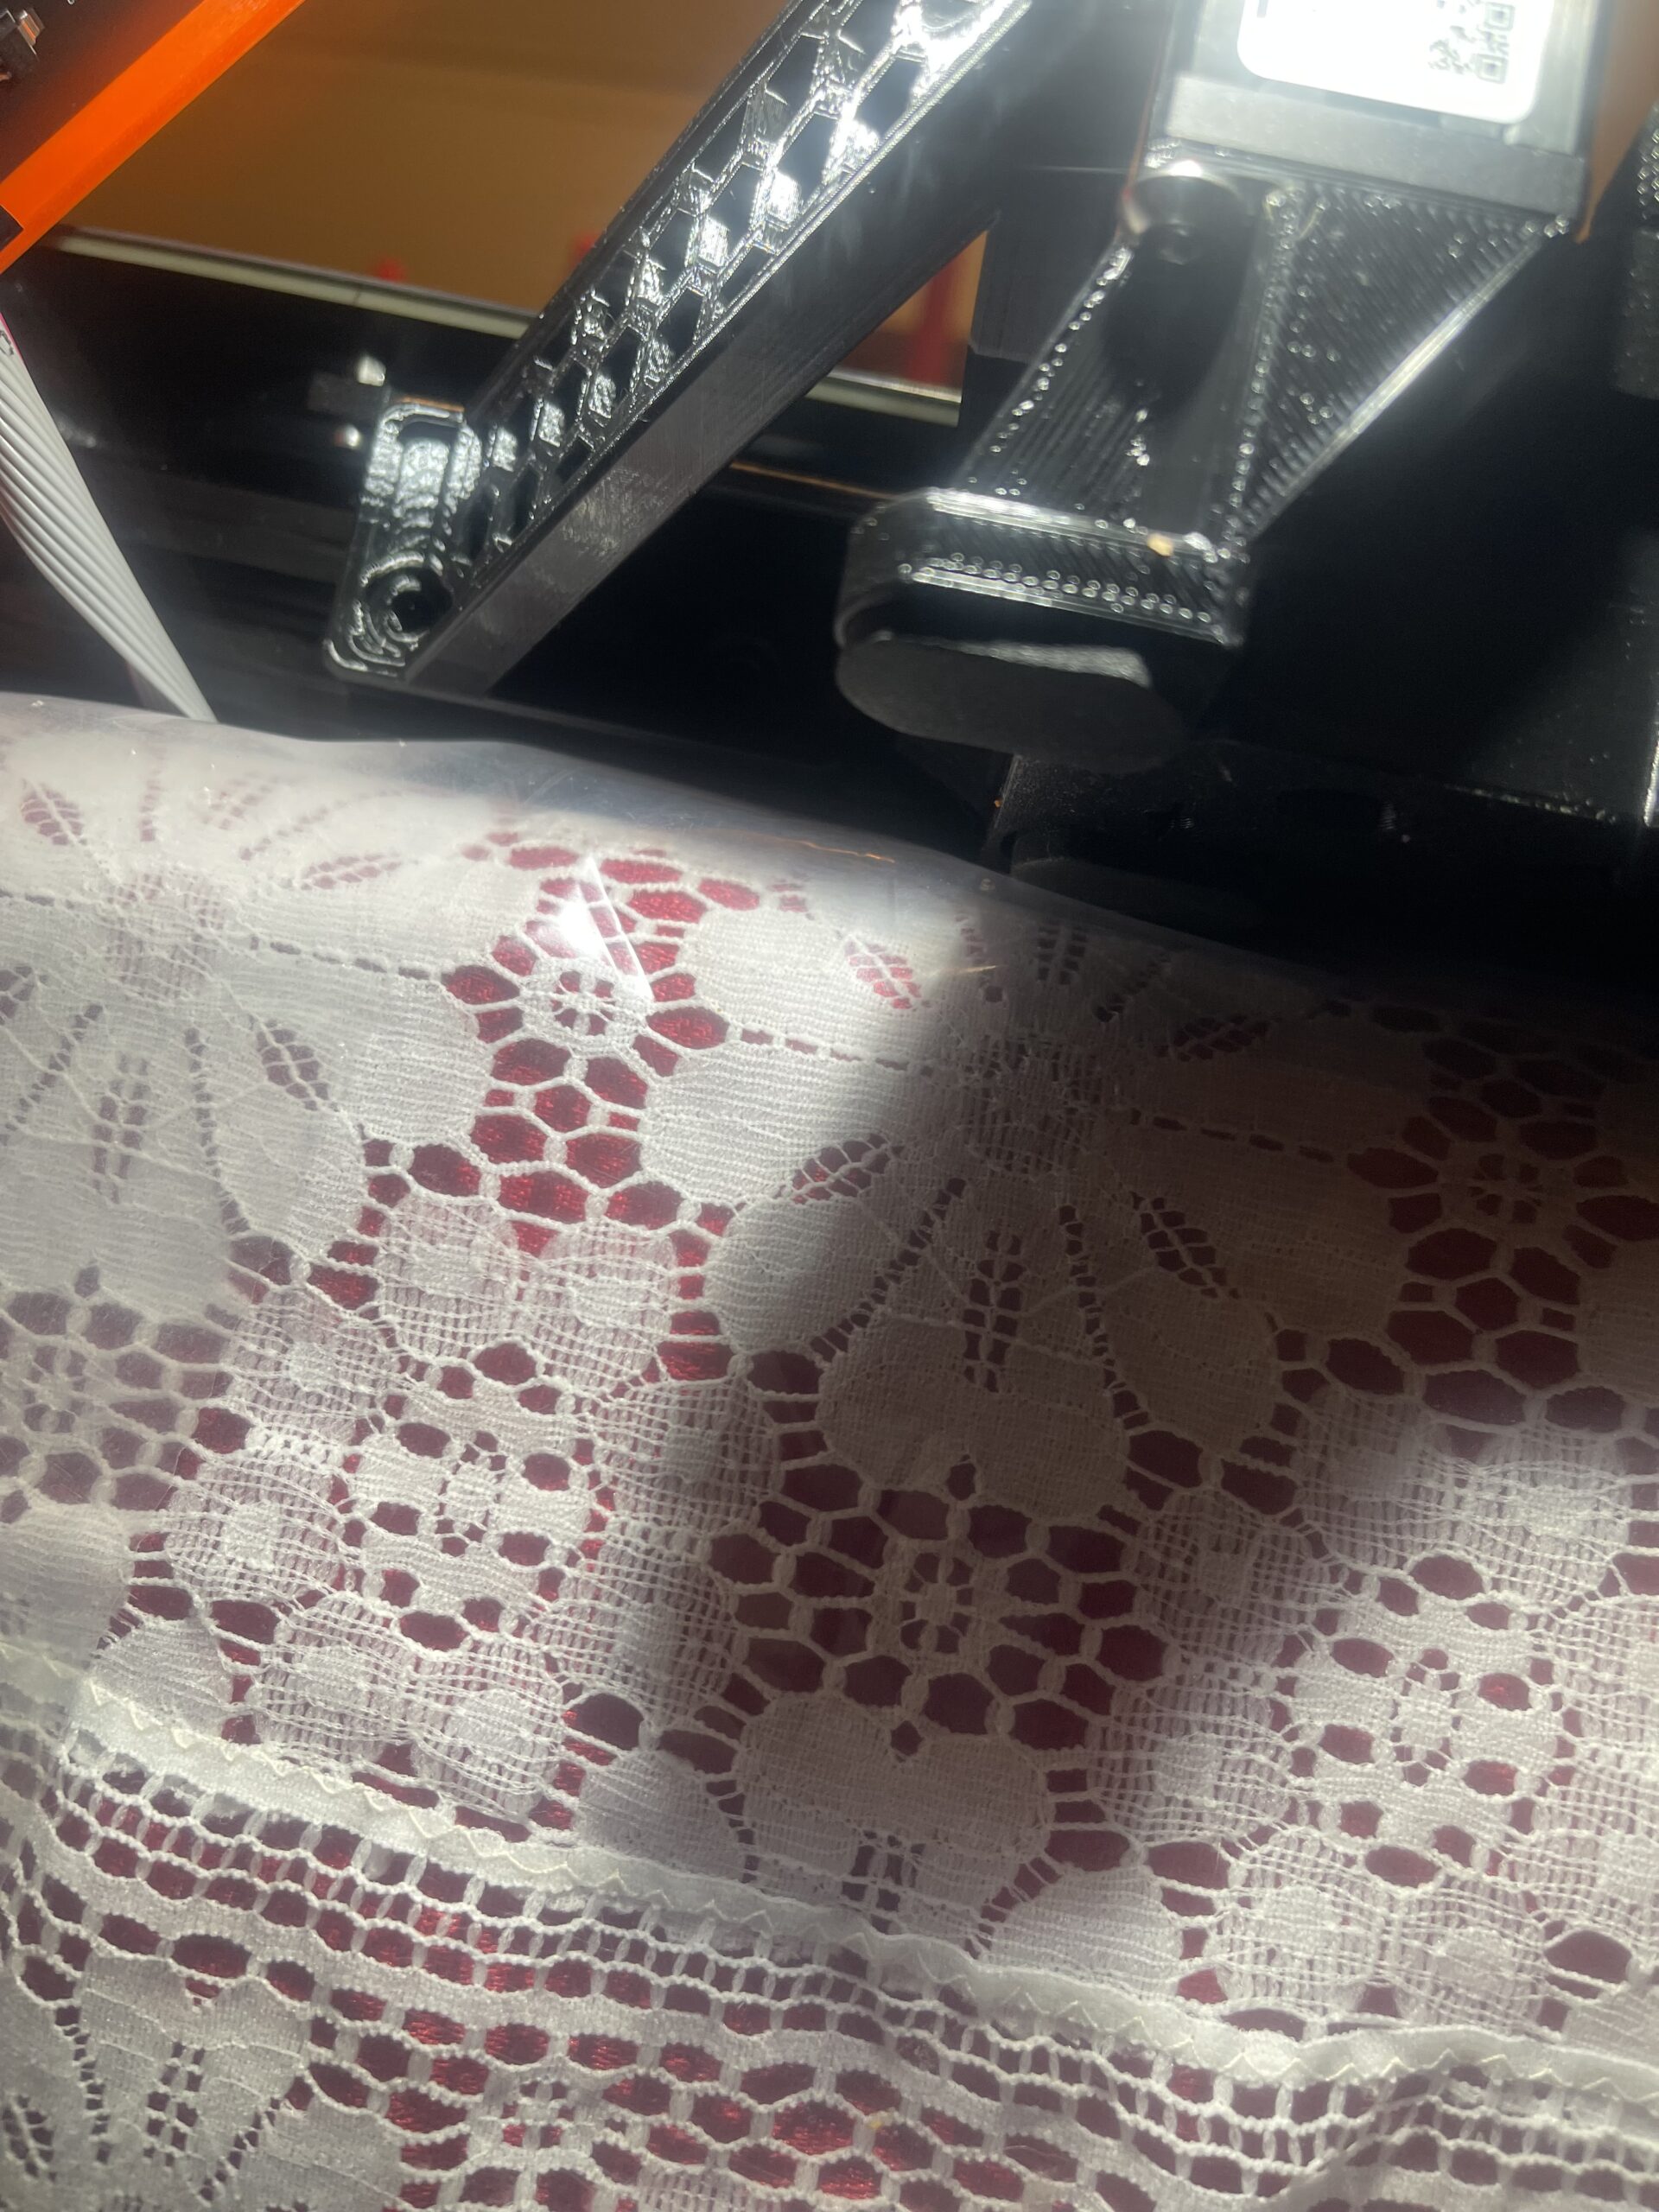
Check that your Z axis is vertical and that the retaining screws are all firmly tightened. the top left square looks OK, but the other squares look like they need more squish.
the mini sometimes suffers from a misaligned Z axis
regards Joan
I try to make safe suggestions,You should understand the context and ensure you are happy that they are safe before attempting to apply my suggestions, what you do, is YOUR responsibility.Location Halifax UK
RE: life adjust Z - my way
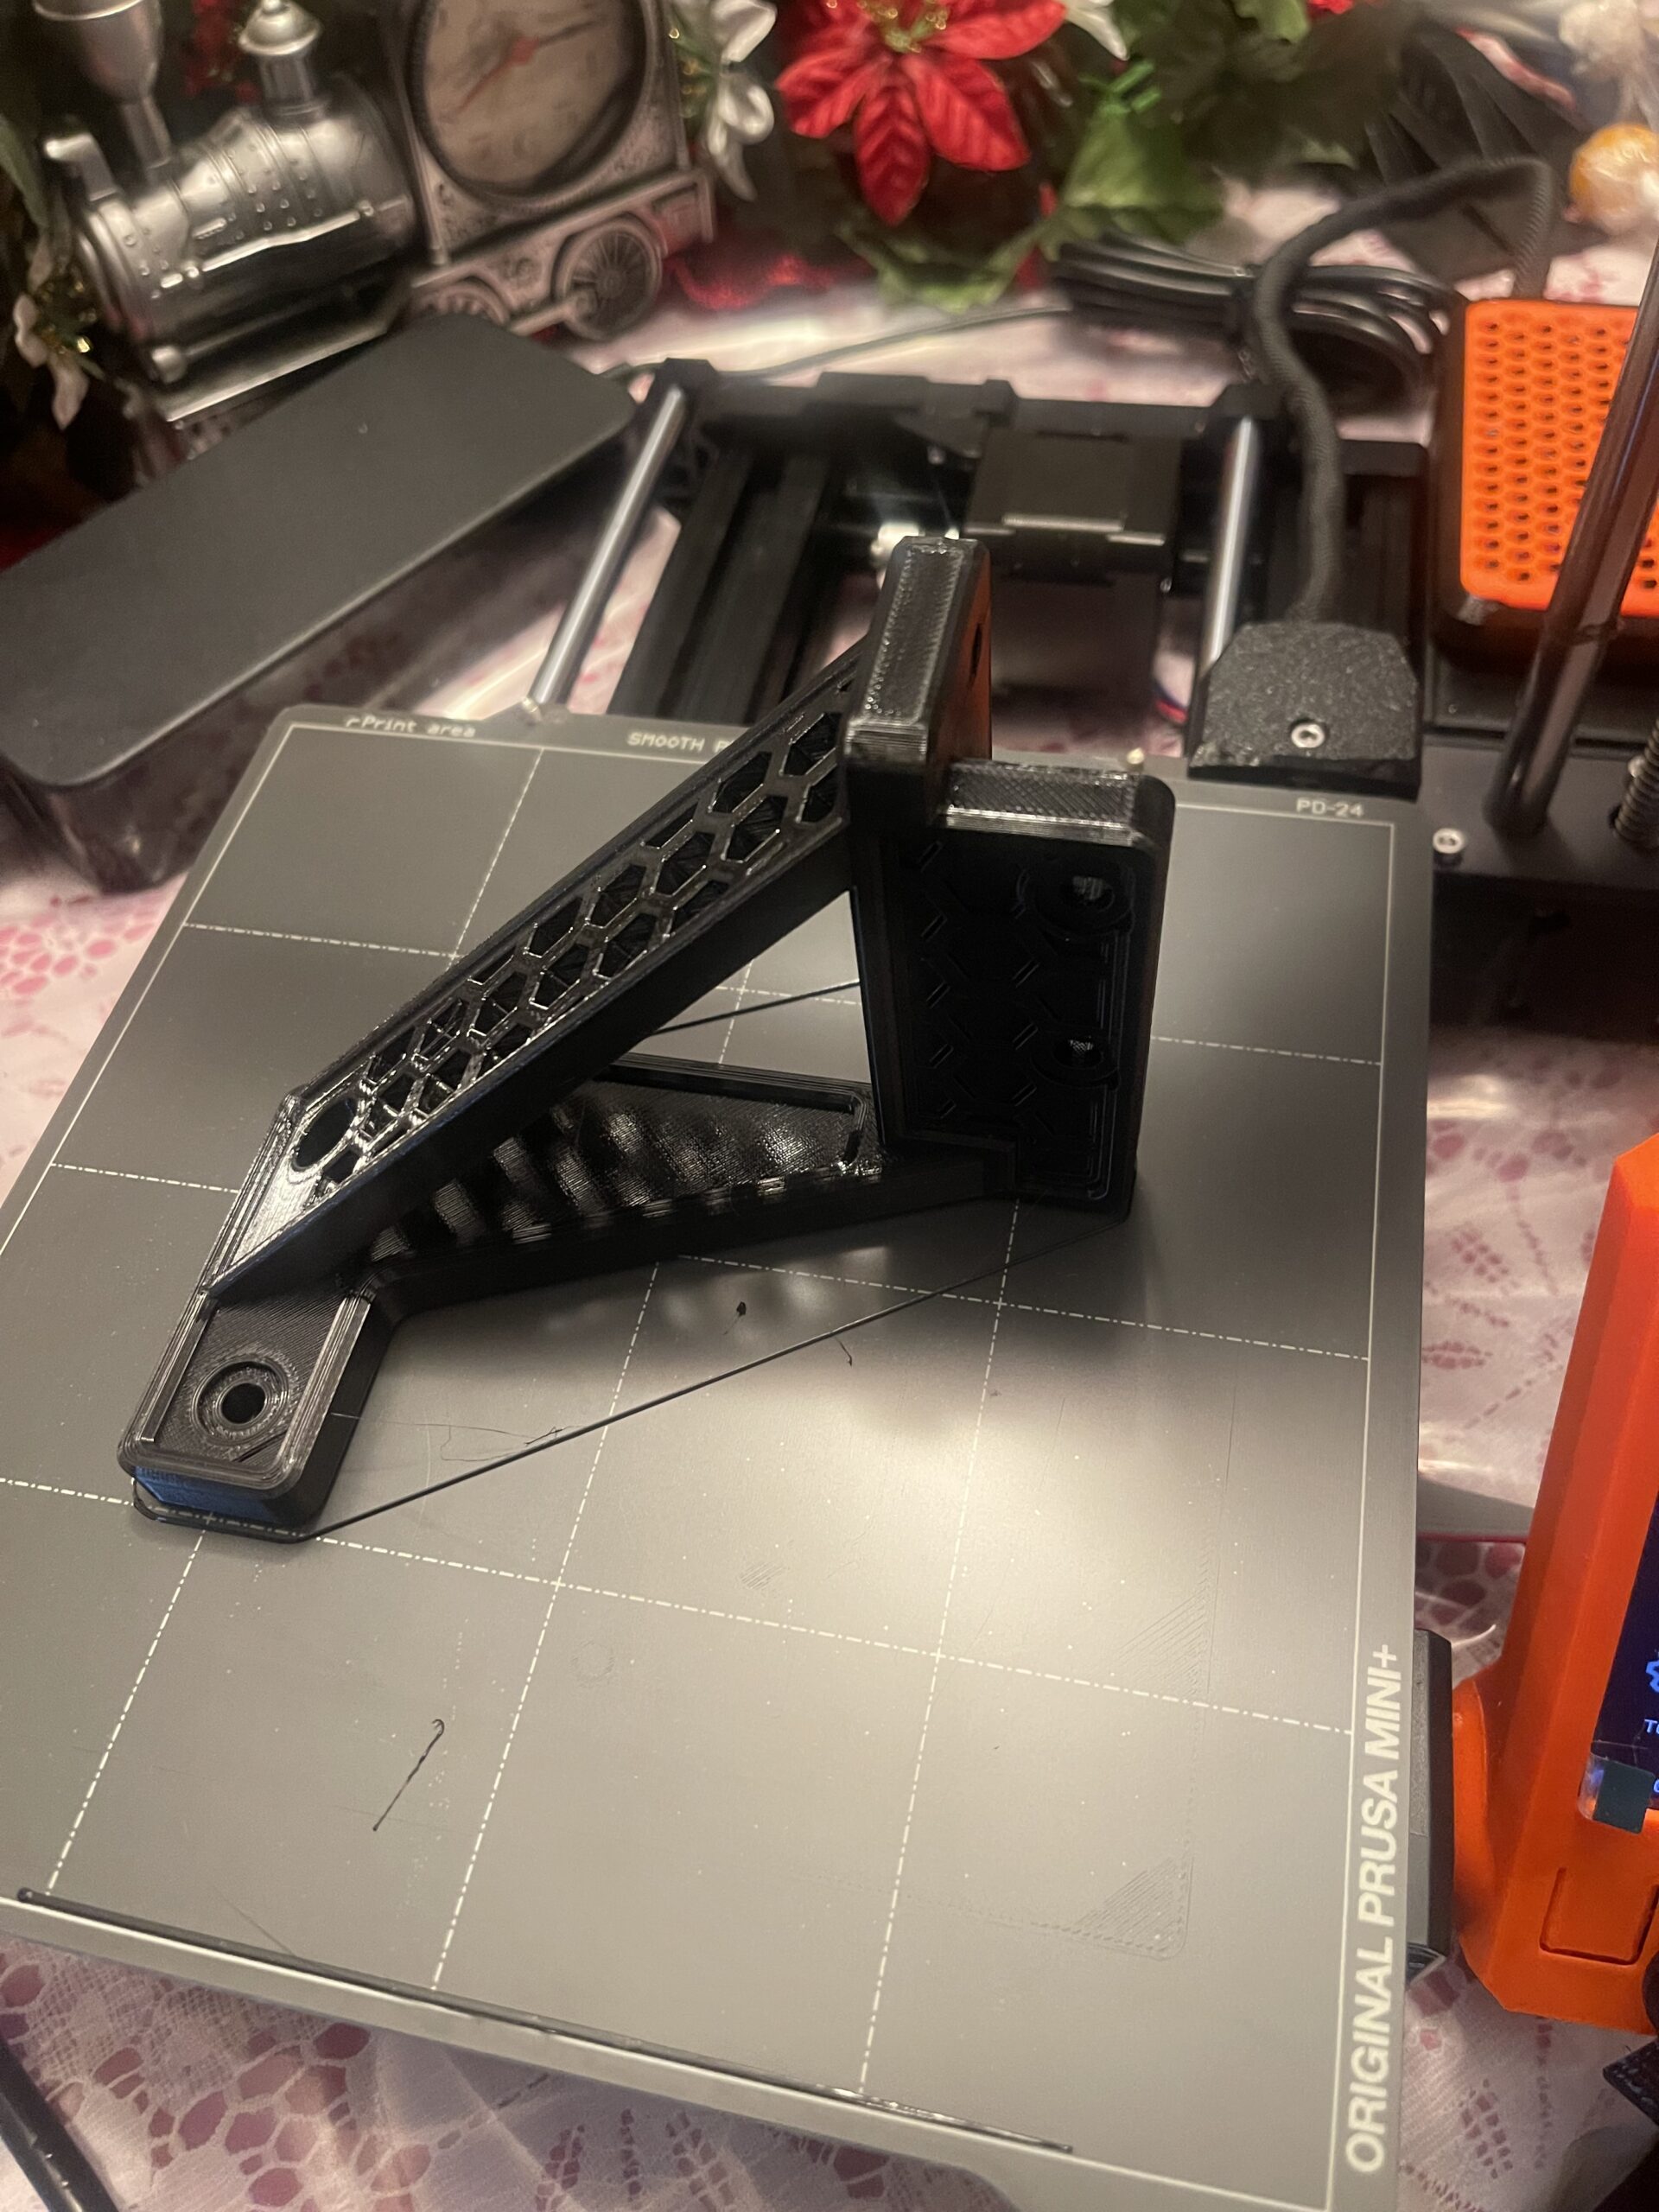
Oh it’s way worse I’m sure. Started at -1.545 and it would lay down a layer on the right side but stopped doing so moving to the left side of the plate. Now Z is around -0.650 or so maybe. But did recently add a Z axis foot it’s installed. Waiting on screws to install the Z axis brace.
The black prints are PETG and orange is PLA. Everything’s Prusament. Just got into the game last month. This mini is first printer. Still learning lots everyday. Thanks

RE: life adjust Z - my way
Looks like you are moving in the right direction...
whilst you are waiting for the bits for the brace, you should be able to do smaller prints towards the back left hand corner of the build plate with the first layer print that you showed above.
regards Joan
I try to make safe suggestions,You should understand the context and ensure you are happy that they are safe before attempting to apply my suggestions, what you do, is YOUR responsibility.Location Halifax UK
RE: life adjust Z - my way
So that small Z axis foot is ok? I still have the mini enclosure to assemble. Did find that I did not have the spring screw on the bondtech extruder tightened enough so it was pulling filament from the dryer. I do print from a Creality Dryer. Suppose I could set the printer outside on the concrete patio instead of a paver. I did get the wifi.
RE: life adjust Z - my way
I don't have a mini, but i am aware that the Z axis is not easy to ensure verticality.
i believe the parts you printed are intended to aid Z axis accuracy
good luck
Joan
I try to make safe suggestions,You should understand the context and ensure you are happy that they are safe before attempting to apply my suggestions, what you do, is YOUR responsibility.Location Halifax UK
RE: life adjust Z - my way
thanks ... I bought in last month while they were having that sale ... bought a CO2 laser as well ... went with Prusa for the name and rep and NOT Chinese!! went with the mini for the sub 450$ price tag tho I was thinking about the Core One for a sec there ...have made a few successful prints one being a Mount Rushmore and Teddy's glasses are there and in detail ... so how it managed to print it in white PLA and fairly decent to now its printing as you saw in the last post absolutely horrible in the orange PLA .... all Prusament filament ... oh and the Mount Rushmore that printed in decent detail ... at the time I had the slice engineering copperhead heat end kit installed facing backwards .... go figure! I mean I reckon it's ok?


RE: life adjust Z - my way
never used copperhead, as long as air flows through the cooling fins, it's probably ok
Joan
I try to make safe suggestions,You should understand the context and ensure you are happy that they are safe before attempting to apply my suggestions, what you do, is YOUR responsibility.Location Halifax UK
RE: life adjust Z - my way
yeah should've done more research before getting the Bondtech and slice engineering combo ... apparently there's a Bondtech bmx direct and e3d Revo combo that ppl have adapted ...
RE: life adjust Z - my way
I use Revo with my zorbiter extruder motor on my zaribo core xy printer.
Never used slice hotends
I use phaetus dragon clone on my mk3s
Joan
I try to make safe suggestions,You should understand the context and ensure you are happy that they are safe before attempting to apply my suggestions, what you do, is YOUR responsibility.Location Halifax UK
RE: life adjust Z - my way
Well what I started out with and what I've gotten to so far ... The live Z is at -1.785 to which might be on the high side considering I could've swore before all the upgrades it was around -0.970 ... upgrades being a Bondtech IFS extruder and Copperhead Hotend ... may try adjusting the Super PINDA tho it was set using the zip tie method ... any other suggestions ... I'm still learning
Thanks


RE: life adjust Z - my way
Hi Joan ... yes the Life-Adjust-Z-Mini zip file doesn't contain the .3mf file you were referring to ... of course I'm just using the .gcode files
Thanks
hi community
just want to share with you my way of finding the right correction value for the life Z adjustment.
just in case that somebody still tries to get it right with the v2 calibration gcode that came with the kit, which i think is only of limited usability.💡
find attached a little gcode that should print a 75x75mm surface with 0.2mm height (PLA settings).
i simply print this file in a bright color (takes about 12 minutes) and change the life Z adjustment level in the middle of the print, when the diagonal of the square is reached.
so a little film is printed. a good idea is to write the settings with an edding at the sheet 😉 .
i repeat the procedure until i get a completely smooth and homogenous surface.
in addition it's a good idea to measure the thickness of the film with a micrometer gauge or a digital vernier calliper ❗➡ when you look at the attached picture, you can see at first sight, that the right foil (with the -365um and -400um) shows some small gaps, which indicates that you need to squish down the nozzle a little bit more.
furthermore you can see that the -500um setting delivered the best result, and as you can guess: it's thickness was exactly 0.20mm.anything more to explain ?
update:
just forget to tell you how you can get the film off from the heatbed without damaging it:
just use coolant spray at one edge. the sheet will immediately curl up and you can get it off easy as pie from the printing surface with your spatula.edit 17th january: just replaced the attached gcode file with one where i added a "G1 Z=10.000 F1800" at the end, just to make sure that the nozzle moves up a little bit more (would remain at 0.2mm after the print).
edit 29th of august: removed the first test sheet (which has been downloaded more than 1000 times) and replaced it by the most recent one (v4).
calibration surfaces for PLA, ABS & PETG (generated with the latest S3D version, lin-advance, G87 and preheat procedure to avoid nozzle dripping (tnx 2 PJR))
Attachment replaced by Joan Tabb.
S3D_calibration_surfaces_75x75@200um_v6.1With the advent of the Prusa Mini the files above, proved unsatisfactory,
I add the file below in the hope that Mini users find it useful, the Contents are a .3mf file with the test patch on the build plate, so that you can edit it for new filaments, plus ready made test patches, for PETG, PLA and ABS.
Please let Joan.t know if there are any problems

RE: life adjust Z - my way
Did a 2nd run this evening switching over to white PLA. This happened. Any guesses out there?
