Re: life adjust Z - my way
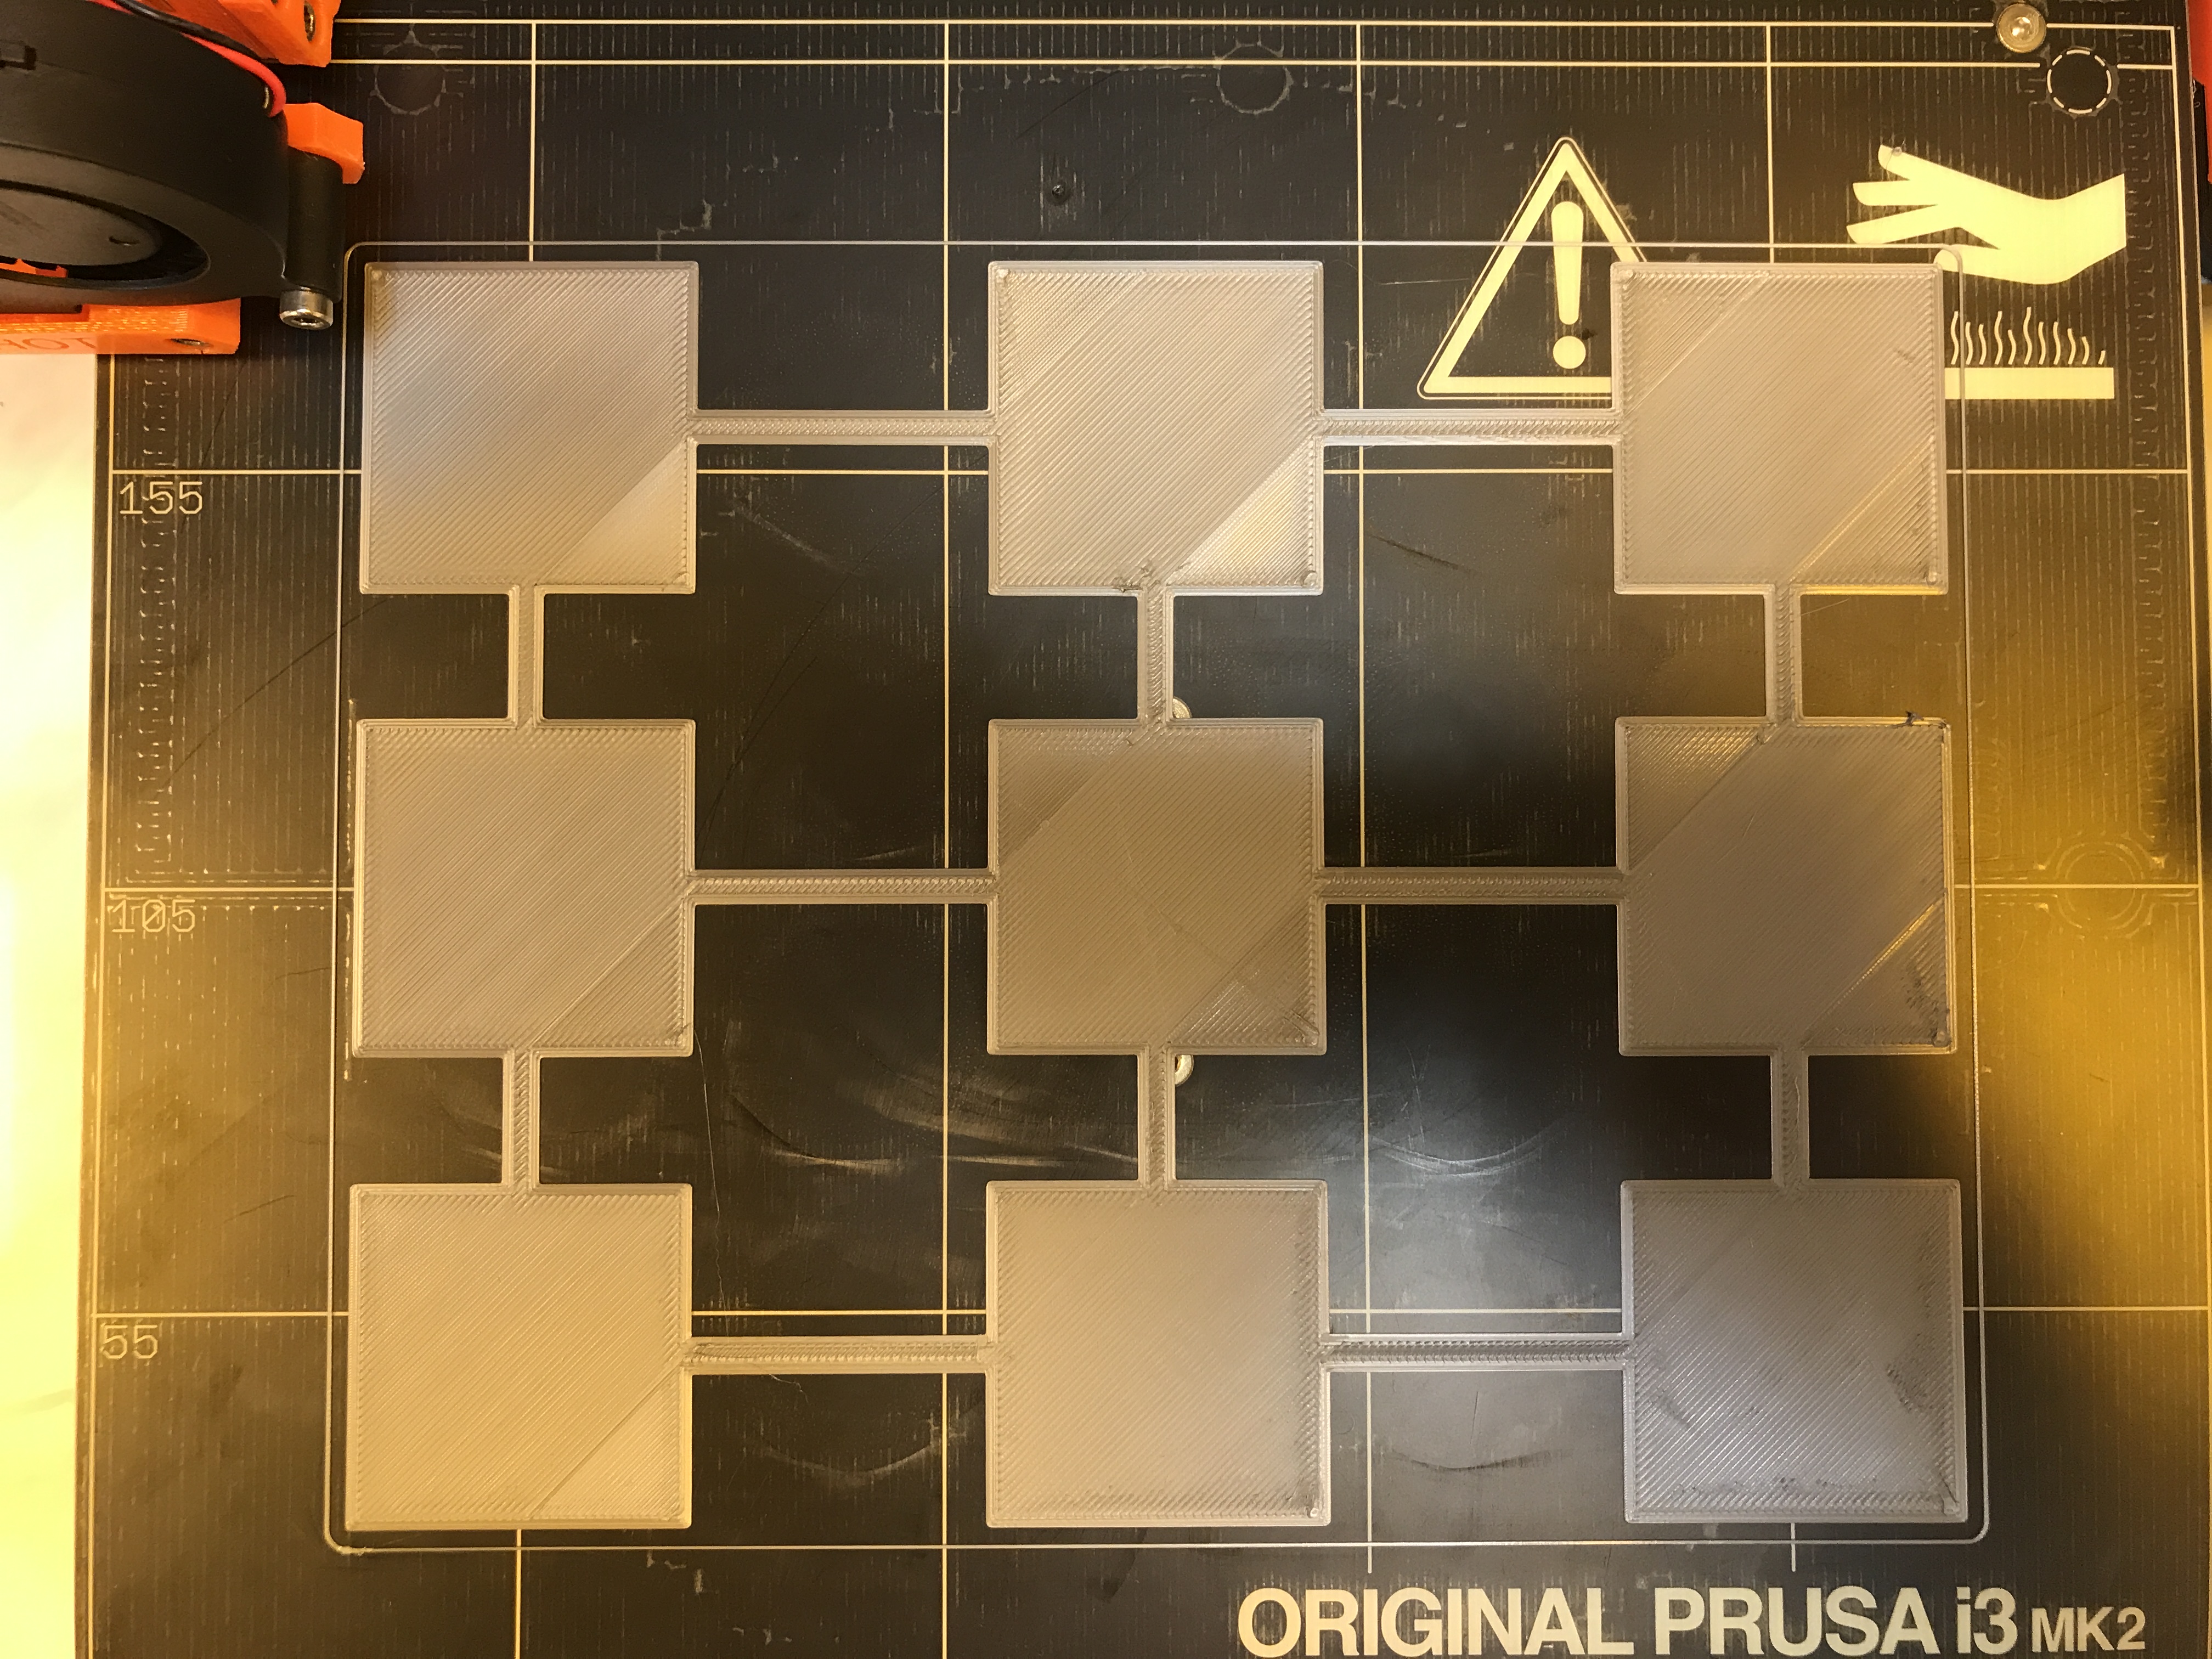
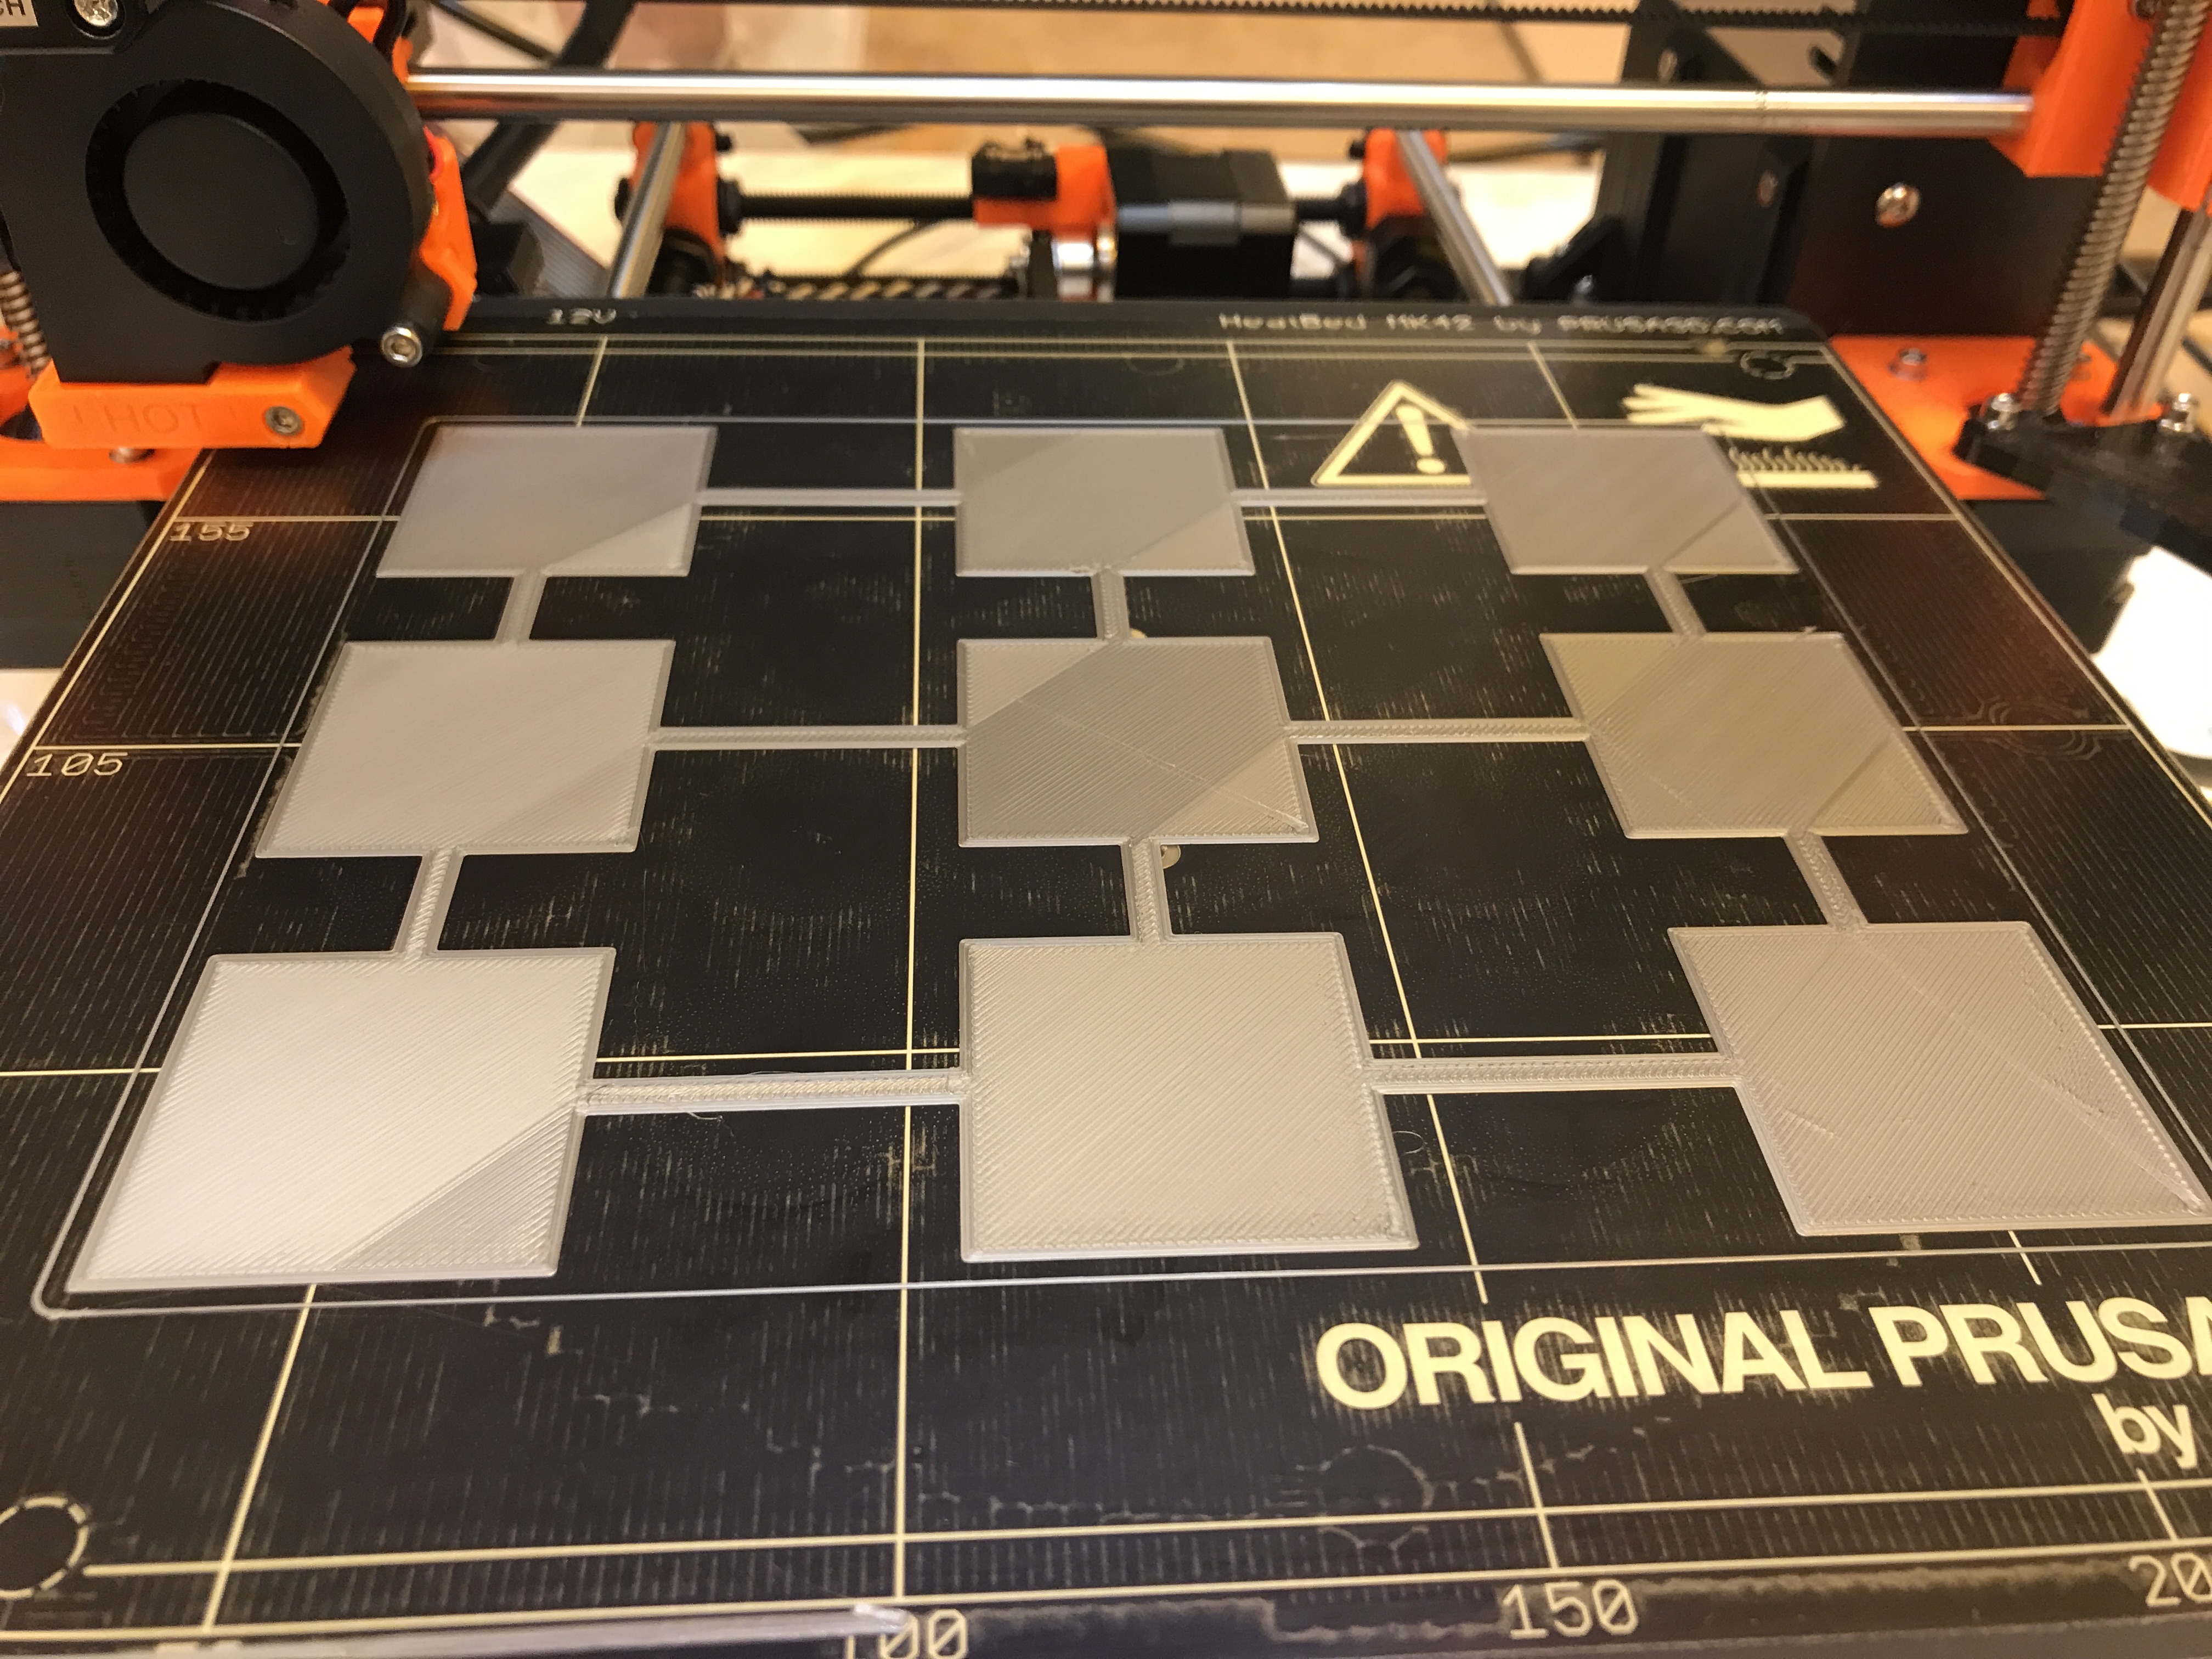
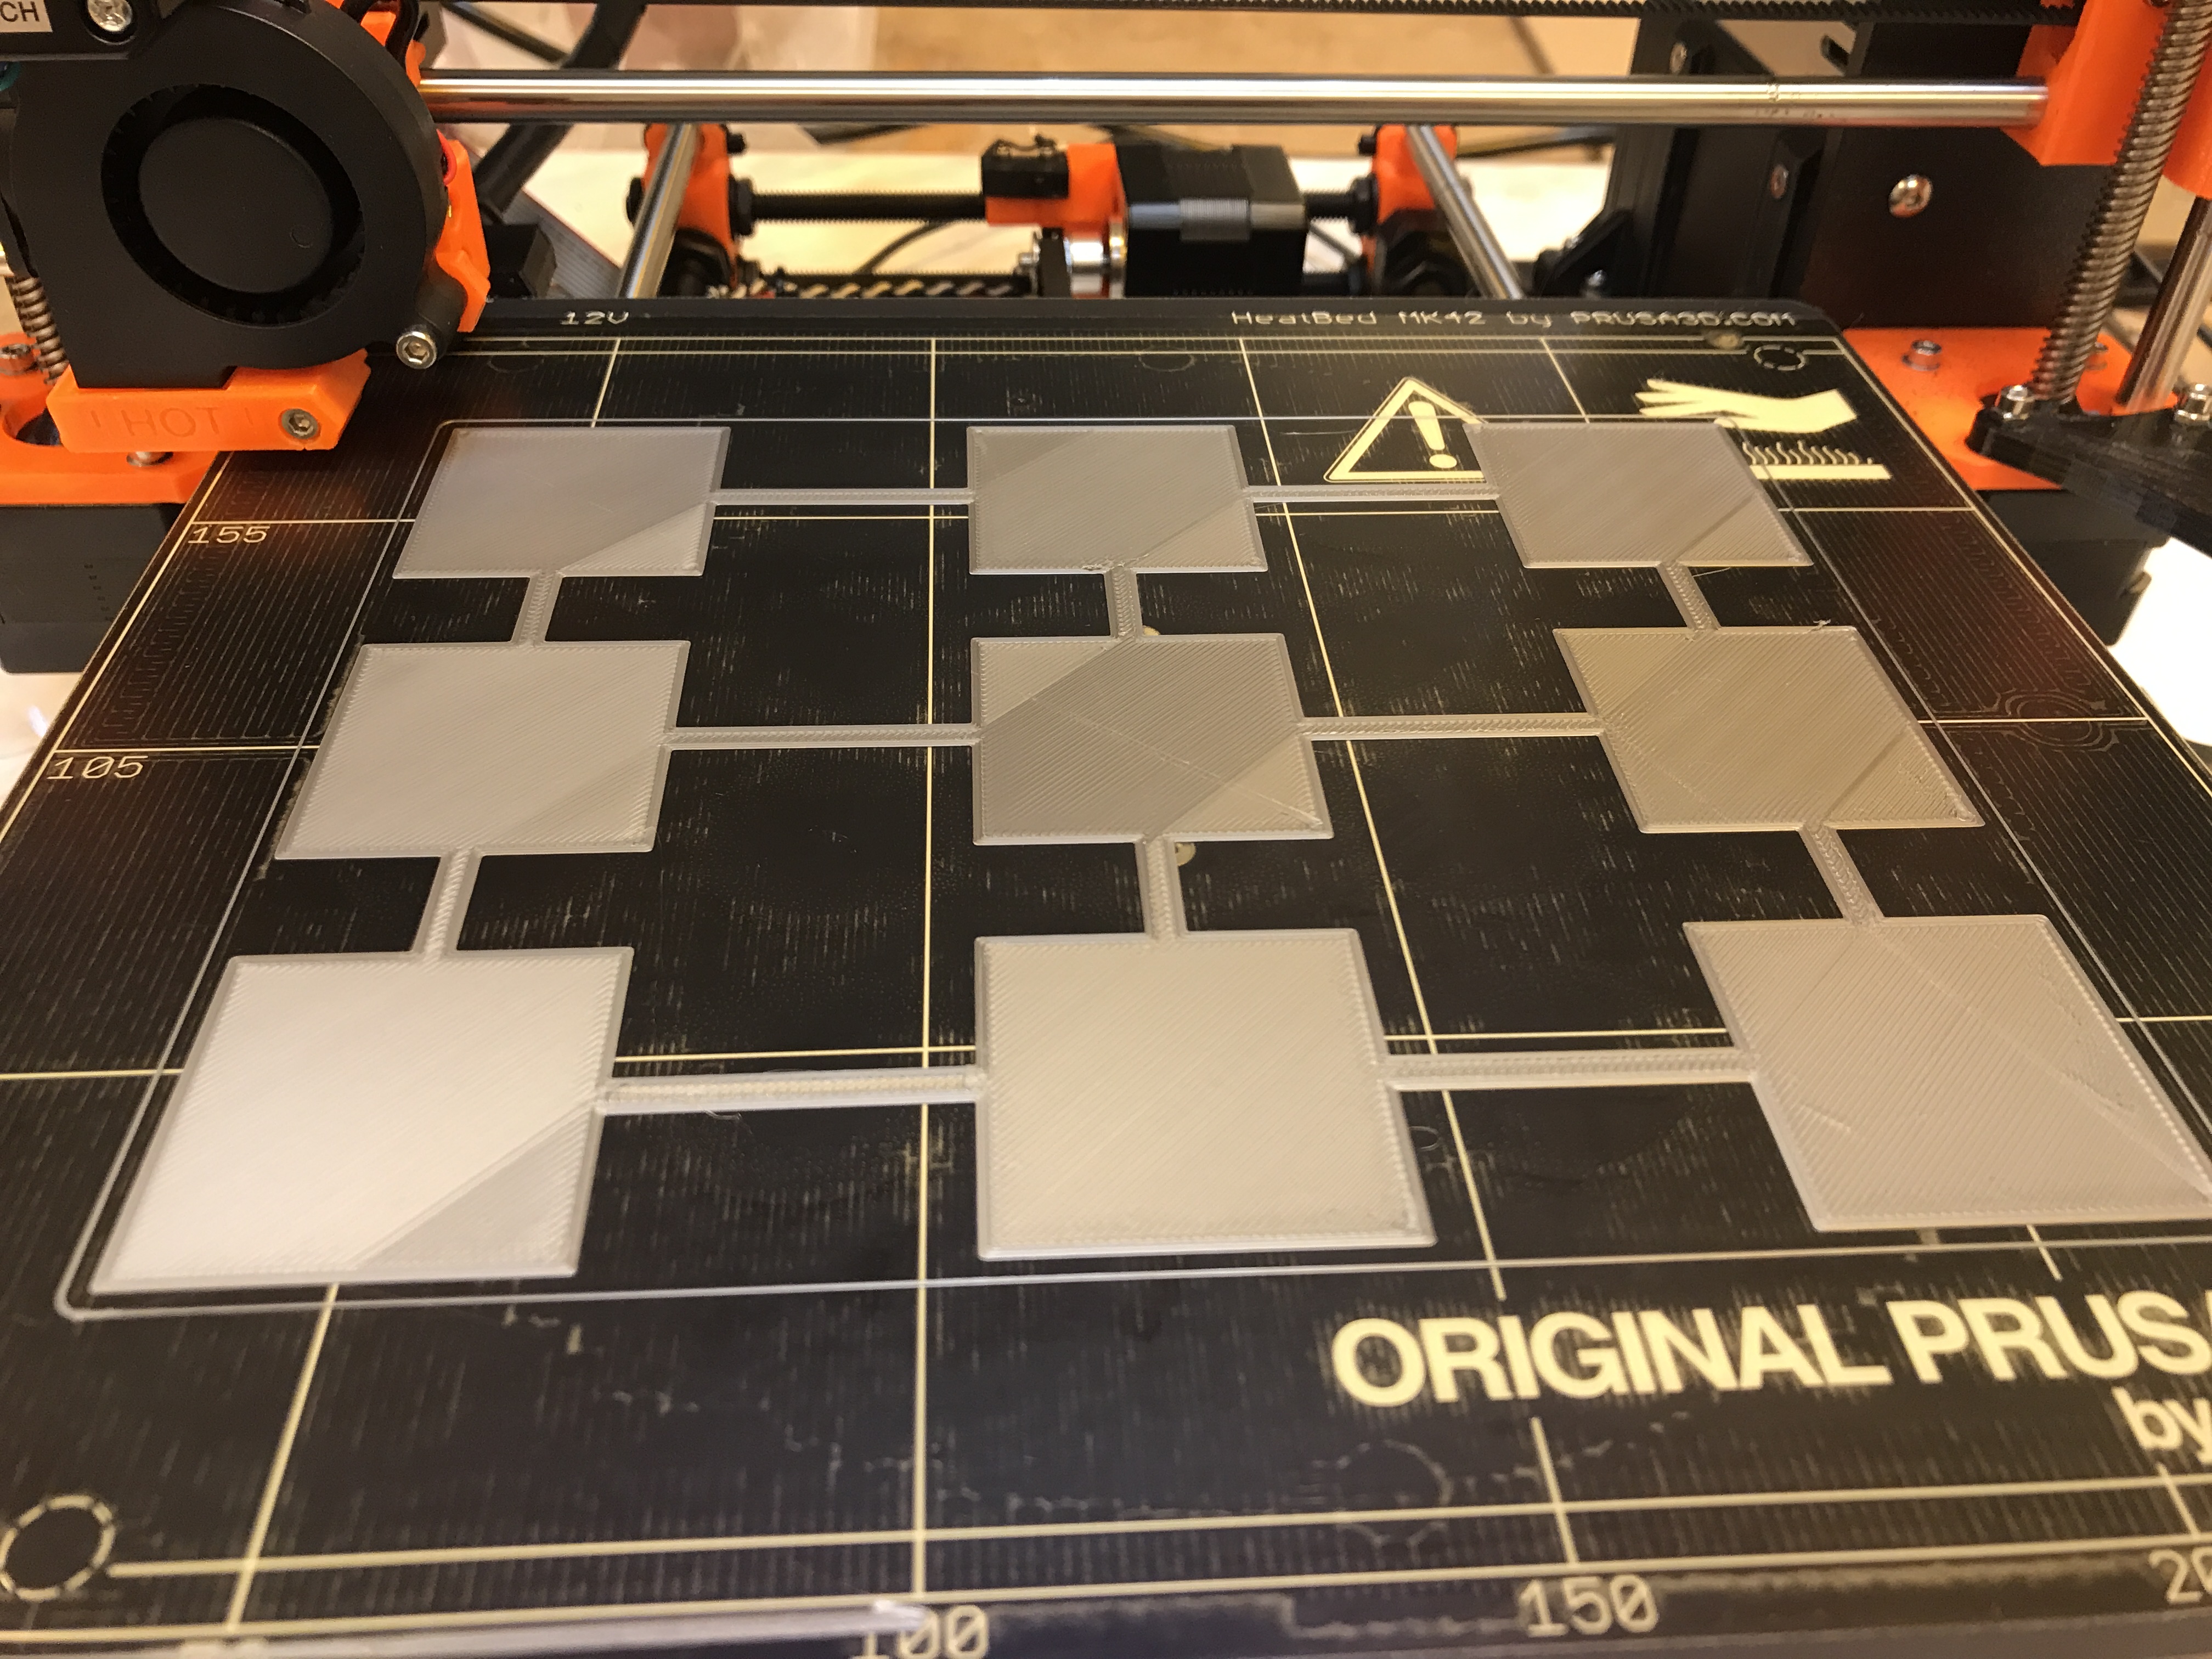
"On my squares negative value actually raises the bed, and positive lowers the bed. I'm almost certain it is that way - went through 10 squares, will post photos later."
Thanks, that is what I was looking for. I think anyone that thinks their bed is perfectly level is either very lucky, or just doesn't know. The only way I see that you can tell is print a single layer covering much of the bed, and measure it with calipers. I'd be very surprised if the variation from one side to the other is less than .o1 mm which is 10% with 0.1mm layer heights.
Re: life adjust Z - my way
Thanks, that is what I was looking for. I think anyone that thinks their bed is perfectly level is either very lucky, or just doesn't know. The only way I see that you can tell is print a single layer covering much of the bed, and measure it with calipers. I'd be very surprised if the variation from one side to the other is less than .o1 mm which is 10% with 0.1mm layer heights.
I was having a problem with the left side of my bed - the first layer was always squished no matter what. "Bed level correction" didn't help, it even made it worse. Once I started printing squares, I realized that "bed level correction" is doing exactly opposite of what is described in the manual - it raises the bed closer to the nozzle when you input negative values. So, I tried increasing the value, and it worked!
That's why many people are having same exact issue (one side of the bed lower than the other) which cannot be solved with "bed level correction" if you follow direction from the manual.
You need to treat - and + values like this:
1) "-" - lowers the NOZZLE closer to bed on that side;
2) "+" - raises the NOZZLE away from the bed.
Re: life adjust Z - my way
.. I have one question - does this calibration take into account the "bed level correction" option found under "calibration"? ...
:geek: as far as i know both: "bed level correction" and "meshbed levelling" are taken into account when you print something. so if you print the little calibration sheet, the answer is: yes.
➡ the only movement that isn't affected by bed level correction and/or meshbed levelling is the movement that you invoke directly through the settings menue (move axis) and i assume that it's the same when you move the hotend with pronterface.
dem inscheniör is' nix zu schwör...
Re: life adjust Z - my way
Maybe it's just my eyes or not understanding what I am looking at. I don't see any difference in the last few pics posted.
Re: life adjust Z - my way
My point about Z hops. Missed entirely?
Look at Thomas Sanladerers video over on YouTube his made from scratch Prusa I3. And Z hops.
Final testing.
I suggest skipping along with this over 4 hour video and hopefully get the Z hop comments by him. Watching the video of the 3D Test print you can see many Z hops due to his print bed not being level. Mesh levelling adjustment. I never have Z hops. My print bed is aligned and very level.
When I say aligned I mean in X Y and Z
Nigel
Life is keeping interested and excited by knowledge and new things.
Re: life adjust Z - my way
The heatbed I got from from the kit was warped in the middle - the center was about 3mm higher than the corners. How was your heatbed, Nigel?
Re: life adjust Z - my way
My point about Z hops. Missed entirely?
Look at Thomas Sanladerers video over on YouTube his made from scratch Prusa I3. And Z hops.
Final testing.
I suggest skipping along with this over 4 hour video and hopefully get the Z hop comments by him. Watching the video of the 3D Test print you can see many Z hops due to his print bed not being level. Mesh levelling adjustment. I never have Z hops. My print bed is aligned and very level.
When I say aligned I mean in X Y and Z
Z-hop has absolutely nothing to do with the level of the bed or Mesh bed leveling. It is a setting in the slicer. Nigel, you've been around long enough to know this.
Re: life adjust Z - my way
Thank you very much for this calibration guide - worked perfectly for me!
I assembled my kit 2 weeks ago and was having issues with my prints not sticking to the bed. Default calibration code (V2Calibration) worked fine so did the PRUSA logo but that's about it - no other prints were sticking to the bed (even froggy). I tried Z live-adjusting according to 3D printing guide but never went lower than -500 - I was afraid the nozzle is too close to the bed. I tried glue and it did not help. I then used your gcode and found that in my case the optimal Z is -600. Indeed, even -550 feels not as smooth as -600. Same for -650.
Thank you again and I think your code should be an "official" calibration code along with the current one. In my opinion, the images in the guide of how the extruded filament should look like with correct Z are completely misleading (or at least not very helpful).
Re: life adjust Z - my way
I had the same non-sticking problem and was frustrated like you. Here is what helped me get going. First, remove your filament, then run the V2calibration Gcode or the single layer one you are using. Set the Live Adjust Z to 0 to start. When the printer starts "printing" without filament, place 2 sheets of regular copy paper on the bed under the nozzle and adjust the Live Adjust Z down until it just starts to drag on the paper. That is your starting point.
Next get "PURE ACETONE" from the home supply place and clean the bed GOOD when the BED is COLD. DON'T USE NAIL POLISH REMOVER.
This really helped me. Now you should be sticking. If you want, print some of these tests out and measure them with a caliper. Shoot for 0.20mm to 0.22mm thickness. If not adjust the Live Adjust Z by the amount its off and repeat.
I really would not go by how a print "looks" because it can be very deceiving. The adjustment procedure needs to be very simple and reliable. It currently one is not, unfortunately.
Re: life adjust Z - my way
@ richard.i I suggest you look again at Z hop. Look at Thomas Sanladerers video and the reason for Z hops in his case! I admit It is usually a setting.
However I thought after watching Thomas Sanladerers 4 Hour video on final testing of his homebuilt Prusa I3 clone that the reason for the hops was his uneven bed and the mesh levelling as explained by him in response to live comments/questions. ie why the Z hops?
I am always ready to admit If I am wrong. And sorry if I mislead anyone.
Nigel
Life is keeping interested and excited by knowledge and new things.
Re: life adjust Z - my way
For some reason I am now having problems with my Z adjust. I have to get the height of the PINDA just right or else the nozzle will drag on the bed, or the calibration will fail. Already put an indentation into the bed!
As of now, I have to set the Z adjust to -0.800 for it to print correctly.
Yesterday I started printing ABS. One large part completely warped and lifted off the bed, making the nozzle scratch over it. Also I have the feeling that some settings might still be wrong. I see small gaps between infill and perimeter.
Also the zits on the zylinders don't look good.
Could someone tell me why im getting such poor results?
(It's Fillamentum ABS)
Here some pics:
http://imgur.com/a/ri9Kc
EDIT: I noticed that for PLA I need -0.700 and for ABS I need -0.800. Why is this?
Re: life adjust Z - my way
I would also like to add my vote of thanks for this idea - I got my new build working last night and tried the supplied calibration gcode but this approach is much better - far more obvious to my tired old eyes, and I agree it should be provided as an alternative if possible?
I ended up with -0.45 for supplied grey PLA which I guess is not too bad? Very interesting comparing the differences side by side!
Best wishes
Chris
Re: life adjust Z - my way
...I ended up with -0.45 for supplied grey PLA which I guess is not too bad? ..,
➡ the value itself is neither bad nor good. 🙄
it's only a number, which is mainly influenced by parameters like the sensitivity of the probe and the distance between tip of the nozzle and tip of the probe.
anyway: thanks for supporting this thread and keeping it alive (or should i say: a life ?).
dem inscheniör is' nix zu schwör...
Re: life adjust Z - my way
Thank you very much for "your way". It works great. 😀
And thanks for the great sound at the end 😆
Re: life adjust Z - my way
I'm using my printer for a few weeks now and want to improve my results. I think a Z-calibration is necessary.
I printed the 9 square pattern with my present Z setting (which is 0.325mm). I know that this number is just a relative value, therefore a picture of the 9 square pattern.
BTW: i didn't change any value during this print.
My questions:
What do you think about the thickness?
Where do the defective spots come from?
In which direction should I go to improve my 1st layer?
Anything else that's obvious?
Thanks for your support!
Christoph
Re: life adjust Z - my way
Hi Christoph,
I am new here and I have not even received my printer yet but here is an observation in case it can help.
It would look as if the test pattern you are using were creating some artefacts which might make it harder to assess the print quality.
For example, on the front middle square, the thickness is homogeneous but on some other squares, you can see marks at 45°. Or is it just on the photo?
From what I can see, it looks like these sudden changes are the result of the strips which connect one square to the next in the test model.
It might be easier to assess the first layer quality with 9 disjointed squares rather than this version where the squares are all connected.
Anyway, just my 2 Cents worth...
Fosk
Re: life adjust Z - my way
Hi,
I have similar printing on that "square pattern" .. happens when the head finish the corners later and heading from opposite direction to fill the gap. Anyhow, I keep having challanges to print a smooth, uniform first layer. My bed level correction is Left, Rear -20, Front, right +30.
Keep trying if I found solution let you know. If you guys have any idea, let us know 😀
Thanks,
Tamas.
Re: life adjust Z - my way
So, I've been messing with this for a few hours now and I think as far as the Z adjust itself goes, it's very close (this is way easier than the calibration code included on the SD card). The problem I'm seeing now is that it appears that my bed is not level. The lines on the front/right are perfect, but just over halfway through the print, all the lines start getting thin and separate.
[attachment=0]2017-04-16_16.55.17[1].jpg[/attachment]
I've tried adjusting the Bed level adjust to -50um for both left and rear This gave me a complete square with all lines looking pretty good except with some dragging on the right side. I adjusted the right side to +10um, but as soon as I do this, the left side starts to thin and separate again. At this point, I reset everything back to zero, redid the xyz calibration and tried again.Same end results. Front/right side looks perfect, rear/left side is thin and separate. Open to any suggestions at this point.
Re: life adjust Z - my way
Is it possible to add a pause like for the color change while printing multi color but instead of changing color adjust the live z and then start again?
I know this is a small problem but doing it on the fly stresses me out I'm basically all over the place with the nob 🙂
Re: life adjust Z - my way
as far as i know, there is no other command than the M600 (filament change) which pauses the print and waits for interaction with the user.
you can pause the print for a certain time with the G4 command (for example "G4 S10" lets your printer wait for 10 seconds) but it doesn't wait for an acknowledgement by the user.
dem inscheniör is' nix zu schwör...


