Re: life adjust Z - my way
Quick question,
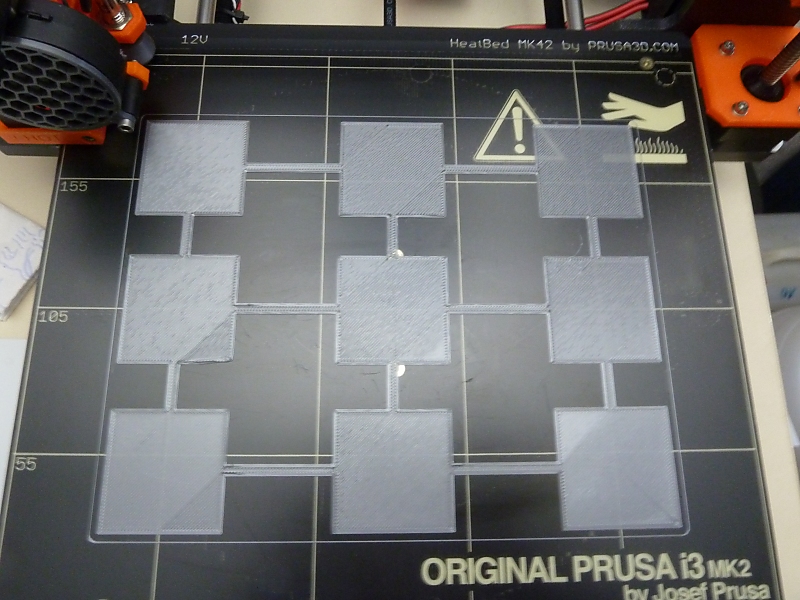
I printed this on my new i3 and it looks uniform and great, however, every strand is individual. Is that how this should turn out or should it be more of a solid single sheet of print?
I am picking up batteries for my micrometer today. Pulled it out and it was dead 🙁
Zack
Re: life adjust Z - my way
➡ as long as there are individual strands you'll need to lower the z live adjustment level further more (make it more negative !).
when everything is fine, it should be a solid single sheet, like a foil or a film.
💡 as soon as you've reached this point, you're quite near the optimum.
I am picking up batteries for my micrometer today. Pulled it out and it was dead :(...
that's the way life works... so it's always a good idea to have some spare LR44 / AG13 batteries in stock 
dem inscheniör is' nix zu schwör...
Re: life adjust Z - my way
[quote="JeffJordan"]:arrow: as long as there are individual strands you'll need to lower the z live adjustment level further more (make it more negative !).
when everything is fine, it should be a solid single sheet, like a foil or a film.
Took me awhile after first starting to figure out if negative or positive was powering the nozzle. (Make it more negative) is good words for beginners to read.
Re: life adjust Z - my way
OK, this is MY way of doing it. Yes, it's not life, but nearly 😉
I use this pattern : http://www.thingiverse.com/thing:1831902
First I use the V2calivration.gcode for rough calibration. Then I print the pattern in 0.20mm.
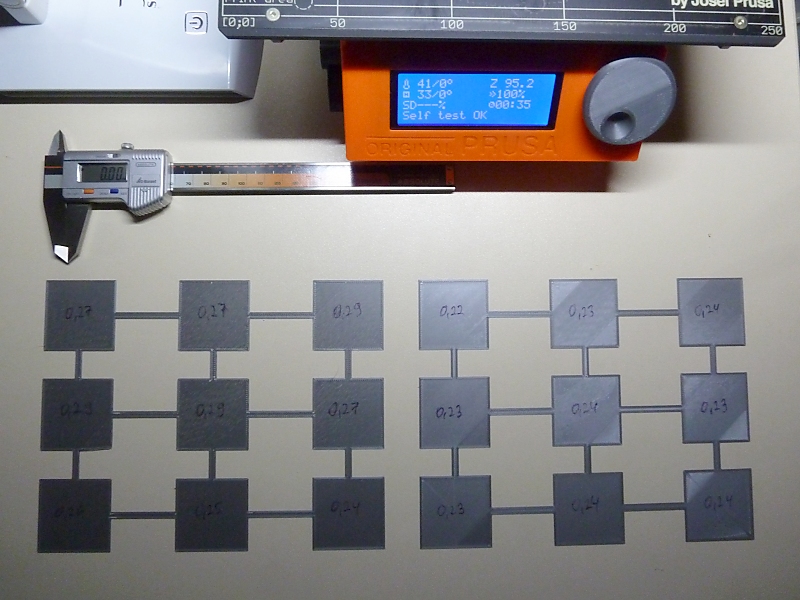
After that i measure the fields with an caliper for exact layer high measurement an every field :
I lower the nozzle a few microns and test it again :
I think it is good enough. Or should I lower the nozzle a few microns again ?
Thomas
Re: life adjust Z - my way
hi thomas,
😛
nice documentation and it looks as you are very close to the optimum.
➡ you could try to lower the z level adjustment value approximately 30 - 50 µm more.
there is an "optimum" when doing these tests. if your nozzle is to close to the printbed, the thickness of the sheet rises up again (because the surface becomes more rough and the squeezed edges of each strand tend to overlap).
❗
but take in mind: when you've found the optimal z-level adjustment value, the adhesion to the printbed is maximal. which might cause big prints with large bottom surfaces to stick at the printbed as hell 😈 .
so it might be a good idea to alter the z-value to a slightly higher level than the optimum... otherwise you might get problems to get your print off from the pei sheet.
dem inscheniör is' nix zu schwör...
Re: life adjust Z - my way
Jeff, you're right !
Not lowering the nozzle, moving the nozzle up was the goal 😀
I'm about 20 microns too deep with the last setup 😯
I'm sometimes removing my prints with an razor blade, gluing much too fast on the bed 😈
Thomas
Re: life adjust Z - my way
JeffJordan, you are my hero!
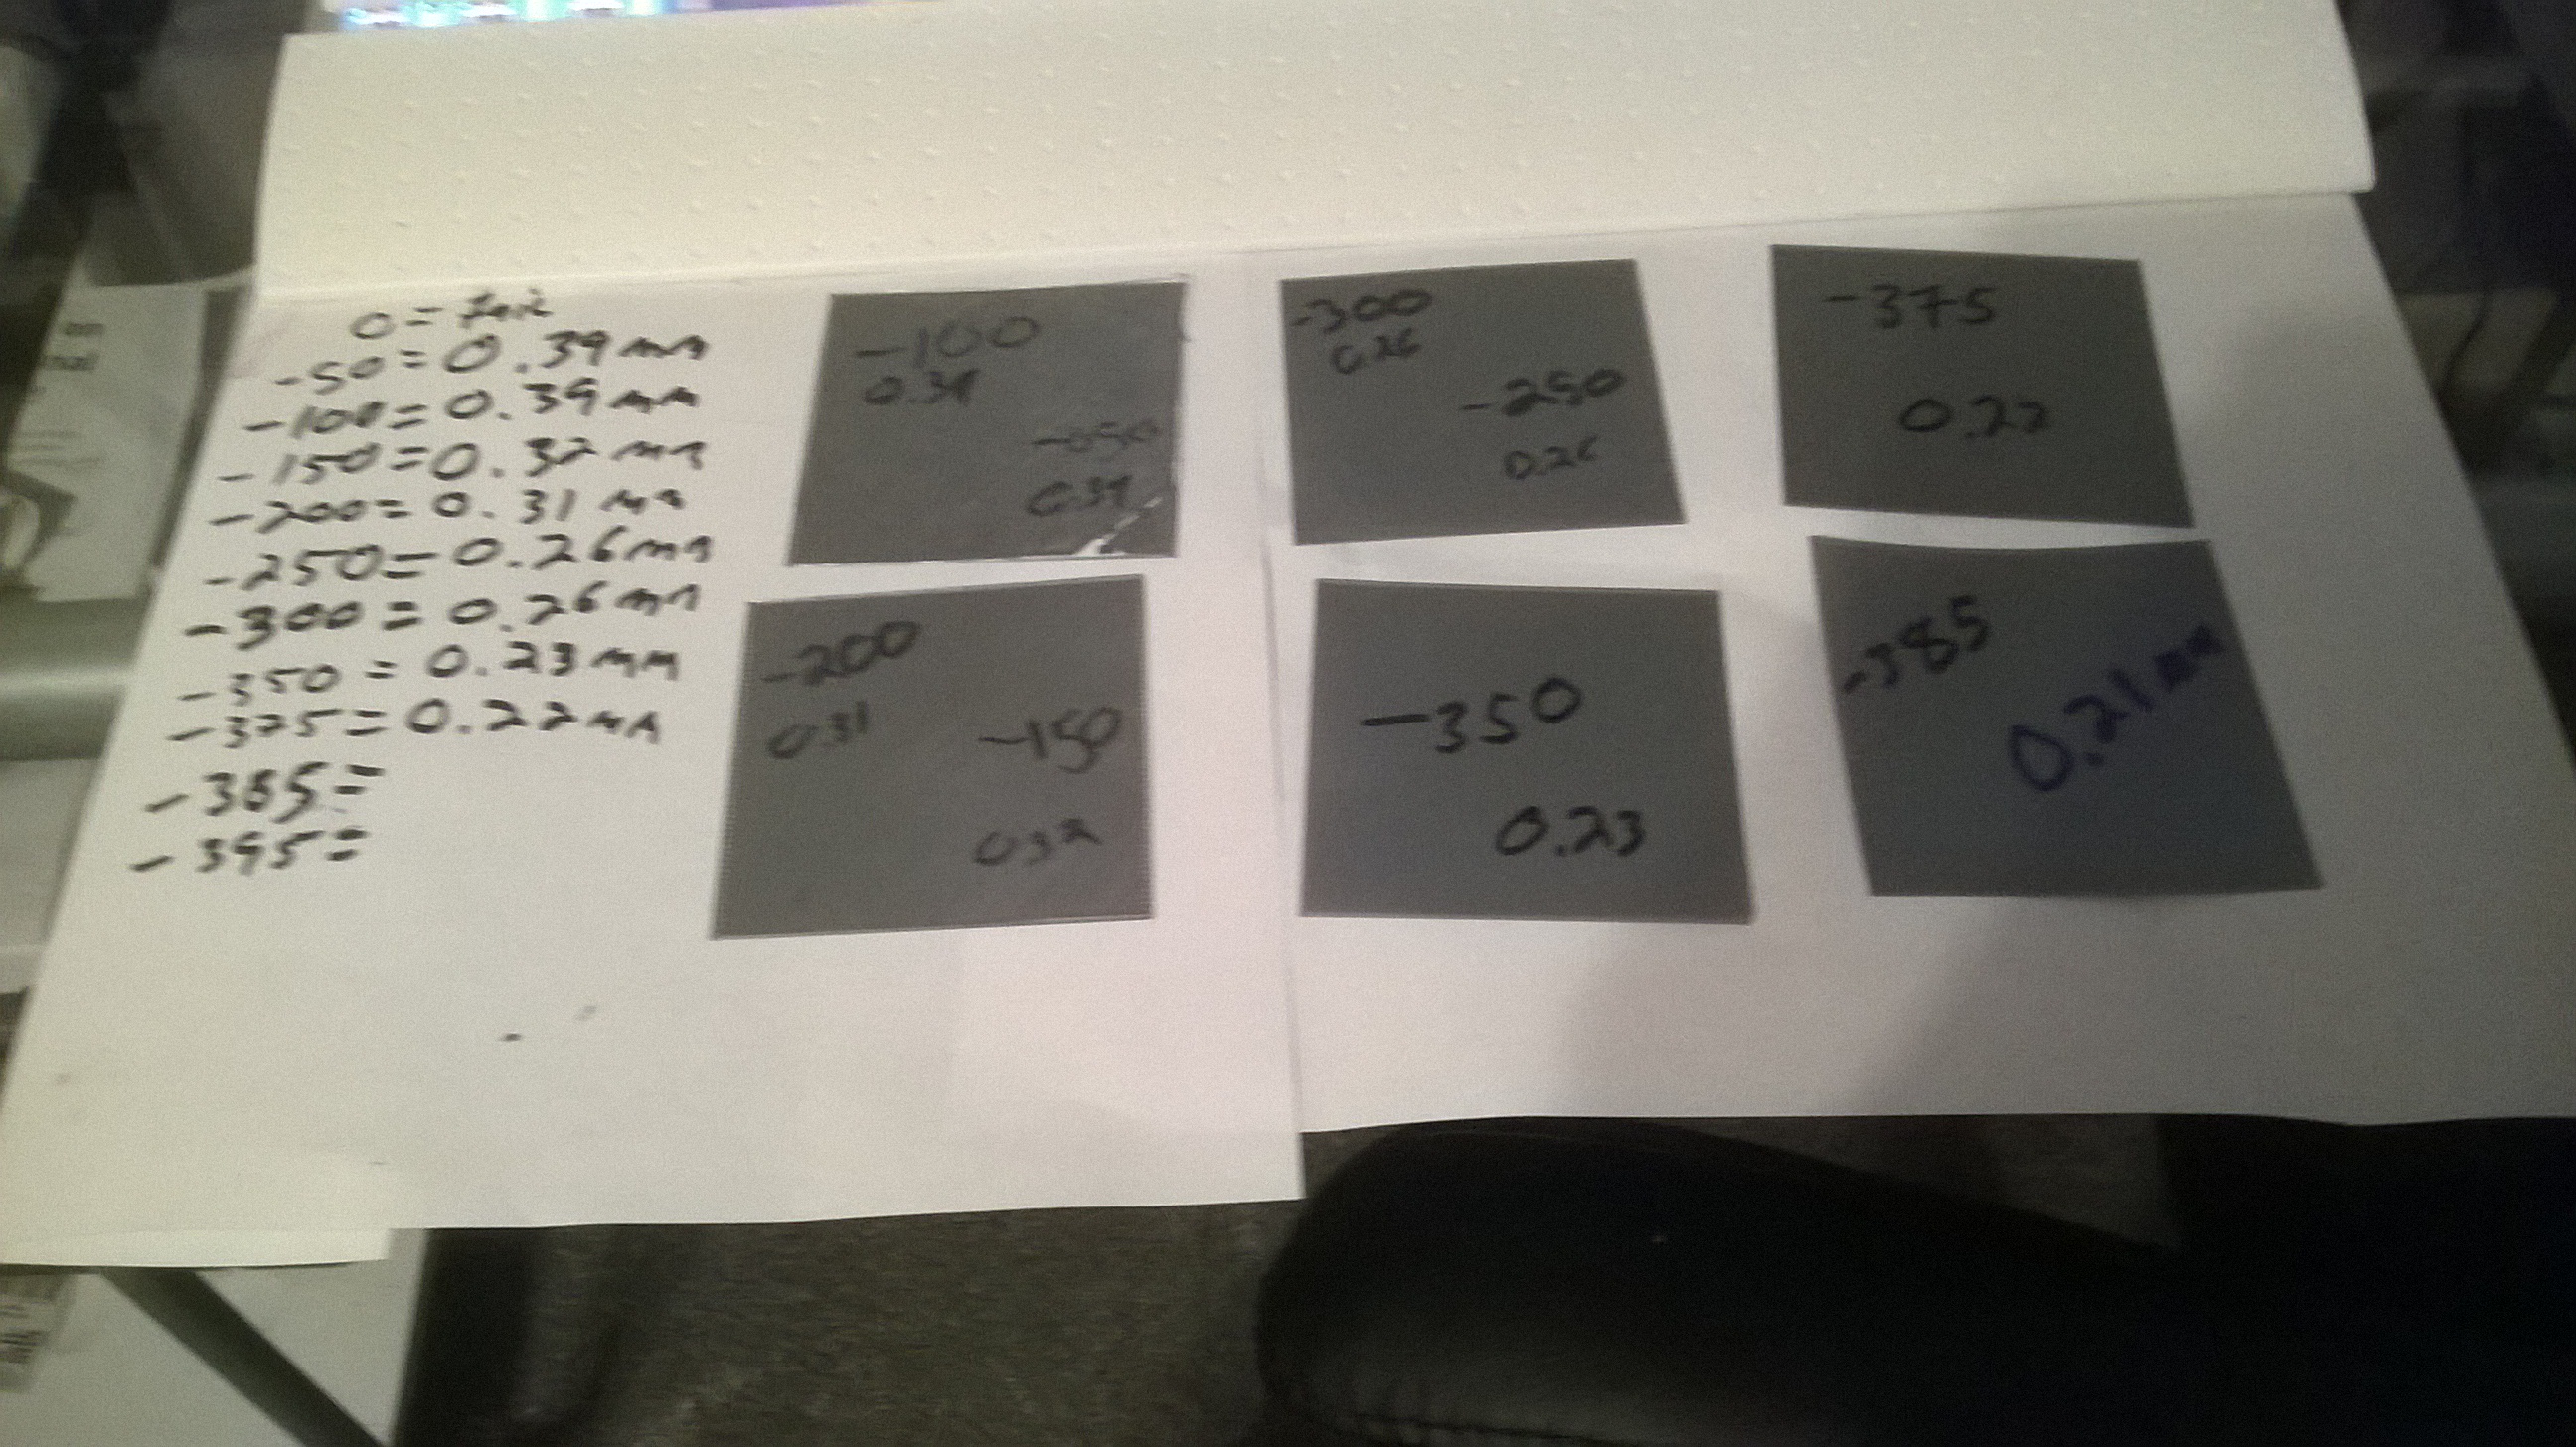
I struggled so much to get my Z setting correct using the V2 Calibration code because it was just a single line and I had no idea if the Z is correct. Is it too squished, is it too round?
Your solution, the Calibration Surface works so much better and now I was able, easily, to set my Z correctly. Thank you very much for your elegant solution!
Re: life adjust Z - my way
This looks promising, will definitely try it out.
Is it normal that I have to adjust the distance for each filament type I print? I printed Prusa PLA and the first layer looked good. However when I tried the Prusa ABS it seemed that the z distance is too high.
I would have expected this value to be calibrated once and that's it. Otherwise I would always have to readjust the value when I change the filament... 😥
Design, Print, Repeat
Re: life adjust Z - my way
➡ the z-live adjust value should be the same for all filaments.
💡 but the "sticking - capability" of the filaments differ. so it's nearly impossible to get nylon sticking at the pei sheet without further measures.
dem inscheniör is' nix zu schwör...
Re: life adjust Z - my way
➡ the z-live adjust value should be the same for all filaments.
💡 but the "sticking - capability" of the filaments differ. so it's nearly impossible to get nylon sticking at the pei sheet without further measures.
Thanks Jeff, that's what I expected.
I'll try it with your calibration code, hopefully this will give me a good result for all filaments
Wird schon funzen 😉
Design, Print, Repeat
Thanks
Thanks for the posting this. It helped a lot in getting my i3 Mk2 calibrated. I kept going back and forth with the stock V2 gcode. On occasion I found myself doing something similar with the first layer of the Prusa logo gcode on the SD card. This definitely helped get things calibrated and systematically going through things. Thanks.
Re: life adjust Z - my way
Thank you so much !!! New to 3D printing, Assembled kit and was getting into trouble with poor adhesion, layer height, etc. This info would have saved a lot of time if it had been in the manual.
Re: life adjust Z - my way
Thank you Jeff for this invaluable piece of Gcode, indeed much handier to get that perfect Z adjust.
I will follow your logic and try to leave it as is once I'm happy with it and look for adhesion problems / extrusion settings whenever a filament is not performing properly at first layer.
I did notice a slight difference in thickness between PETG and PLA, PLA being slightly thinker (a difference of 0,02 - 0,03) compared to PLA.
Would this be because of the PETG gripping the PEI surface more aggressively?
I'm not using a glue stick covered bed to test it but Joe's advice to use window cleaner when cleaning for PETG.
Re: life adjust Z - my way
...I did notice a slight difference in thickness between PETG and PLA, PLA being slightly thinker (a difference of 0,02 - 0,03) compared to PLA.
Would this be because of the PETG gripping the PEI surface more aggressively?
did you mean thicker or thinner ?
anyway: here i've noticed no difference between pla and petg (regarding the thickness). i can only imagine, that the viscosity of the filament might have an influence. and the viscosity itself is a function of the temperature at which you print. btw.: for my herz petg i use 255°C.
dem inscheniör is' nix zu schwör...
Re: life adjust Z - my way
did you mean thicker or thinner ?
anyway: here i've noticed no difference between pla and petg (regarding the thickness). i can only imagine, that the viscosity of the filament might have an influence. and the viscosity itself is a function of the temperature at which you print. btw.: for my herz petg i use 255°C.
The PETG prints a little thinner.
This was the one bought from the Prusa shop.
I'm using the stock settings of 230/85 for the first lauer and then 240/90.
Re: life adjust Z - my way
Jeff, can you post your factory file for S3D?
Mostly I use filament that comes in at 1.71 mm and would like to make a version that works with that
I suppose I'd have to manually make the gcode changes you made as well.
Thanks!
Re: life adjust Z - my way
Jeff, can you post your factory file for S3D?
Mostly I use filament that comes in at 1.71 mm and would like to make a version that works with that
I suppose I'd have to manually make the gcode changes you made as well.
Thanks!
💡 i used the original prusa i3 mk2 RC4 factory file, that josef posted here at the forum. i'll attach it here, for your convenience:
btw.: this should be the same factory file the v2calibration.gcode was made by prusa.
when i look into the gcode file now, i can see a "; profileName,Original Prusa i3 MK2 RC4 (modified)" in line #6. but i can't remember that i really made changes that affect layer height, extrusion or width. i think i only fiddled around with the end script and the brim and maybe with the speed as well.
➡ but you can check every single parameter when you open the .gcode file with a text editor (lines 1 - 184).
dem inscheniör is' nix zu schwör...
Re: life adjust Z - my way
Thanks so much for this, just to be clear, this new gcode can replace the V2calibration?
Re: life adjust Z - my way
😛 i think so.
dem inscheniör is' nix zu schwör...


