First Layer Woes - 2.00 and still no "smush"
Completed the kit build, passed calibration with "perpendicular", not seeing any red flags. Z-calibration is just not working out for me, though. I've tried the Prusa logo test as well as Jeff Jordan's at https://forum.prusa3d.com/forum/original-prusa-i3-mk3s-mk3-assembly-and-first-prints-troubleshooting/life-adjust-z-my-way. My current Z is at 2.0 and I'm still not getting a solid first layer.
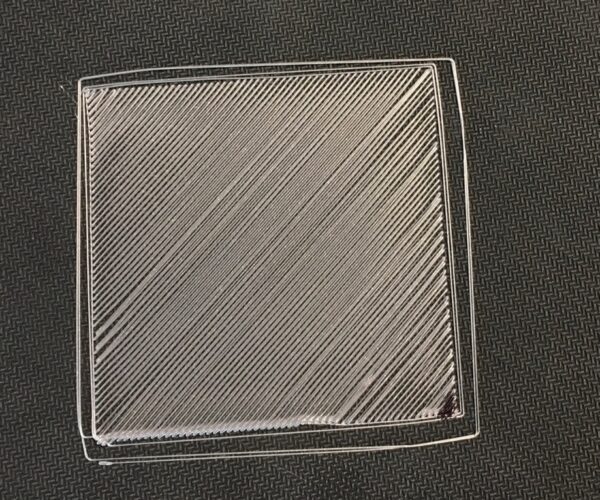
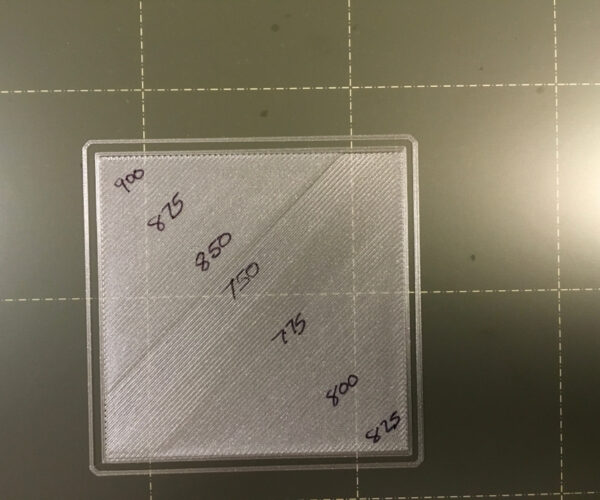
The test below starts at 1.35 in the lower right corner and finishes in the upper left at 2.0. Jeff's images show that the layer should be solid. This is using the PLA that comes with the kit. Also, as you can see in the image, the borders and corners are not coming out straight but I suspect this will get solved once I have the Z value worked out correctly.
I set the height of the PINDA sensor using the zip tie approach in step 3 of the calibration instructions: https://help.prusa3d.com/en/guide/9-preflight-check_36224
Any help would be greatly appreciated. Thanks!
RE: First Layer Woes - 2.00 and still no "smush"
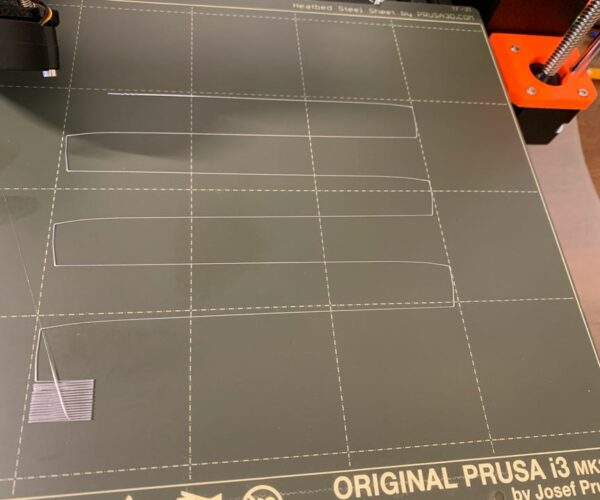
Re-ran XYZ calibration, passed with perpendicular again. Re-ran Z calibration and the result is below. Z adjustment went from 0.0 in the lower right corner to 0.6 in the upper left, and the lines on the zig zags are crooked. Going to try raising the PINDA a bit.
RE: First Layer Woes - 2.00 and still no "smush"
Your Live-Z is way too high in the last pic. I'd bring it down (make it more negative) by 0.06mm or more and keep going down until the strands stick well enough that you can poke them without dislodging the extrusion.
and miscellaneous other tech projects
He is intelligent, but not experienced. His pattern indicates two dimensional thinking. -- Spock in Star Trek: The Wrath of Khan Unfortunately,…
RE: First Layer Woes - 2.00 and still no "smush"
@bobstro
I appreciate the suggestion. I'm brand new to 3d printing and am still learning the terminology. Those values should have been negative and -0.06 to -0.20 🙂 I wasn't able to make editing changes to the post by the time I realized it.
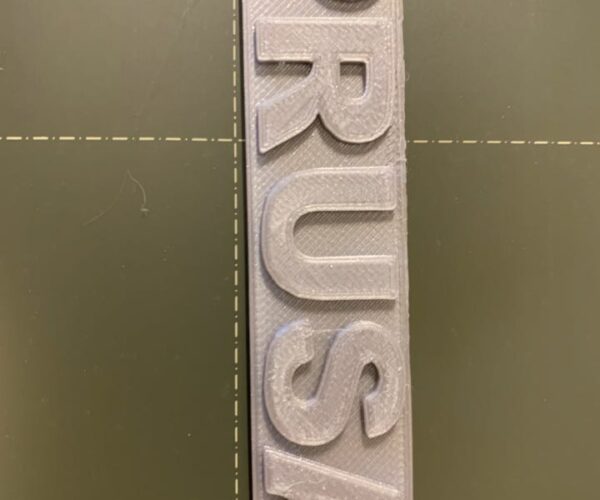
I lowered the PINDA sensor a notch, re-ran Z, and the results are much more improved now. Solid fill and straight lines and corners. I'll try Jeff's again for the fine-tuning. One oddity that I noticed in the logo print showed up on the back, in the middle of the top edge (right edge in the photo below). Looks like it printed on a slight curve. Should I re-run a full XYZ calibration?
RE: First Layer Woes - 2.00 and still no "smush"
Have you tried the 'Life Adjust Z My Way' process Use search.
this uses a larger square which is easier to adjust...
there are test files at the bottom of the first post on the first page
regards Joan
I try to make safe suggestions,You should understand the context and ensure you are happy that they are safe before attempting to apply my suggestions, what you do, is YOUR responsibility.Location Halifax UK
RE: First Layer Woes - 2.00 and still no "smush"
I have been using "My Way" throughout the day and have spent the past two hours reading through the later posts. I've noticed that you have helped a lot of people which is encouraging.
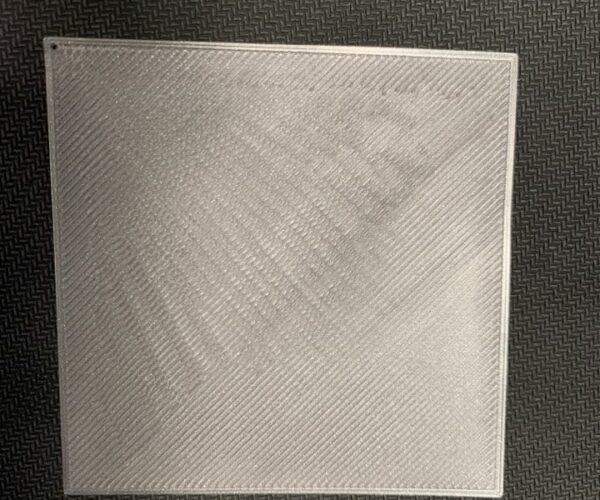
At some point, I made the wrong adjustment and the head started pushing the bed down during print initialization, so I reset the printer and started over. The image below is my latest attempt.
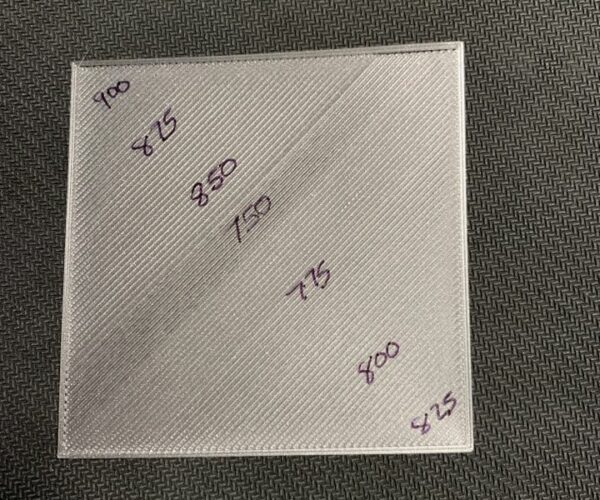
The lower right corner is a -0.800 setting. The upper left was -1.000 which seems to have made it worse.
The -0.800 is smooth and solid but the lines are ridged rather than a smooth file which Jeff has described as being the goal ("like film or foil"). It's also translucent while other pics that people have shared seem to be more solid. Now, as I'm writing this, looking at p37 of the posts, the images there where people are calling success match what I have at -0.800 to -0.825, so I must be heading in the right direction.
That's encouraging.
RE: First Layer Woes - 2.00 and still no "smush"
@phishfrye
Pick up the square by the top left and bottom right corners,
bend the film so that the filament side welds are being stressed, and flex the foil,
If all of the joints remain connected then all of your levels are pretty close to optimal for your current setup.
then look at the top side for the smoothest surface, then turn the foil over and look at the bottom surface for the same section,
Hopefully the bottom layer will be completely fused with no fine lines denoting the edges of the filament, that should be the ideal setting... then look towards the corner where live Z negative number is smallest, and you may start to see the faint lines where the edged of the adjacent filaments are not quite squishing together. those sections are not quite low enough...
the bottom side towards the corner with the highest negative number, may show the edges of the filaments completely squished together.
but the top surface is likely to be a tiny bit rougher, than the optimum setting area...
these tests are 'reading the filament'
As you previously noted, when the nozzle was too low, the filament lines went wriggly the top surface and the bottom surface got ugly and the filament seemed to be squirming about under the nozzle during printing, this is the result of trying to push too much filament into too small a space. as you noted, raising the nozzle, that little bit, improved the results significantly.
I think I forgot to ask previously, are you using 3x3 mesh bed levelling, or 7x7 MBL? 3x3 ests 9 points on the build plate, 7x7 tests 49 points, and creates a finer mesh which usually gives better levelling and improved adhesion.
If you are not using 7x7, you can turn it on using the LCD Menu.
regards Joan
I try to make safe suggestions,You should understand the context and ensure you are happy that they are safe before attempting to apply my suggestions, what you do, is YOUR responsibility.Location Halifax UK
RE: First Layer Woes - 2.00 and still no "smush"
I went through the same thing with my new build. I lowered the PINDA, even going lower than the recommended height (bad idea).
What finally fixed it for me was finding @joantabb’s post in the “Life Adjust” thread, and particularly finding the 75x75 test file, as the default test pattern leaves a lot to be desired.
With that said, my current z-value (texture sheet) is -1.9. Higher than I’d have hoped, but I’m not sure it’s worth further tinkering since I’m very happy with my prints & level of squish. Good luck and keep at it- as I said, @joantabb offers excellent suggestions, so pay close attention and you’ll be fine.
RE: First Layer Woes - 2.00 and still no "smush"
Thank you, this was a lot of very helpful information. I am currently trying a benchy with -0.850 and can see some adjustments will be needed based on this article: https://blog.prusaprinters.org/does-your-freshly-assembled-original-prusa-i3-mk3-print-as-the-best-it-can_29445/
I was using the default 3x3 leveling. I will try 7x7 next.
@davebudz the "Life Adjust" thread and file are very helpful but I found it a challenge as a newbie not knowing what I was looking for or how to judge a print as "good". Joantab's comment above is the help that I needed to know the difference between something that looks good and something that is a good print.
RE: First Layer Woes - 2.00 and still no "smush"
Printing a test patch that is large enough to make adjustments and see results as you print is key to a good layer one. As is a clean print sheet. Fingerprints are bad and you never want to touch the printing surface with bare fingers or palms: underside is fine, but top is a no-go zone.
RE: First Layer Woes - 2.00 and still no "smush"
RE: First Layer Woes - 2.00 and still no "smush"
With that said, my current z-value (texture sheet) is -1.9. Higher than I’d have hoped, but I’m not sure it’s worth further tinkering since I’m very happy with my prints & level of squish. Good luck and keep at it- as I said, @joantabb offers excellent suggestions, so pay close attention and you’ll be fine.
Allow me two comments on the above, for your peace of mind:
Ultimately the number is pretty irrelevant as it is dependent on the height of your PINDA probe and the actual thickness of the sheet and only relative to the baseline set in the setup wizard.
The fact that your setting for the textured sheet is sounding rather low is also quite normal. The textured sheet is exactly that: textured. That means it has hills and valleys. The PINDA measures mostly distance to the hills but the plastic needs to be pushed into the valleys. Therefore z-offset for the textured sheet will always be lower than for the smooth sheet. In the current firmware you can store up to 4 different offsets for different sheets.
Just be mindful when you change from textured (low) to smooth (high) unless you want to have a beautiful engraving on your smooth sheet like I have managed to do...
Cheers
Hansjoerg
RE: First Layer Woes - 2.00 and still no "smush"
Not true Hans - the PINDA senses metal, not sputtered plastic texture. The textured sheet is ~300um thinner than the smooth sheet, but essentially has a similar metal layer the PINDA detects. Since the smooth PEI is thicker than the sputter coating on the textured sheet, the result is the nozzle is higher off the printing surface when using the same Live-Z value.
RE: First Layer Woes - 2.00 and still no "smush"
ooops, thanks for the clarification, I was under the, obviously wrong impression, that the probe is ultrasound based
RE: First Layer Woes - 2.00 and still no "smush"
ooops, thanks for the clarification, I was under the, obviously wrong impression, that the probe is ultrasound based
It is inductive; creating a magnetic field to sense nearby metals.
RE: First Layer Woes - 2.00 and still no "smush"
actually makes a lot more sense, ultrasound could be confused by too many other things
RE: First Layer Woes - 2.00 and still no "smush"
Got tied up for a couple of weeks and wanted to circle back and take a quick minute to thank everyone for their help. After getting the calibration process down (and a small belt adjustment), I printed a perfect benchy tonight.
Thanks again!
