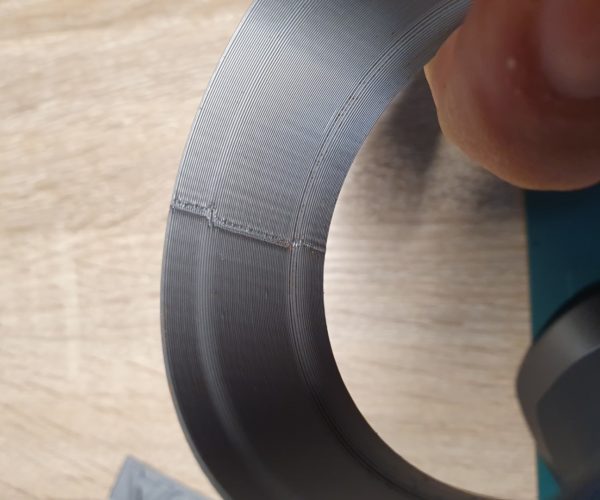
Circles Not perfect circles
Greetings everyone,
I am new to the community so i would appreciate any help here.
received my printer a few days ago and aftes some hours assembly (i am a pretty experienced craftsman) the printer passed all the tests and was ready to print.
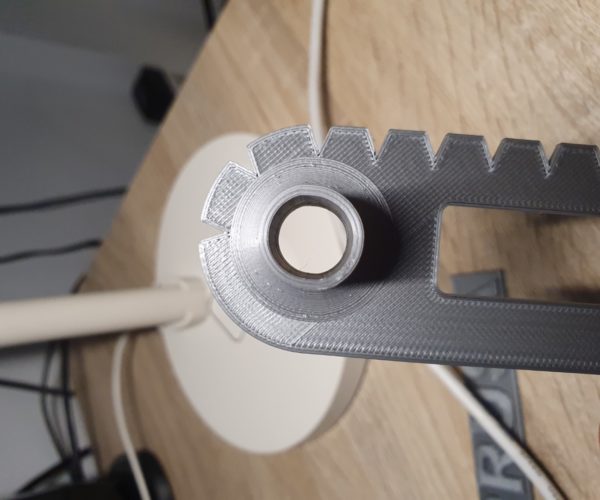
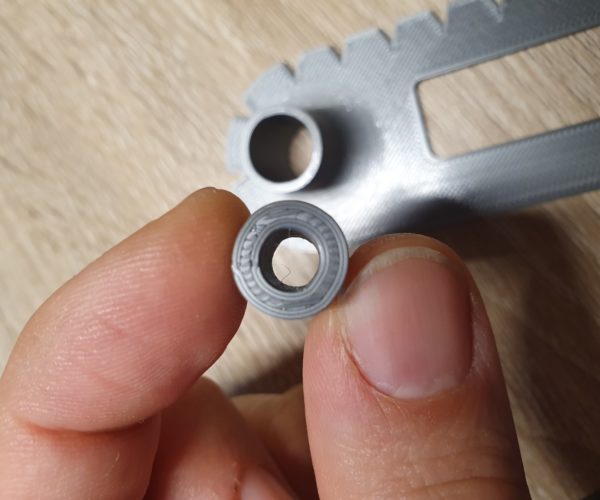
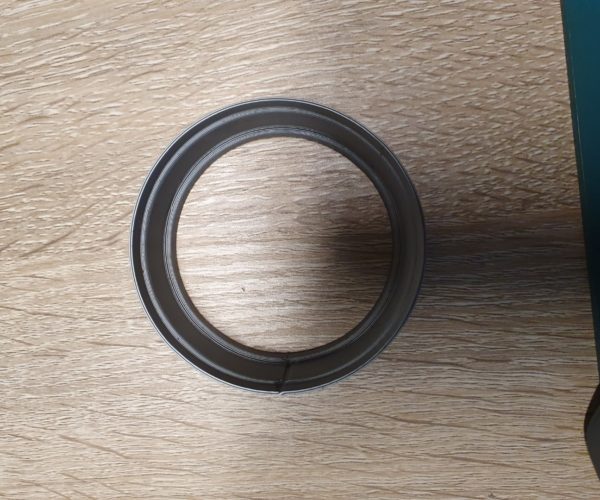
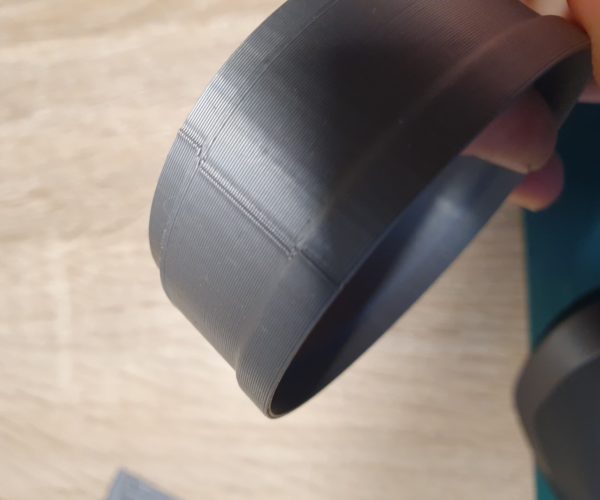
Everything seems great until now that i designed an extruded circle only to find out after the prints that the circles are not perfect but ovalish or kinda deformed. This is a pretty easy pring with not support and its printed straight up.
The printer is completetly leveled and calibrated with 0 tolerance on the feet. It seems dead centered. I have printed a few simple items these days and this is the first problem i am noticing. Any feedback on how to debug this?
RE: Circles Not perfect circles
Hi,
would be great, to send more details like:
- how did you modelled your model
- what filament do you use
- what were the print set ups - layer height, speed,- the best would be to export the project from PrusaSlicer, zip it and attached to your next post here.
First suggest would be to to design and print a circle with 5-10 cm diameter, where the issue could be more visible.
Did you try to print a benchy boat from the attached SD card? it is a benchmark on the several print parameters including horizontal and vertical circles and of course other stuff. But when trying to print it out, watch that you use the correct filament. I guess it is for PLA.
even an old man can learn new things 🙂
Standard I3 mk3s, MMU2S, Prusa Enclosure, Fusion 360, PrusaSlicer, Windows 10
PRUSA MINI+ Prusalink + Prusa Connect
RE: Circles Not perfect circles
Hello Zoltan,
My model was Modeled via solidworks, exported to STL then imported to prusaslicer and was printed face down (the face with the hole on the pad)
The fillament is PLA from prusa and was purchased with the printer. (1.75 grey)
What kind if export do you need? the G-code?
Settings are 0.15mm quality modified with 30% infill and no supports.
The circles look like proper circles in the slicer.
RE: Circles Not perfect circles
It is called a seam and it happens when the nozzle is changing the layer. When it is changing at the same x,y position the seam is more visible.
Slicer tries to hide the seam to corners and interior, circle does not have unfortunatelly corners. it should be set up in slicer how you want to have a seam.
even an old man can learn new things 🙂
Standard I3 mk3s, MMU2S, Prusa Enclosure, Fusion 360, PrusaSlicer, Windows 10
PRUSA MINI+ Prusalink + Prusa Connect
RE: Circles Not perfect circles
Circle distortion is generally one of two things: belts that are sloppy loose, or belt drive gears slipping on the motor shaft.
Slipping gear are common when the kit assembler doesn't follow the flat first rule.
Flat First: Drive gears must be tightened flat-first.
1) Start with both set screws fully loosened so the pulley is free to spin on the motor shaft.
2) Align one set screw dead center with the flat on the motor shaft, slowly tighten the screw until it fully contacts the flat surface.
3) Torque the flat set screw to spec.
4) Now tighten the jam set screw, and torque it to spec.
Once tightened, never touch the flat set screw unless the jam screw is first fully loosened.
Why Flat First? Set screws have flat ends. If you tighten the jam screw first the set screw on the shaft flat doesn't fully contact the shaft, only one small edge of the screw surface is biting. Reversing torques can easily shift the shaft to a position the flat screw no longer contacts the shaft. This lets the jam screw wriggle loose. And after a while, vibration loosens the screws until the gear is free to rotate.
RE: Circles Not perfect circles
If the gears are properly tightened, then belt tension needs to be checked.
The deflection method is best. Move the extruder to the left home position, and the bed fully back. Apply a force of 7 ounces to the lower of the belt pairs, mid way. Measure how far the belt deflects. 12/64 is the desired Y deflection; 15/64 for X.
Metric conversions in this PDF:
RE: Circles Not perfect circles
You where correct.
There was a missasembly in the base belt drive tentioner. It is fixed and now all looks good.
Thanks a lot for your help.
