Blobs at the retract positions
I just assembled my brand new Prusa i3 MK3S+. I know this kind of printer from the company where I work and that one always printed flawlessly. After assembly I printed my first object with it, a small funnel. I used the silver sample PLA filament which was included. The model was sliced with standard settings.
Print settings: 0.20mm QUALITY
Filament: Prusament PLA
Printer: Original Prusa i3 MK3S & MK3S+
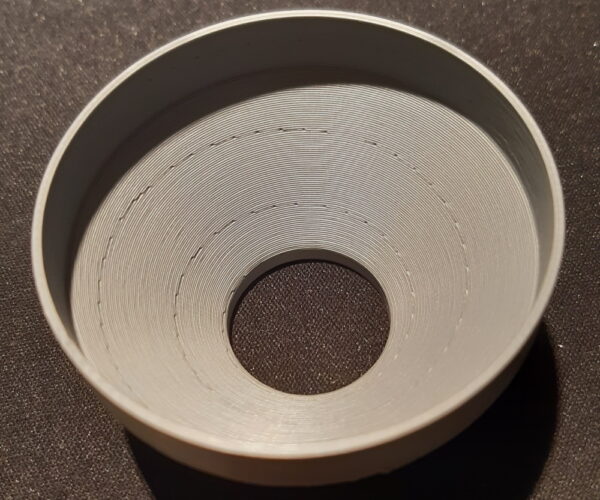
I quickly noticed that the printer forms big blobs on the bottom side of the funnel in the overhang at every position where the retract happens. Retracts in straight walls seem to be fine. It seems that the printer has poor control over the filament near the retracts though. I also printed a Benchy which shows a slight but unusual amount of stringing and shows underextrusions in some areas of the surface (presumably behind the locations where retracts occur). I try to take a meaningful picture of it later.
By now I have several years of 3D printing experience but can't make much sense out of it. What I already checked is:
- Adjusted the extruder tension in both ways -> didn't change anything
- Reducing the print temperature -> didn't change anything and should already be fine (210°C)
- disassembled the extruder and checked for the bondtech drive gear to be properly fixed -> was sufficiently tight already (actually I hoped this to be the solution)
- checked for proper alignment of the bondtech drive gears -> was ok
- disassembled the hotend and checked for any noticable problems -> nope, nothing suspicious
- changed the filament for brand new Prusament Orange PLA -> same problem
I don't have any idea what to check next or where the actual problem lies. What I'm sure about: this should not be the expected behaviour of the printer. What I did not do and also don't want to do is tweaking the slicer settings in any way because I'm convinced that this would at best be a workaround and would only shift the problem. I'm really frustrated at this moment.
Do you have any further ideas?
Bottom side of the funnel:
top side / inside of the funnel
If you're interested in creating an own print for comparison, I uploaded the model here:
http://www.the-powl.de/misc/Pfeffermuhle_Trichter.stl
and also the exact gcode file I used:
http://www.the-powl.de/misc/Pfeffermuhle_Trichter_0.2mm_PLA_MK3S_38m.gcode
Moist filament? probably not
I've read a few things about moist filament which could cause similar issues but with other printers I have never had any issues like that. Also the two filament I tried rolls were brand new. It was only a few minutes for the silver PLA and a few hours for the orange PLA since I cut the sealed plastic bag open.
There is no sign of damp filament in your picture.
In Print Settings > Layers and perimeters try changing the seam position, you may need to be in advanced mode. Also try inverting the part but unless you make other changes this might just move the seam marks to the inside...
You have, by accident, found a combination of wall thickness and overhang angle that accentuates a common issue.
On the plus side, your printer seems to be working reasonably well.
I would rate that print as good enough for the first month.
Every user builds their printer slightly differently so during the first few weeks of use the printer will run-in and settle its parts together; then you will have to go over the basic maintenance checks, lubricate and recalibrate. Even if you got everything dialled in perfectly today, it would all need re-doing.
Better to settle, temporarily, for a basic working printer and get some useful printing done, make your early mistakes, establish a routine and generally get used to the process. Then when you do your one month service you can take extra care knowing the new settings on your now stable printer are likely to last for several months.
Welcome to the forum.
Cheerio,
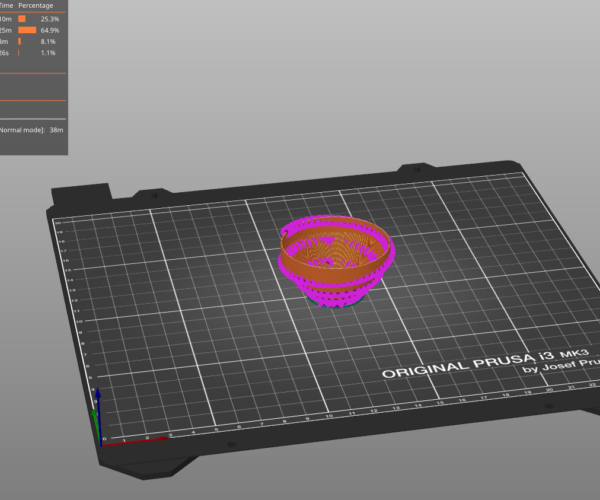
If you look in slicer, layer by layer, you'll see that slicer is squeezing in four perimeters, two "Perimeter" and two "External perimeter" in the slope.
When checking "Print Settings -> "Layers and perimeters" -> "Detect thin walls" PS change the inner two perimeter to gap fill, which is one filament line.
Prusa i3 MK3S+ FW 3.11.0 (kit dec -20), PrusaSlicer 2.6.1+win64, Fusion 360, Windows 10
Enable "Detect thin walls"!
@the-powl
Printed two versions:
Left one with same standard setting as you did.
Right one with same standard settings, except for "Detect thin walls" enabled
Yes, I know tuning retraction settings will make it even better
Prusa i3 MK3S+ FW 3.11.0 (kit dec -20), PrusaSlicer 2.6.1+win64, Fusion 360, Windows 10
RE: that's it
Thanks for your replies! And special thanks to Ringarn67 to do testprints for me! 🥂 In the meantime I also tried this and had success with it! But I'm also a bit staggered at this point. I thought the prusa presets were already perfectly tested for every application. I also didn't expect the slicer to overfill a wall if it can't fit the perimeters in it (even after years of 3D printing I constantly learn something new). That's of course the reason why at the layerseam excess material is gushing out the seam. Seem like there is no complete plug&play even within the prusa ecosystem.
As soon as the walls get thin you have to be observant and check for possible problems, layer by layer.
If the lines are yellow there are always an even number of them, even if it looks like one line, as in your file
I thought the prusa presets were already perfectly tested for every application.
Unfortunately not.
If that was the case there would be no "How do I print this" section on this forum 😀
Glad I could help
Prusa i3 MK3S+ FW 3.11.0 (kit dec -20), PrusaSlicer 2.6.1+win64, Fusion 360, Windows 10


