Assembling MK3 Issues, shaft does not fit into Extruder-idler
I have an issue with the shaft not fitting into the extruder-idler, currently stuck in the building process at chapter 5 step 4.
I am unable to fit the shaft in the extruder-idler, cracking the first in the process and breaking my replacement i printed.
The shaft does not appear to fit, i understand the guide says use reasonable force but i have tried for the better part of an hour trying to do so with my fingers/hands.
I even gave them a hearty coating of wd-40 as a lubricant but that was unsuccessful as well
Will be printing a third one when i have time, what steps i should take to resolve this issue i am having and continue with my build.
Re: Assembling MK3 Issues, shaft does not fit into Extruder-idler
I used tiny vice grips. https://smile.amazon.com/Irwin-14-6LN-4-Inch-Capacity-6-Inch/dp/B00004SBB3/ref=sr_1_1?ie=UTF8&qid=1540433029&sr=8-1&keywords=needle+nose+vise+grip
they let you apply the force in line so that there was nothing but a straight push into the idler door mounts with the direction from the smaller mount to the larger mount.
but that was with a Prusa prepared part be sure the part you print does not have smaller holes than the original part and that you support the part while squeezing the rod into place be sure you have both of the needle bearings inside the gear it is easy for one to fall out while things are being manipulated ..
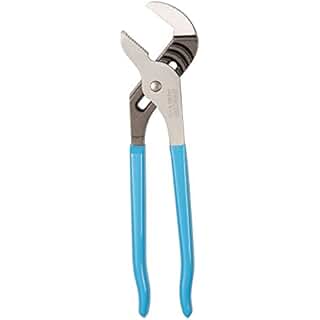
other options would be a small panavise or anything that lets you squeeze in a straight line... I used the needle nose and not regular vise grips as the long nose means they are pressing in a very low angle... you could use something like a woodworker clamp as well or even pliers like these.

adjust them so when the handles are closed the space is the the same as the distance outside to outside of the shaft mounts so you don't crush the part.
Re: Assembling MK3 Issues, shaft does not fit into Extruder-idler
I either didn't have--or couldn't find--the correct tool, so I think I just pressed it--carefully--against the kitchen countertop.
I had to take it apart to make an adjustment to get the Bondtech gear to align properly, but got it back together again the same way (countertop press).
That's "MISTER Old Fart" to you!
Re: Assembling MK3 Issues, shaft does not fit into Extruder-idler
There are a few steps during assembly where it can be difficult to fit metal pieces into printed parts. In all such cases, I found that tapping the piece in was easier than trying to press it in with a c-clamp or pliers.
A few light whacks with the long-nose pliers that are included in the kit does the trick.
Re: Assembling MK3 Issues, shaft does not fit into Extruder-idler
I have a similar issue with the X-axis assembly. The two metal rods don't want to go all the way in the printed parts. I can do one by twisting it in. The other one goes only about 1 cm in and stops. To put the second printed part on bot rods at the same time I won't be able to twist it.
I watched two assembly videos on YT, and there wan't that much force required to put the X-axis all together. So I wonder, do you think I could use a file to remove some irregularities in the printed parts' holes (printed layers going perpendicular to the rods)? Just enough to fit the rods in. It's my first printer, so I won't be able to re-print the part myself if broken. That's why I want to reduce the force needed.
Re: Assembling MK3 Issues, shaft does not fit into Extruder-idler
Use an 8mm drill bit to ream the holes.
Re: Assembling MK3 Issues, shaft does not fit into Extruder-idler
I hope you're joking. Anyway, I managed to fit the rods in. Just a piece of sand paper wrapped around a pencil and a few strokes in the holes did the trick.
Re: Assembling MK3 Issues, shaft does not fit into Extruder-idler
I was offering assistance. Why would I be joking?
Re: Assembling MK3 Issues, shaft does not fit into Extruder-idler
I vote drill bit, or file.
you want that shaft to be tight. so for gods sake don't take too much off.
I have a Prusa,therefore I research.
Re: Assembling MK3 Issues, shaft does not fit into Extruder-idler
Olaf gave good advice just don't do it with a hand held electric drill
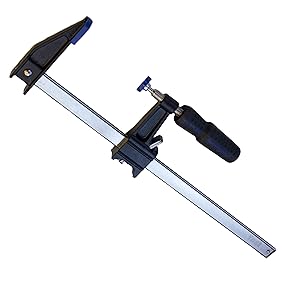
i would first try a woodworkers clamp like this one

less than $10 from amazon if you can't find one to borrow. seriously if the part were to break while you pressed it together with this it was defective and prusa will replace it but if you start working it over with power tools then it is all on you.
if you still want to go the power tool route then read on:
The best way is to drill a few thou undersize in a drill press or mill and then use a 8mm reamer or perhaps an undersize (slightly)8mm reamer if there needs to be some friction in the fit.
unless you have access to a well equipped machine shop (and unless they do a fair bit of metric work that might be a problem) the other way is to take an 8mm length of steel (does not need to be hardened to work with plastic) and on a grinder form a 'D' bit reamer at the end
even a broken 8mm drip could be used for this or one of the soft Stainless steel 8mm rods that used to be used in printers (speaking of printer I got some nice 8mm rods out of a scrapped epson inkjet wide carriage printer i found at the dump in the space they had for electronic trash)
now the safe war to use one of these is a drill press at a minimum and in plastic turning the chuck by hand if you are new to this sort of thing...
the easy was is to buy a nice new good quality 8mm drill and BY HAND not powered use it to ream the part. Unless your hands are far more steady and stronger than mine don't try to free hand it; find a friend with a drill press or rent one and proceed slowly or you will be printing another part.
the danger with using a drill rather than a reamer is that it is easy to drill over size bu a new 8mm reamer costs quite a bit more than a drill.