RE: Adhesion issues and print quality.
One note if it helps, using prusaslicer after slicing, check the first layer that all points are touching the build surface. I've had some irregular although minor differences in stray vertices that have caused separations from the bed. Since then I always verify the models that I plan to print, especially those that I've downloaded.
Good luck and stay safe,
Phil
Stay safe and healthy, Phil
RE: Adhesion issues and print quality.
One similar thing that threw me a few weeks ago is that PrusaSlicer apparently does not auto-correct or snap-to an object that is ALMOST parallel to the build plate as Cura will.
In my case I loaded an object that was at an angle and manually entered the correction numerically. In this case it refused to slice and generated an error. Another user who tried it used the 'place face' tool and it sliced properly, and I've been using that in lieu of manually entering a correction angle ever since.
RE: Adhesion issues and print quality.
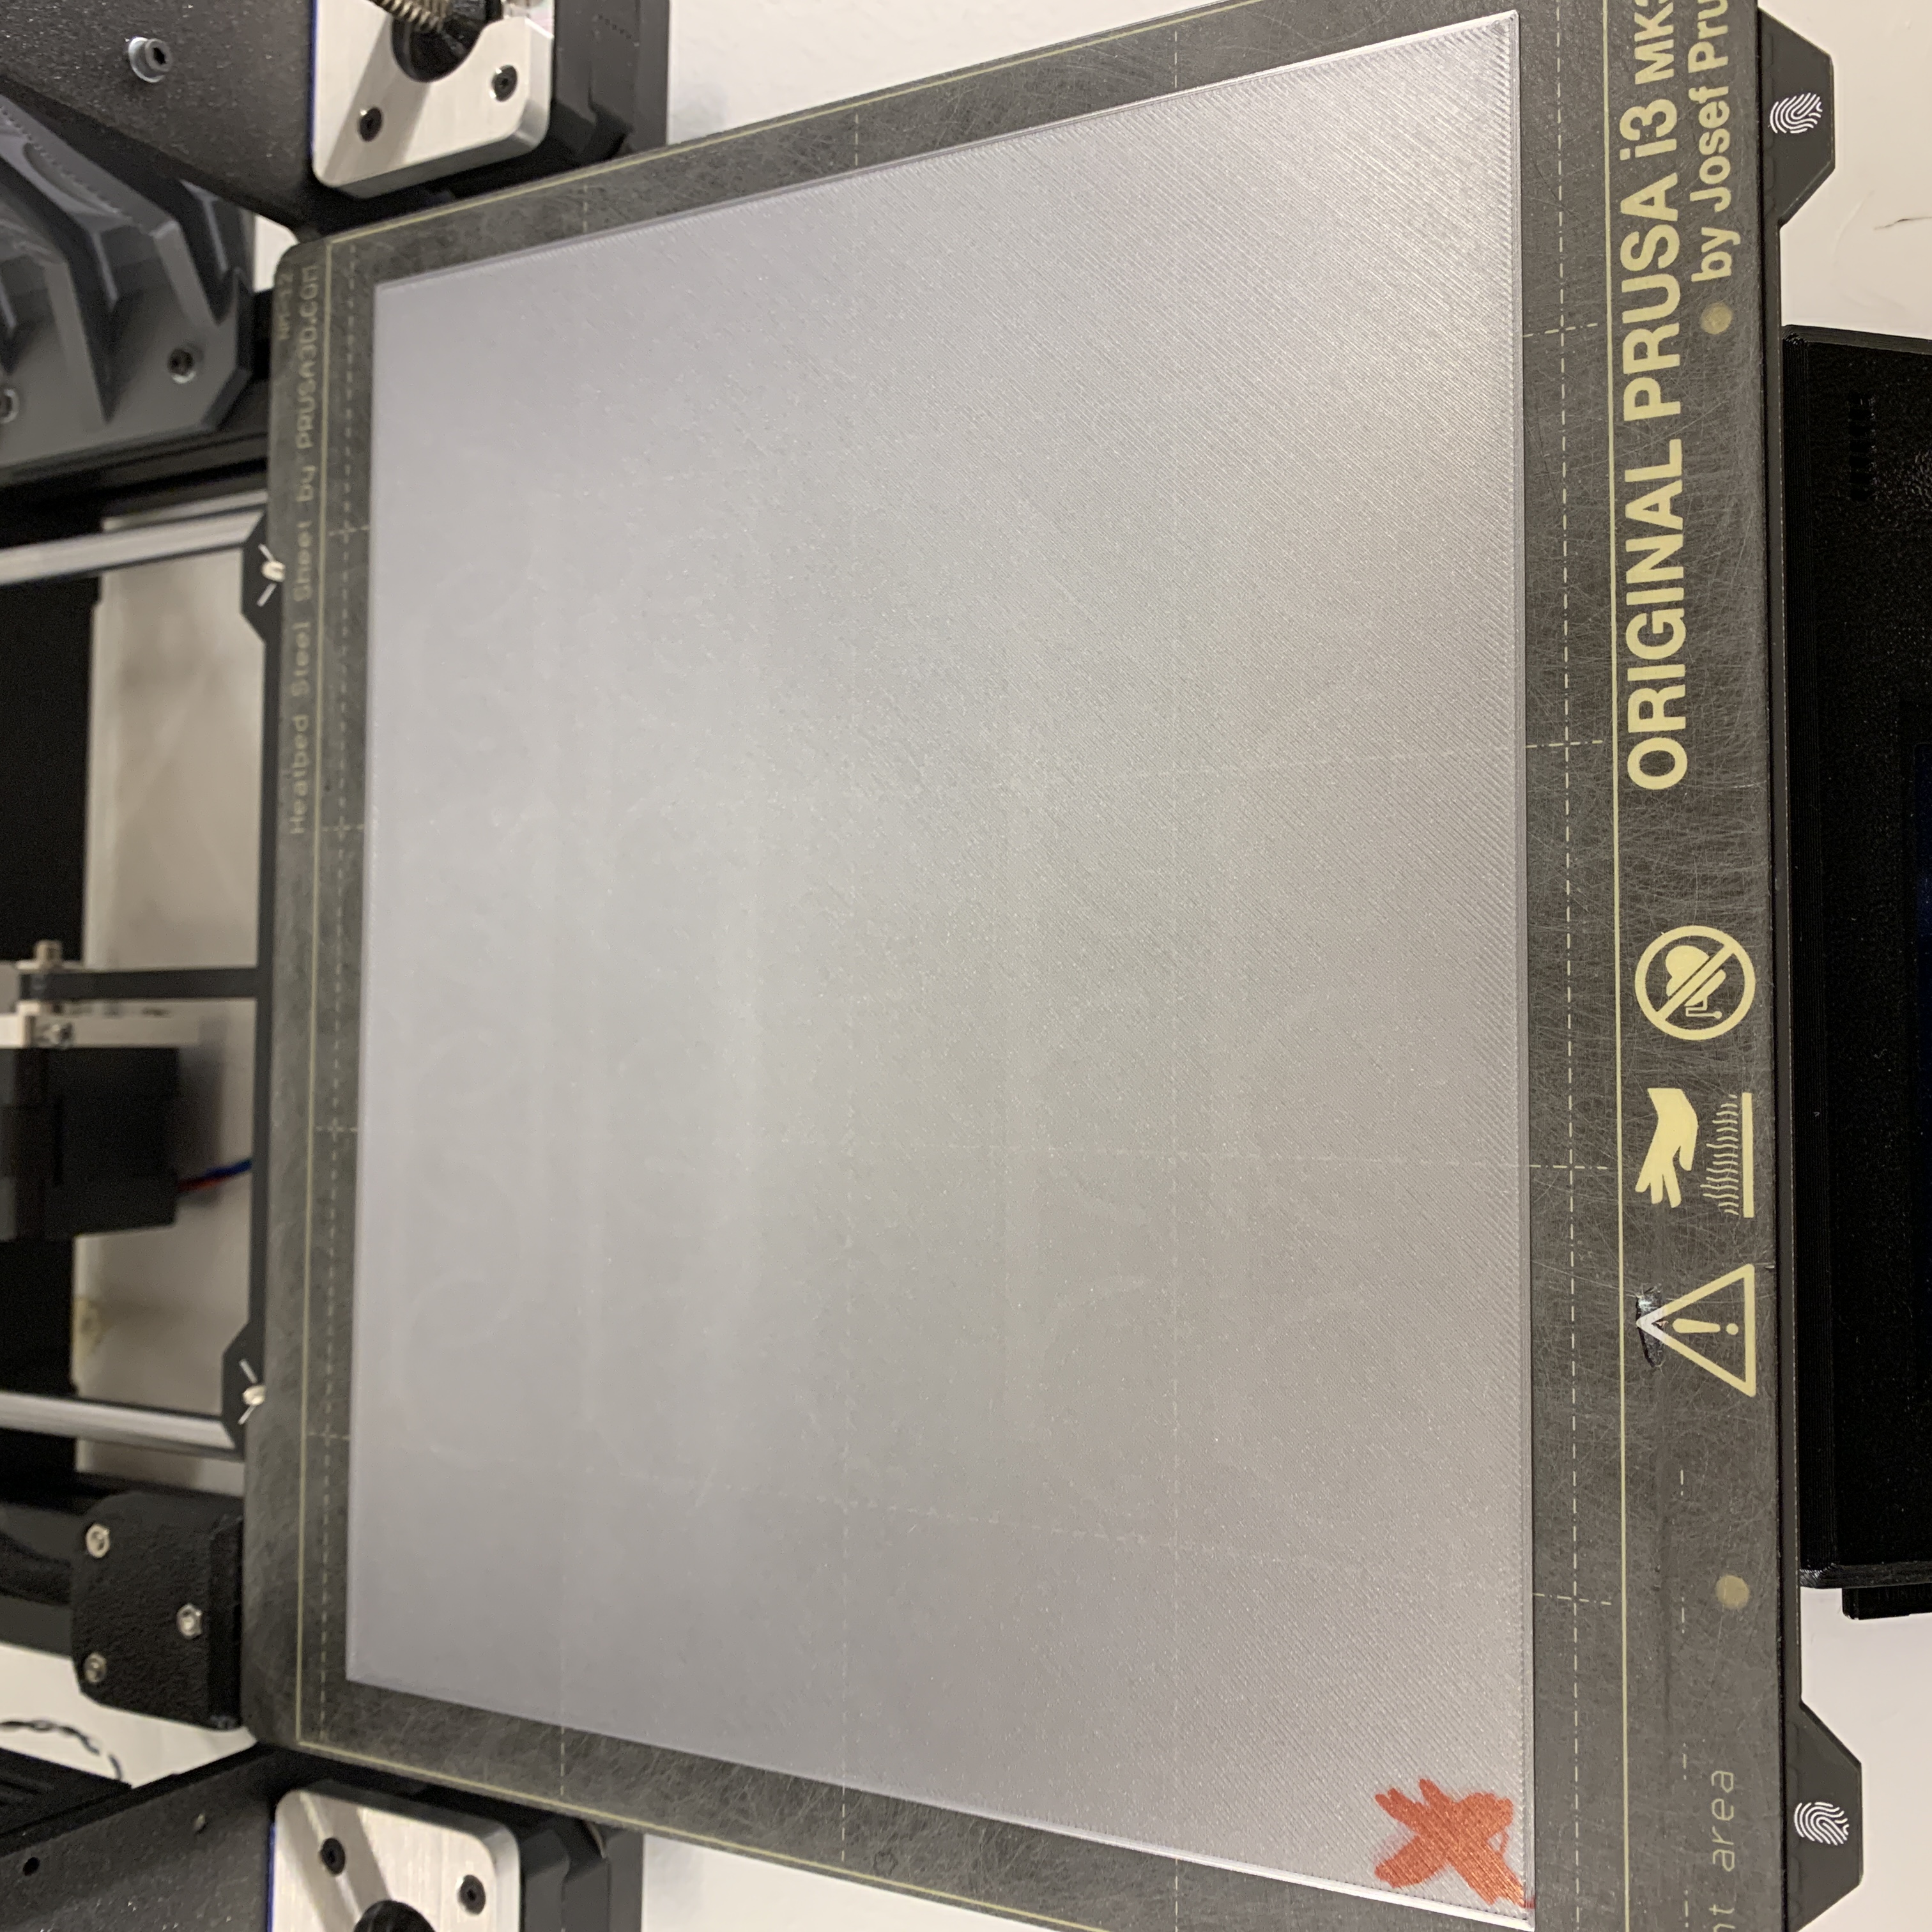
I'm pretty sure the problem is your heat bed once it warms up isn't flat (this is not the same as level) across the whole surface. You can do this by laying a flat edge in several diff locations on the heat bed when it's at room temperature. In the X axis maybe in the back, middle and front. In the Y axis left, middle and right. Just make a mental note of what you see. Then let your heat bed warm up to printing temperature and check the same way with the strait edge. I would bet that you will see gaps in a few areas. This is my first layer covering most of the surface after fixing mine...
RE: Adhesion issues and print quality.
Thanks.
I've downloaded a 1st layer test that comes out well from thingiverse.
I have lowered Z so that the filament is a little more squished than before, too.
I think some of my problems are due to poor geometry. Flat under surfaces develop a tiny 1° bend 3/4 the way along their length during design, so that they become part of layer 2 for some of their length.
I have started to use the mesh repair tools in Blender, which have improved my geometry no end.
RE: Adhesion issues and print quality.
@gkmakeit
I've not thought of that being problem. I shall look.
Many of my.prints now fix OK, though. It's just the odd ones that cause me grief.
I've lowered Z to squish a bit more than I did. My hotend for PLA starts at 215 and drops to 205 for subsequent layers to reduce stinging. With one filament, I drop to 198.it was cheap and cheerful, and strings at the drop of a hat.
I use the Slic3r base placement tool most times. I've had to learn to separate multiple objects, as they are handled as one until then
The built-in Netrabb repair tool has been a joyous discovery, reducing print errors and slicing refusals.
With lots of help, I'm improving.
It's more like learning to play a piano to a good standard than like printing. Hours of work, building on skills you have painfully learned.
Pad
RE: Adhesion issues and print quality.
³in terms of the base placement tool in Slic3r, I often find that a single flat surface on an object (or that's how I planned it when I was building it) offers 2 or 3 different positioning options, two of which leave much of the base at an angle to the plate, so there's still something up with by handling of geometry in Blender.
This is yet another source of adhesion errors for me.
Pad
RE: Adhesion issues and print quality.
@paddy_finn
You can think a face is flat in blender but unless you are very careful in moving edges/vertices around it wont be in reality. Often if you go into one of the higher detail view modes and you have a lightsource configured you can see this issue from the shadows (where you wouldnt expect them to be).
Its just one of the things you have to learn. Also if you run the 3dprint tool in Blender one of the things it checks for are non flat faces, that can help you spot them.
RE: Adhesion issues and print quality.
@paddy_finn
Try running this first layer test and post some pictures.
https://www.prusaprinters.org/prints/16639-prusa-mk2-mk3-mk3s-heatbed-flatness-level-check
RE: Adhesion issues and print quality.
@gkmakeit
Thanks. I downloaded and printed the file, and found it was very much not flat, with some parts of the bed ploughing, and others with poor filament adhesion.
I've played about with the screws, and essentially adjusted it so it is flat at 60°C but off true at room temp.
I'm a bit worried about the long term effects of that sort of stress, but leaving the bed loose runs risks of untoward movement as well.
Pad
RE: Adhesion issues and print quality.
@neophyl
It's correcting them that is the bugger - I have one - that campervan flap I was working on as soon as I bought the printer - and there's a little bit - about 1/5th - of the cover that is printed in layer 2, not layer 1. I can't find the problem with it, although I am sure that I have made it somehow. I used non-destructive changes throughout the design, as far as I could, as you suggested. It prints, and fits, and works fine, but this bit has a different texture from the other 4/5th. I understand that Cura will fix this sort of thing automatically, but after going through Cura, this section began printing on the 5th layer!
I tried to use an enforcer to put support below it on Prusa Slicer, but it wouldn't place any on so small a layer.
Paddy
RE: Adhesion issues and print quality.
@paddy_finn
What I've done to resolve issues similar to yours is using Blender to identify and subsequently bring all bottom or top vertices to the same level. Once the model, stl file, is loaded into blender I've chosen the side that's off. Once there I can generally see the culprit faces by discoloration or where the print tool identified a non-flat face.
What I do from there in the edit mode with the magnet on vertices is select the vértice that is off and with G selection point to a good vértice and pressing z to force the match to the z-axis. One can watch the vértice location on the right visual bar and it should be same exact match.
Another method I use is with the prusaslicer look at the first layer. Any areas not printing are areas I use to clean up with blender. Either the areas that print on the plate are too high or the areas not printing are too low. Depending on how many vertices your model has determines how grueling the task is.
I used to have several print failures with another brand of printer that used the manufacturer modified cura. I had no way to visualize the layers as with Prusaslicer and being new to 3d modeling and printing I was baffled.
Although I'm now beyond those times I'm still learning something new every day changing my development paradigm as I move along. 3d printing is a fantastic tool for learning to make things that work.
Stay safe and healthy,
Phil
Stay safe and healthy, Phil
RE: Adhesion issues and print quality.
@paddy_finn
It should sit flat at room temperature I would make sure there's no burrs on the bed carriage or the spacer where the screws go. I can't imagine you had to loosen all the screws, did you have at least two that stayed tight? You only need two to keep the bed from moving in the horizontal direction.
The amount of stress on the heat bed every time you turn it on is very high. If you think about it the thermal stress is high enough to bend and bow that heat bed even with 9 screws holding it down to a 1/4" or thicker aluminum. What I've done with mine is to let that thermal stress normalize.
I can't say what the long term effects will be, but I know I have my mk3 and two mk3s have worked for me since I adjusted the heat beds. I have around 200 days worth of printing between the printers.
RE: Adhesion issues and print quality.
Sometimes this can be frustrating. Be stubborn and you will get the firts player to complete.
I persoanlly find Z height to be the most common reason followed by a dirty bed. I have a check list for poor adhesion.
--------------------
Chuck H
3D Printer Review Blog
RE: Adhesion issues and print quality.
@pcweber
Hi there. I couldn't find that magnet setting, despite a good while looking about, but I did find this.
You select one vertex that is actually in the plane you want. Press Shift-S and align 'cursor to selected', then press. (does this set transform with respect to 3d cursor, or just zoom in your view?). Then select all the vertices that make up the plane you want, Press S to select scale, then chose either X, Y or Z depending which axis you want to align the vertices in, and then hit 0 (Zero - on the keyboard, rather than the NumPad).
Everything comes out flat and aligned on the plane you set. Including vertices that you didn't mean to select!
It's like a miracle, and it's not a lot of trouble, either.
Pad
RE: Adhesion issues and print quality.
There's a horseshoe magnet on top and with the option vertice you can, align to that. However, to my surprise you mention a function I've never used, next time I'll try it. I'm glad you found something that works!
Stay safe and healthy, Phil
RE: Adhesion issues and print quality.
The "." is centre view.
RE: Adhesion issues and print quality.
That is quite an interesting video included with the full-bed single-layer print.
I do know that when I do ABS prints right after PLA prints and warm the bed up to ABS temperature, on the first ABS print it will almost always 'double tap' when doing the auto leveling.
When I get done with the current project I plan to do this test. Since I do PLA, PETg and ABS regularly, I'll probably have to average things out at more or less the PETg temperature.
RE: Adhesion issues and print quality.
I noticed a difference between my printer I use for PLA and the two for PETG.
RE: Adhesion issues and print quality.
I may to try this on one of mine. Adhesion is tough to achieve and I have tried everything but this.
--------------------
Chuck H
3D Printer Review Blog
RE: Adhesion issues and print quality.
In reference to another thread, it may be interesting and worthwhile to try this using clear PETg.