Ribbing, banding issue
I hope someone can help identify this issue I have with a print on the i3mk2.
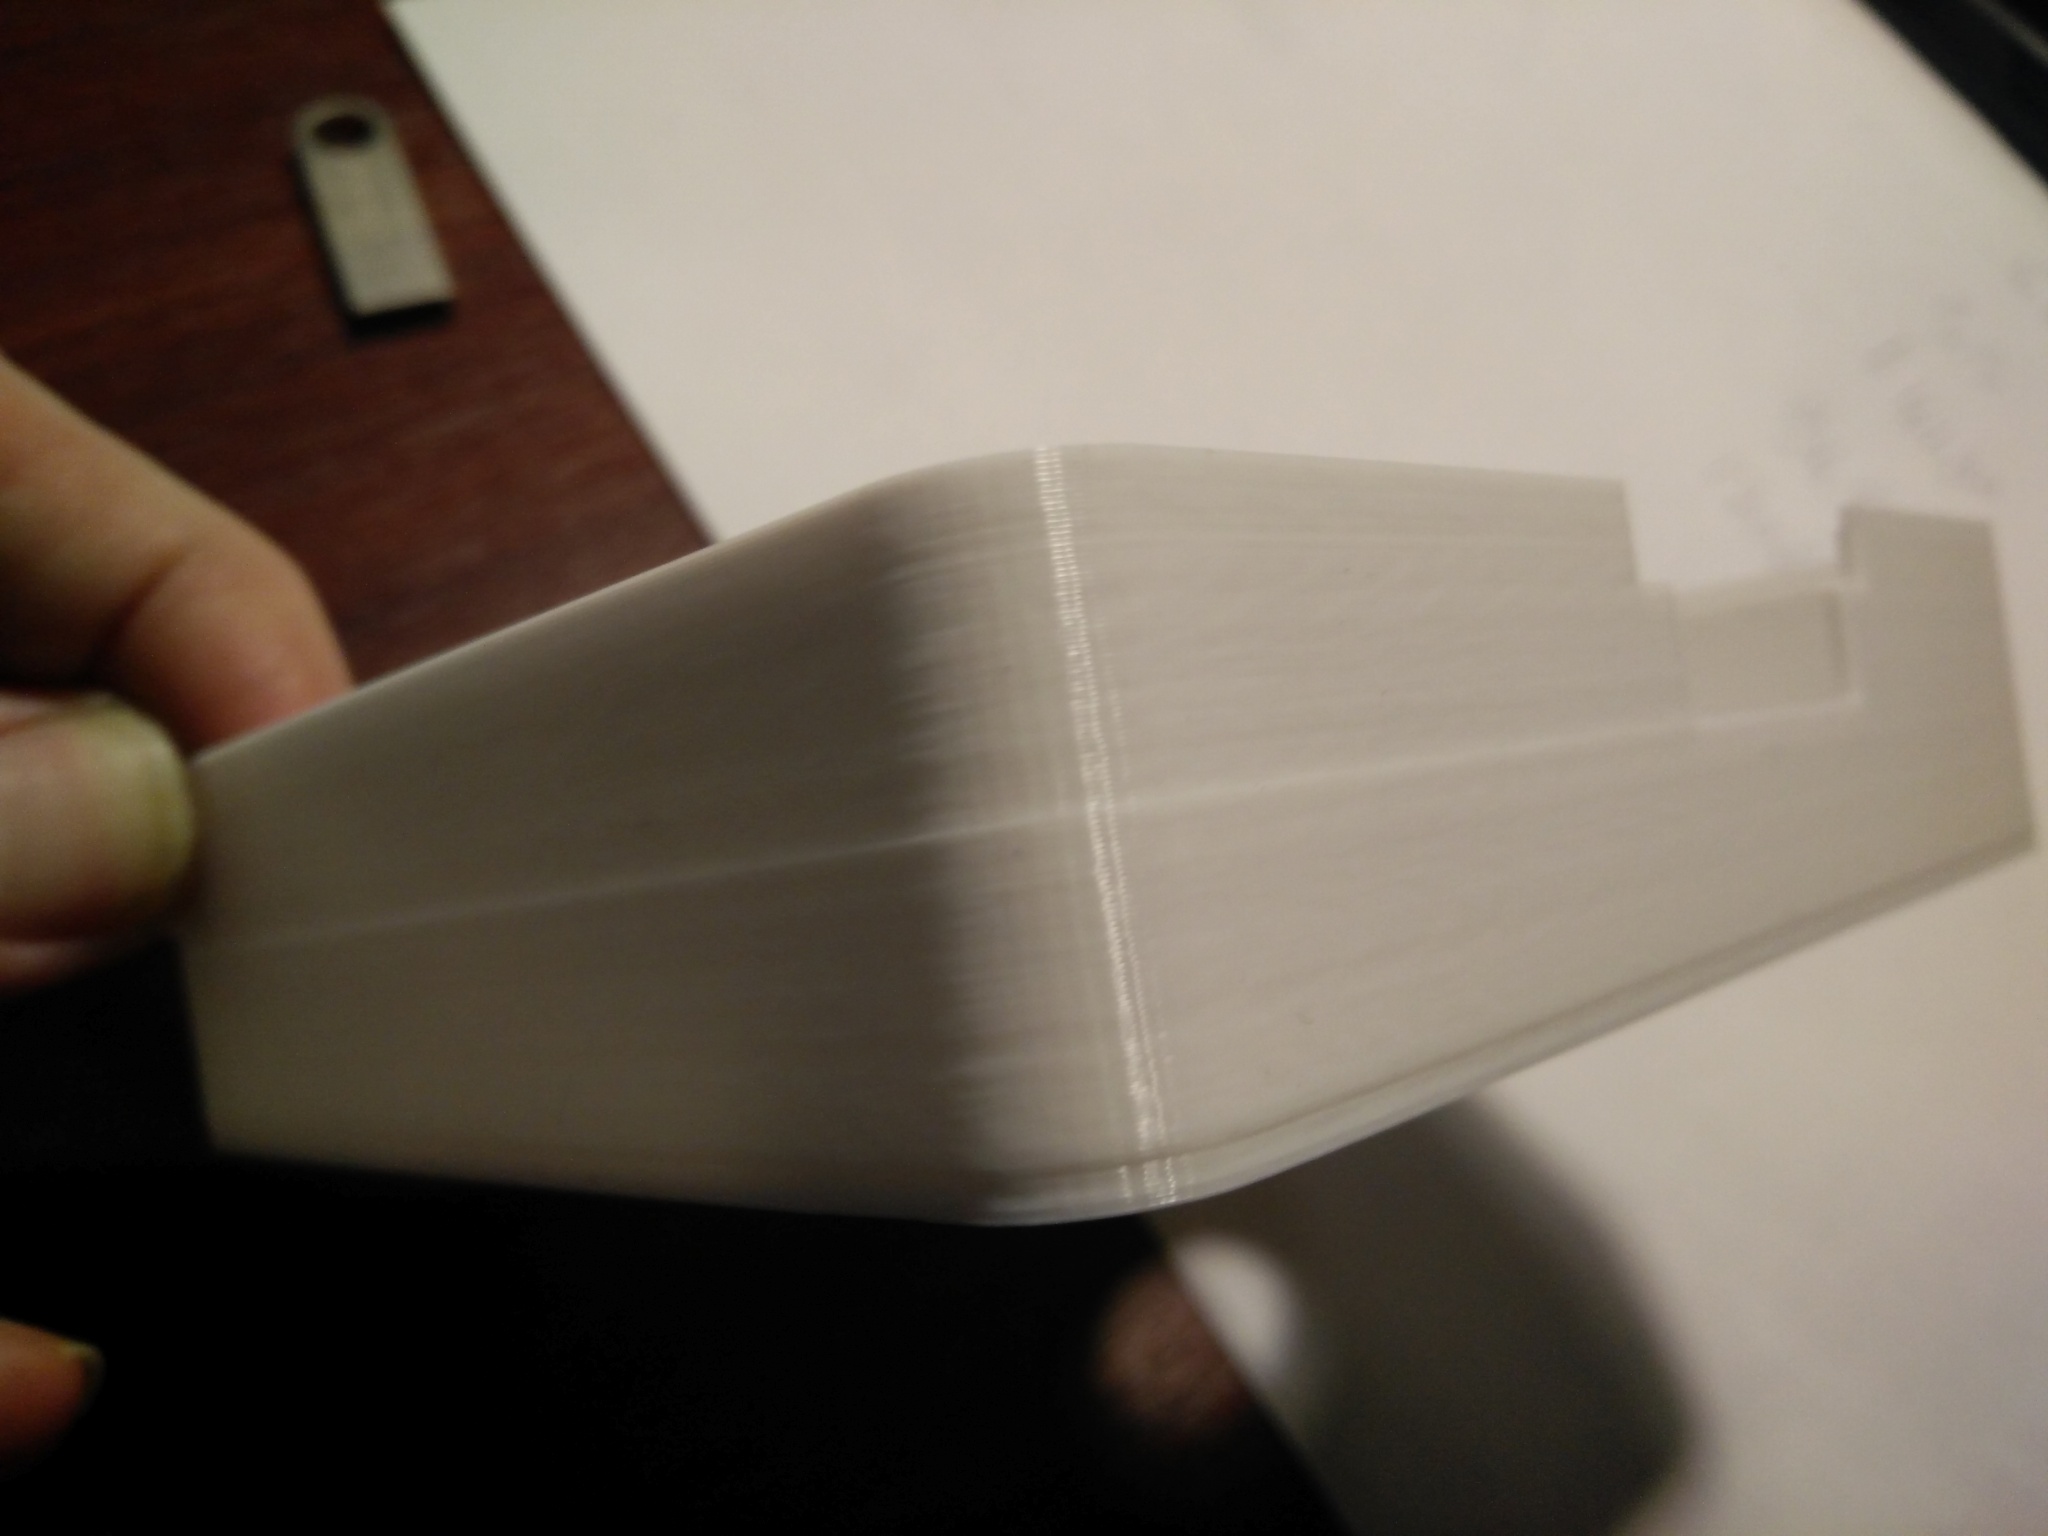
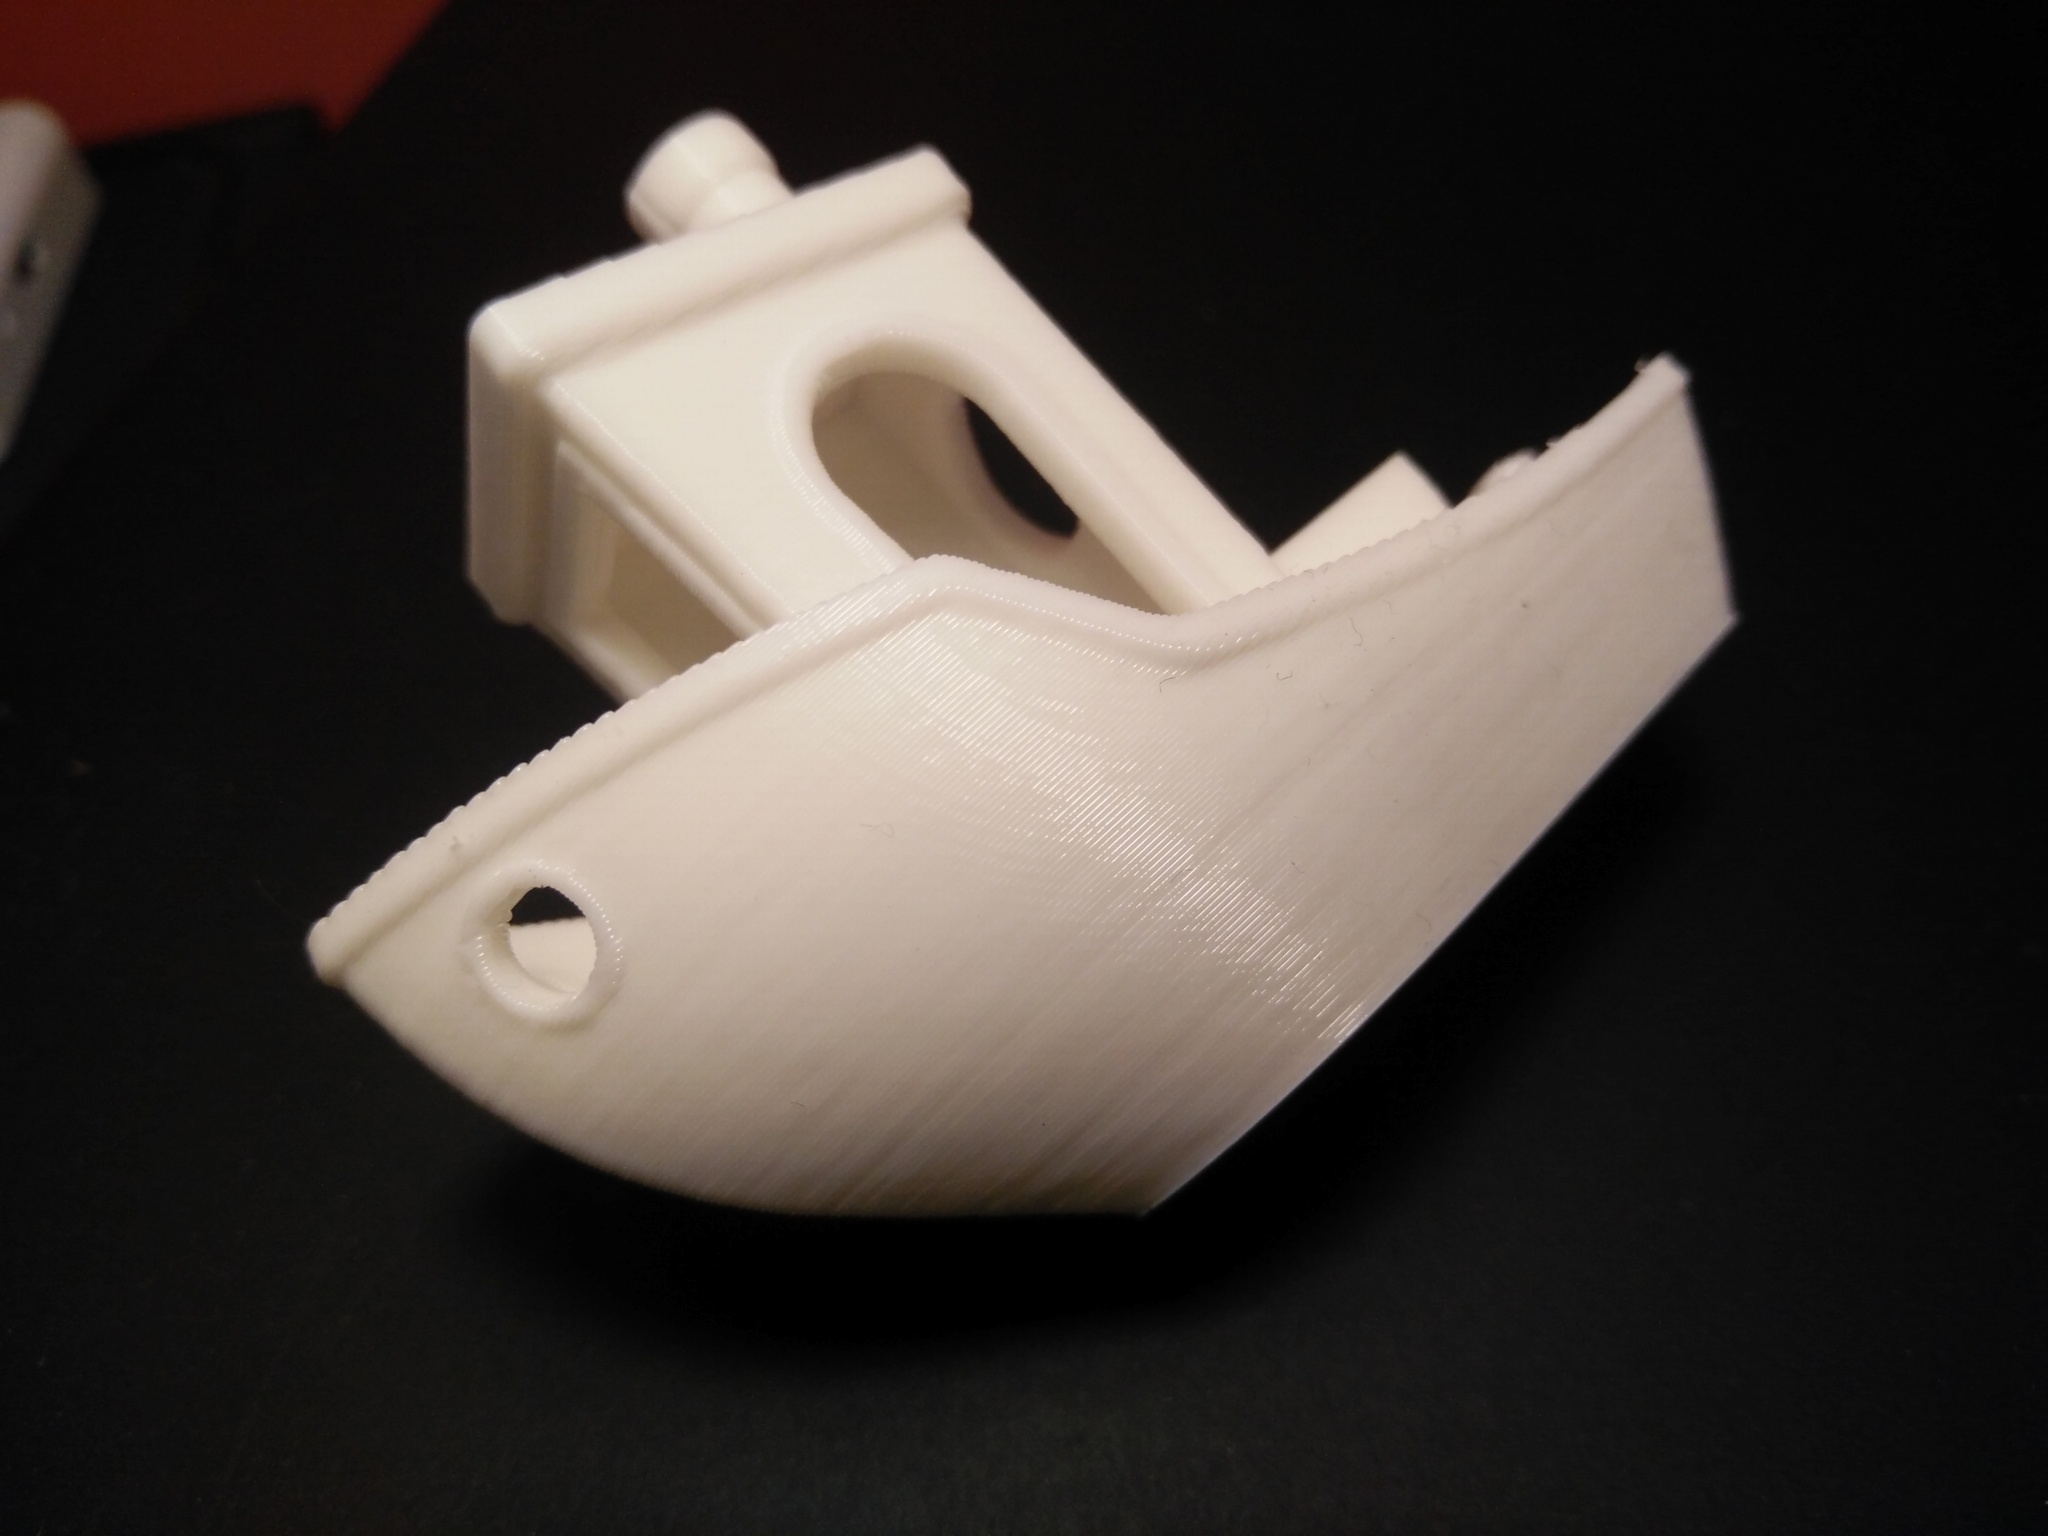
When the first 1,5mm layer is build and it starts with the walls of the case, the first banding starts to appear.
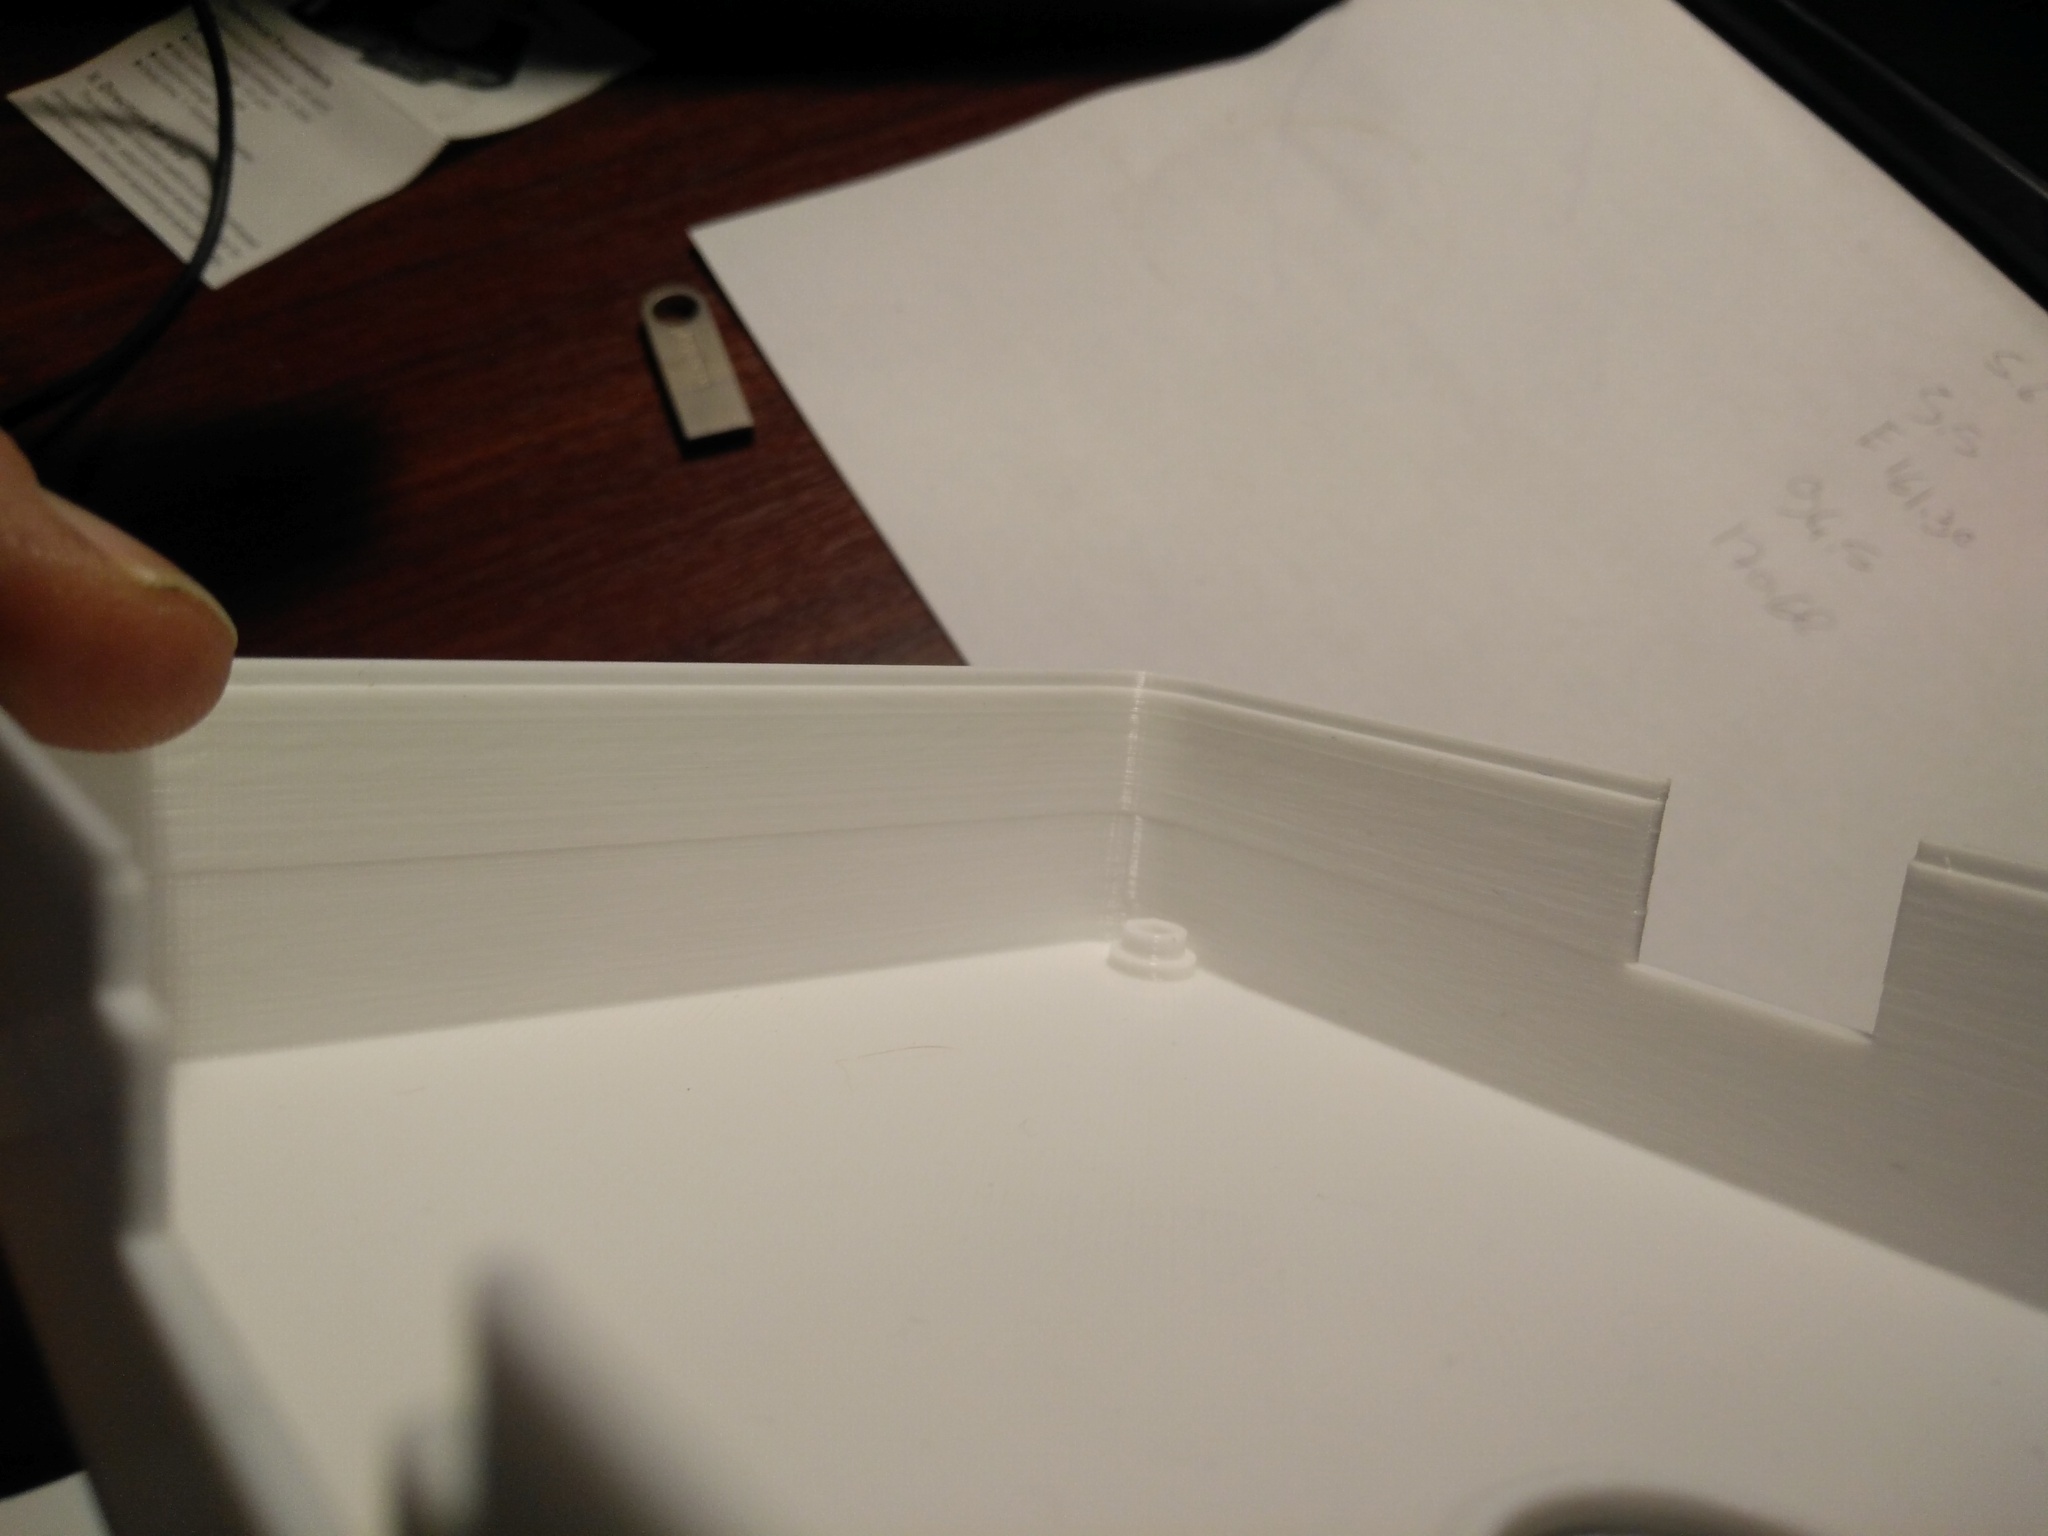
Then it goes well until it reaches the cutouts on the sides, Big grooves start to appear.
On pic2 you can see the grooves are less bad on the corner, this is where the printhead starts a new layer.
Something seems to cause a shift in XY direction, the part is also a tiny little bit skewed and not fully perpandicular.
Prusa support told me to check the belts tension. The Y-belt was indeed too loose but that didn't fix the issue.
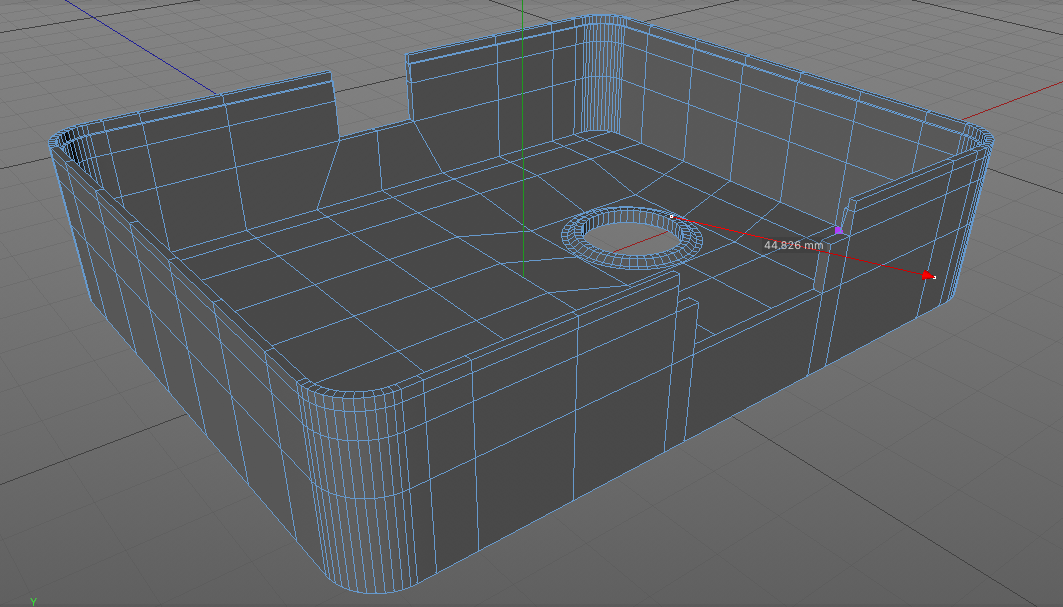
I did all the calibration stuff and I also checked the 3D model but there are no boundary edges or non manifolds.
Anyone have a clue what's going on here?
Re: Ribbing, banding issue
Make sure the little screw (grub screw) on the pulleys of the motors are tight and not slipping. They should be on the flat part of the motor shaft. if it wiggles a bit, it will also cause this. usually one side of the layers will be inset and the opposite will be sticking out at the exact same spot/heights.
Re: Ribbing, banding issue
Thanks for your reply,
I checked the grubs screws and they are tight.
I also made some adjustments on the y-frame and made sure everything is straight and perpendicular.
Calibrated everything, still no luck, still banding 🙁
Think I'm done fiddling around with this Prusa i3 MK2, going for an another brand.
In my opinion it's quite poorly constructed and maybe it just can't perform better than this.
Re: Ribbing, banding issue
There are multiple issues possible. I had a strange one which is usually never mentioned. Maybe you're in the same boat.
Check the following: Let the printer cool down. Hold the print head with your hand. Grab the nozzle with your other hand/finger and try to move it in all directions. If you feel even a little movement, try to understand where is it coming from. There should be no movement at all.
In my case the two plastic head parts had a bigger tolerance. So the whole E3D hotend was not fully tight in place in the plastic enclosure. Even by tightening all the screws, it wasn't enough. So during the big direction changes, it moved a little bit and it was enough to produce same inconsistent lines what you have.
Hope that helps.
Update: Don't give up! Prusa i3 MK2 can perform outstanding well and reliable. I had to learn a lot about this printer and about slicing. But once you're starting understand things, the quality will steady improve even with the same printer.
Going with another brand means to have same/different issues. 3D printing is still nothing simple and require a lot of knowledge, doesn't matter which brand you take.
Often linked posts:
Going small with MMU2
Real Multi Material
My prints on Instagram
Re: Ribbing, banding issue
Thanks for your reply Nikolai,
I checked the hotend but there was no movement, to be sure I tightened the case screw a bit more.
I made some more adjustments to the y frame with a digital calliper, straightened out everything, and tightened every nut and bolt.
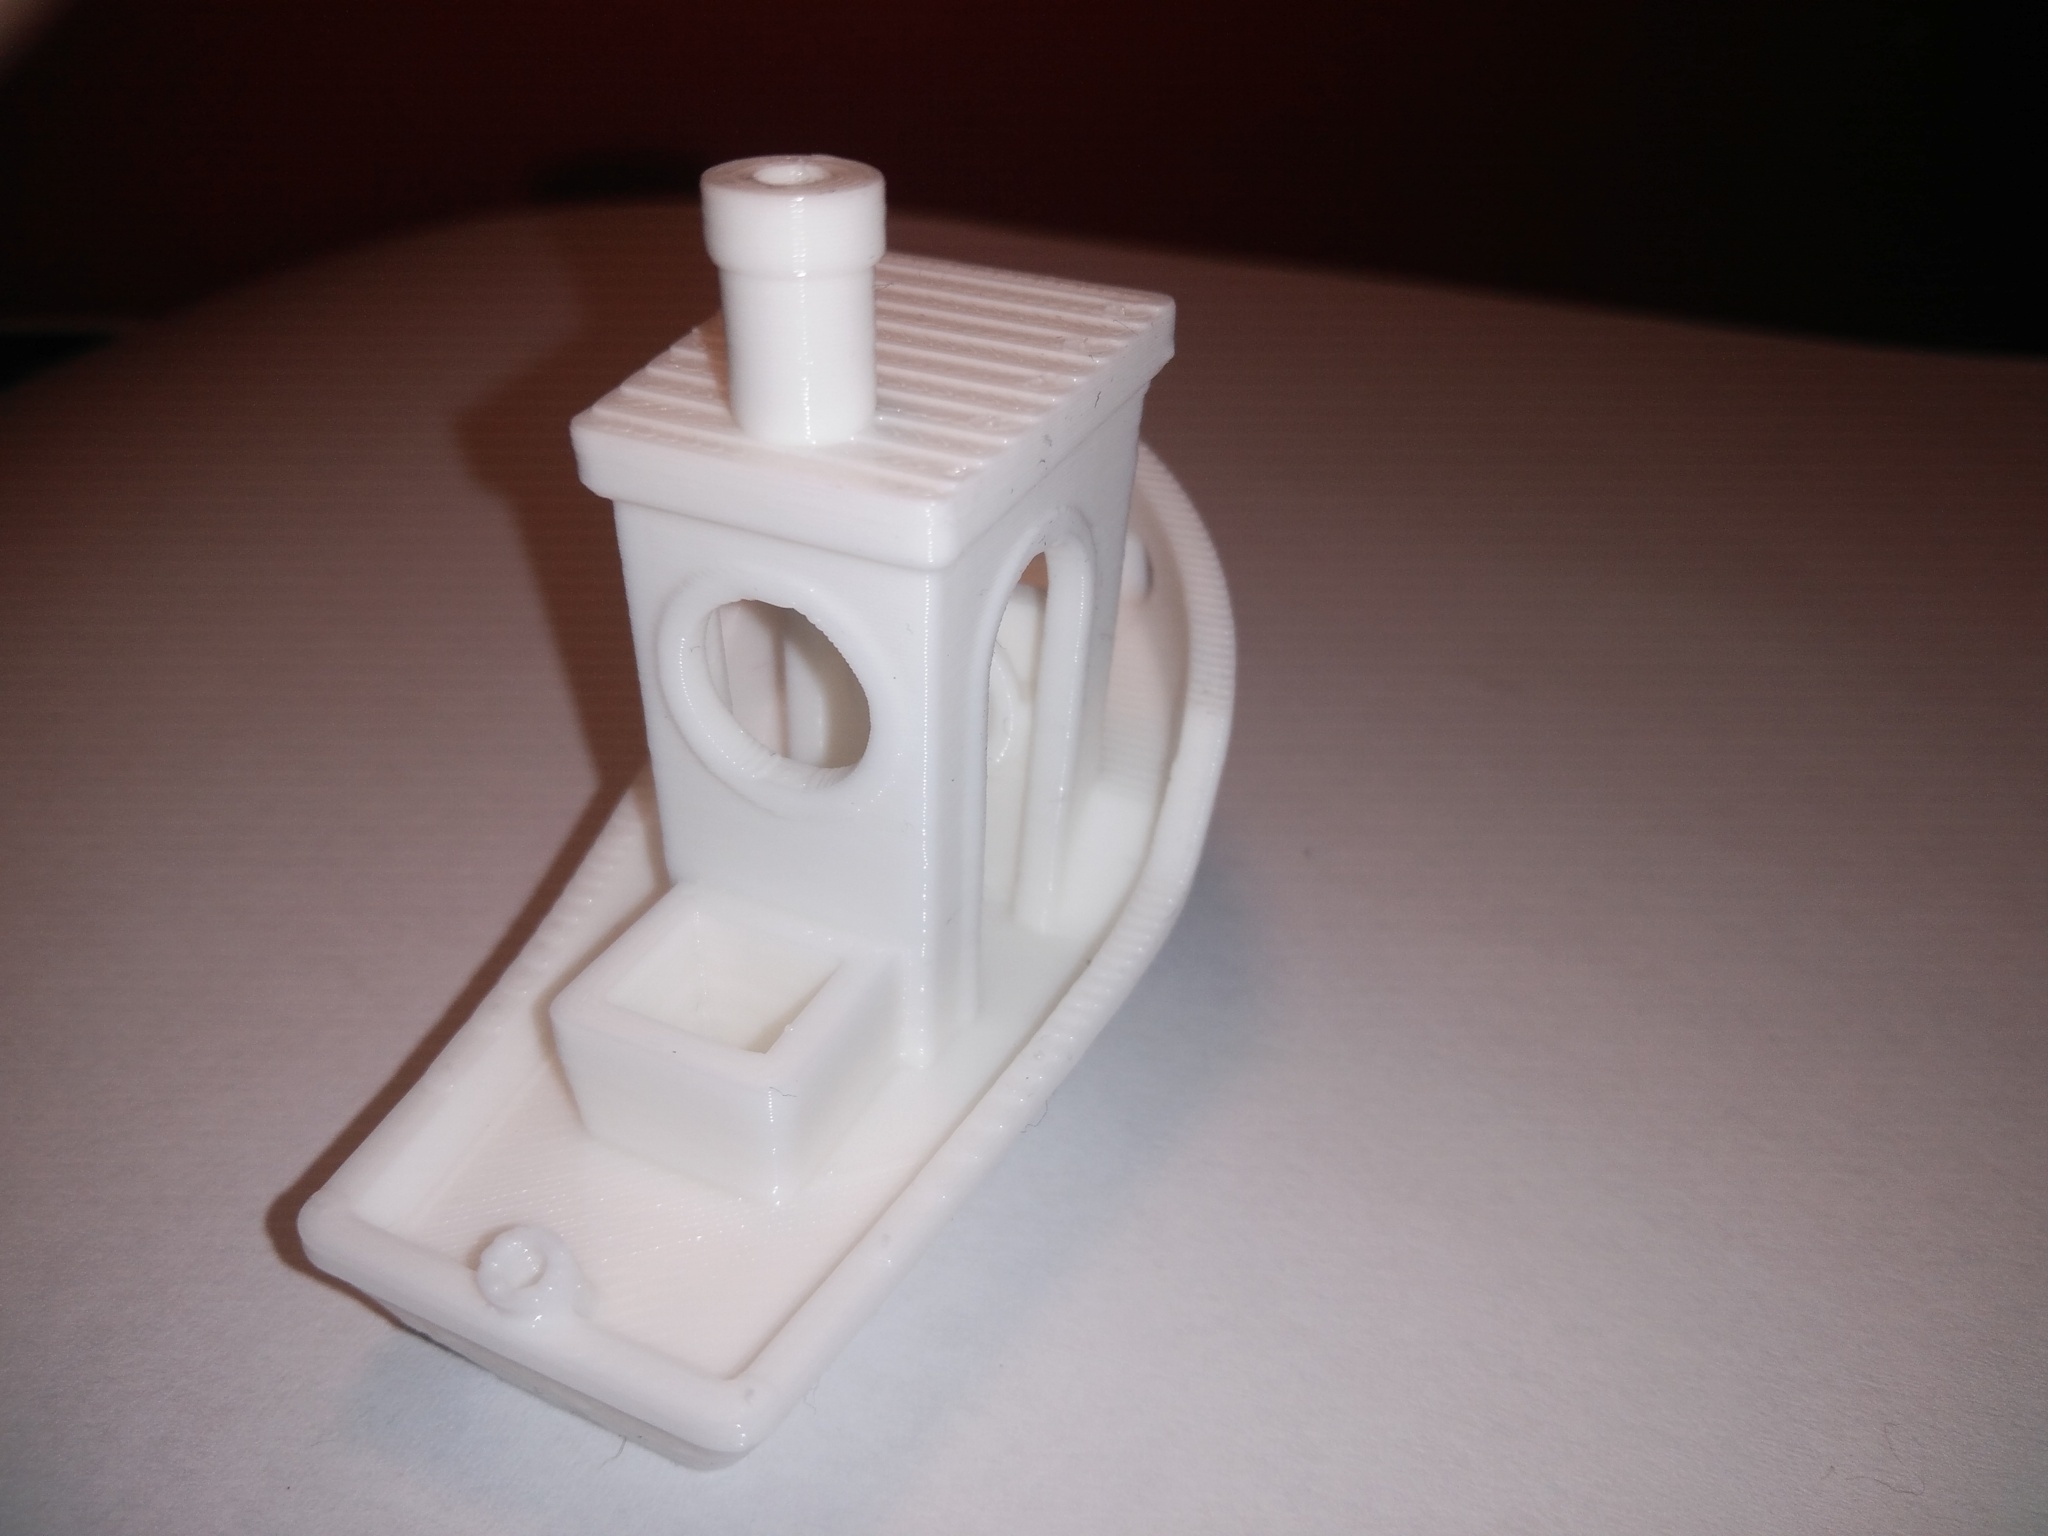
As you can see on picture, this improved the print quite a lot compared to the first one I showed.
Still you can see an inwards edge at the base and an inwards edge when it reaches the cutout of about 0.15mm.
The base edge goes all around the object and the cutout edge occurs only on the left side of the object.
I thought it could be an issue with the 3D model, so I cleaned up the mesh even more.
Really don't know what else I can do to fix this.
Re: Ribbing, banding issue
It almost looks like a layer shift. If you want me to provide the STL file and the desired filament temperature, I can slice it for you. Just to make sure it's not a Slicer/Object issue.
Have you tried to print a benchy?
Often linked posts:
Going small with MMU2
Real Multi Material
My prints on Instagram
Re: Ribbing, banding issue
You need to try another model that's known to work, that's smaller first to see if it's repeatable across everything. a cube preferably the same height would be fine to see if it happens at the same height. then we can figure it out and just get prusa support to fix you up.
both of them moved by the same amount and it's EXACTLY where the hole/slot starts. if that isn't a problem with the model it sure is a coincidence. Look at the model/slice preview in Slic3er and see what it looks like there.... run it through netfabb for good measure. i've seen my share of messed up models. usually they're holes or weird things though.
FYI, even a $10,000 machine can have these problems. 99% of the time they don't but you could be in the 1% with any other printer you pick.
Edit: Other things to check is if there is excess BELT under the bed catching on the idler wheel at the front or back stepper at it's min/max. i know i had to trim mine.... it will feel spongy if it's catching on it.
Re: Ribbing, banding issue
Hi Nikolai,
I didn't print a Benchy yet, but I've just started up one. I'll put up the result here in a couple of hours.
Great that you want to take a look at the stl file, can I email it to you?
Printing temp. PLA 210 degrees. Can you let me know which Slicer and settings you use?
Thanks!
Re: Ribbing, banding issue
Hi Nikolai,
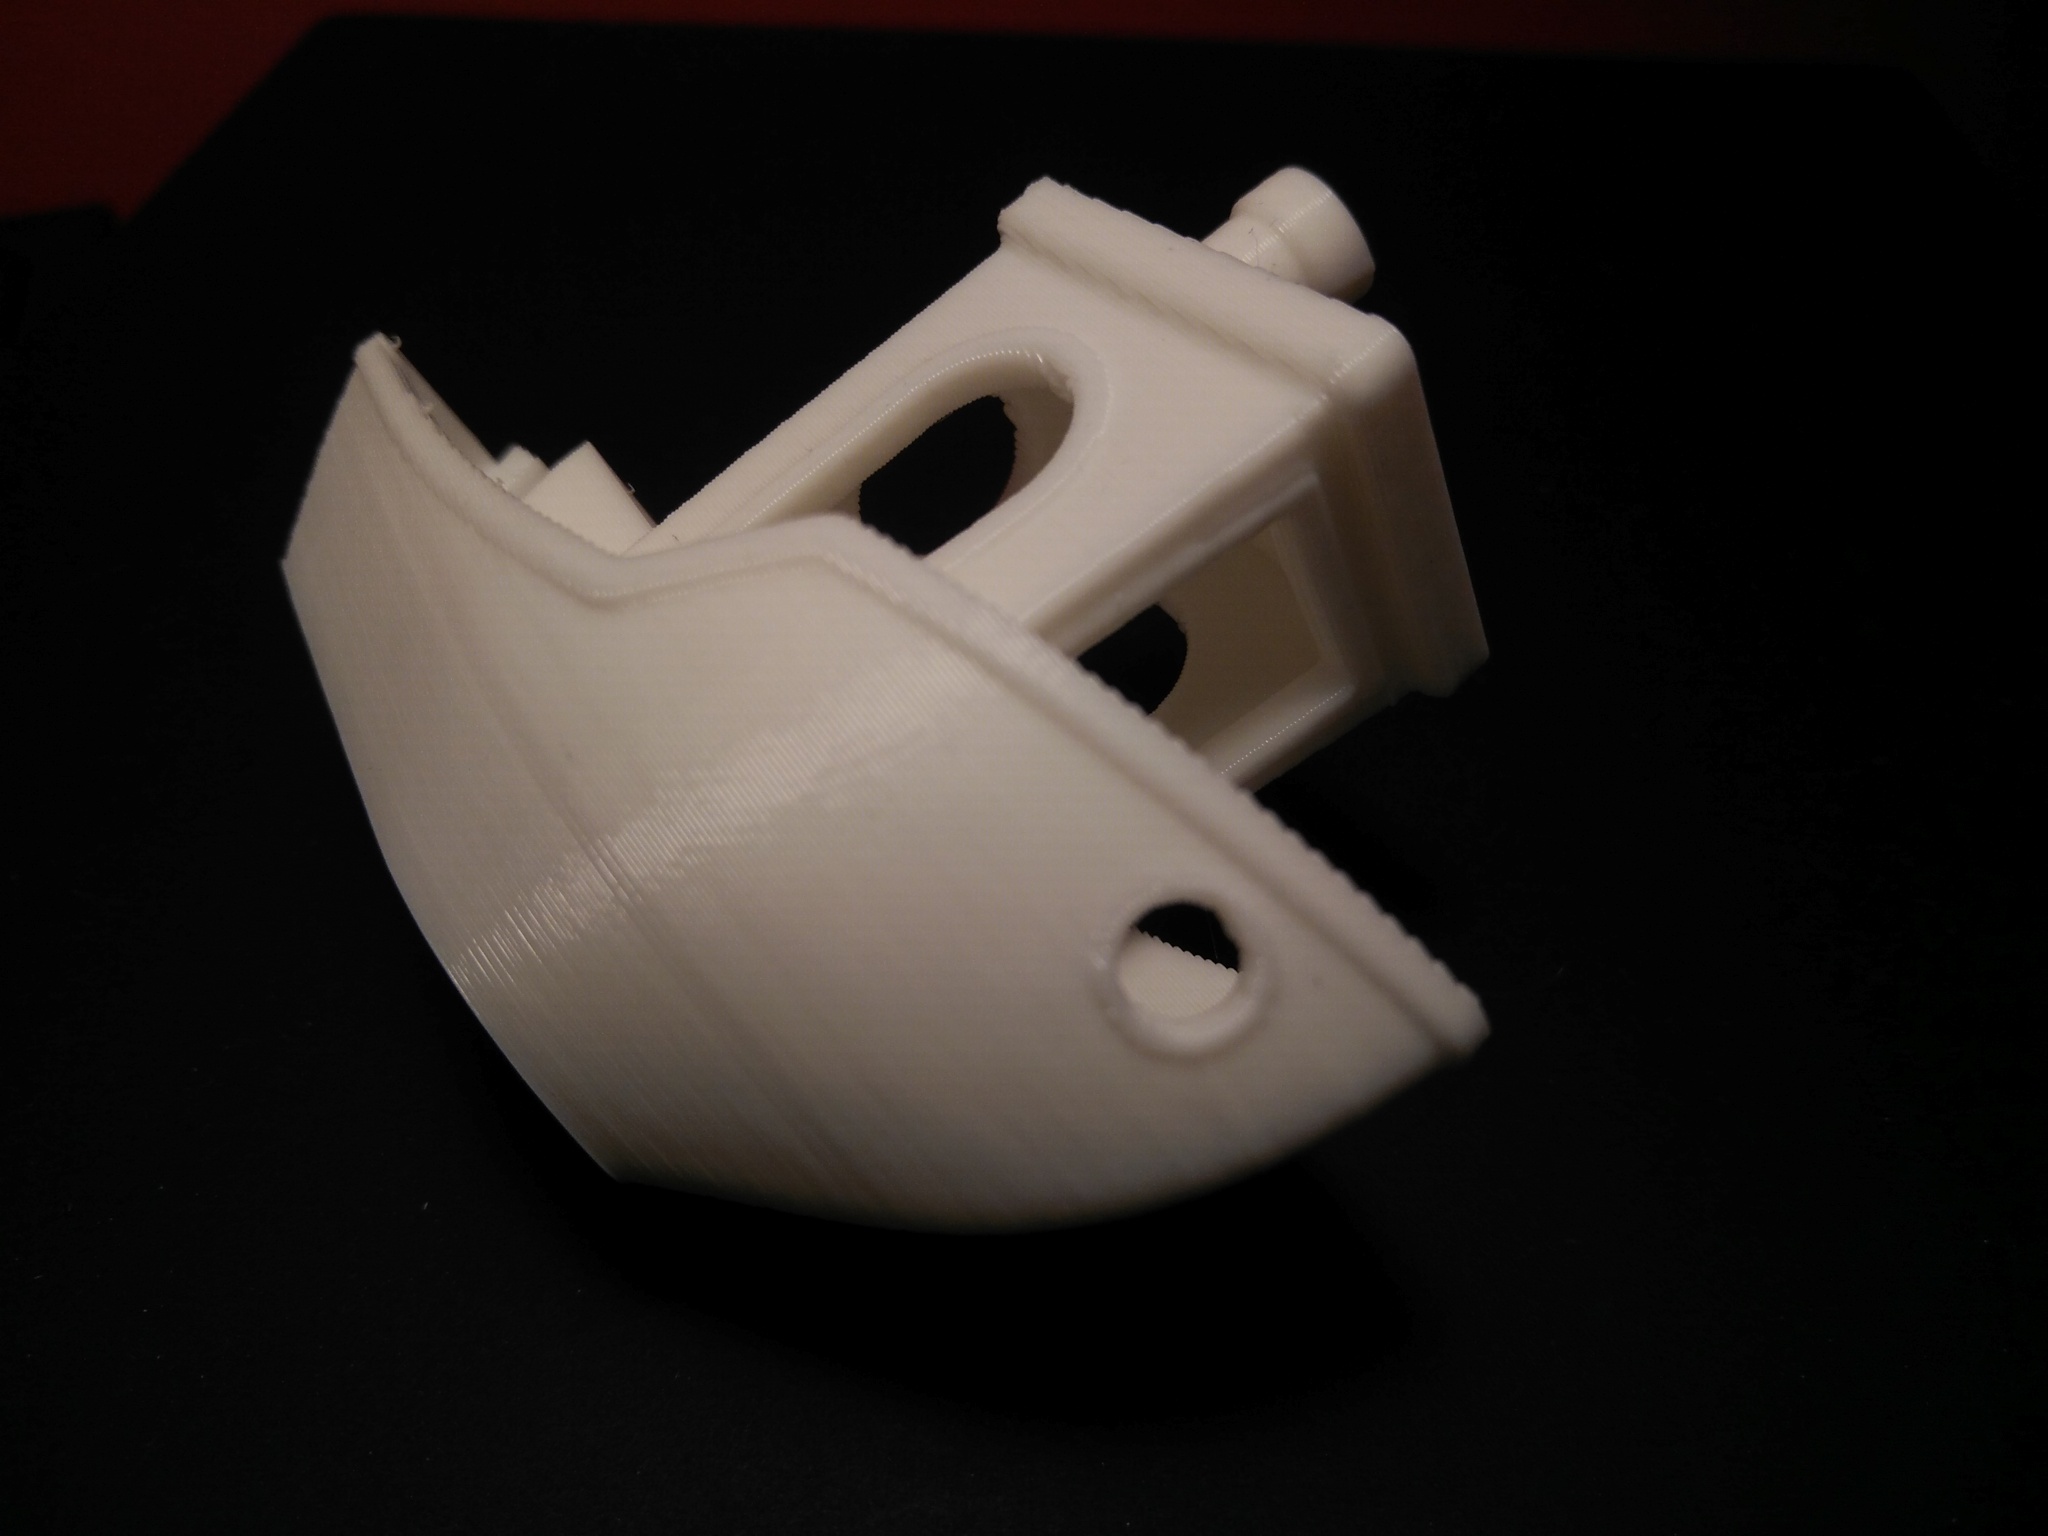
Here is Benchy. Printed with 0.2mm, it came out better than expected but still some banding on the side and a bit rough on the top surfaces.
Re: Ribbing, banding issue
Your benchy looks already pretty good. I don't think the one line has mechanical source. You can prove this by comparing with the other printed objects. If it appears on all models on the same height, then you have to check. My assumption is more towards Sli3er/Filament dial in.
Actually I can see this line on my Slic3r Benchy, too.
Anyway: Your benchy looks a little bit over-extruded. I would suggest to try following things separately:
1. Print with lower extrusion multiplier ( for example: 0.95 , 0.9)
2. Lower the print speed
3. Slice with Cura and print
I'm using Simplify3D. It's pricy but I never regret to buy it. In most cases it just generates a better print out of the box once you dial-in your filemant. You can print my sliced benchy attached and compare to your results. It's for the Makergeeks PLA filament, but you should see the difference.
Often linked posts:
Going small with MMU2
Real Multi Material
My prints on Instagram
Re: Ribbing, banding issue
Yes I also think its not a mechanical thing since it appears on different heights.
The edge on Benchy appears exactly at the height of the boat deck I noticed.
I will try it with Simplify3D and tune some stuff. Where did you get the Simplify3D fff settings for the i3mk2?
Thanks for your advice again!
Re: Ribbing, banding issue
Original S3D settings are from this forum. After that I modified them all the time till I got the perfect settings for me.
Small tweaking is based on the model but overall I'm happy with a slow printing. It's not that loud and reliable with ABS and PLA. Try my gcode Benchy. If you like it, I can post the screen shots from all the settings window.
Often linked posts:
Going small with MMU2
Real Multi Material
My prints on Instagram
Re: Ribbing, banding issue
Did you calculate your extrusion multiplier and measured your filament diameter? If not, please do so using this method: starts at 3:00.
Additionaly you should calibrate your first layer like so:
https://shop.prusa3d.com/forum/prusa-i3-kit-building-calibrating-first-print-main-f6/life-adjust-z-my-way-t2981.html
I can say that the quality you are achieving is definitely not the best the prusa can do.
Cheers, Markus