Re: Obtaining the perfect final print
Hi Rob,
ABS is very sensitive to drafts, and needs a warm environment in which to pint well,
I believe that when prusa used ABS a lot, they kept the printer room at about 30Centigrade
lots of people build an enclosure to provide warm draft free operating conditions
others find that a large cardboard box suffices
I didn't have an enclosure, and had warping problems...
I don't use ABS because it aggravates my chest.
regards Joan
I try to make safe suggestions,You should understand the context and ensure you are happy that they are safe before attempting to apply my suggestions, what you do, is YOUR responsibility.Location Halifax UK
Re: Obtaining the perfect final print
Fixed the pic.
Thanks, but your image upload didn't appear to work; a broken picture link is shown. Could you try again?
and miscellaneous other tech projects
He is intelligent, but not experienced. His pattern indicates two dimensional thinking. -- Spock in Star Trek: The Wrath of Khan Unfortunately,…
Re: Obtaining the perfect final print
@bobstro: thanks very much for doing that, the registration and lack of ringing is certainly better than I can achieve. What settings did you use?
@joan: understood, my printer is already mounted in a cupboard, I might try turning the extractor fan off for the ASA print.
Re: Obtaining the perfect final print
I'll upload a Slic3r profile tomorrow. On the road today! I should point out that I'm printing using PLA to see what the printer can do. I have no experience with ABS, so you may have altogether different issues.
@bobstro: thanks very much for doing that, the registration and lack of ringing is certainly better than I can achieve. What settings did you use?
and miscellaneous other tech projects
He is intelligent, but not experienced. His pattern indicates two dimensional thinking. -- Spock in Star Trek: The Wrath of Khan Unfortunately,…
Re: Obtaining the perfect final print
[...] What settings did you use?
I've attached a .3MF file that contains the part and slicer settings I used for Slic3rPE. Do keep in mind I'm using a MK3, but most settings should work well on a MK2.
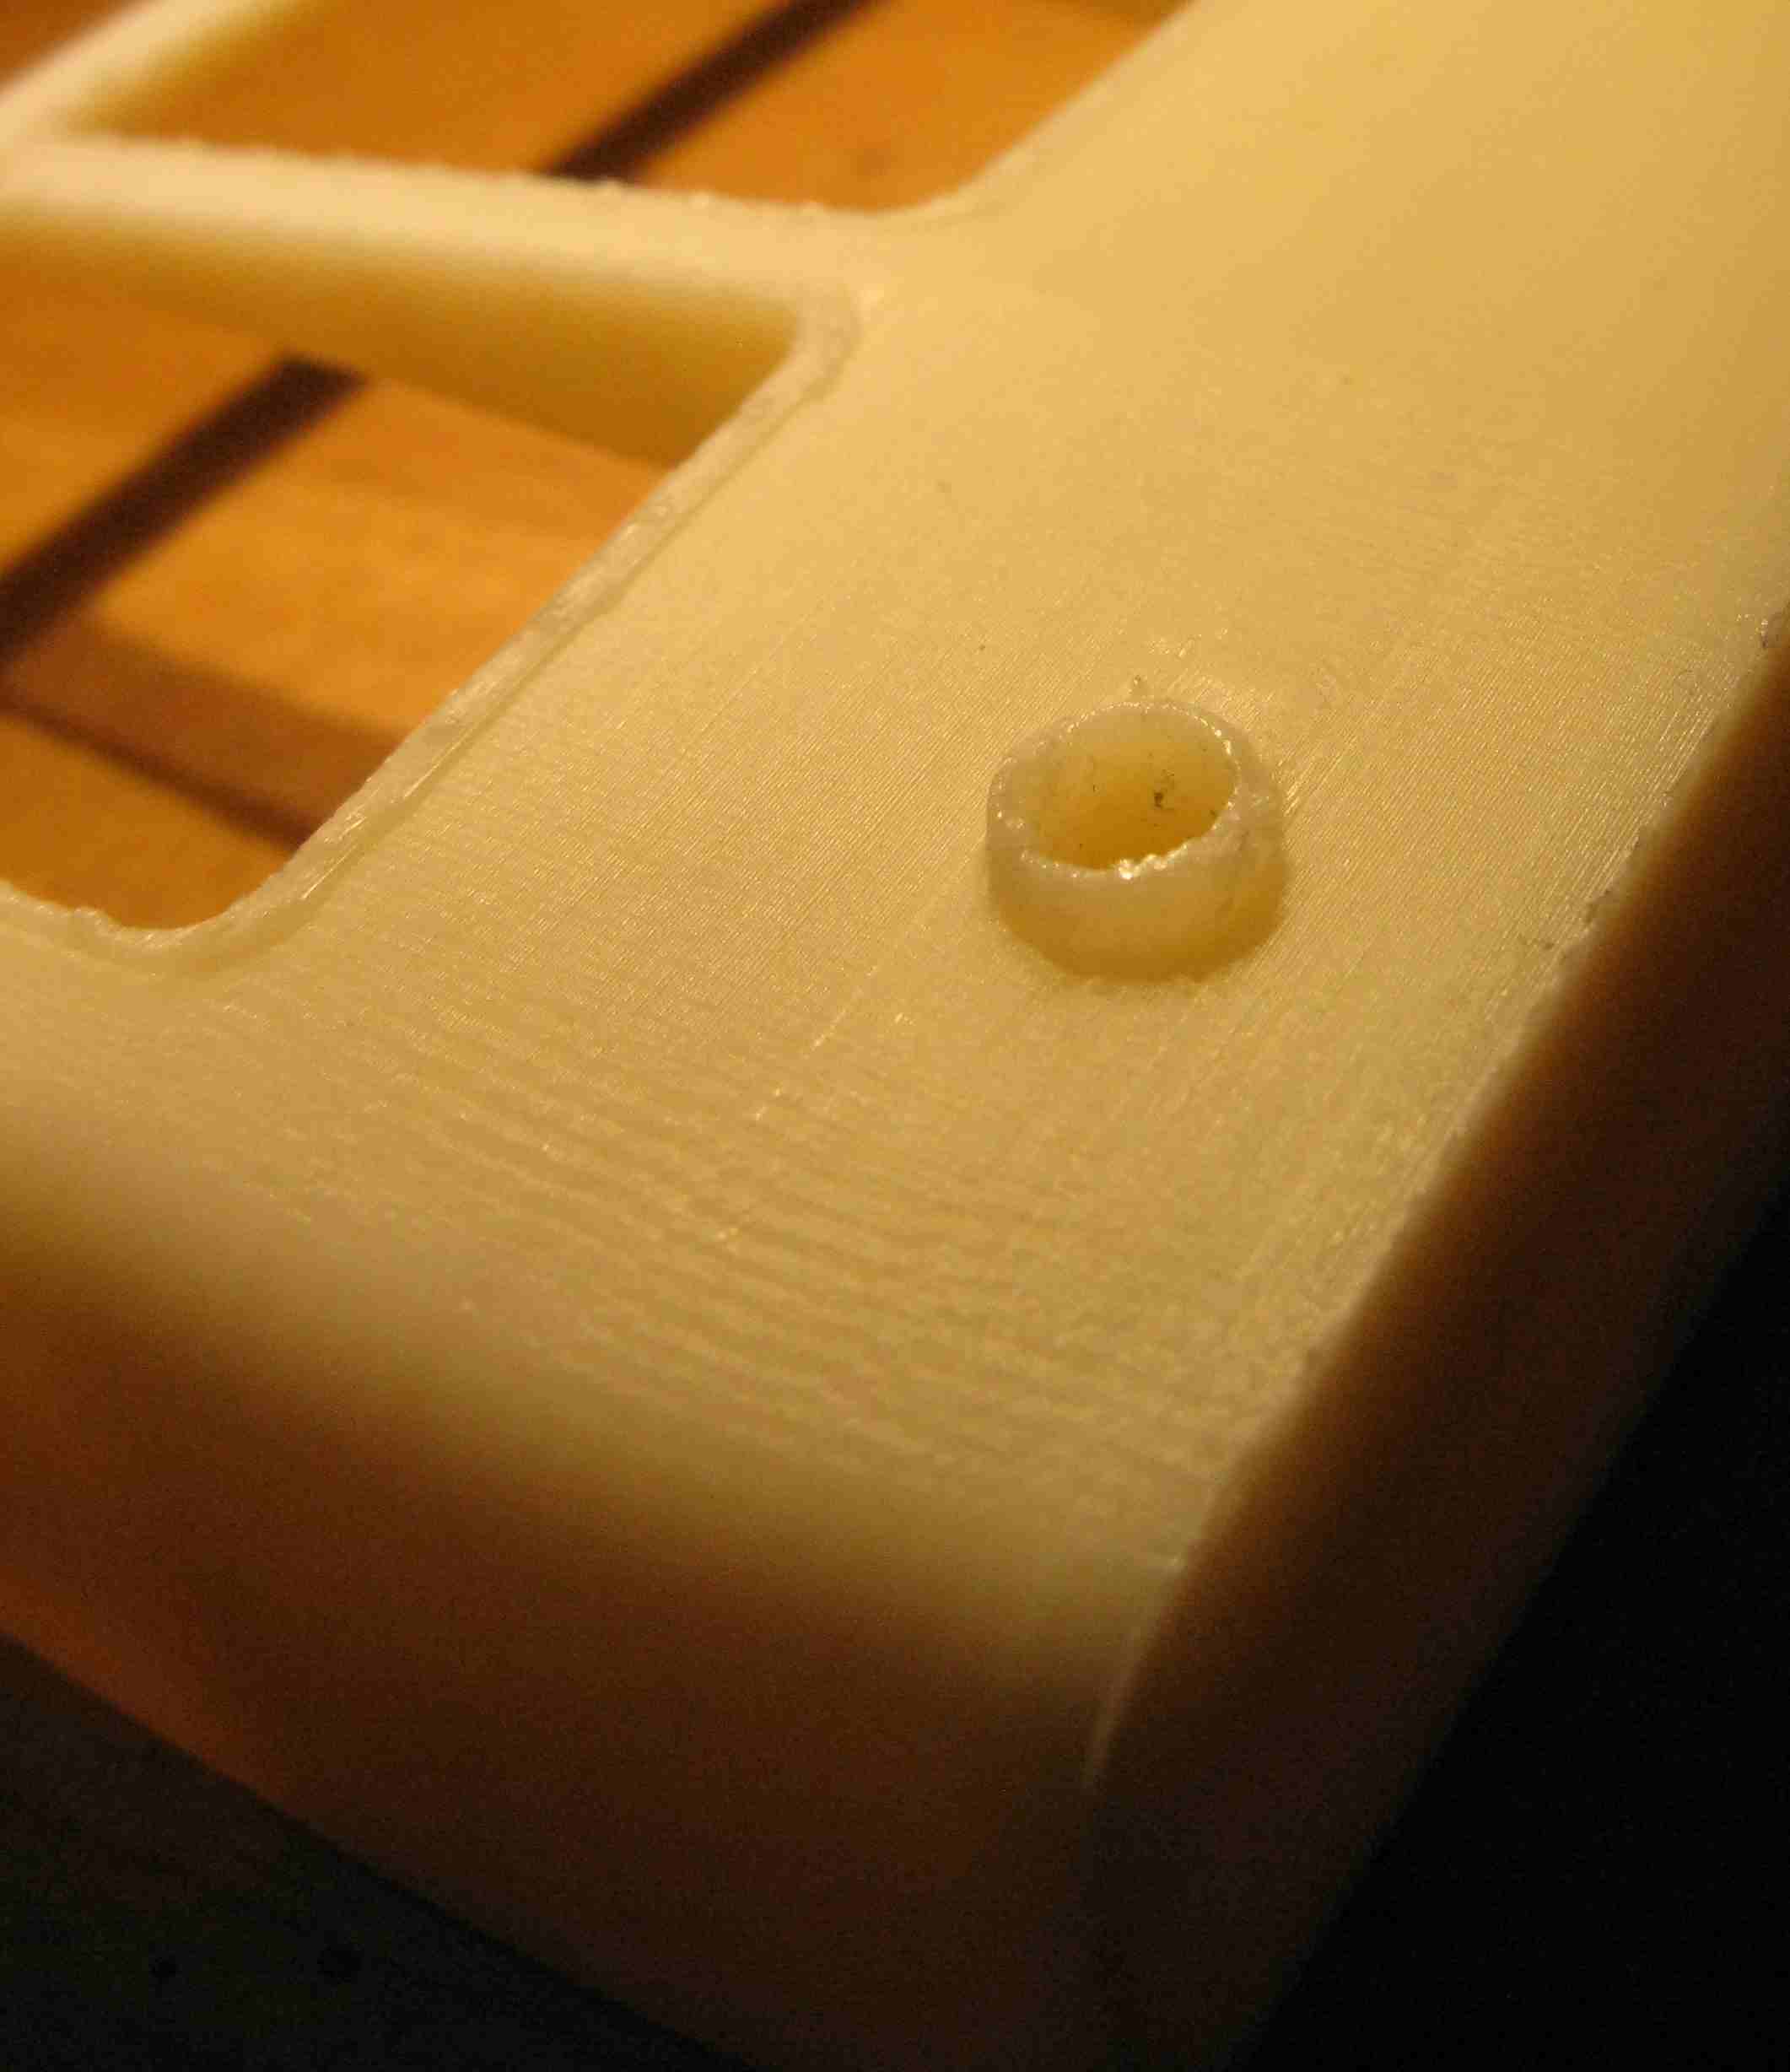
Here's a better picture after a little cleanup with a deburring tool:

The top of the window frame is a little rough as a result of the sagging, but it cleaned up rather well. I'm not sure how fine of a finish you're after. Here's what I'm seeing in Slic3r preview:

Those little boxy shapes at the top and bottom of the light hold are part of the print apparently, so what I thought was a defect in the print is actually pretty close. Not sure if those are really supposed to be there though!
and miscellaneous other tech projects
He is intelligent, but not experienced. His pattern indicates two dimensional thinking. -- Spock in Star Trek: The Wrath of Khan Unfortunately,…
Re: Obtaining the perfect final print
That's really interesting, many thanks, and a very nice picture. You are definitely achieving a better result than I am, so I will consider the upgrade to a MK3.
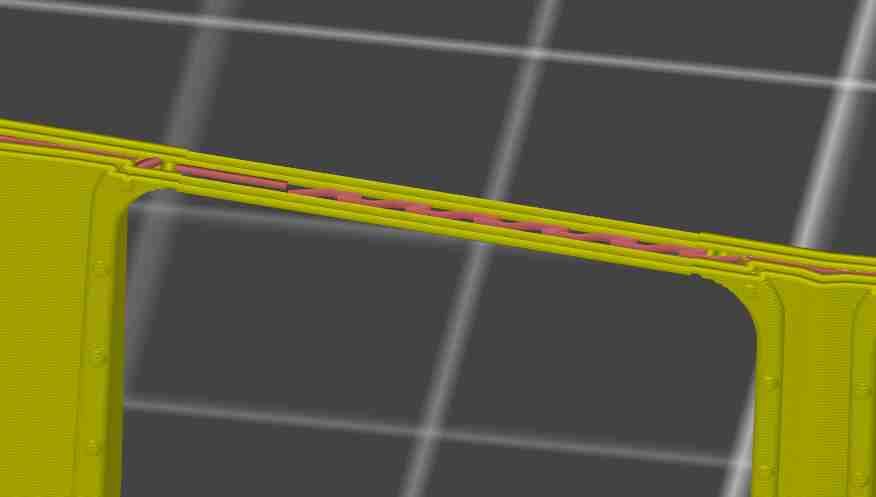
On the defects at the top and bottom of the hole, those are very strange. I don't see them on my sliced view (0.10 mm height):
This is with Slic3rPE-1.41.1-rc+win64-full-201810051336.
Re: Obtaining the perfect final print
I wouldn't think you need to upgrade to improve your finish results, but I'm no expert with the Mk2.
That's really interesting, many thanks, and a very nice picture. You are definitely achieving a better result than I am, so I will consider the upgrade to a MK3.
On the defects at the top and bottom of the hole, those are very strange. I don't see them on my sliced view (0.10 mm height):
I'll play a bit more with preview mode to see if I can spot where they're coming from. They don't show up until after slicing. I'll try another slicer to see what happens.
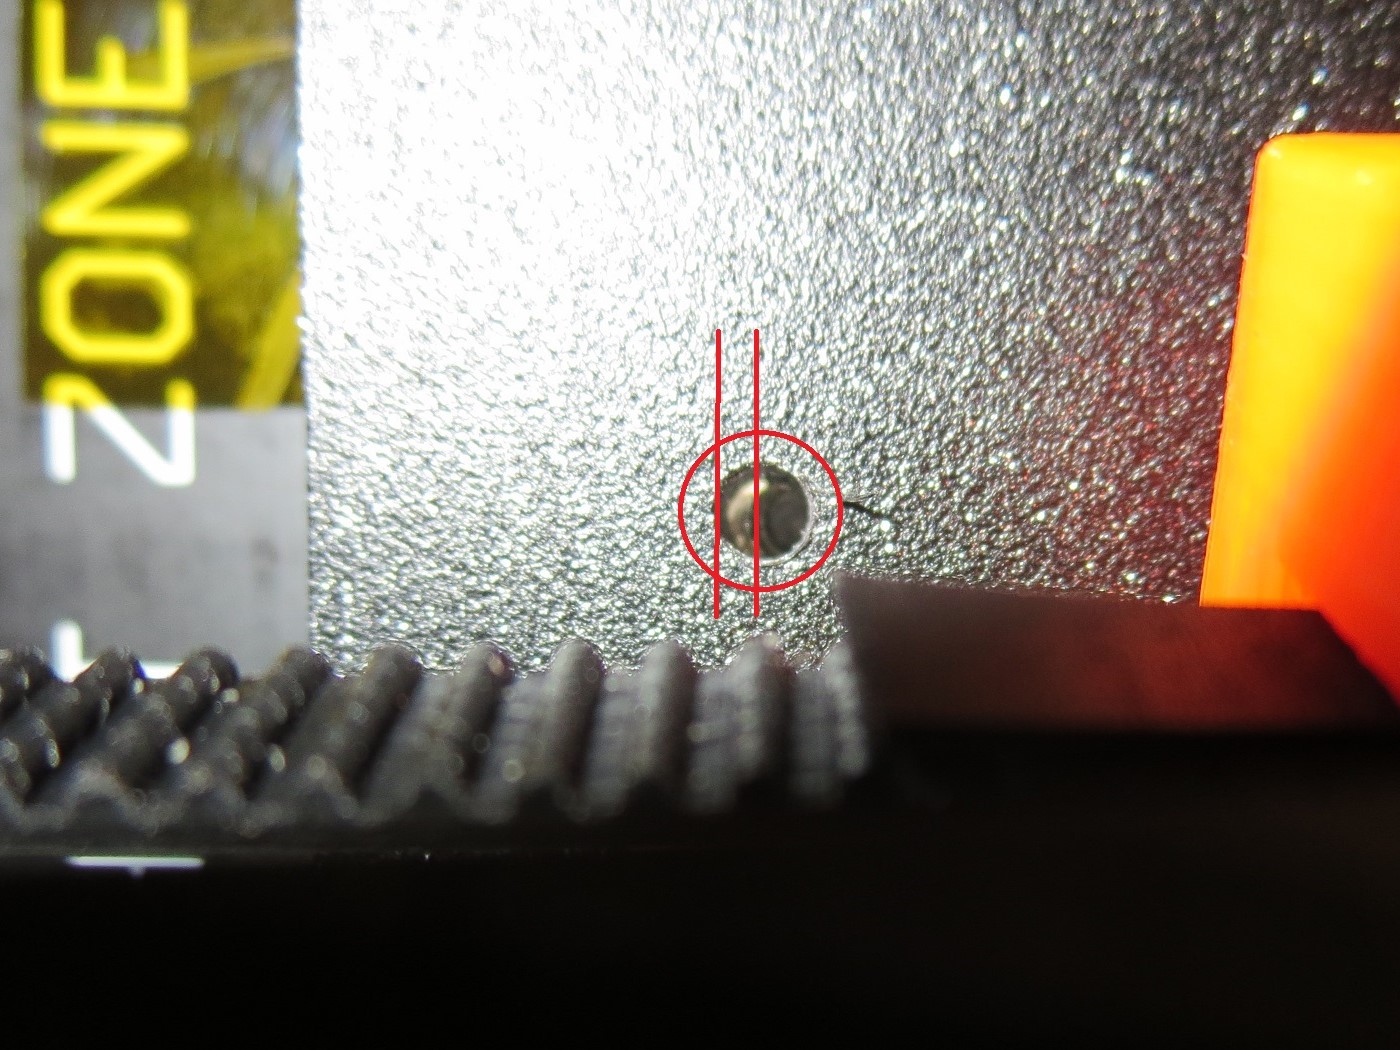
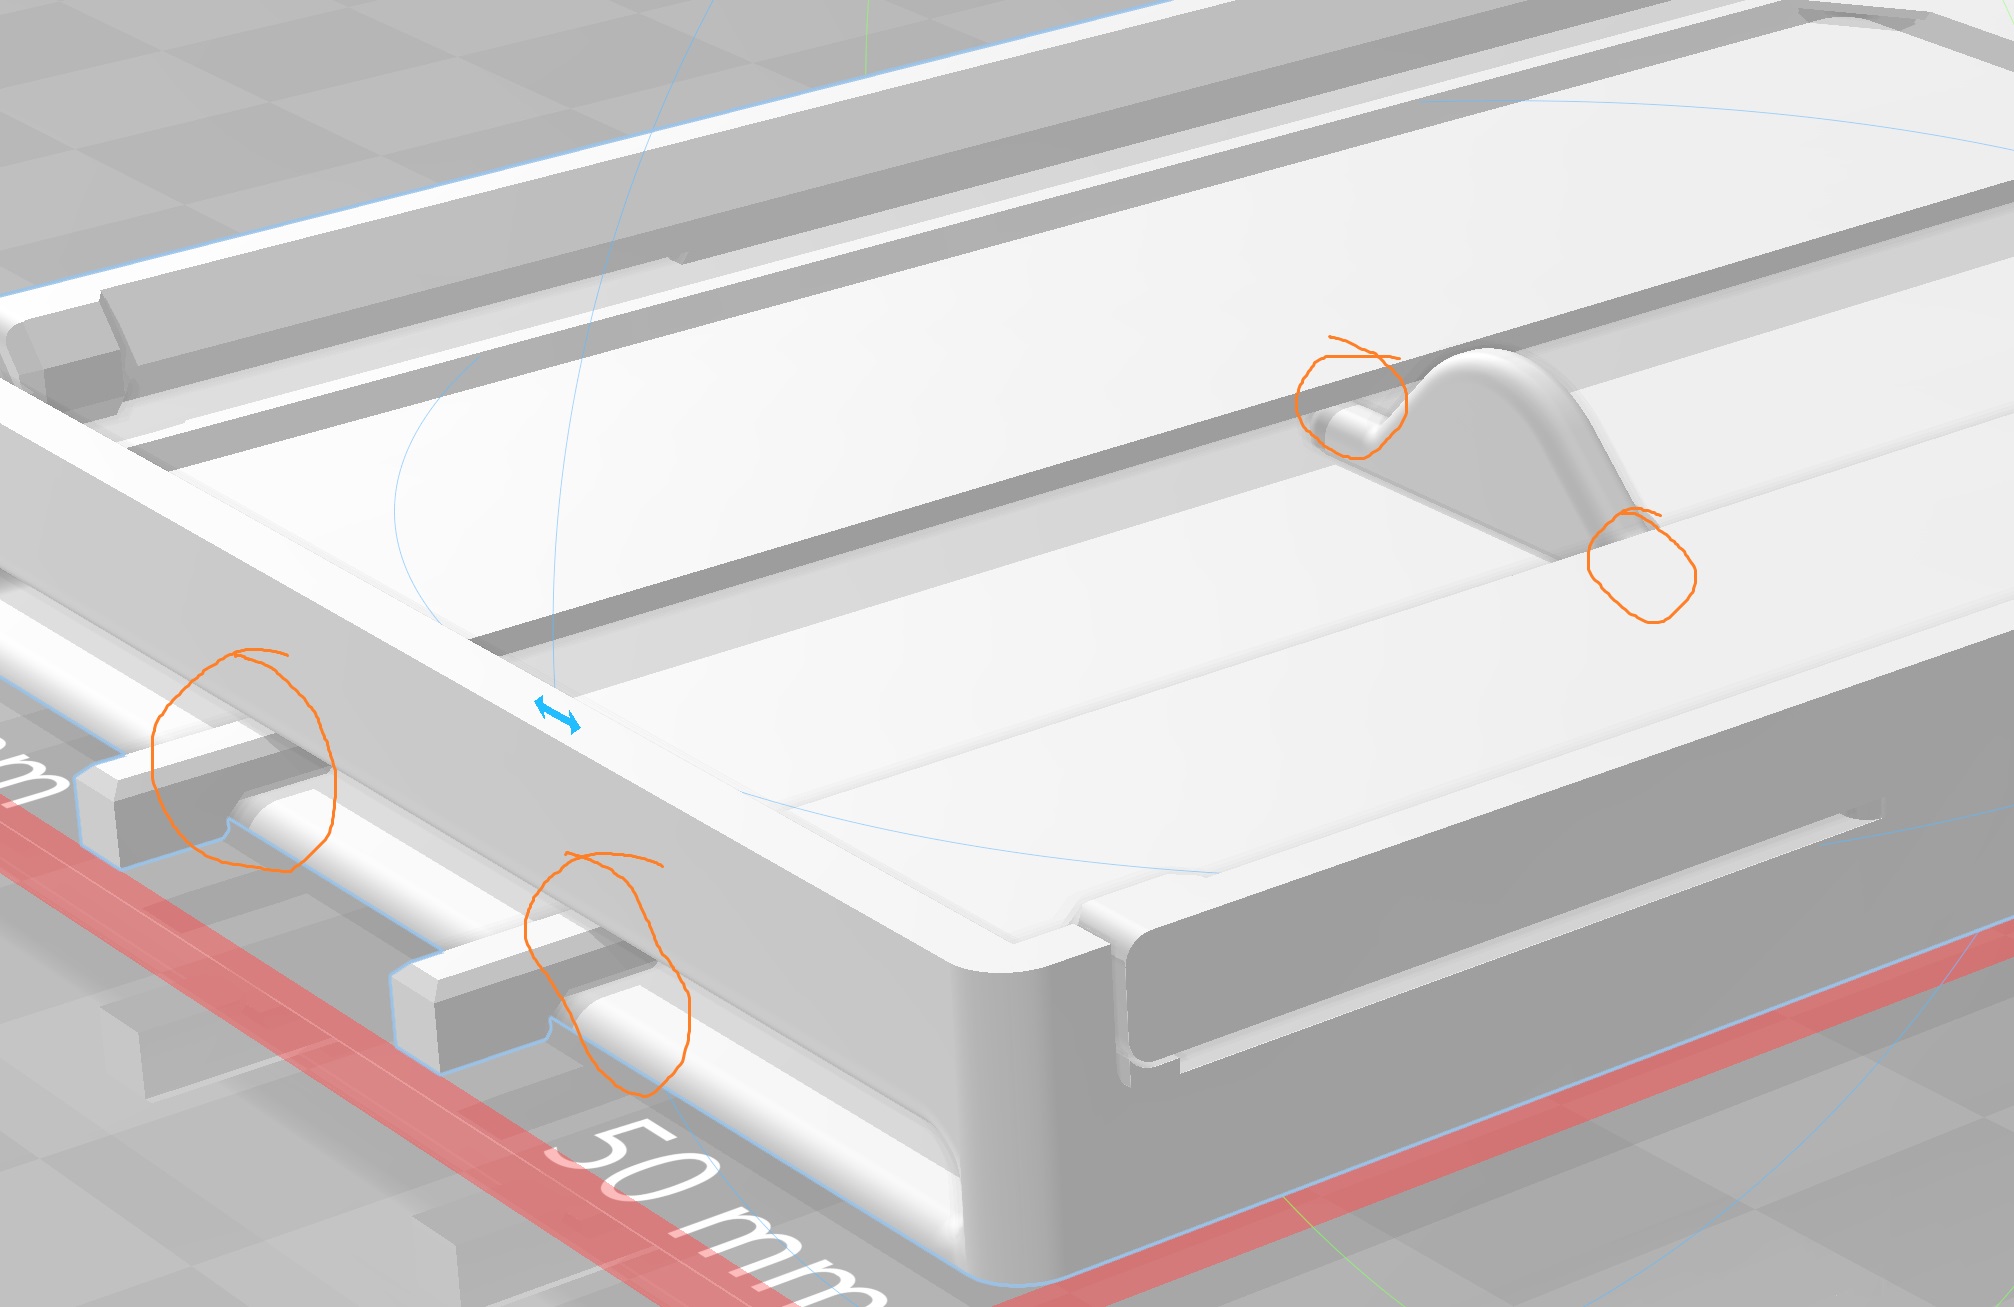
I was having a hard time with the bridging at the top of the windows. I can get very good bridging over that same distance on other models, so I took a look in Slic3r's preview mode:

It looks like there's a slight angle on the right side of the window frame that causes the slicer to try to print part of the frame as a wide overhang which will have no chance of bridging successfully. That accounts for the couple of dangly strings I always got at the top right of the frame. If you look at the bottom of the window frame, you can see that it also tilts the same direction. You could possibly rotate the part or the window slightly to reduce this problem.
Did you design the part yourself? Any chance you could clean it up in CAD?
and miscellaneous other tech projects
He is intelligent, but not experienced. His pattern indicates two dimensional thinking. -- Spock in Star Trek: The Wrath of Khan Unfortunately,…
Re: Obtaining the perfect final print
The MK3 has, as far as I can tell, higher resolution stepper motors, which might help, and the additional advantage of being a bit quieter (my printer is up in my loft and is often left to print overnight, causing occasional complaint).
The object is of my own design, so bridge now fixed:
Just to be clear, I assume you aren't saying that you can leap such a large bridge without a support structure?
Re: Obtaining the perfect final print
It's not 100% perfect, but you can get a very good result:
[...] Just to be clear, I assume you aren't saying that you can leap such a large bridge without a support structure?

That's the Mk3 using pretty basic PLA settings at 0.10mm layer heights with a 0.40mm nozzle with no supports. It's pretty amazing to watch it print the bridges up close. They're rough on the underside, but don't sag much over that 50mm span. If you send a link to the updated STL, I'll give 'er a go!
and miscellaneous other tech projects
He is intelligent, but not experienced. His pattern indicates two dimensional thinking. -- Spock in Star Trek: The Wrath of Khan Unfortunately,…
Re: Obtaining the perfect final print
Really? I'd just kinda assumed support structures would be necessary. Impressive.
Thanks for your generous offer to give the revised STL a spin, here it is: https://1drv.ms/u/s!AqUHa_qo4gdB8gozTpABeE8VlG4Z .
Re: Obtaining the perfect final print
FYI, Joan was quite right: the indiscriminate nature of acetone vapour smoothing is too much for my small and detailed prints:
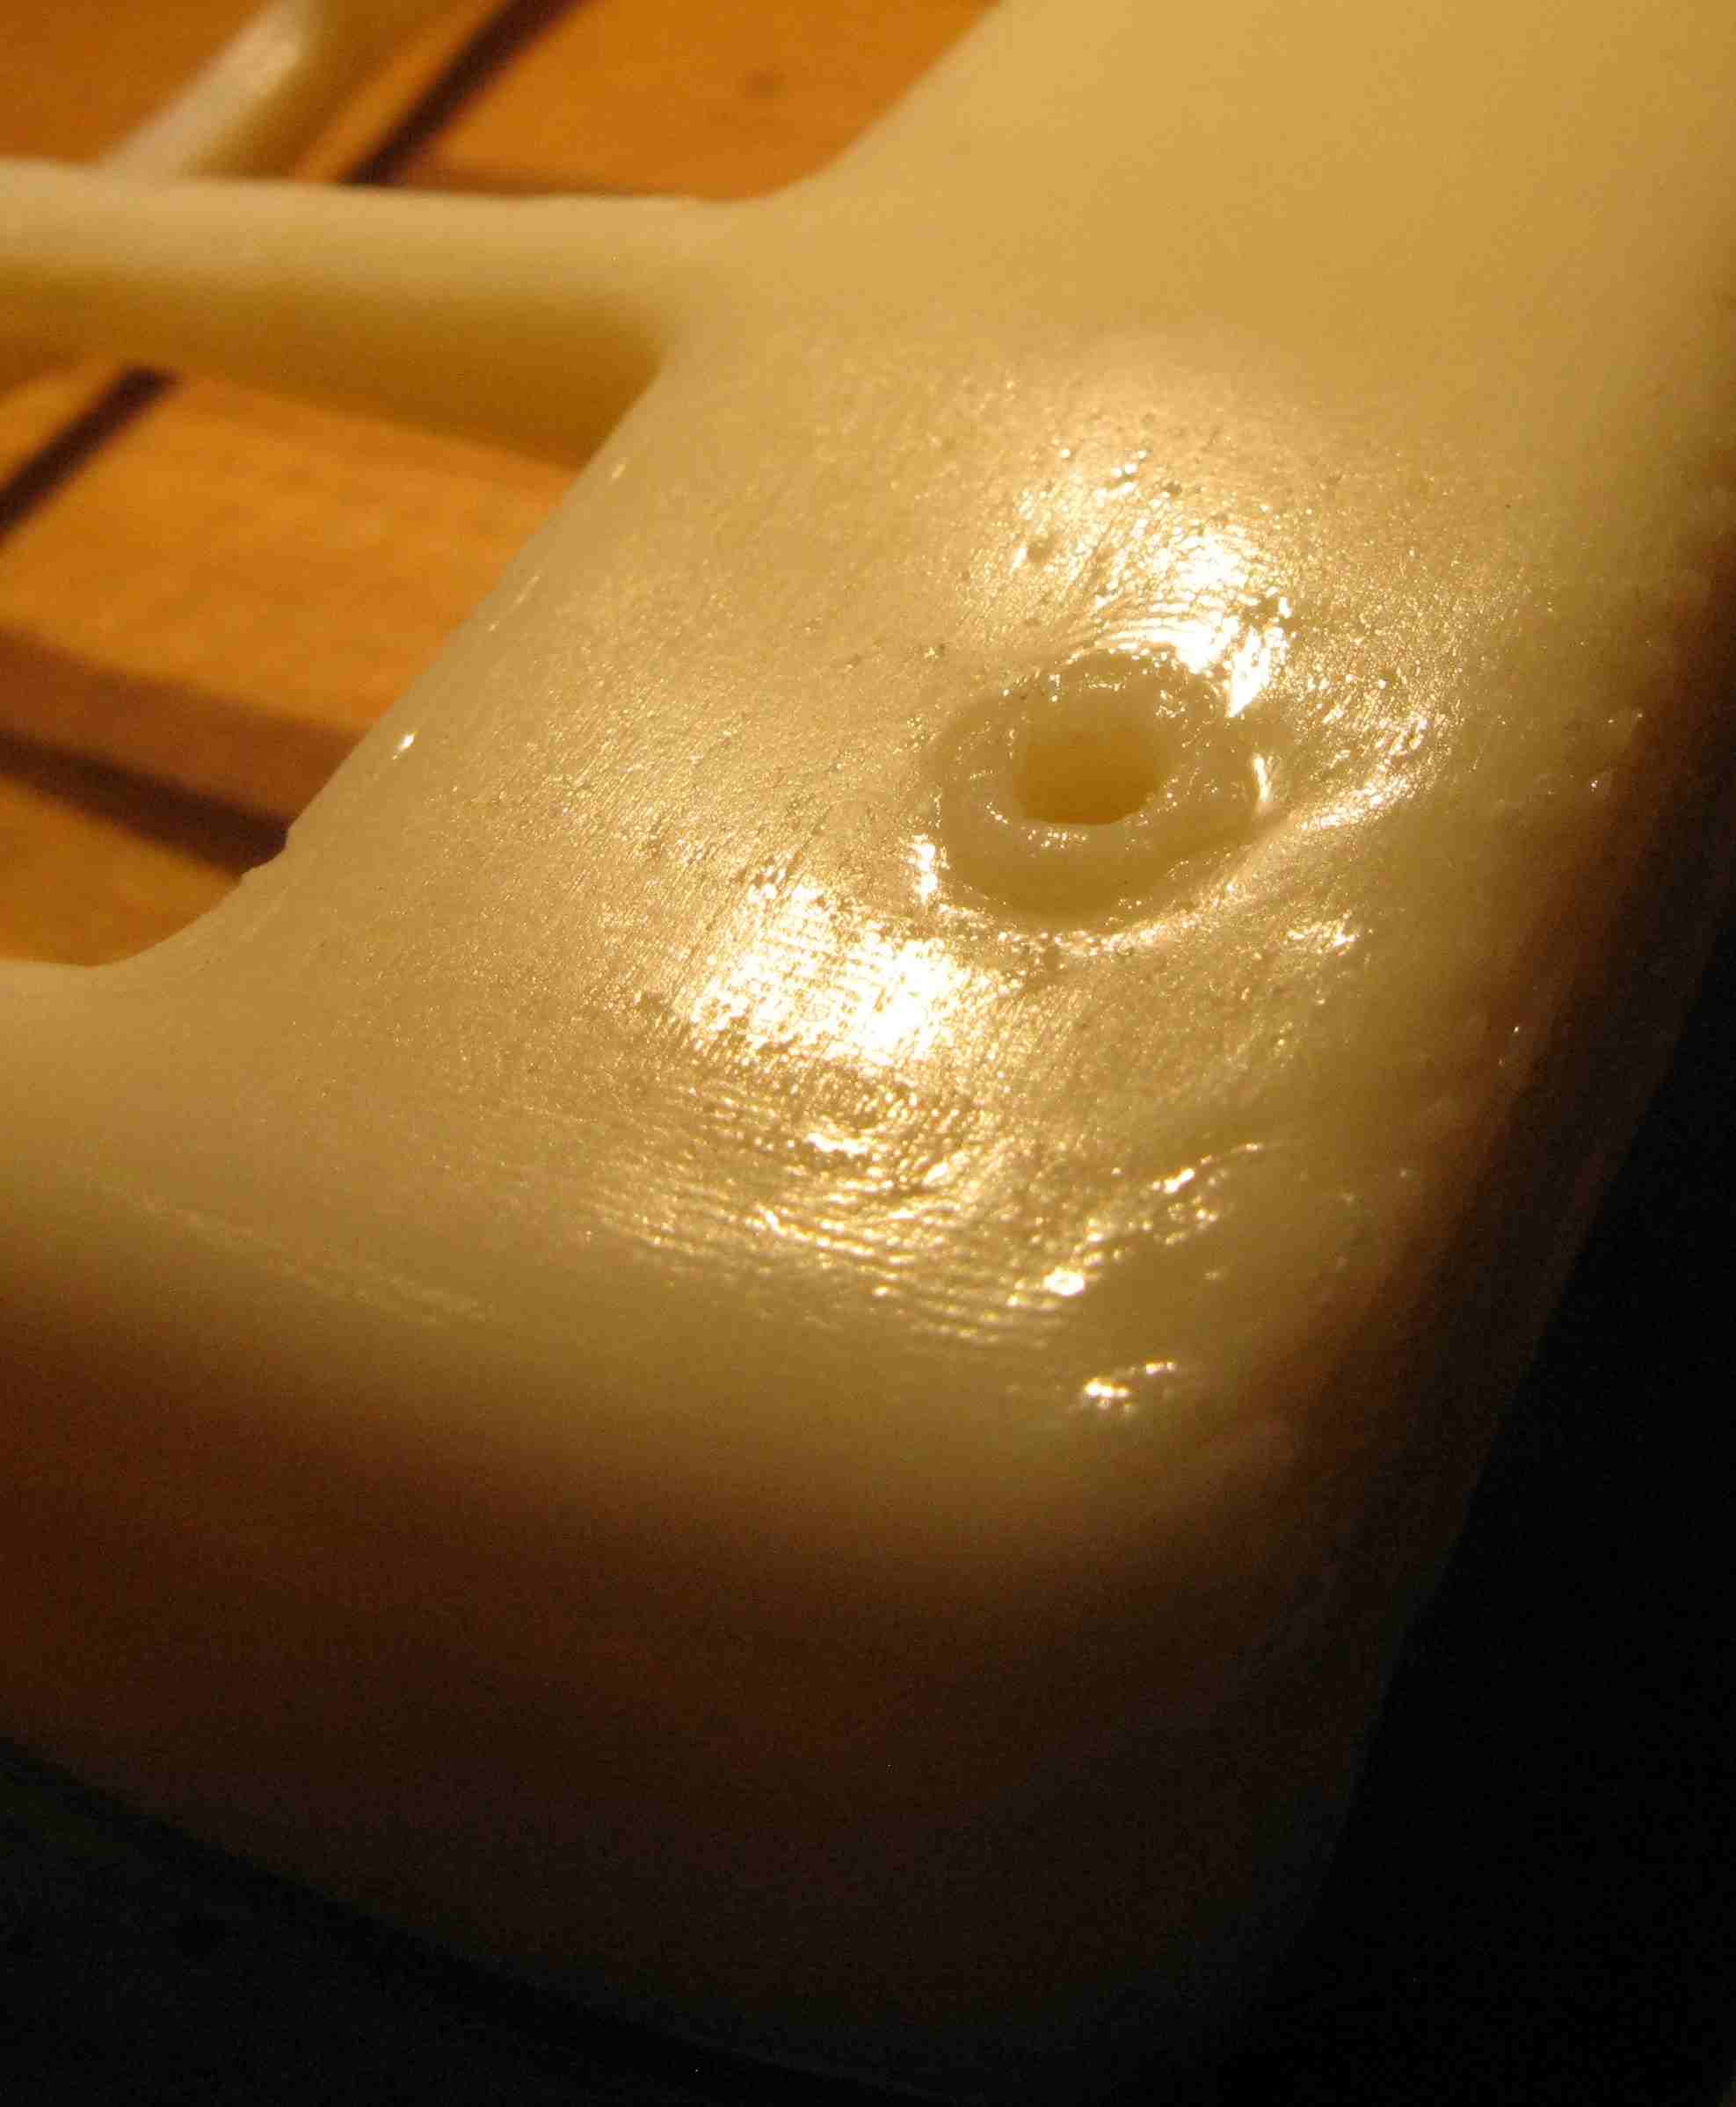
Looks like it's loads of sanding for me...
Re: Obtaining the perfect final print
You might try covering the little spots with something like wax (hardware store sells wax rings for toilets that is malleable) and use the vapor smoothing for the rest of the print and save some time.
Neal
Re: Obtaining the perfect final print
Auto filler primer may help before sanding.
If interior finish doesn't matter, you could lay the part on its back with support so the broad front is the top surface. Check out Cura's ironing feature for smooth top surfaces.
and miscellaneous other tech projects
He is intelligent, but not experienced. His pattern indicates two dimensional thinking. -- Spock in Star Trek: The Wrath of Khan Unfortunately,…
Re: Obtaining the perfect final print
i was doing the same comparison with my prusa vs fortus .
let me tell you this , with pla and good slicing software , you can have the same quality prints with your prusa (doesnt matter mk2 or 3 , they are the same) .
but when it comes to abs or asa , forget it .
to get the same quality prints with those , you'll need a heated chamber , not just an enclosure .
printing at room temps , or even slightly higher temps is not enough . maybe you could get the same appearance , but the fortus parts will have much better layer bonding = strength .
Re: Obtaining the perfect final print
Check out Cura's ironing feature for smooth top surfaces.
You can also check my slic3rPE fork for ironing, and more options for a better top surface:
Re: Obtaining the perfect final print
I've added manual supports to challenging prints with success
They've helped with bridges in the past.
I maintain an informal list of San Diego, CA 3D printing enthusiasts. PM me for details. If you include a contact email and I can add you to the informal mailing list.
Re: Obtaining the perfect final print
I was going to go down the "cover the features I want to retain" route with acetone smoothing but I think first I'm going to actually try sanding/priming to see how difficult it is, 'cos that way I do get more control.
I tried laying the print flat but of course it came out worse without this "ironing" feature; I'll take a look at that...
And yes, I'm not really complaining about the Fortus/Prusa comparison, with the price difference of both the machine and, when using a printing service, the print itself, being two orders of magnitude I remain happy with my Prusa :-).