Obtaining the perfect final print
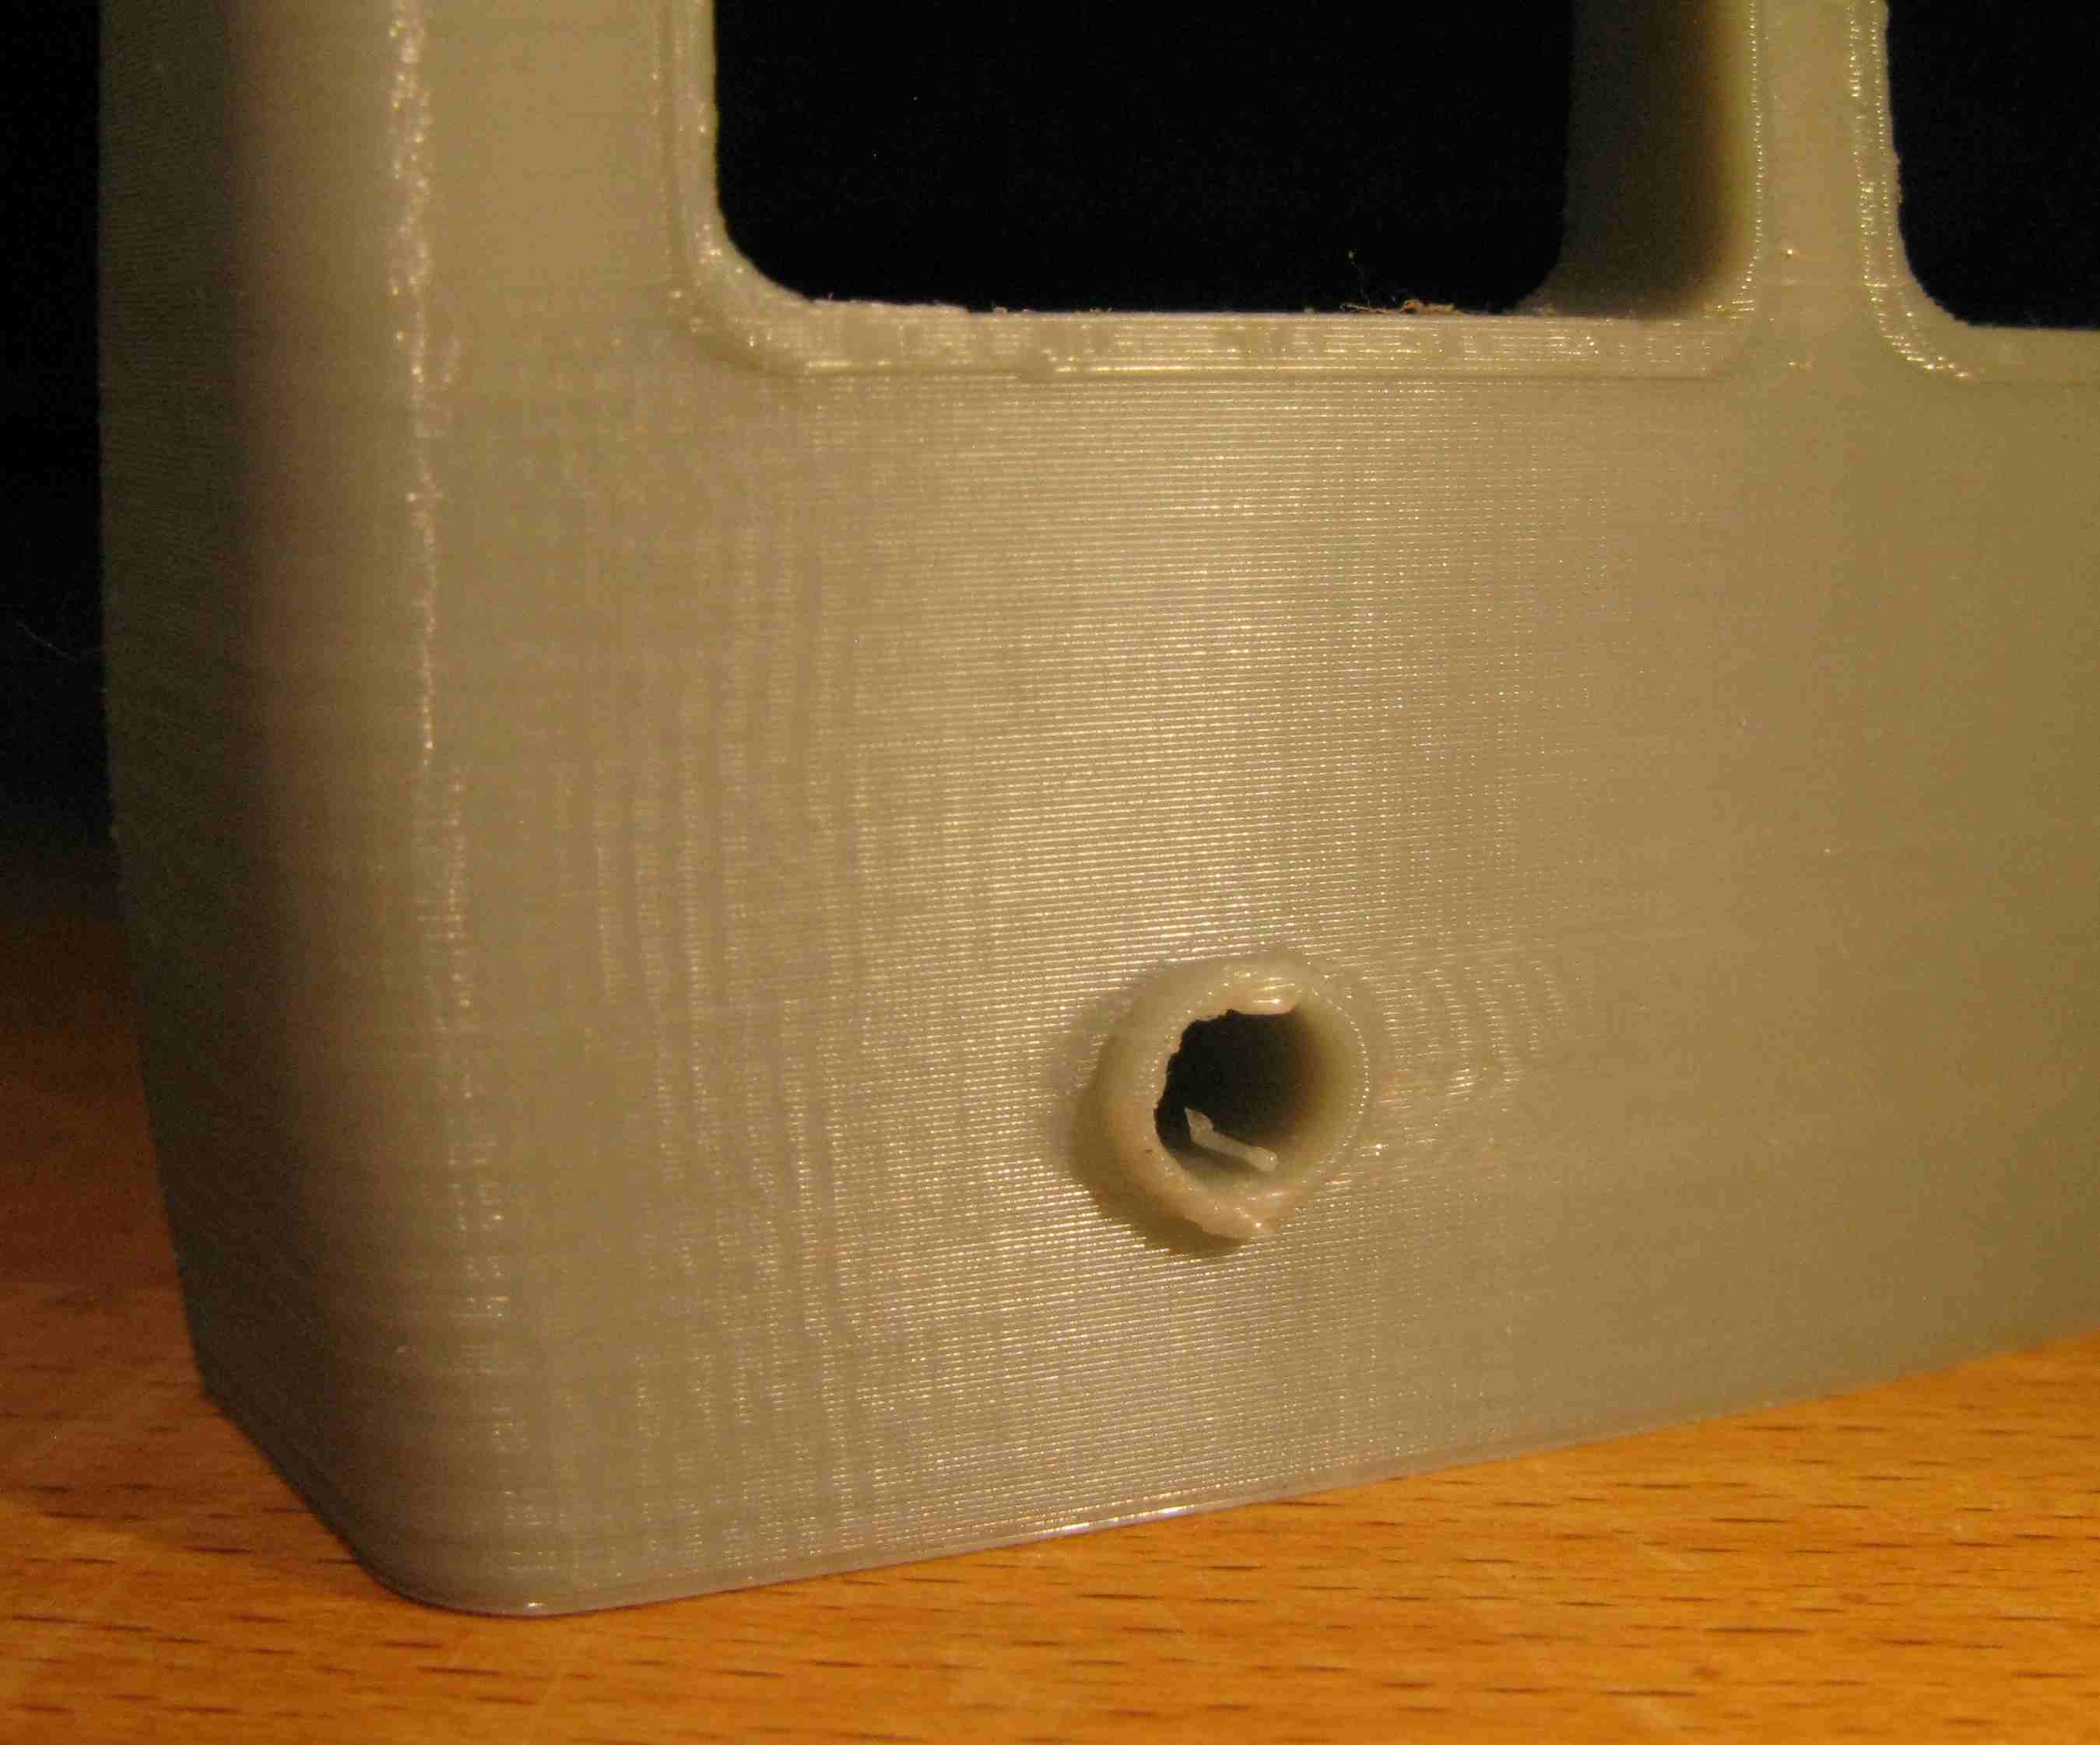
I'm 3D printing a scale model (1:30 scale) and have reached the stage where I need to determine how I make my final, perfect, print. Using PLA in my Prusa MK2S, with 0.15mm OPTIMAL settings in Slic3r and normal print speed, the outcome is not quite good enough. As a point of comparison I've had the same part printed on a Fortus 450MC (which costs around £200k), in ASA (which is what my final print will be in). The resolution of the printer is not much better at 0.127 mm but, obviously, the extra £199,400 has gone somewhere because the stepping is barely noticeable to the touch:
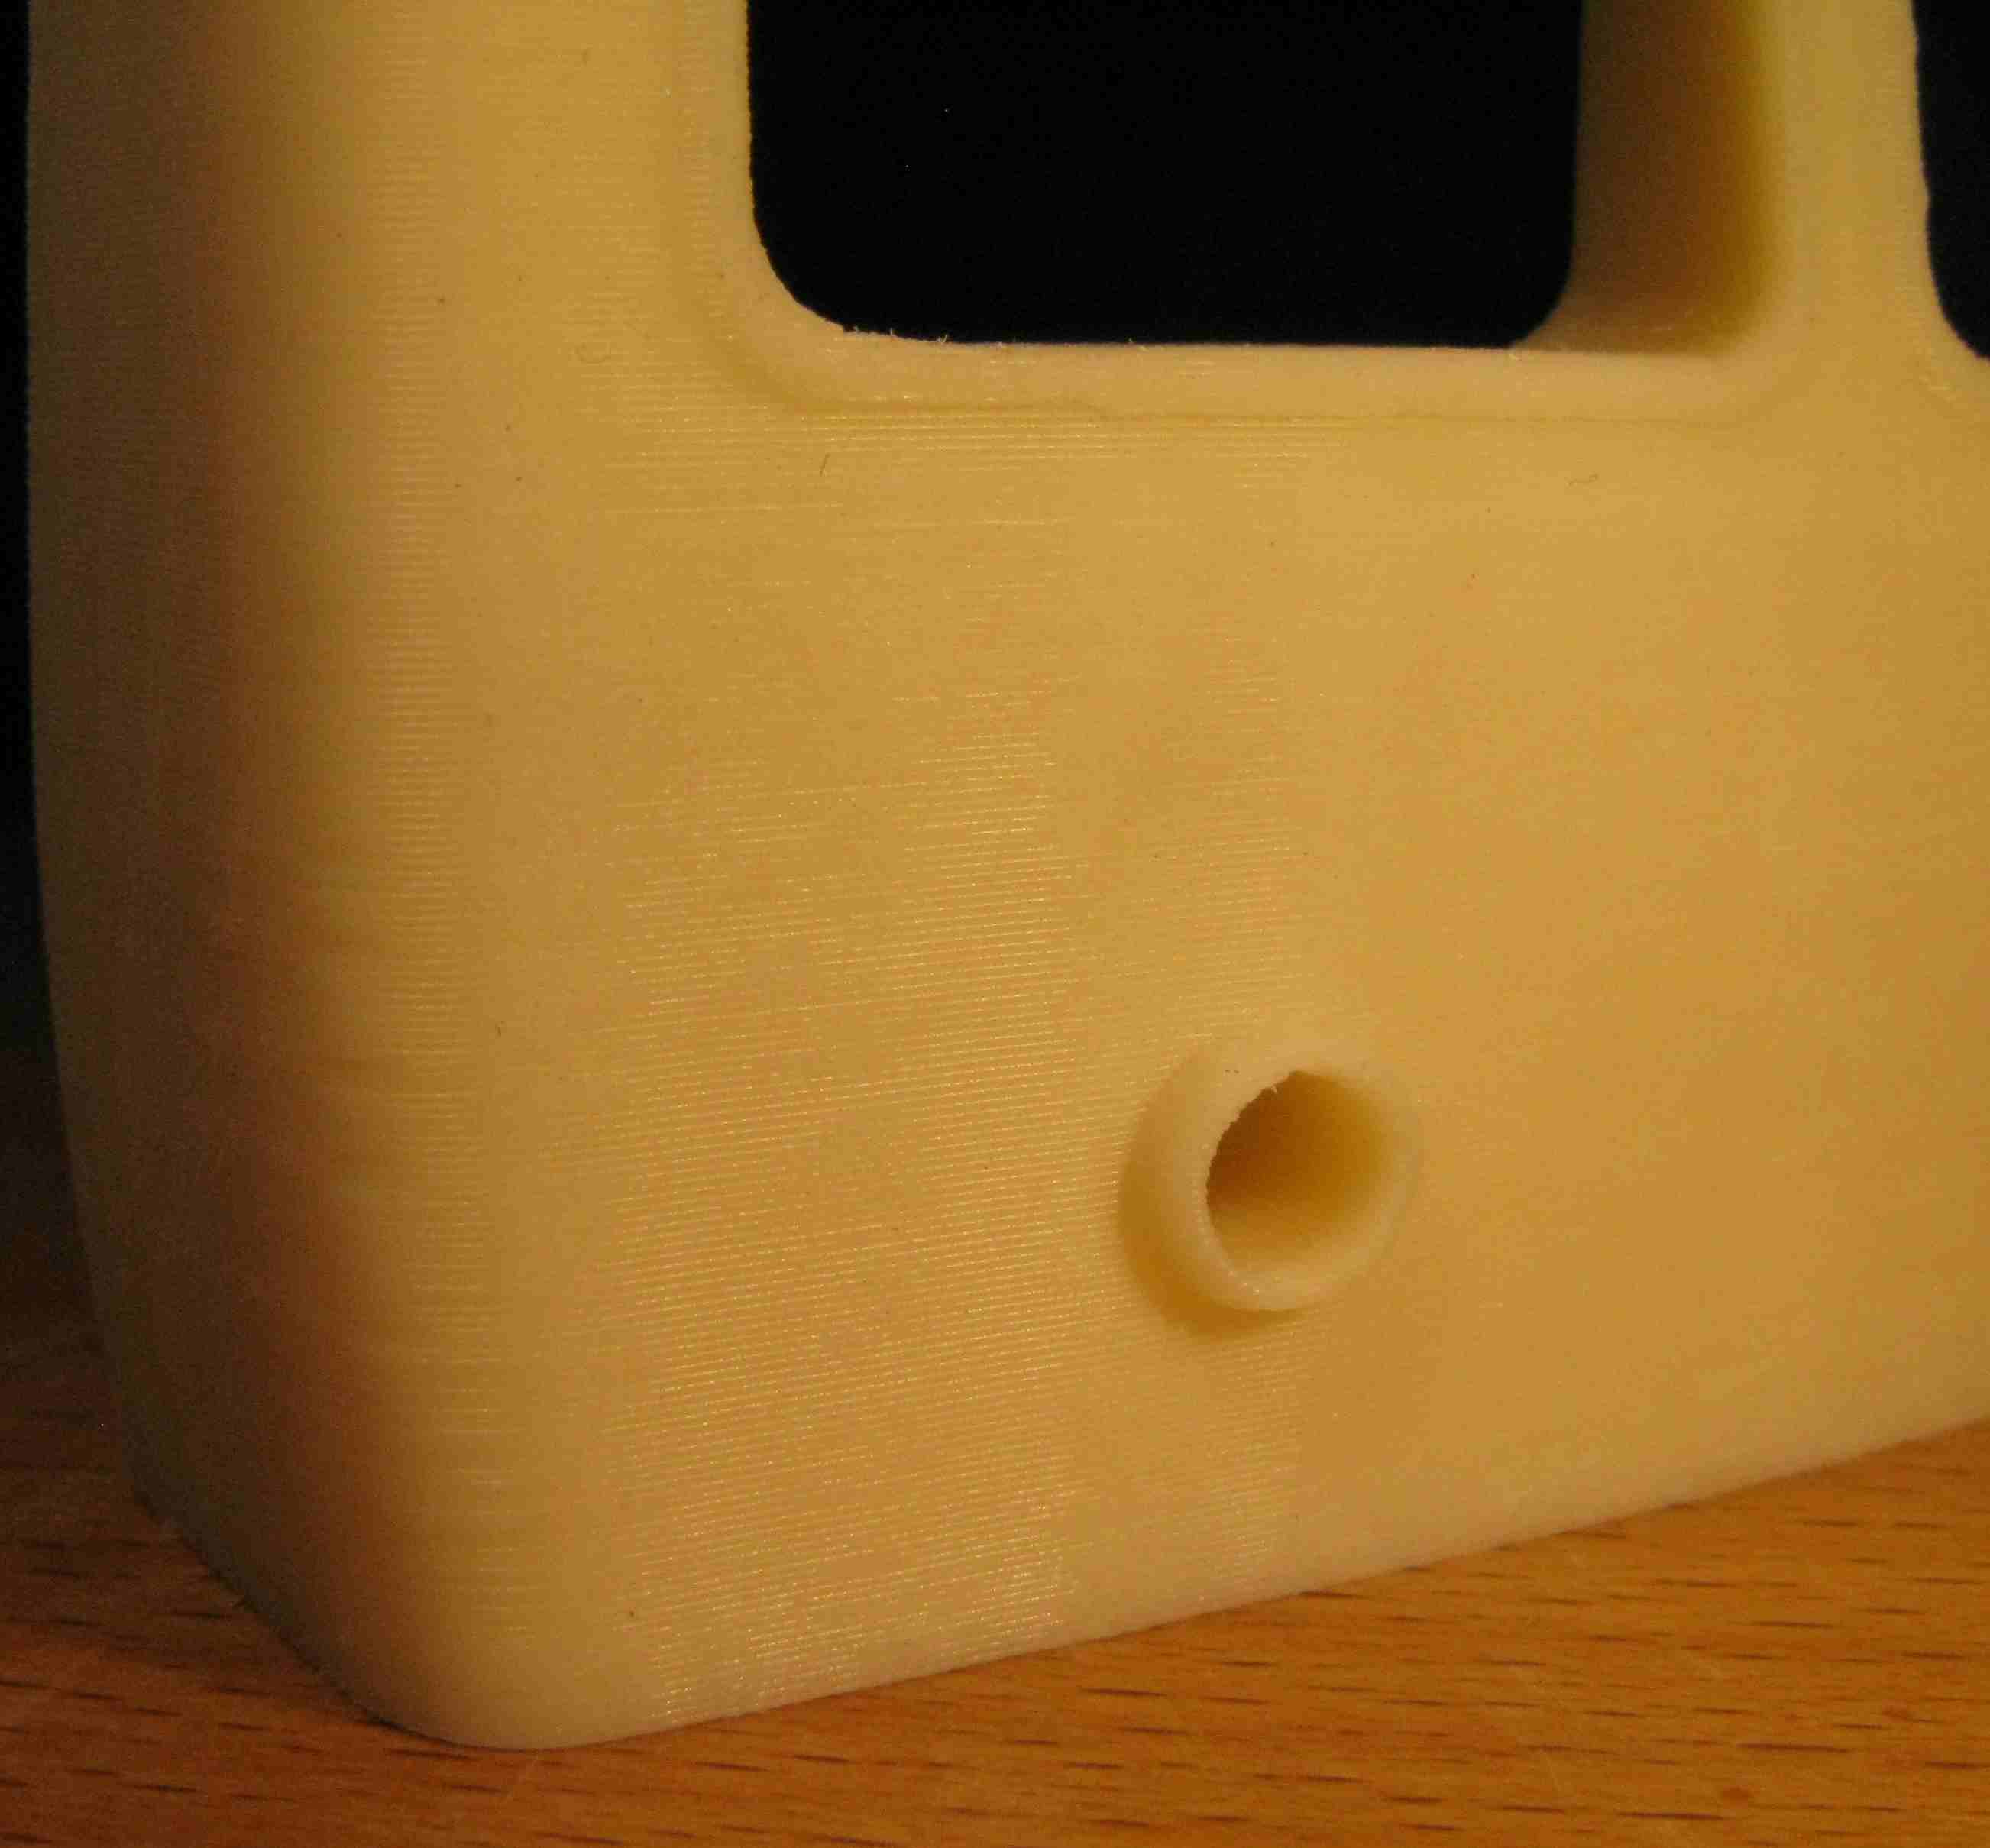
...and this single print cost me more than £100 to have done. So my question is, where can I find guidance on how to tune up my settings, reduce my speed to a crawl (obviously print in ASA) etc, how close can I get to perfect with my beloved Prusa?
Re: Obtaining the perfect final print
Can you provide a link to a sample STL? It's all well and good for helpful suggestions, but it might be useful to actually see the results different users are getting with their settings.
Re: Obtaining the perfect final print
Thanks for the swift response. The STL file you can find here: https://1drv.ms/u/s!AqUHa_qo4gdB8gYQUtDa6Gz6c70j .
I'd not heard of "extruder linearity correction calibration", will go and take a look. I'm not familiar with "ringing", will also look into that. I've ordered a reel of ASA and so, when that has turned up, I can start experimenting with temperature control also.
Re: Obtaining the perfect final print
I've downloaded it and will try some prints.
Thanks for the swift response. The STL file you can find here: https://1drv.ms/u/s!AqUHa_qo4gdB8gYQUtDa6Gz6c70j .
I'd not heard of "extruder linearity correction calibration", will go and take a look.
That procedure should help with some of the distortion on vertical surfaces and the "salmon skin" effect you sometimes see.
I'm not familiar with "ringing", will also look into that.
It's that distortion you see after any sharp curve. You'll see an echo pattern caused by the physical mass of the extruder being moved along the print direction. Look into jerk & acceleration changes. There are diagnostic prints on Thingiverse that can be helpful.
I've ordered a reel of ASA and so, when that has turned up, I can start experimenting with temperature control also.
Are you set on ASA? Some of the PLA and PLA+ materials are very good and easy to work with. ASA requires an enclosure to print well and is known for warping issues. I've not bothered with it (won't put up with smells) so can't say from firsthand experience.
Re: Obtaining the perfect final print
Many thanks, it would be really instructive to see how it looks when somebody who knows what they're doing prints it.
My choice of ASA is simply to have something reasonably robust and UV-hard, since this model will be used on an outdoor railway. Warping might not be good but I have my printer in a ventilated cupboard so smells shouldn't be an issue.
Re: Obtaining the perfect final print
Well, I certainly don't know what I'm doing, but I'm enjoying doing it!
Many thanks, it would be really instructive to see how it looks when somebody who knows what they're doing prints it.
My choice of ASA is simply to have something reasonably robust and UV-hard, since this model will be used on an outdoor railway. Warping might not be good but I have my printer in a ventilated cupboard so smells shouldn't be an issue.
Will you be painting or otherwise finishing the parts?
I've sliced the cab vertically to print 1/3 of the panel for speed. I'm trying a print now with PLA and 0.10mm layer heights. Will post the results if it's at all decent.
Re: Obtaining the perfect final print
Plan on painting it but hopefully nothing more than that. Looking forward to your printing results!
Re: Obtaining the perfect final print
FYI, looks as though the extruder linearity correction might be a feature that is beyond the MK2S as I have no "e-correct" item in my printer's menu (and I am using the latest firmware, version 3.1.0). Will experiment with my jerk/acceleration though.
Re: Obtaining the perfect final print
Ah apologies. Just saw your post in the new list and missed the fact that you're on a Mk2s. Still plenty of other fun to be had!
This has inspired me to spend some time calibrating my bridging. Those light features and windows really need good bridging.
Re: Obtaining the perfect final print
Quick question: Is this an STL you downloaded, or a model you created? If you created it, pulling some of the trim parts (e.g. window frames, light bezels) out to print horizontally would allow picking out more detail with a fine nozzle.
Re: Obtaining the perfect final print
It is one I created. Never occurred to me to print parts separately to enhance the detail, that's not a bad idea. How fine could I go do you think?
Re: Obtaining the perfect final print
Another question, which I guess your test print might answer: could I get a sufficient gain in print quality if I were to upgrade my MK2S to MK3? Though most of the improvements seem to be do with reliability (something I've not had a problem with) the Trinamic thing might be of benefit...?
Re: Obtaining the perfect final print
Sorry for all the questions but I've just been reading about acetone polishing of ABS/ASA. If I print the detailed parts separately then acetone polishing seems to me to be a viable way of removing stepping on the multiple 3D printed parts I will eventually need to make (10 to 20 parts per coach, three coaches) without having to spend an hour or so sanding each one. Don't suppose anyone on here has tried it...?
Re: Obtaining the perfect final print
Hi Rob,
Acetone smoothing has no conscience, it will smooth small detail as well as extrusion lines....
give it a try on a test piece and see if it matches your needs.
If you haven't perfected printing with ABS, be aware that you may need to consider an enclosure to prevent warping.
regards Joan
I try to make safe suggestions,You should understand the context and ensure you are happy that they are safe before attempting to apply my suggestions, what you do, is YOUR responsibility.Location Halifax UK
Re: Obtaining the perfect final print
Hi Joan,
Yes, I might have to print the detail separately and fit it later. Can you explain a little more about the warping issue with ABS?
Re: Obtaining the perfect final print
On the road, will reply in detail later. Big challenge is bridging at top of windows. Had it working well on test pieces, but the cab print had some sagging. 10 minute fix with a file. Surface is good at 0.10mm with no ringing but still definitely 3d printed. A spritz with auto filler primer may suffice. That light hole actually has bumps at top and bottom that look like print defects. You can see them in preview.
Re: Obtaining the perfect final print
> Surface is good at 0.10mm with no ringing but still definitely 3d printed. A spritz with auto filler primer may suffice
"no ringing" sounds great, after that I really do need to look into finishing techniques properly, I plainly can't expect to just paint this.
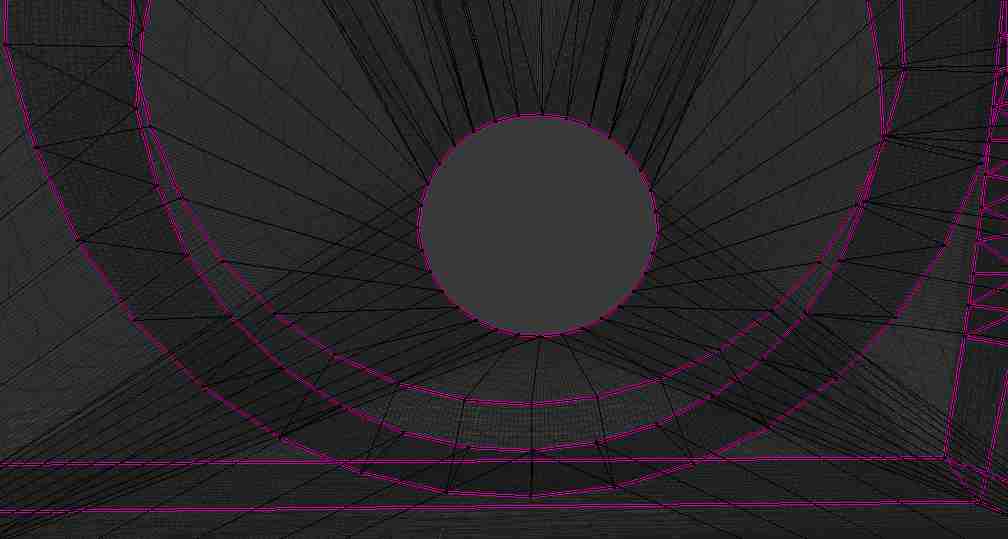
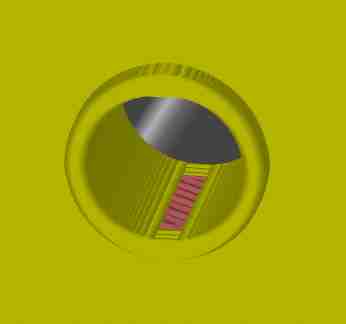
> That light hole actually has bumps at top and bottom that look like print defects.
Oooo, yes, the STL file seems OK but the sliced version isn't. It goes wrong at about the point when it transitions to greater in-fill. Very odd, have raised an issue on Slic3r.

Re: Obtaining the perfect final print
Nothing spectacular, but here's what I got last night.

Re: Obtaining the perfect final print
... Oooo, yes, the STL file seems OK but the sliced version isn't. It goes wrong at about the point when it transitions to greater in-fill. Very odd, have raised an issue on Slic3r.
If you zoom in on the STL there appear to be tiny boxes at the top and hanging off the bottom of the ring. Those tiny details ate tricky to pick up on vertical surfaces
Re: Obtaining the perfect final print
Thanks, but your image upload didn't appear to work; a broken picture link is shown. Could you try again?
I wonder where those boxes are coming from? They don't appear in the original Blender object, as far as I can tell.