RE: "Perfect first layer" issues
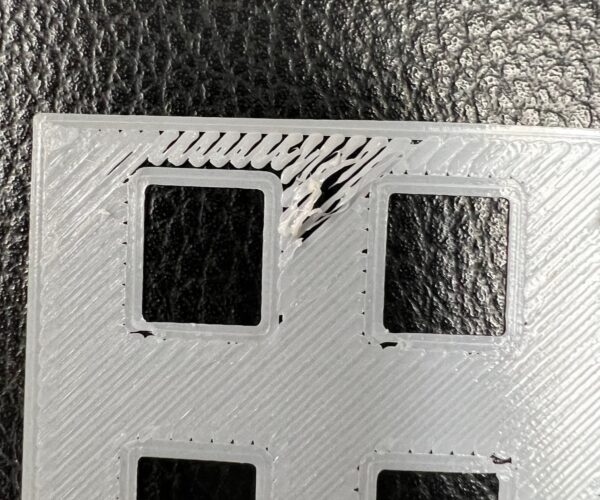
Same issues for me here, the back right side of the bed is almost always causing problems with separations and low adhesion despite "Perfect first layer" descriptions. I don't want to have to go and custom slice everything with a lower z Height (not even sure exactly how), I'd just like this new tech to work well (satin sheet and PLA on the XL by the way.)
RE: "Perfect first layer" issues
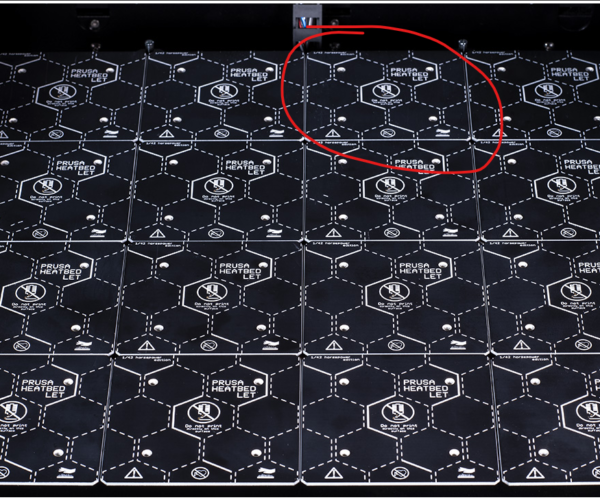
Running into a similar issue here. The filament has great squish everywhere except the left and right side of the back of the bed. I haven't had a problem with lifting yet, likely because I am printing some really large pieces right now, so they really don't get a chance to lift with the extra mass around them. Looking at the footprint of the section with the odd layer, it looks like it is the size of one of the heater panels. I may try to re-align the one under the odd spot.
RE:
Really seem like I hit the jackpot on having an XL that hit all the possible problem one could have with an XL as I also have this issue where the back of the printer has noticeably worse first layer. I don't get why mesh levelling isn't compensating for that. It's almost as if it doesn't work.
I kept wondering why my purge tower were failing to stick to the bed but I now realized I was always putting them in the left corner.
Now that octoprint work on the singletool XL, has anyone tried the Bed Level Visualizer plugin. I used to use that on my CR-10 to calibrate the bed to perfection. Would love to try it on the XL to get a better sense of the issue, but octoprint won't work yet on the multitool XL 🙁
RE: "Perfect first layer" issues
I was having the same problem until I did what I saw as another solution on the forum, place the objects at -.1mm z depth (sinking). That solved the bed adhesion problem for me, of course, we shouldn’t have to do this, but whatever works
RE: "Perfect first layer" issues
I was having the same problem until I did what I saw as another solution on the forum, place the objects at -.1mm z depth (sinking). That solved the bed adhesion problem for me, of course, we shouldn’t have to do this, but whatever works
Not sure I understand. If you were to put an object at -20 in the slicer it would not print it 20mm under the bed surface. It would just ignore the lower 20 millimetres of your object.
Why would putting it a -.1mm do anything differently?
Woudn't you instead have to play with the Live Adjust Z option they added? My issue with that feature is that it gets reset every print so you have to remember to go manually lower it on the printer each time which is ultra annoying and easy to forget when you have 2 other printers that don't need that :\
RE: "Perfect first layer" issues
https://www.printables.com/model/538384-prusa-xl-first-layer-test/comments
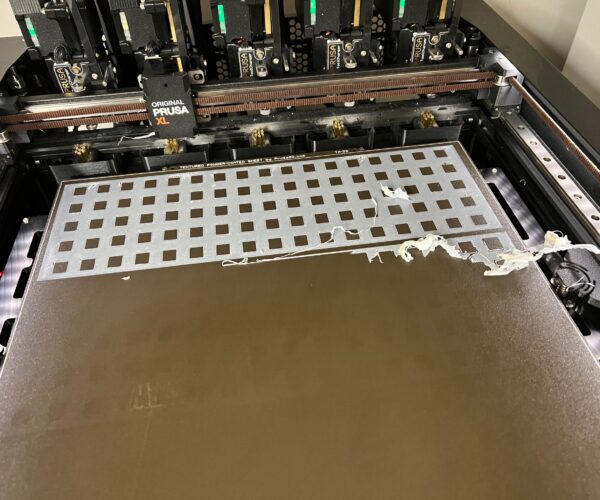
So I tried that print and saw that the issue is across the whole bed. Just trying to pull that sheet from the bed, it splintered everywhere as the print line didn't stick together.
Then I saw in the comment that Prusa support suggested that they heat the bed at 80c for 10 min before starting a print.
Tried it and it solved everything.
So I guess that 9min heat absorption step is just not enough for every case. Should be fixed in a firmware update eventually.
RE:
I'll try this tomorrow, but if they're honestly suggesting that I add ANOTHER 10 mins to the front of every print cycle (which ia already long as hell with the heat absorbing, nozzle cleaning, and bed probing), then I have no choice but to laugh and return my unit. That is completely unacceptable. If their bed can't pre-warm consistently in a reasonably short time, then they should have redesigned it.
Not only that, but the literal point of mesh bed leveling is to solve for this situation. I did a few tests where I printed small 2cm squares 1 layer thick in various spots, thus reducing the bed probing to a very few points. Even in this case, both with and without absorbing heat, it was a mess in that area, so this is definitely a physical issue.
Brand new to 3D printing and my 5-tool XL is my first 3D Printer!Check out my Multi-Tool fork of PrusaSlicer to mix and match nozzle sizes.
RE: "Perfect first layer" issues
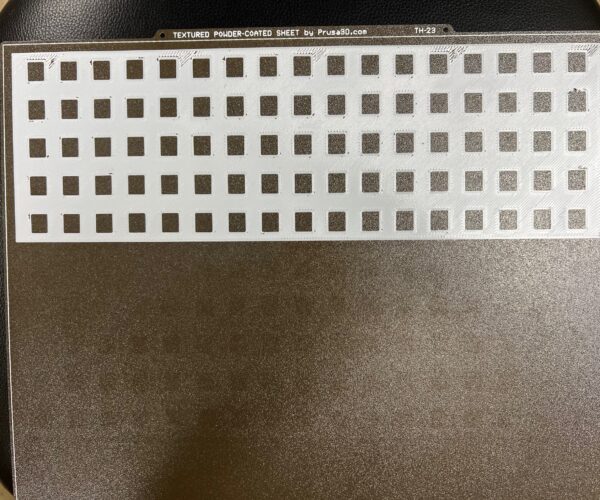
I created a simple grid with holes in it in Blender - this saves filament but also causes the printer to draw perimeter lines in more places, to REALLY show errors between perimeters and solid fill. The pictures below are a single layer thick of Prusament PLA marble gray. I kept everything to 100% stock profile settings for image shaper. I have a multi-head unit, but this does not matter for the results I should see. I have attached the model I used to do this test if anyone else wants it.
Left side: nozzle is clearly WAY too high: https://www.smugmug.com/gallery/n-zJ379/i-NHVFnHH/A
Middle: looks pretty good: https://www.smugmug.com/gallery/n-zJ379/i-8tBRQ6w/A
Right side: nozzle is clearly too low: https://www.smugmug.com/gallery/n-zJ379/i-3H6RzhS/A
Thank you very much for posting those pictures. This seems to be exactly what my new XL is doing as well (5 head, received 12/22). Back right has almost no 'squish' and the bed is clearly a lot lower in that area. I too am scratching my head at what the bed leveling/probing is even doing around that area for it to be that far off. I've visually checked with a straight edge, and I can't see an obvious slope downward in that area unfortunately.
@shwalamazula, did you ever align your panels physically? I saw someone on a different thread found their entire bed frame (CNC aluminum) was warped and Prusa had to send them a new one.
RE: "Perfect first layer" issues
Thank you very much for posting those pictures. This seems to be exactly what my new XL is doing as well (5 head, received 12/22). Back right has almost no 'squish' and the bed is clearly a lot lower in that area. I too am scratching my head at what the bed leveling/probing is even doing around that area for it to be that far off. I've visually checked with a straight edge, and I can't see an obvious slope downward in that area unfortunately.
@shwalamazula, did you ever align your panels physically? I saw someone on a different thread found their entire bed frame (CNC aluminum) was warped and Prusa had to send them a new one.
Just a quick followup, I did use a machinst's straightedge to confirm that the back left PCB panel was slightly lower. Not sure if this is the right approach, but I loosened the 4 mounting screws under just that panel, just 1/4 turn per screwhead. I was hoping there was some spring under there keeping the panel pushed up firmly, and it does appear to be the case. That made a huge difference for that one super low spot. I am going to try 1/4 turn tightening the other back corner which was high for me next.
Keep in mind, I am not referring to the screws for mounting the entire heatbed to the aluminum frame or the z-axis. I mean the 4 screws directly under each panel.
Brand new to 3D printing and my 5-tool XL is my first 3D Printer!Check out my Multi-Tool fork of PrusaSlicer to mix and match nozzle sizes.
RE: "Perfect first layer" issues
I guess I should know my own printer better, but are the individual squares actually adjustable? Is that the intent by Prusa? I should maybe see a kit build instructions to get an idea what it looks like under there.
RE: "Perfect first layer" issues
I guess I should know my own printer better, but are the individual squares actually adjustable? Is that the intent by Prusa? I should maybe see a kit build instructions to get an idea what it looks like under there.
Each of the 16 PCB heatbed tiles mounts to the frame via 4 screws. The assembly manual does not reference the mounting details, as, even in the kit, the tiles come attached to the sub-frame. Either way, making a small tweak did make a noticeable difference when testing via feeler gauges, and definitely did not make that tile loose or wobbly.
I did not have the courage to do a full removal on one of the screws to check for a tension spring, etc.
Brand new to 3D printing and my 5-tool XL is my first 3D Printer!Check out my Multi-Tool fork of PrusaSlicer to mix and match nozzle sizes.
RE: "Perfect first layer" issues
Just realized my link in one of my earlier comments to my Printables model didn't post. This is the grid I referenced in my post about 3-4 down from the top of page 2 here.
https://www.printables.com/model/680628-prusa-xl-back-of-bed-torture-test
Brand new to 3D printing and my 5-tool XL is my first 3D Printer!Check out my Multi-Tool fork of PrusaSlicer to mix and match nozzle sizes.
RE:
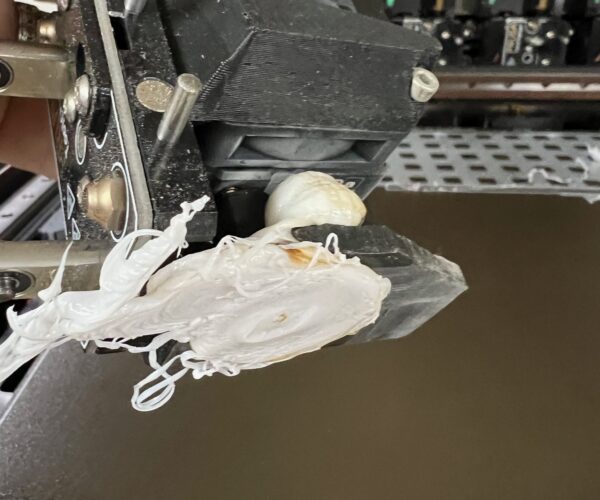
More info - yesterday I was trying to print a multi color print with a big footprint. I could not do it - anywhere on the bed because the print would peel up due to being too high in spots and wreck itself. I literally tried for 1.5 days and made nothing but a pile of shredded filament. So I ran this test pattern and It printed the one across the back first, failed when the middle one started.
What's interesting is the 5 spots across the very back where it's too high, like the nozzle adjusted upward in those spots for no reason and then lowered itself after a short while. To me they look like they're located at 5 probe points.
RE: "Perfect first layer" issues
So I would try 2 things. First, modify the g-code for the printer to probe at a lower temperature. Then, before you start your print, preheat the nozzle do a filament purge to flush some material out, then clean the nozzle really well with a brass brush. Then, run your test. This will eliminate any filament ooze that is affecting calibration. Support will likely run you in circles if you don't do this test first. The g-code to modify is below (under Printer settings -> Custom g-code -> Start G-code.
Second, I'd take a high quality straightedge and check across the tiles, both when they are cold, and when heated to 60C. Mine was REALLY obvious when I did that. Others have unmounted all 16 heater tiles and found that the aluminum frame itself was badly warped. That may be worth checking if you are really willing.
The G-code:
Look for this block and modify the line or just paste in my block:
; set bed and extruder temp for MBL
M140 S[first_layer_bed_temperature] ; set bed temp
G0 Z5 ; add Z clearance
M109 T{initial_tool} S{((filament_notes[initial_tool]=~/.*HT_MBL10.*/) ? (first_layer_temperature[initial_tool] - 10) : (filament_type[initial_tool] == "PC" or filament_type[initial_tool] == "PA") ? (first_layer_temperature[initial_tool] - 25) : (filament_type[initial_tool] == "FLEX") ? 180 : (filament_type[initial_tool]=~/.*PET.*/) ? 175 : 140)} ; wait for temp - PLA 170->140 to prevent oozing while probing, FLEX 210->180
Brand new to 3D printing and my 5-tool XL is my first 3D Printer!Check out my Multi-Tool fork of PrusaSlicer to mix and match nozzle sizes.
RE: "Perfect first layer" issues
I just built my second XL yesterday and it's the same. I've never had so much struggle with first layers than with these XLs.
It might because I only use PET and the textured sheet?
I literally scrape off 20+ prints for every successful one. It's always within seconds of starting the print that it's coming up. Most common issues are 1) Z way too high, peels up, fails. 2) nozzle blobs cause it to fail right away, and 3) rarely too low, peels up, fails. I've done all of the bed cleaning, nozzle cleaning, pre-warming countless times.. I'm going to try real low probe temps next, and then if I can't get that, .4 nozzles.
RE: "Perfect first layer" issues
It might because I only use PET and the textured sheet?
Yes. I had to switch to the Satin.
--------------------
Chuck H
3D Printer Review Blog
RE: "Perfect first layer" issues
BTW, I printed the 'first layer test print' and it came out terrible.
I measured with a good straight edge, looked closely, and didn't find any significant drop/lift points.
Without changing anything, I re-printed the sheet again and it came out flawless. !!?!?!
I've now printed several more things and I am not seeing the unlevel issue anymore. I'm wondering if one/two of the heatbed plates got bumped in shipping and misaligned, then after futzing with it (and heat cycling several times) that it popped back into place.
Additionally, when I put the print sheet on, I do it differently than I did on my MK3S+; I am now laying it flat on the front 75% of the heatbed, and then sliding it backward until it 'seats' on the pegs. The XL's alignment pegs are so much shorter than the MK3S+ that this was necessary. Not sure if that has 'realigned' my heatbed either.
RE: "Perfect first layer" issues
...@shwalamazula, did you ever align your panels physically? I saw someone on a different thread found their entire bed frame (CNC aluminum) was warped and Prusa had to send them a new one.
Not yet. The project I was working on had a deadline, so I just avoided that part of the bed for the rest of the prints and haven't used the machine in the last 4-weeks. I should go do that today, while I'm between projects.
RE: "Perfect first layer" issues
I checked mine with straightedge too. They look good.
