Printing 203mm Rectangle on Mini
Ok, so this isn't completely a rectangle, but I have an object that is a bit too big for how I want to print on the Mini. I have an XL that is busy at the moment, but would be ideal for this part. I was playing around with the idea of printing it at a 45 degree angle, but would need supports to do that. I can't figure out a way to do that without drastically adding to the print time. Is there a better print configuration for this part than what I have now? Thanks!
Best Answer by Neophyl:
No you print it like you have now but your support choices are less than optimal. You don't need to support the entire thing, just the base. As long as your bed adhesion is correct you can get away with all sorts of things support wise.
Also as its a 45 degree slope you can reduce the XY separation and the contact z distance as the angle means its further away anyway. Because its all the same angle you can optimise the support settings. Slice the attached project and switch to view 3 (side view) and you will see that the support is still far enough away from the part even with the reduced gaps. Grid support is also not needed and overkill for this and painting the area you want supports is much more efficient.
If I was printing it on my old Mk3 I would reduce the amount of support still further as my bed adhesion is really dialled in but I don't know what yours is like so the painting is a little more extensive to give a safer support amount. You could also run a line further up just the middle if you are worried about wobble. I use this all the time for things like this -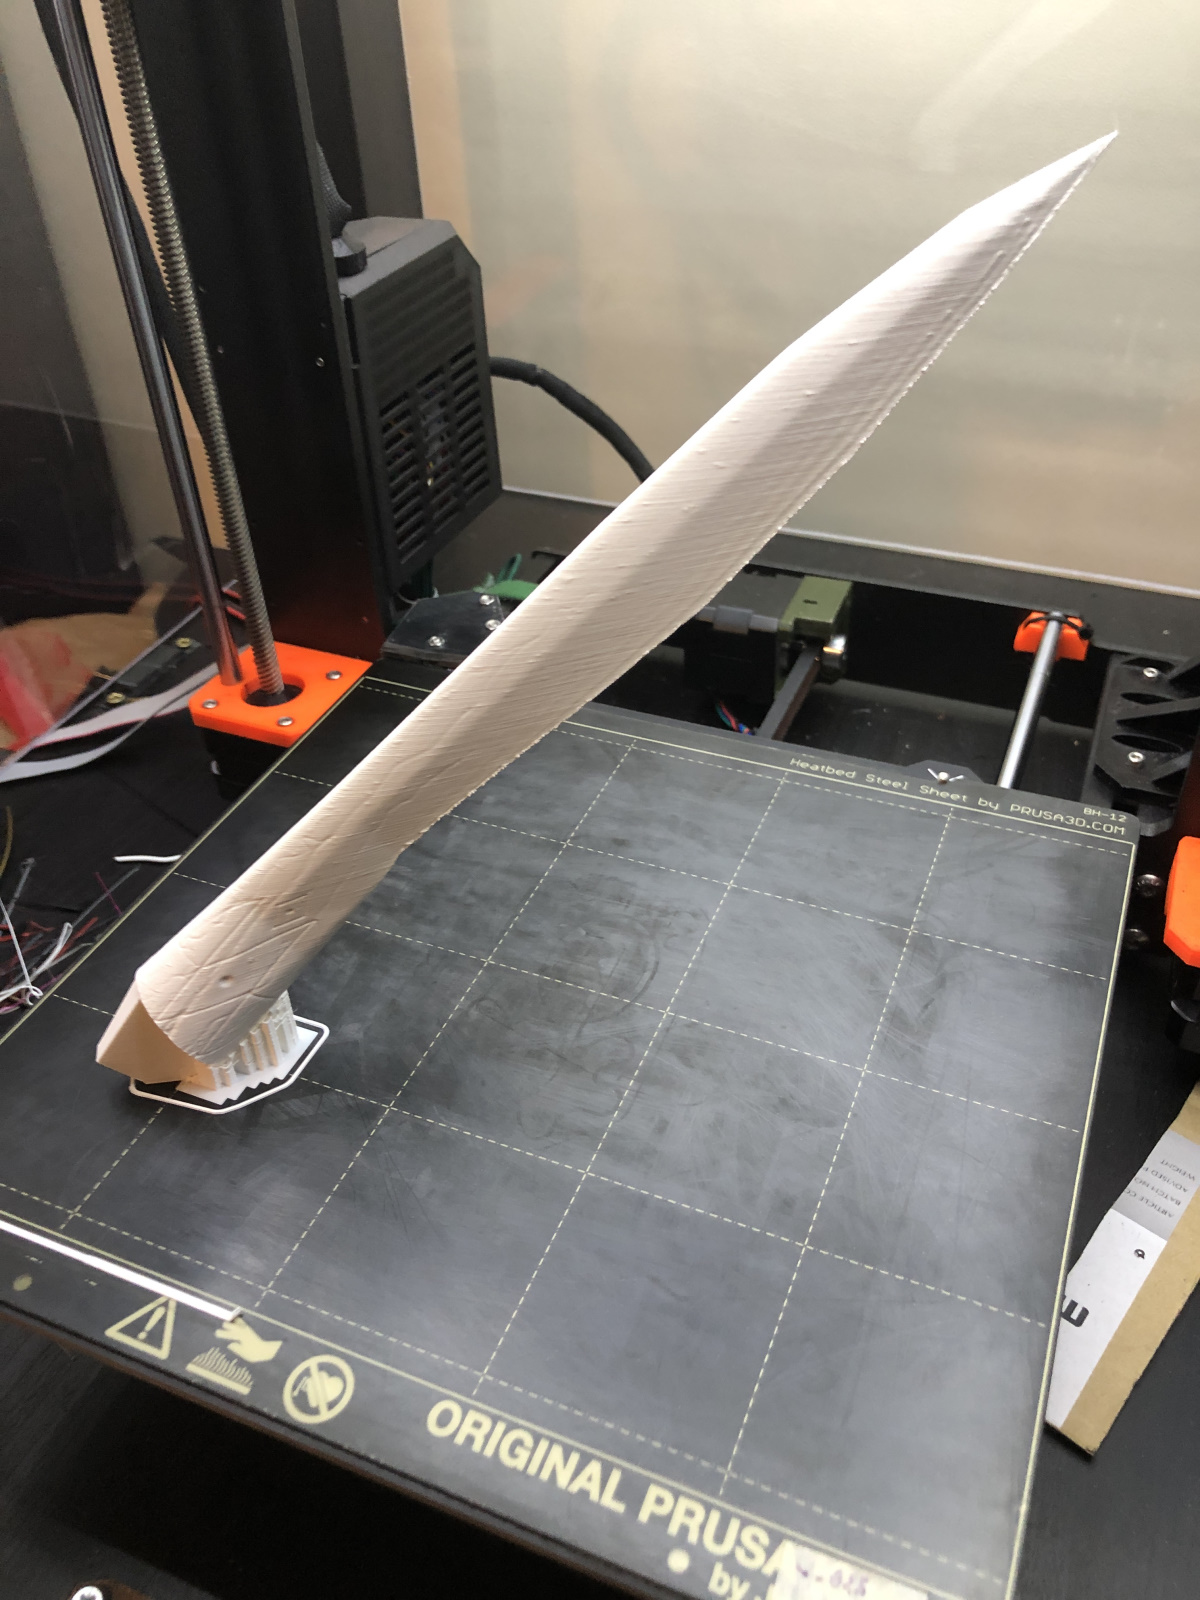
Also turned vertical shell thickness to partial as with 4 perimeters you don't want or need the extra. Anyway have a look at the project. 4.5h print time
Mini+MK3S+XL 5 Tool
RE: Printing 203mm Rectangle on Mini
No you print it like you have now but your support choices are less than optimal. You don't need to support the entire thing, just the base. As long as your bed adhesion is correct you can get away with all sorts of things support wise.
Also as its a 45 degree slope you can reduce the XY separation and the contact z distance as the angle means its further away anyway. Because its all the same angle you can optimise the support settings. Slice the attached project and switch to view 3 (side view) and you will see that the support is still far enough away from the part even with the reduced gaps. Grid support is also not needed and overkill for this and painting the area you want supports is much more efficient.
If I was printing it on my old Mk3 I would reduce the amount of support still further as my bed adhesion is really dialled in but I don't know what yours is like so the painting is a little more extensive to give a safer support amount. You could also run a line further up just the middle if you are worried about wobble. I use this all the time for things like this -
Also turned vertical shell thickness to partial as with 4 perimeters you don't want or need the extra. Anyway have a look at the project. 4.5h print time
RE: Printing 203mm Rectangle on Mini
Thank you @neophyl. I remember seeing this post in the past but couldn't remember where or from who. I appreciate your time reviewing my file.
Two questions I have, you mentioned, "it's a 45 degree slope you can reduce the XY separation" yet your version has the setting at 20% and mine was at 80%. Why would you do that? Does that give you more support and less wobble? My other question, is regarding the number of interface layers. You went above the drop-down list options, and made yours 4. What is the reason behind that?
Mini+MK3S+XL 5 Tool
RE: Printing 203mm Rectangle on Mini
I'll answer a bit out of order. When it comes to interface layers more is generally better - in my opinion 🙂 I found that when trying to remove supports with 1 or 2 layers of interface you would end up with bits stuck to the print as the interface would break apart easily when trying to remove it. Those locally stuck bits would then be a pain to remove and generally would leave more surface scarring hacking away at them trying to get rid of it.
By using more layers the interface forms more of a cohesive but still flexible layer and 'peels' off in larger sections and I've found makes removal easier and cleaner. Especially with a dental pick wedged between to the force applied is away from the part. I have had whole sections come away in one part even without tools on larger things like helmets.
Give it a try and see on some test parts.
As for the angles, thats also from experience. With a part that generally has vertical sides and overhangs that protrude out then like you I generally use a 80% XY separation gap. If you don't then you can sometimes get it stuck to the perimeters. Same with Z gap, normally I use 0.2mm like you too and for flatter surfaces on top of supports you need that gap to get the supports to come off.
The thing about slopes like your part placement is that the supports take into account both x/y AND Z distance to the layer above. This generally has the effect of making the support be further away from the part than you would normally expect. Drop your X/Y to 0% and slice and look at the preview. You will still see a gap as its using the Top Contact Z distance to the layer above. In fact drop the Z distance to 0.05 and slice and preview, there will still be a gap.
~With normal settings you can have too much of a gap to your support. Its why I like to drop them down a bit. I do encourage you to try prints with quick small sample parts at similar angles though, after all printers and filament vary so its best to see what works for your setup.
RE: Printing 203mm Rectangle on Mini
THANK YOU! I have that issue with the interface layers and i thought i was stuck with it. (No pun intended. 😄) I will definitely try that next time. Thanks for the explanation on the gap. I’ll do some experimenting as you suggested.
Mini+MK3S+XL 5 Tool