Change print quality mid-print?
Hi,
I am a newbie Mini+ owner and am wondering if there is a way to change print quality mid-print. My daughter and I are working on a project where the main body of the print does not need to be in fine detail (we are used .20 quality) but the top layer has some lettering that would probably look much better if we could use .07 ultradetail. Doing the who print in .07 ultra detail would increase the overall time too much. Is there a way that we can select just set the layers with the protruding text that could be printed with a different print setting when the printer reached that point? I tried adding a modifier box over the text but did not see a setting to simply change to a different print quality or speed at those layers.
Thanks,
Brook
RE: Change print quality mid-print?
Good morning Brook,
you can use variable layer height to change the layer height as the model progresses.
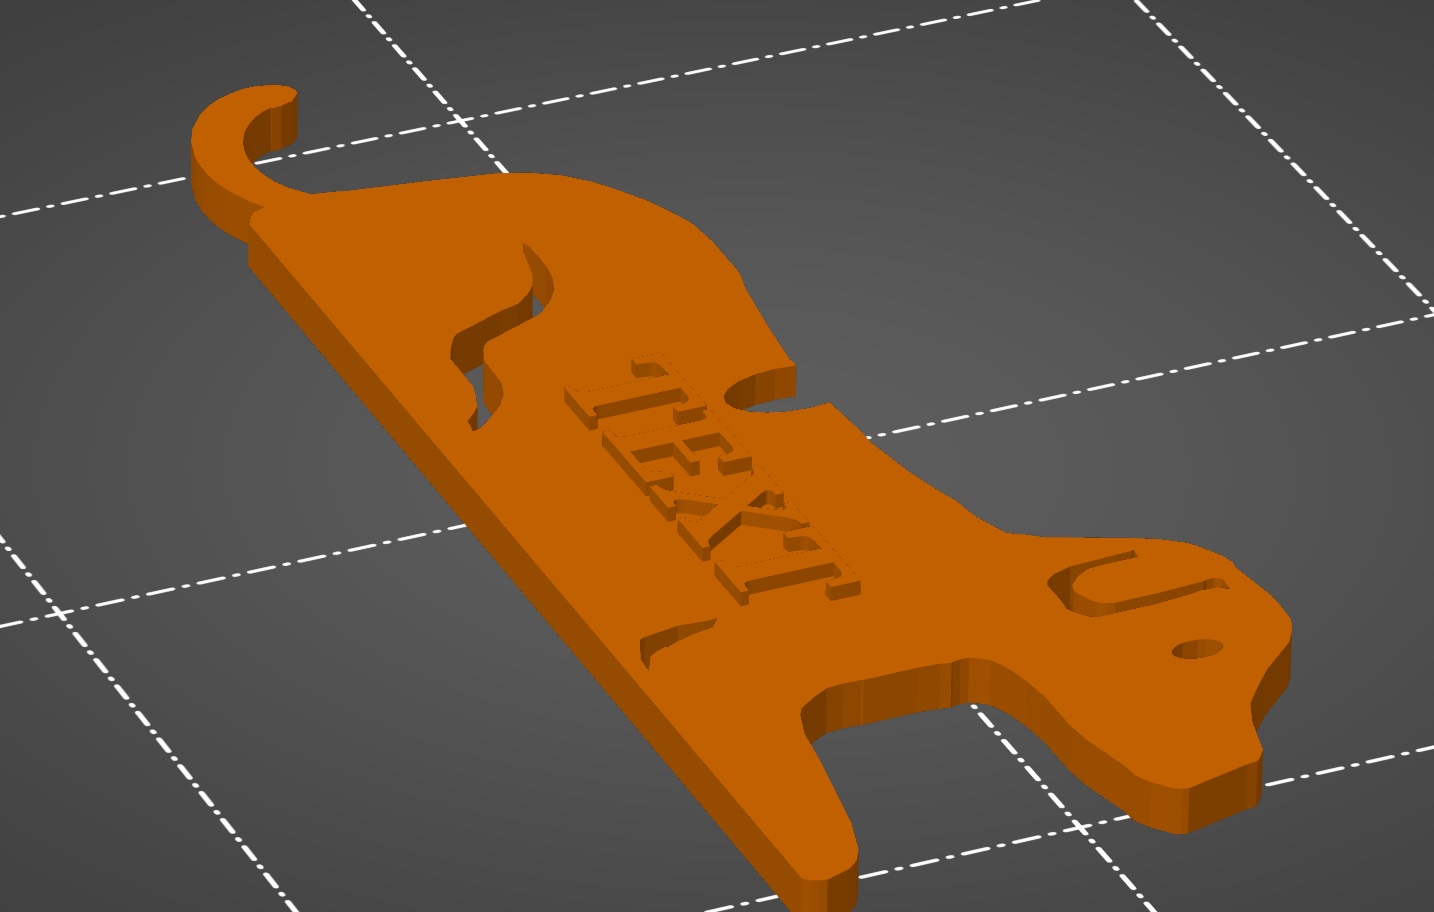
the Blue Dog seems to have other issues.
the Text "Buddy" seems poorly rendered, this may be due to your choice of font, and the extrusion width set in Prusa Slicer...
Prusa slicer only renders elements that are equal to, or greater than the extrusion width set for your nozzle
Click on the image Above Onto open it fully.
top left is the pre sliced model
Image 1, shows that when sliced, the links between the letters disappear
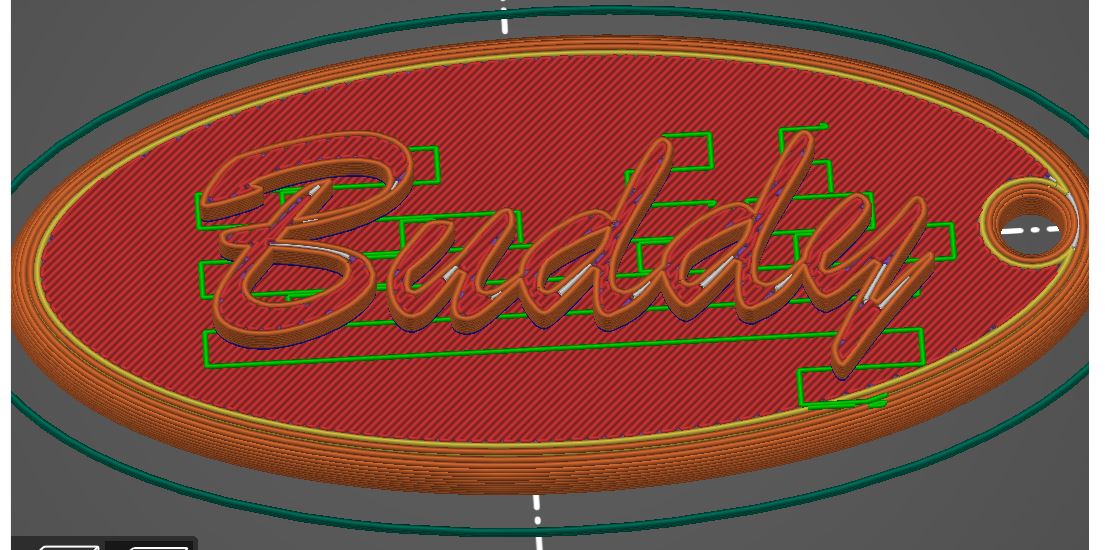
image 2 shows that you can restore the links by changing "XY Compensation" from 0, to 0.1mm (This alters all dimensions of the model, by 0.1mm in the X and Y axis(Probably not a problem here but if the size was critical, this may be an issue)
Image 3 shows that changing the 'Extrusion Width' for "External Perimeters" also restores the links between the letters.
Image 4 shows that increasing the model (Or Text) Size by a tiny amount, (In this case 2% larger) also restores the links...
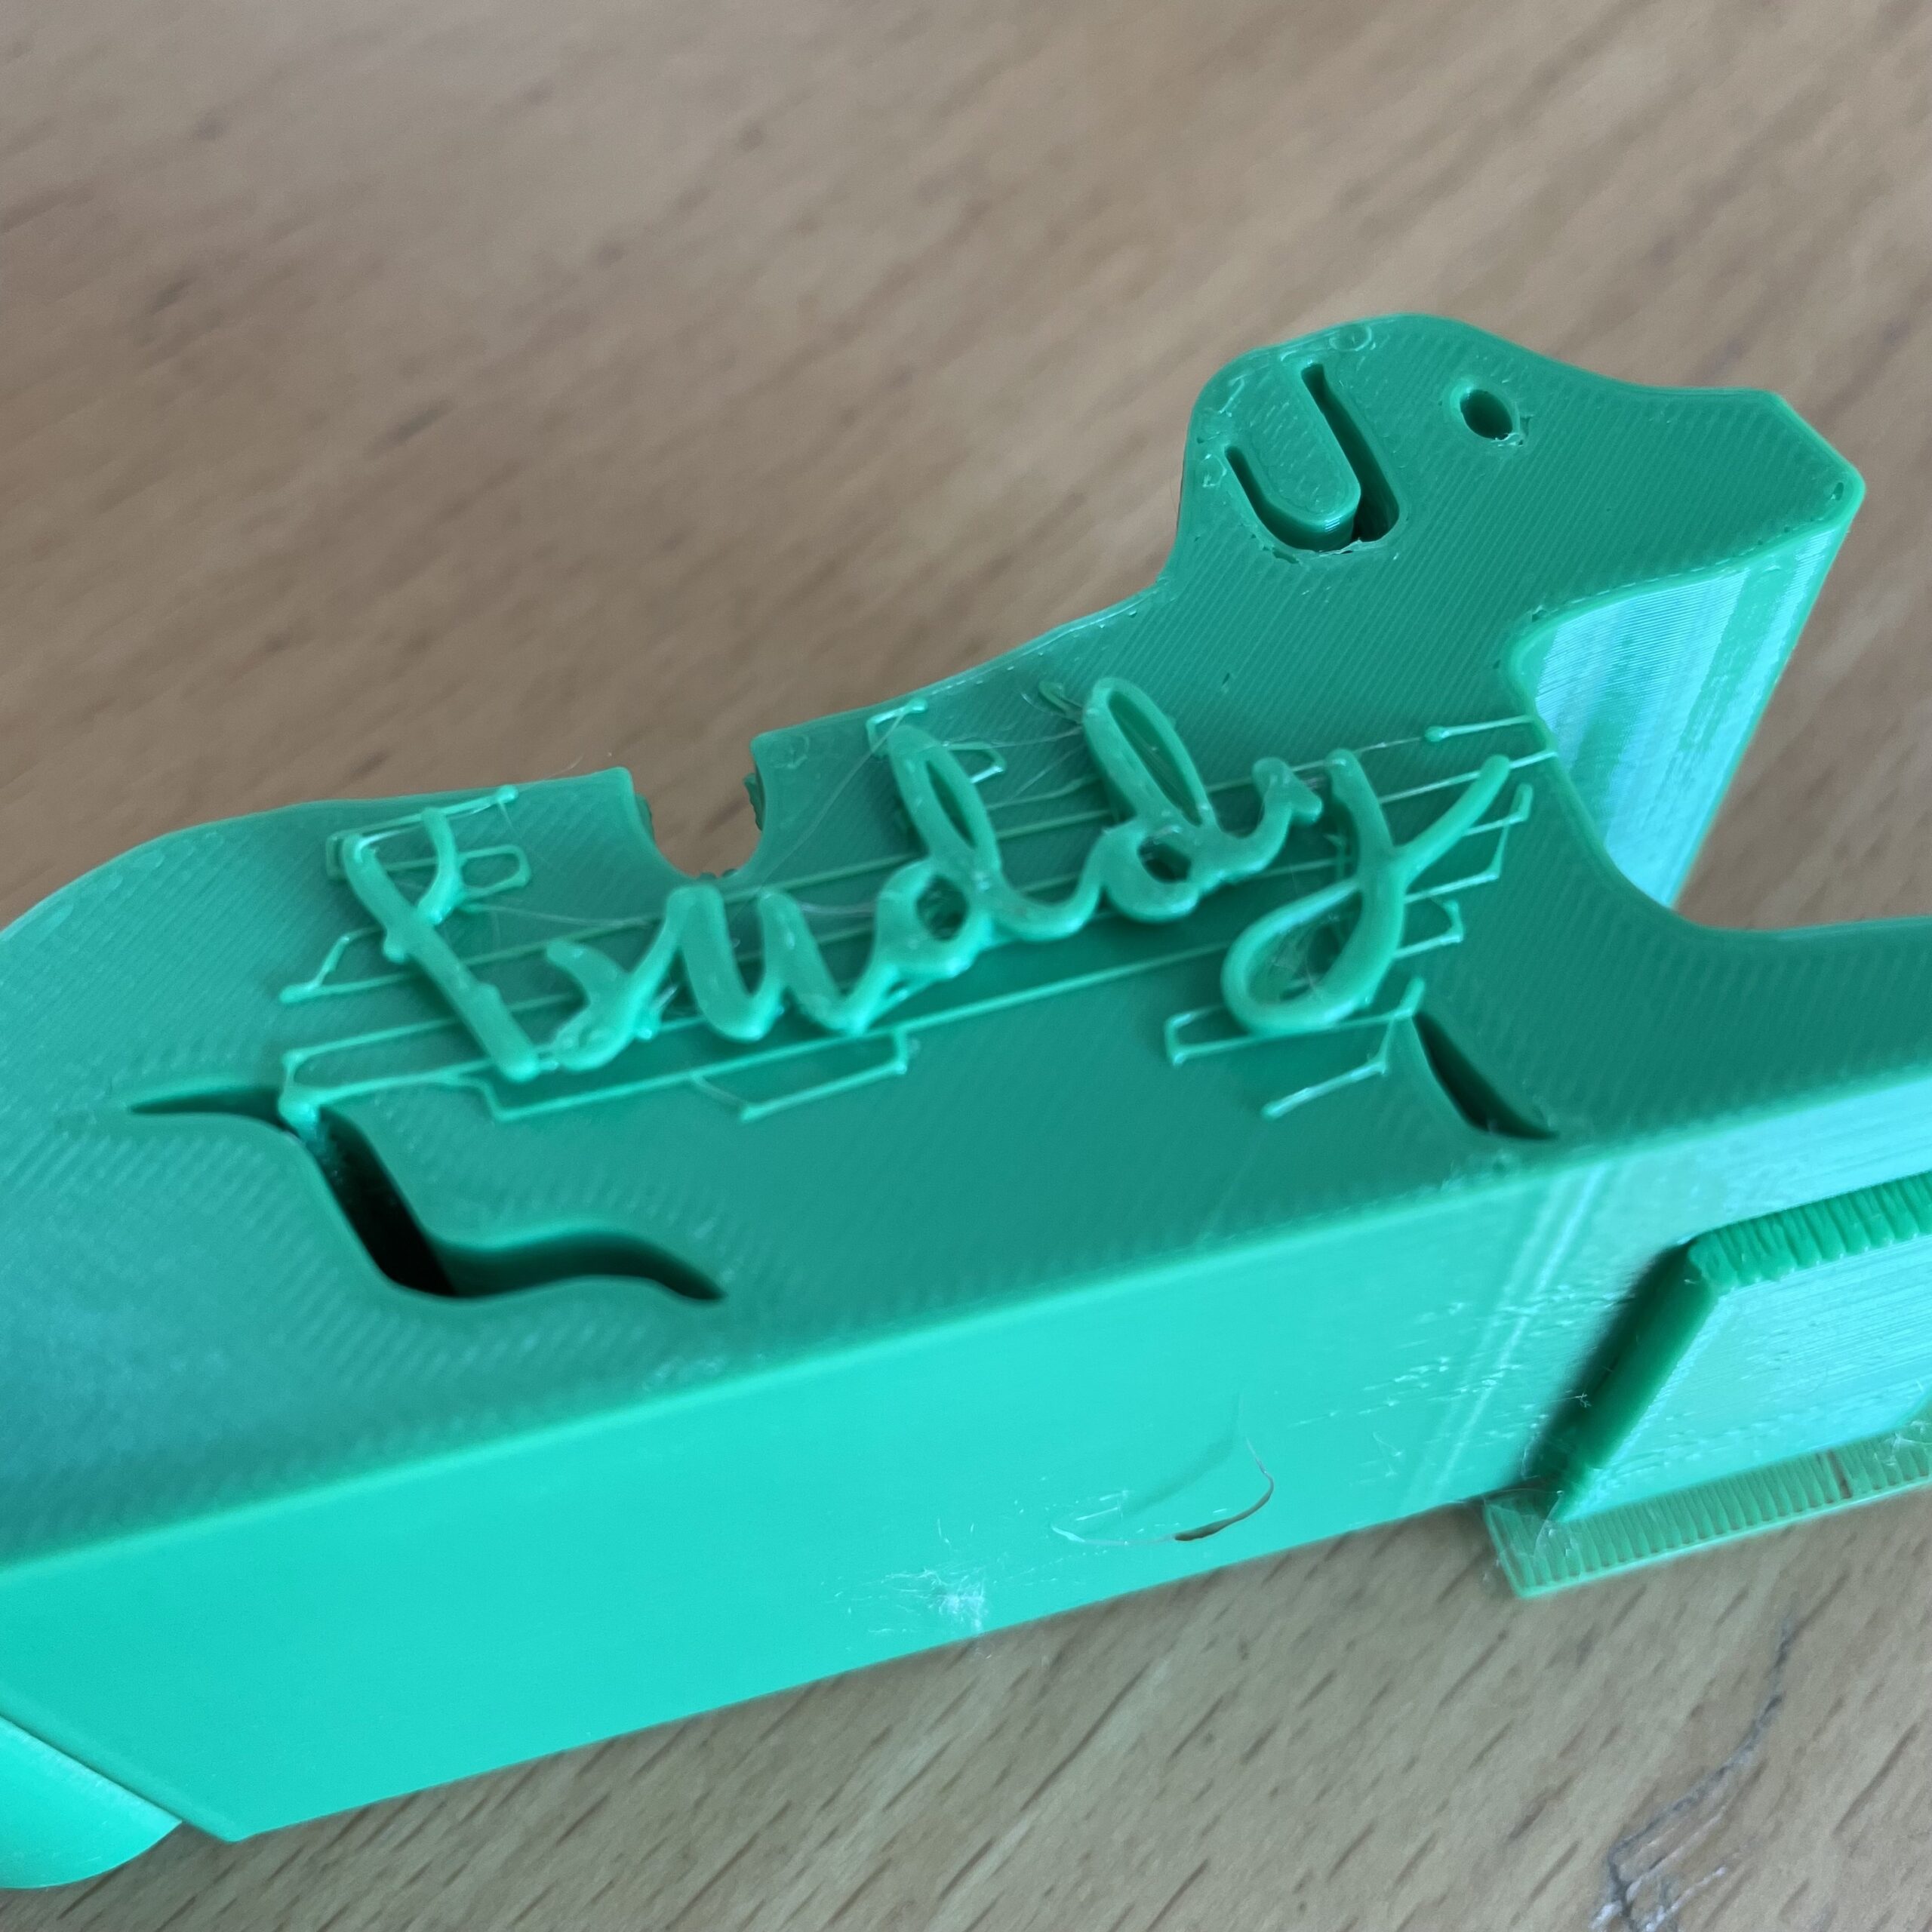
On your Blue model, you have lines behind the text, on top of the dog... are these intentional?
they look like Support material,
which suggests that the back of the text is slightly higher than the surface of the dog.
Not knowing how you made the model makes it difficult to offer a solution...
If the text is a separate STL, you could lower the text on the Z axis until the letters touch the model
then there would be no need for support.
regards Joan
I try to make safe suggestions,You should understand the context and ensure you are happy that they are safe before attempting to apply my suggestions, what you do, is YOUR responsibility.Location Halifax UK
RE:
What she said.
Plus I would add that with a standard 0.4 mm nozzle, you're not going to see any appreciable improvements below 0.1mm layer height. In fact, for a model like this, there's no vertical detail so I'd stick with 0.2 or even 0.3. Lower layer height is not going to give you better horizontal resolution, for the text.
Formerly known on this forum as @fuchsr -- https://foxrun3d.com/
RE: Change print quality mid-print?
Hi Joan and fucher,
Thanks for you help! What she wants to do is put customized lettering on the dog. She drew the letters in Procreate, then imported them to Vectornator, then she traced them and exported them as a .svg file and then imported that into TinkerCAD where she placed the lettering on the dog. So it sounds like we may need to either modify with the changes Joan suggests (though the overall increase may not work as the top part of the dog is a hollowed-out circle that an Apple Watch charger fits inside. We'll try the XY compensation first.
Any idea why the scribbly lines around the text happened?
Thanks,
Brook
RE: Change print quality mid-print?
Hmmmm.... the Scribbly bits!
Do you remember me writing
On your Blue model, you have lines behind the text, on top of the dog... are these intentional?
they look like Support material, which suggests that the back of the text is slightly higher than the surface of the dog. Not knowing how you made the model makes it difficult to offer a solution... If the text is a separate STL, you could lower the text on the Z axis until the letters touch the model then there would be no need for support.
In the image above there is a tiny gap between the top of the oval and the bottom of the letters unless you use supports, this will give you a slicing error message, to say that there are empty layers
However, if you lower the letters so that there is no gap, when you slice the model, it will not need support
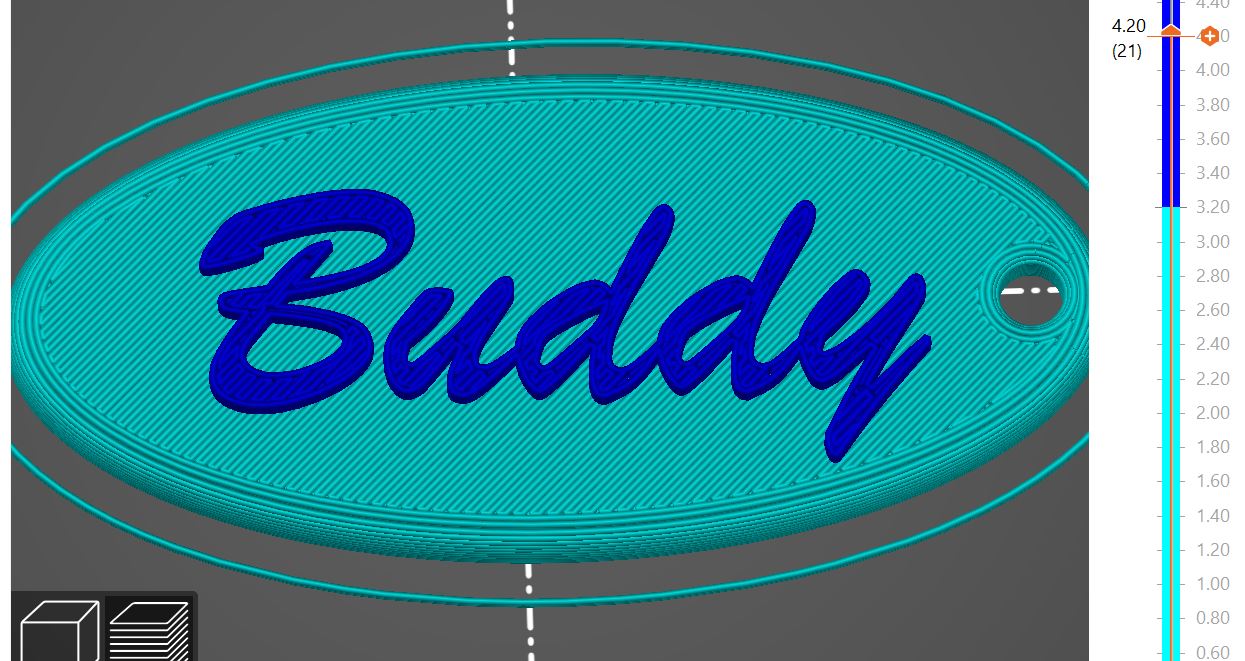
In the image above, you can see that there are no squiggly bits of support underneath Buddy.
I have used the colour change by layer height option to change the letters to a different colour as well.
so if you print like this, the oval will print first then the printer will stop, move the extruder to a safe position... (Front Right on the Mk3, I have no idea where the Mini moves to...)
And it will start bleeping you, the LCD Display should tell you what to do to complete the colour change. the old filament will eject, the new filament will need to be loaded and you will get a wormcast of waste filament as the printer purges the remains of the old colour, and prepares to continue with the new colour.
there is a temptation to pull this waste off the nozzle...
BUT I tryto resist the temptation, and simply hold the waste with tweezers, whilst I instruct the printer to continue the print...
the printer will begin to move back to the print, and if it is anything like the Mk3, the extruder will prime itself, and squirt a little more filament out of the nozzle,
this stays attached to the waste that you are holding and pulls off the nozzle...
If you forget, and remove the waste, then the prime squirt will attach itself to the start point of the new colour on the model
I hope that makes sense.
regards Joan
I try to make safe suggestions,You should understand the context and ensure you are happy that they are safe before attempting to apply my suggestions, what you do, is YOUR responsibility.Location Halifax UK
RE: Change print quality mid-print?
Remember that Joan's tips are band-aids — they may or may not get you a reasonable result but don't address the underlying issue. Regarding the text in Tinkercad:
1. To avoid gaps between the top of the dog and the text, import the SVG. Click on the top of the dog, then use "w" to move the work surface to the top of the dog. Then select the text, click "d" to drop it on the work surface. Align text and dog, then use Group to combine them.
2. To avoid text that's too small to print with a 0.4mm nozzle, either make sure your text lines are wide enough before you convert them to SVG, or after importing the SVG into Tinkercad, use Shift-click on one of the corners to scale the text, to make the letters thick enough. I prefer to make the lines thick enough in a program such as Inkscape because that gives me more control than scaling.
1
Formerly known on this forum as @fuchsr -- https://foxrun3d.com/
RE: Change print quality mid-print?
Thanks Joan and fuchsr! Very helpful advice!